The Lightning Tools’ Data Viewer App provides your Office 365™ users with the ability to see SharePoint® list content or external content data stored outside of SharePoint® within an easy to configure App Part. This page contains documentation on:
- Configuring an App Part.
- Using the Data Viewer Web Part Configuration dialog.
- Exporting and Importing the configuration data for the App Part.
Configuring an App Part
Complete the following steps to configure the Data Viewer App Part:
- Add the Data Viewer App Part to the page.
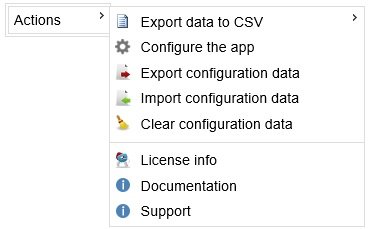
Note: You need to add the Data View app to your site, before you can add the Data Viewer App Part to the page. - On the Lightning Data Viewer App Part, click Actions, and then Configure the app.
The Data Viewer App Configuration dialog is displayed.
Using the Data Viewer App Configuration dialog
The dialog consists of four tabs:
- Web Part. Use to select the data source provider, and the type of view that you wish to create.
- Data Source. Use to configure the data source such as selecting a list, or configuring the methods required by Business Connectivity Services (BCS).
- Columns. Use to build your view by selecting the columns that you wish to display, and also configure the filters for each column along with option of adding custom calculated columns.
- Display. Use to style your view by setting conditional formatting, column widths, data formatting and configuring the pagination and CRUD operations.
Once you have configured the options on the four tabs, at the bottom of the Data Viewer App Configuration dialog, click Save.
Exporting and Importing App Part configuration data
Importing and Exporting of configuration data allows you to export the settings and import them again between different environments. such as, from your staging environment to your production environment.
To export the configuration of an App Part:
- Add an App Part to the page, and then configure the Data Viewer app part.
- From the Actions menu click Export configuration data.
The browser may then ask you to allow pop-up. - Save the Data Viewer Configuration data file, amending the name of the file to represent how you configured to App Part.
To import the configuration of an App Part:
- Add an App Part to the page.
- From the Actions menu click Import configuration data to display the Import Configuration Data dialog.
- Click Browse to display the Choose File to Upload dialog box.
- Navigate to where you save the configuration data file, and then click Open.
- Click Save.


Post your comment on this topic.