
In this section of the New Training form, users can define the documentation to be assigned as reading material for trainees.
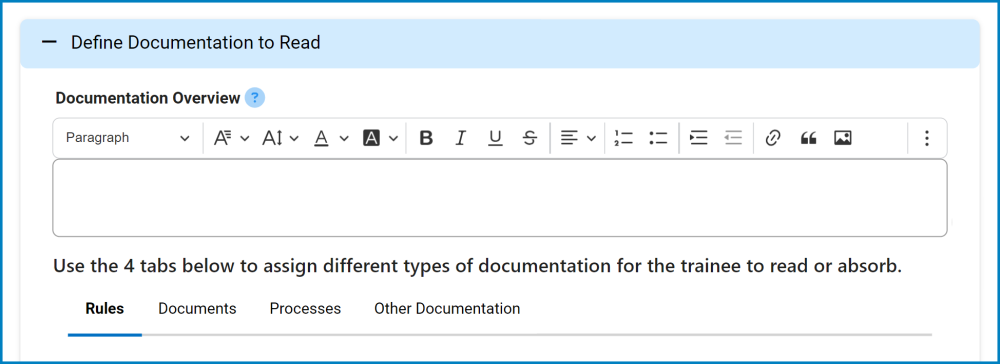
- Documentation Overview: This is a rich text field that allows users to provide a summary of the documentation, including any necessary instructions or credentials required to access the material.
- Tabs: Users can utilize the tabs in this section to assign different types of documentation to the training.
- EPC Objects: Users have the option to assign EPC objects (rules, documents, or processes) as documentation.
![]()
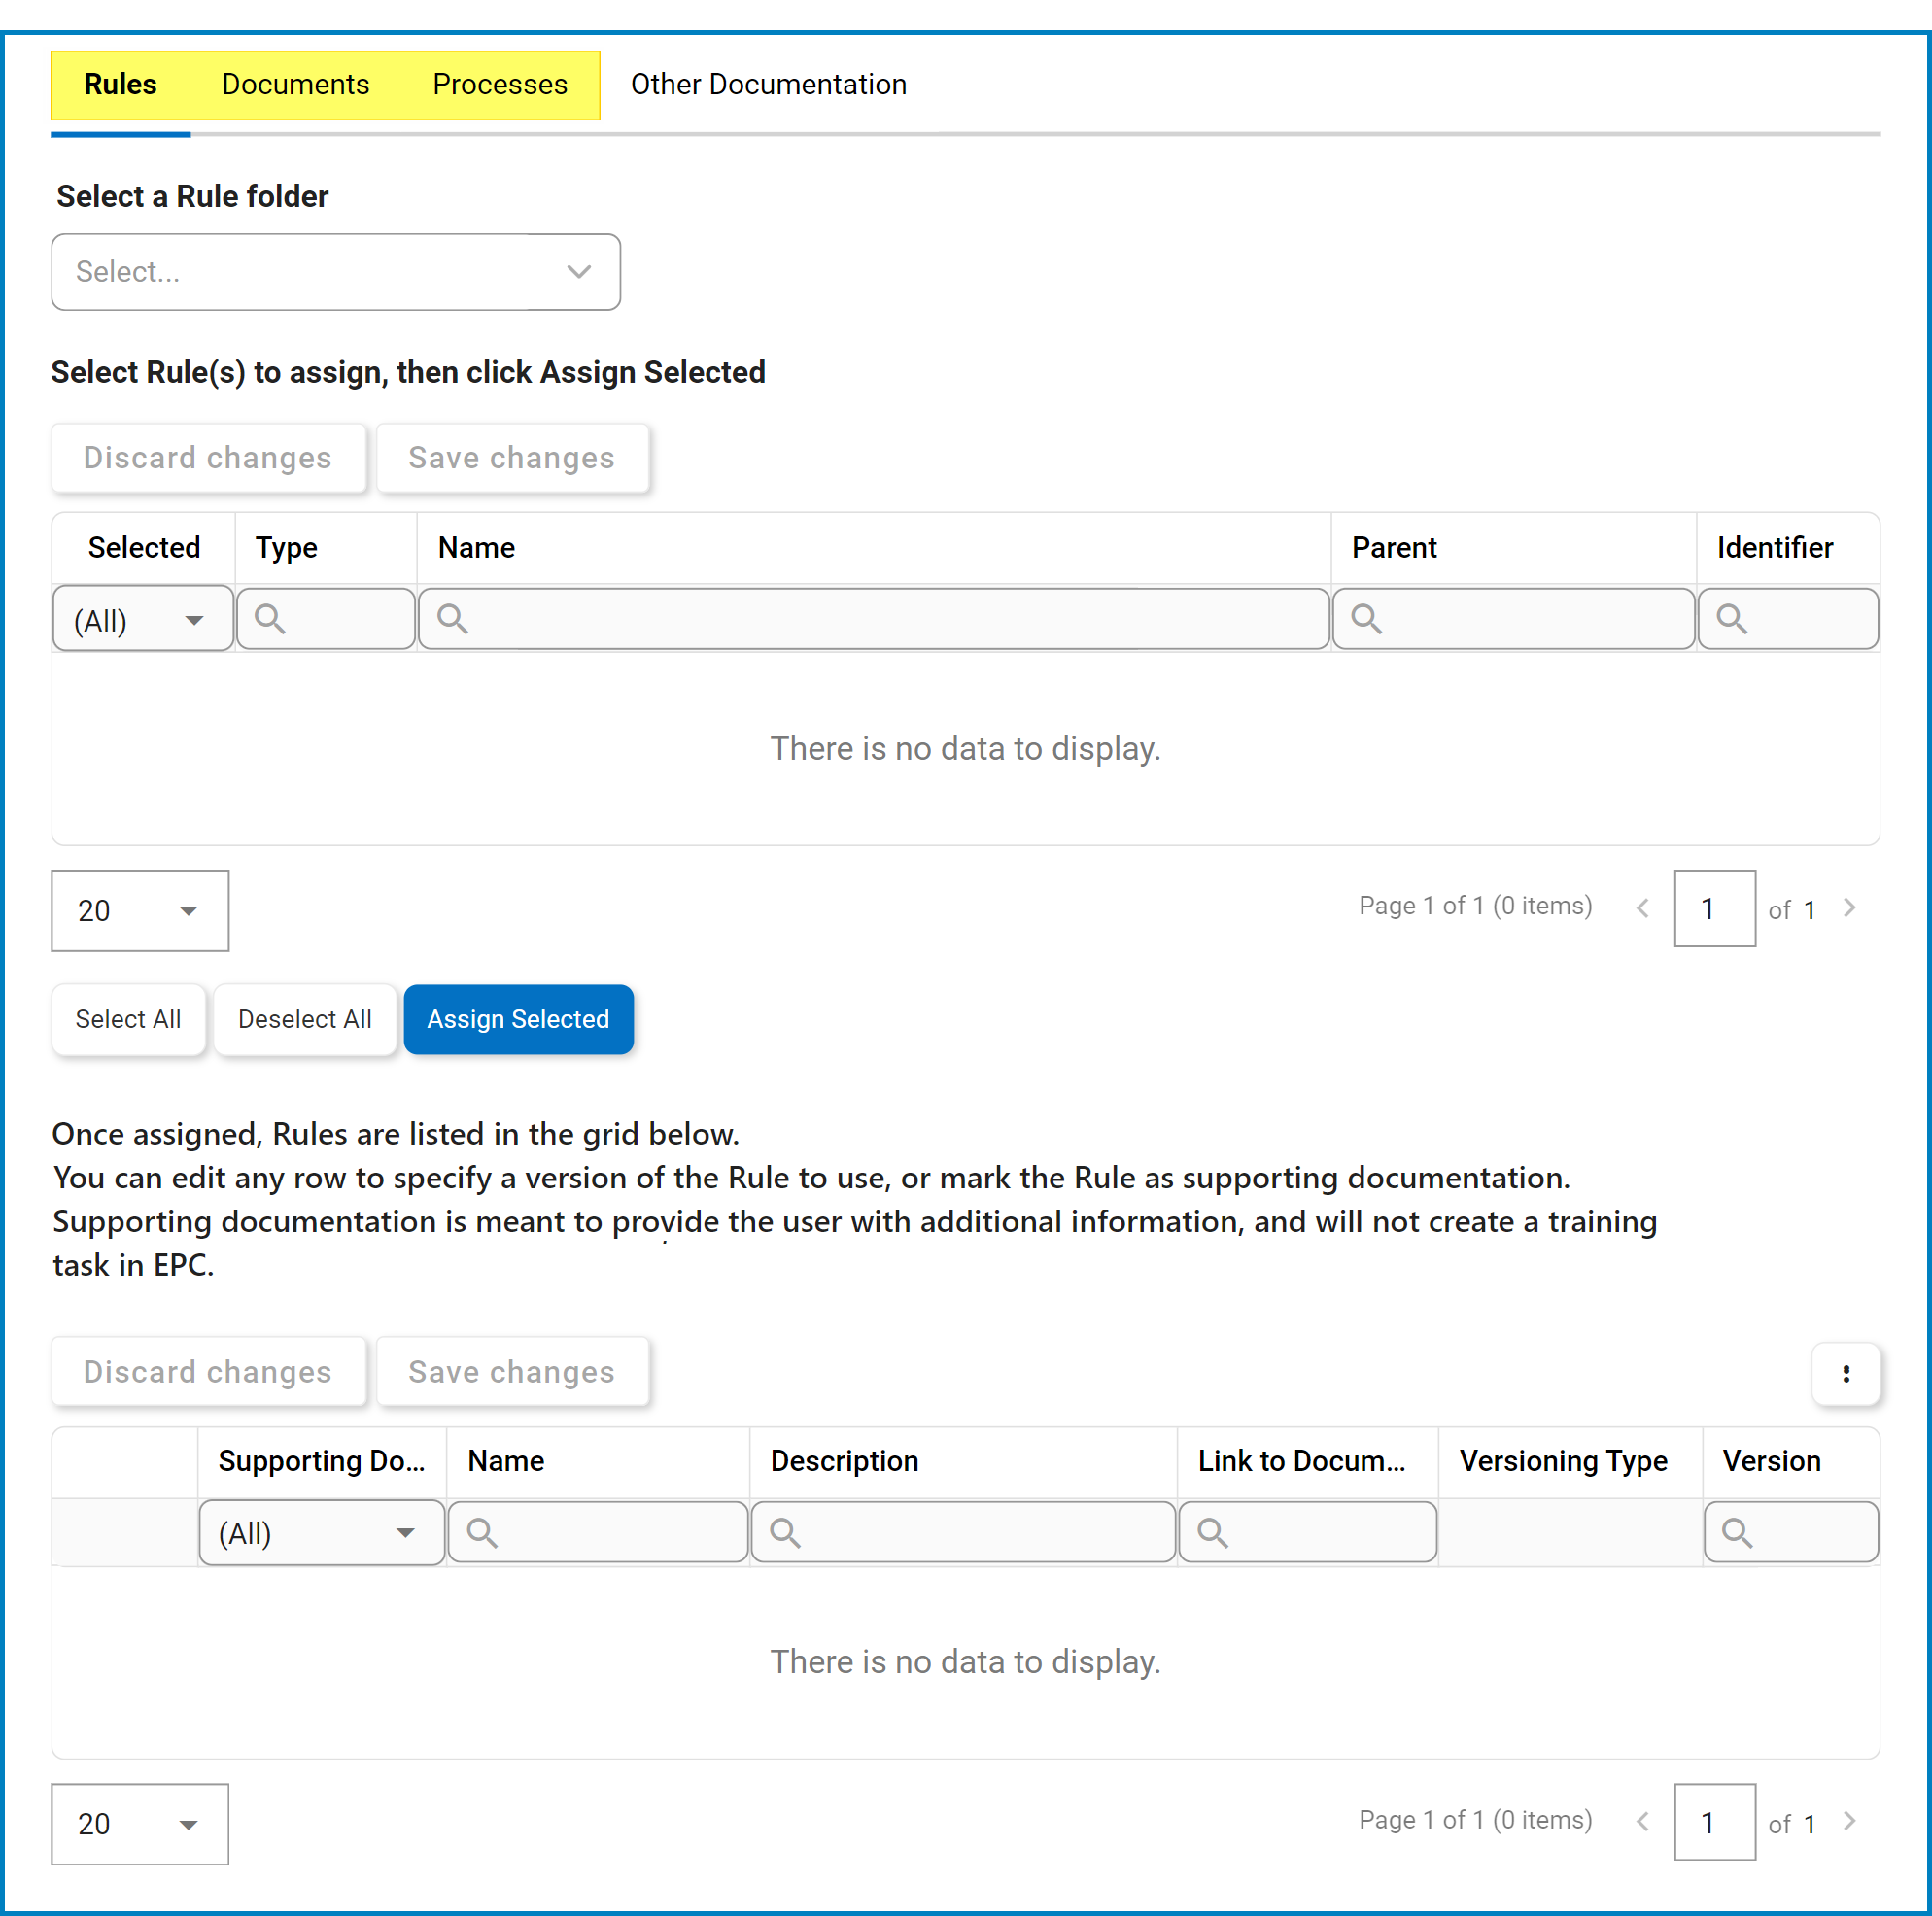
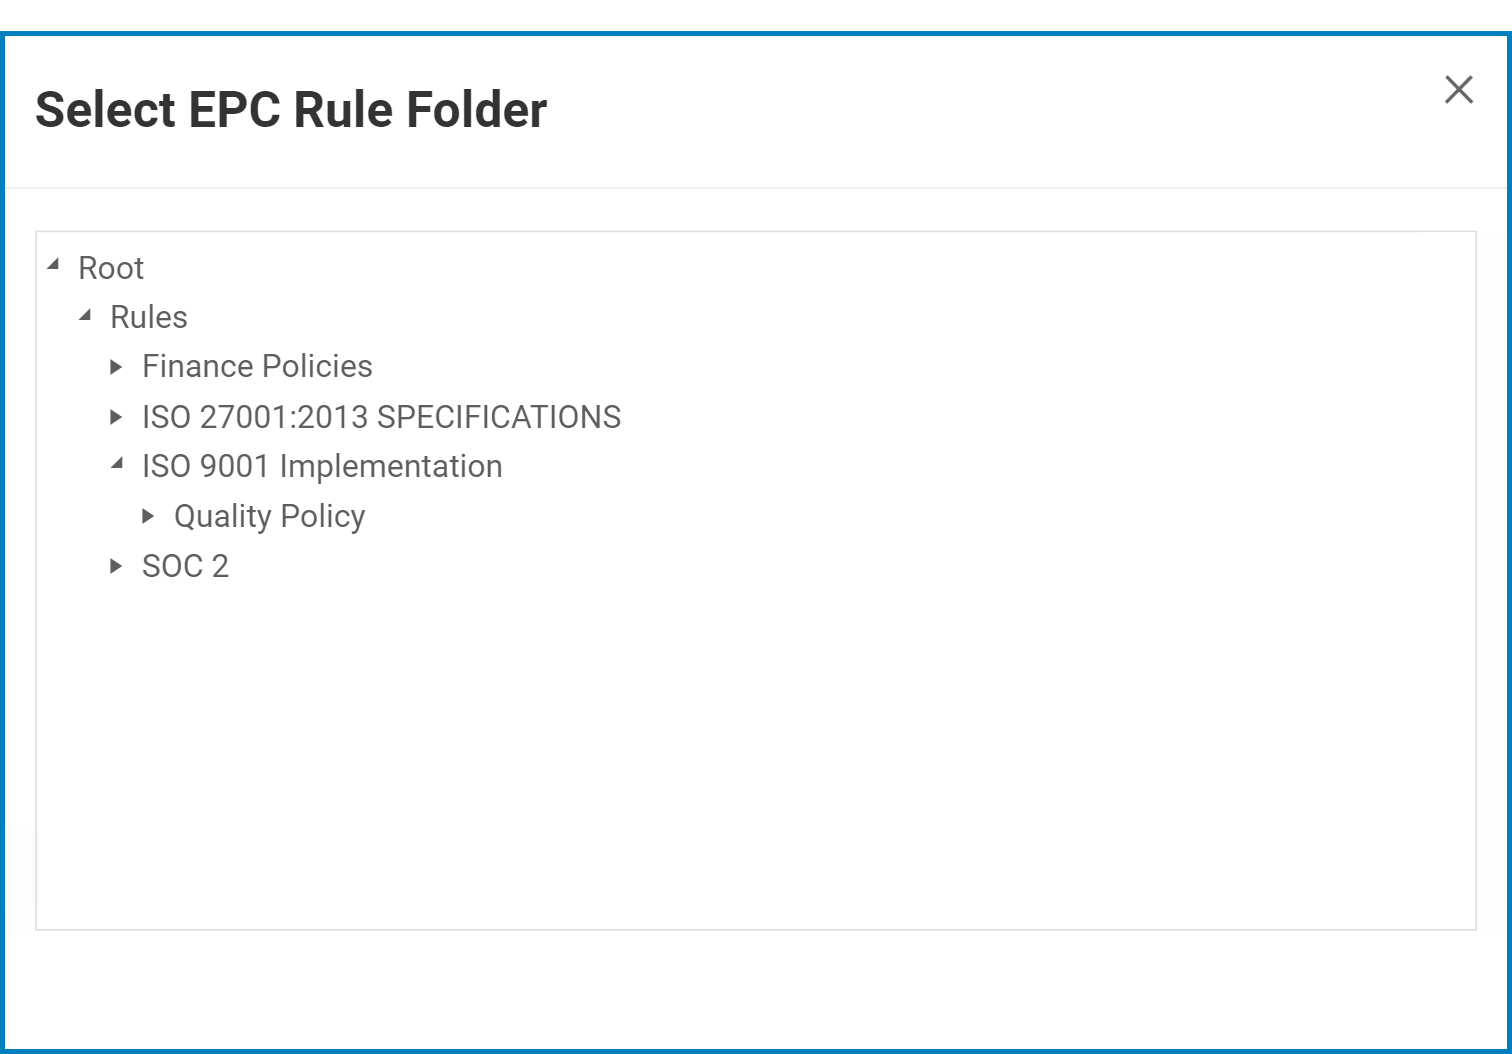
- Select a Rule/Document/Process Folder: This is a single-select field that displays the list of EPC object folders. Rather than in a dropdown menu, however, this list is displayed in a pop-up window.
![]()
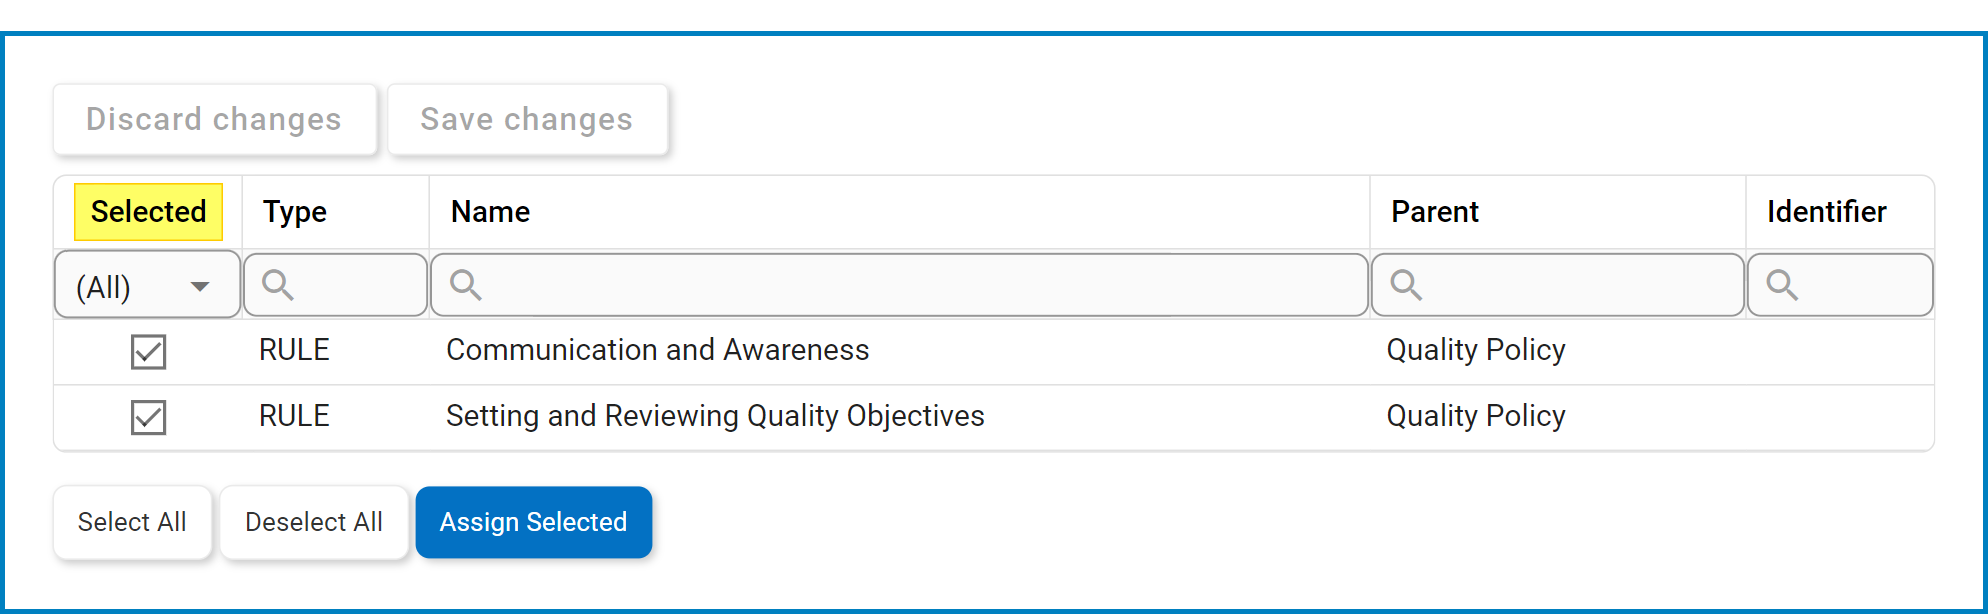
- Once a parent EPC object folder is chosen, its child objects will populate the below grid.
![]()
- Once a parent EPC object folder is chosen, its child objects will populate the below grid.
- Select All: This button allows users to select all child objects in the grid for assignment.
- Deselect All: This button allows users to deselect all child objects in the grid.
- Assign Selected: This button allows users to assign the selected child objects in the grid.
- Once assigned, these nodes will automatically populate the Assigned [Objects] grid.
![]()
- To set an object as supporting documentation, select the corresponding Supporting Documentation checkbox.
- To delete an assigned object, select the corresponding Delete (
![]() ) icon.
) icon.
**To confirm the deletion of items in the grid, click on the Save Changes button or simply click outside the grid. To undo deletion, click on either the Discard Changes button or the Undo (
![]() ) icon.
) icon. - To modify the version of an assigned object, select the corresponding Edit (
![]() ) icon. Users can also simply double-click on the object.
) icon. Users can also simply double-click on the object.
- This will display the Edit Version of EPC [Object] form.
- This will display the Edit Version of EPC [Object] form.
- To set an object as supporting documentation, select the corresponding Supporting Documentation checkbox.
- Once assigned, these nodes will automatically populate the Assigned [Objects] grid.
- Select a Rule/Document/Process Folder: This is a single-select field that displays the list of EPC object folders. Rather than in a dropdown menu, however, this list is displayed in a pop-up window.
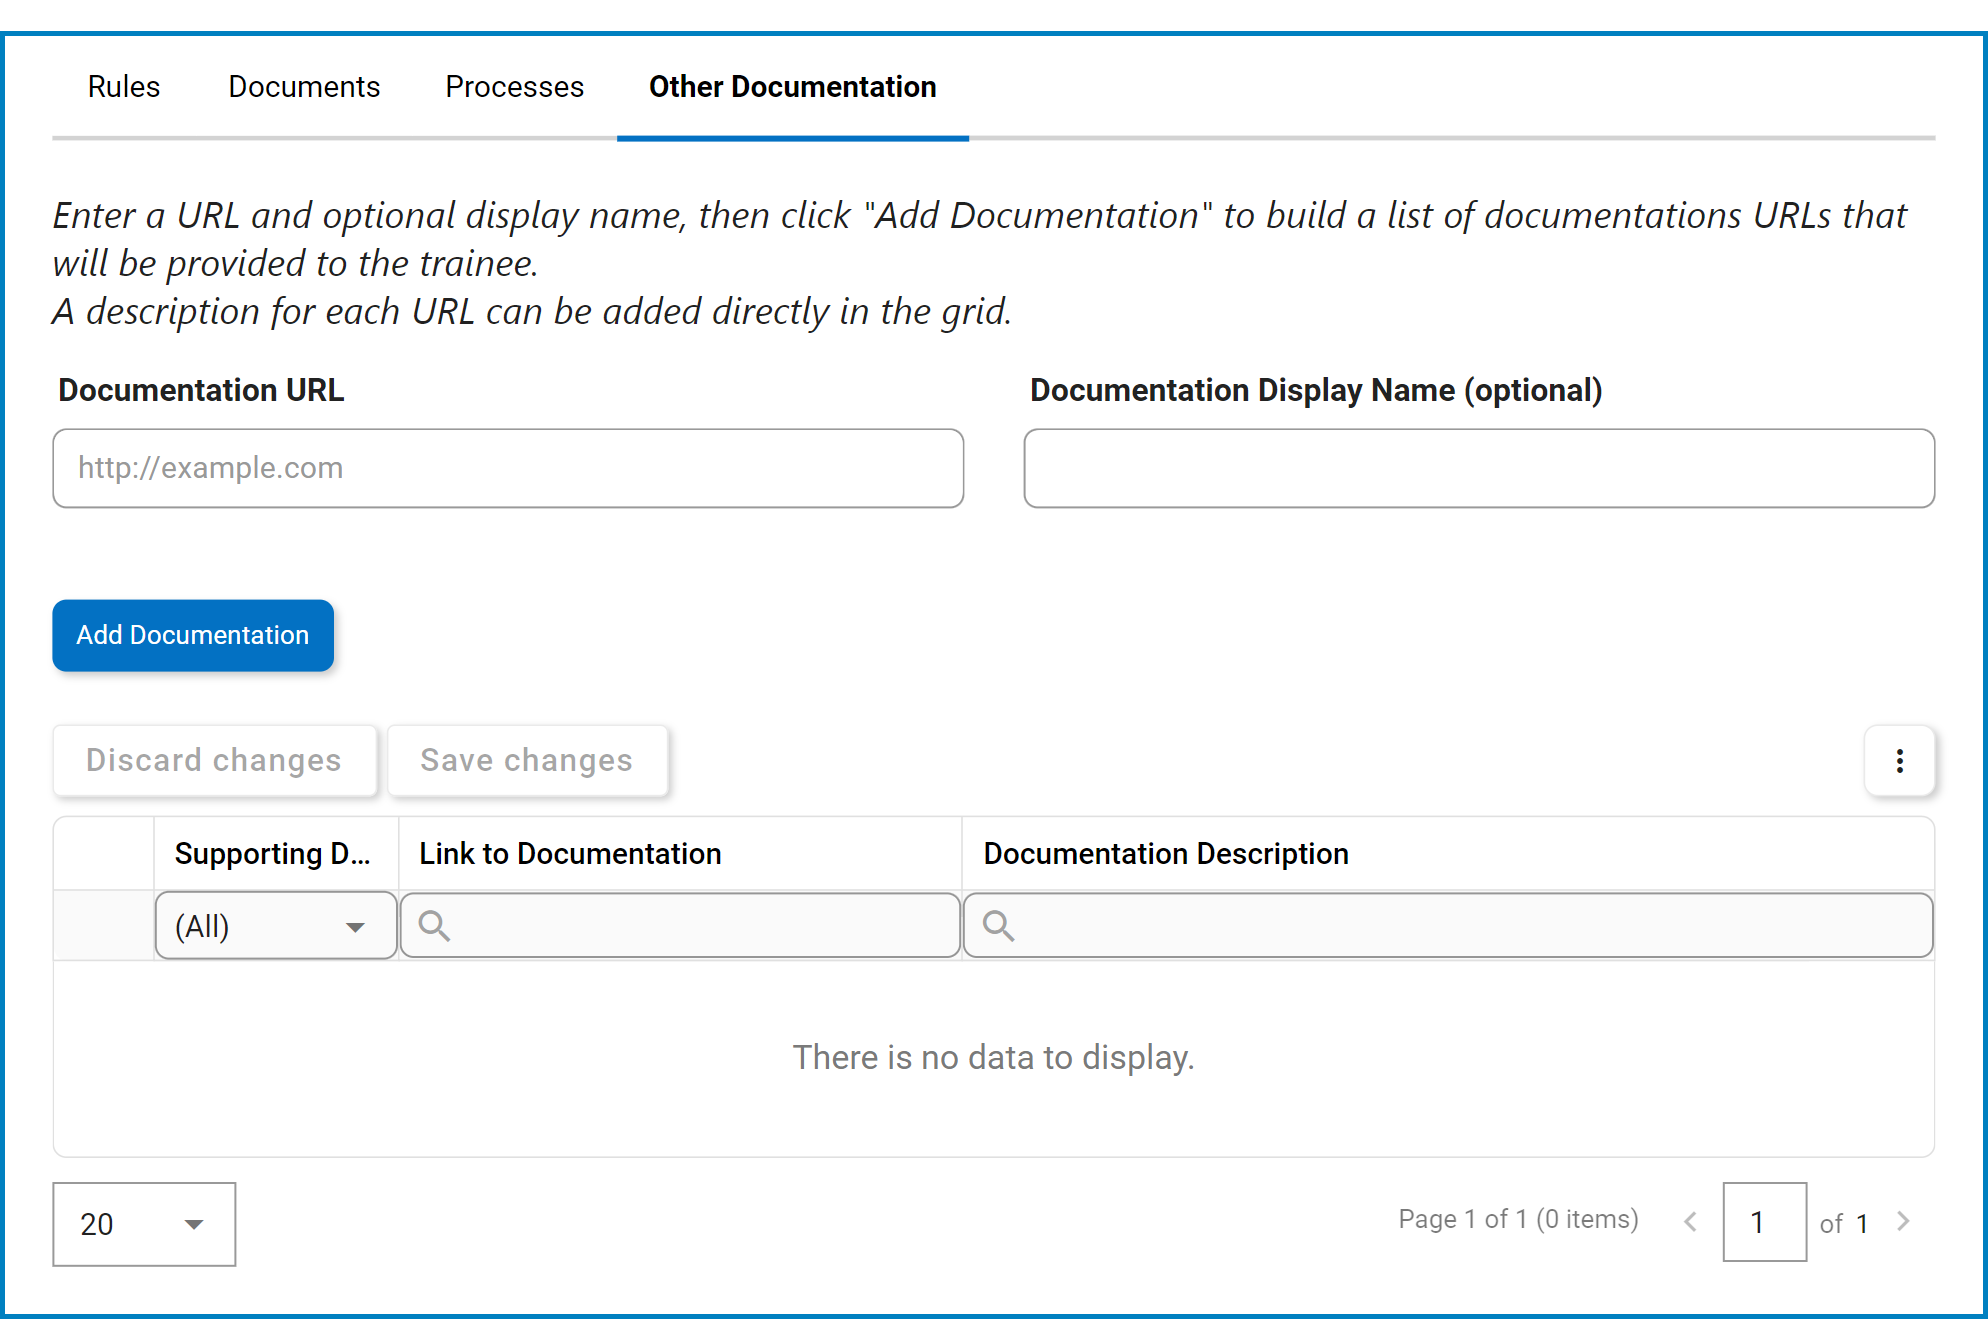
- Other Documentation: Users can also include links to external documentation.
![]()
- Documentation URL: This is a text field that allows users to input the URL for the external documentation.
- The expected format for the URL is ‘http://example.com’.
- Documentation Display Name (Optional): This is a text field that allows users to specify a display name for the URL.
- Add Documentation: This button allows users to add the linked documentation.
- As links are added, they populate the grid.
![]()
- To set a link as supporting documentation, select the corresponding Supporting Documentation checkbox.
- To delete a link, select the corresponding Delete (
![]() ) icon.
) icon.
**To confirm the deletion of items in the grid, click on the Save Changes button or simply click outside the grid. To undo deletion, click on either the Discard Changes button or the Undo (
![]() ) icon.
) icon. - To provide a description for a link, simply edit inside the corresponding Documentation Description column.
- As links are added, they populate the grid.
- Documentation URL: This is a text field that allows users to input the URL for the external documentation.
- EPC Objects: Users have the option to assign EPC objects (rules, documents, or processes) as documentation.


Post your comment on this topic.