Allowed Payment Methods
The following settings will determine the payment methods that you could have when selecting payment options in the Dispatch Console and Passenger App and when going through the payment process in the Driver App.
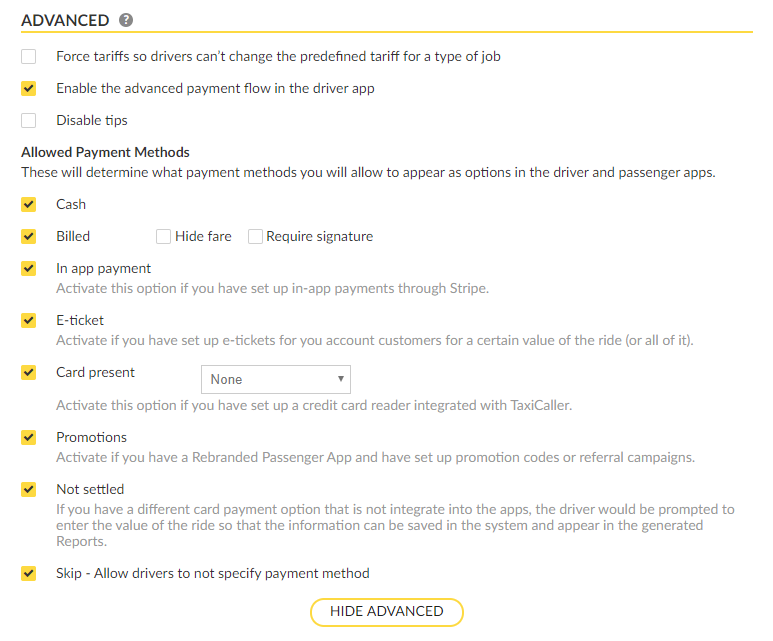
Cash:
If this is selected, the option will show in the driver and passenger apps, indicating that the rides offered by your company can be paid in cash.
Billed:
Billed refers to a payment option in which the fare is associated with a specific Customer Account, and you will be able to generate invoices for them to pay afterward. For example, if you run a specific service for a company where your Taxi Company provides to them their taxi services, you can create the profile of this company under Customer Accounts and then the system will associate the fares to that profile. Finally, at the end of the month, for example, you will be able to run reports to invoice all the jobs to be paid.
The customer account must be already created for enabling this feature.
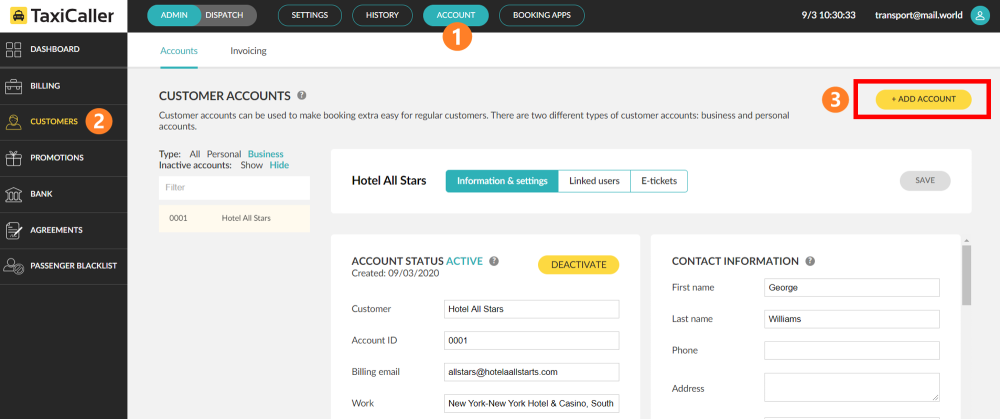
You can create a customer account under Account>Customer>AddAccount.
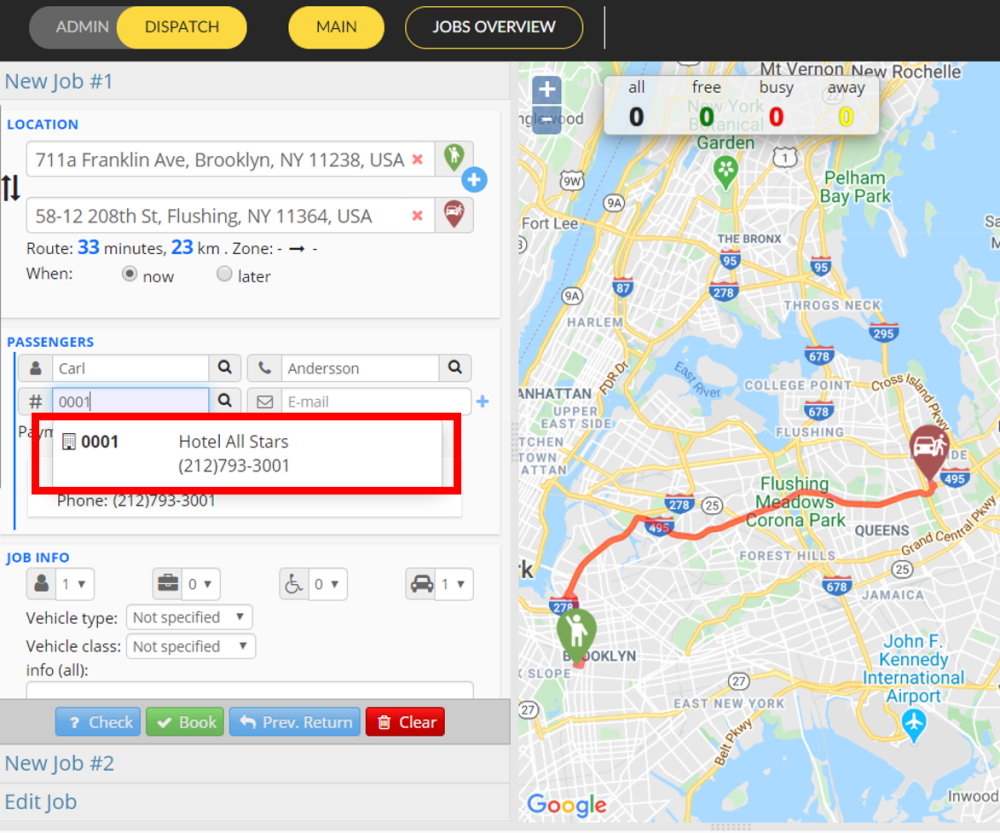
You will require to enter the Account ID in the Dispatch to recall the customer account.
Finally, this feature will enable the functionality of Account in the Driver App.

For more information about how to create customer accounts visit Create a Customers Account Section.
In-app payment:
If you are interested in activating an in-app payment you will need to link your account to one of the providers we partner with.
Currently, our most used provider is Stripe. To activate Stripe:
- click and follow the link to Activate Stripe
- Click on Stripe Connect.
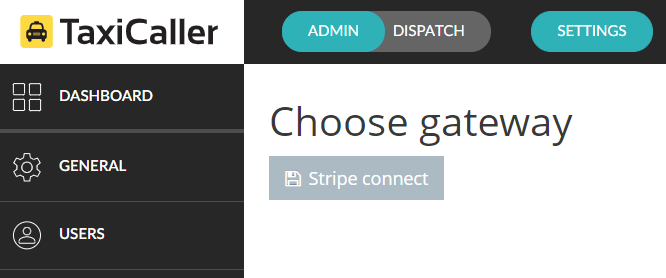
- Sign-up if you do not have an account in Stripe.
- Fill in the form and then you will be ready to go.

For more information about how to connect Stripe please visit the following section on How to connect Stripe
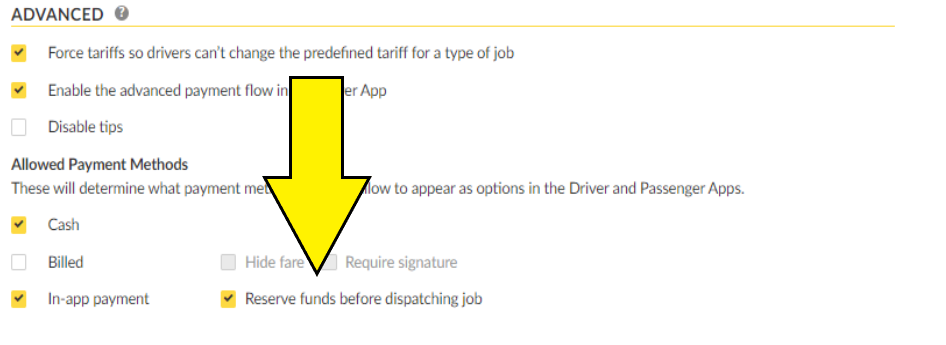
Reserve funds before dispatching the job:
With this feature, you can securely and conveniently hold funds on a passenger’s credit card, guaranteeing payment for the upcoming ride. This eliminates uncertainties associated with collecting payment after the ride, providing peace of mind for both drivers and passengers.
To activate this feature, you’ll need an integration with Stripe and ensure that in-app payments have been enabled in your Admin settings:
The job cards in dispatch will now show an additional symbol for jobs that are booked via the app and has in-app payment as the payment method. The ‘’Credit card’’ symbol will have a specific color based on the status of the transaction.
Red: Couldn’t reserve funds, therefore the job will not be dispatched.

Green: Funds are reserved, and the job is about to be dispatched.

Yellow: Reserving funds, and the outcome is not known yet.

Please note that the reservation will be done just before the job is assigned. For pre-bookings, the reservation will not occur before the actual T-time.
E-tickets:
E-tickets are electronic tickets that you can offer to your customers by giving them a certain amount of the price of the ride.
To enable this option, you will need to create first the E-tickets that you would like to give.
You can create E-tickets under Account>Customer.
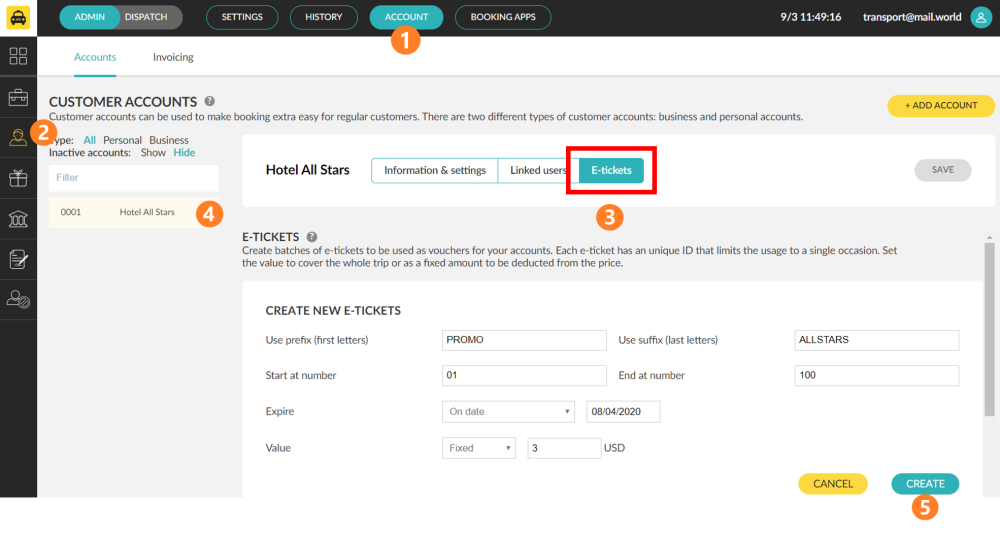
To learn more about how to create E-tickets please visit E-tickets Section.
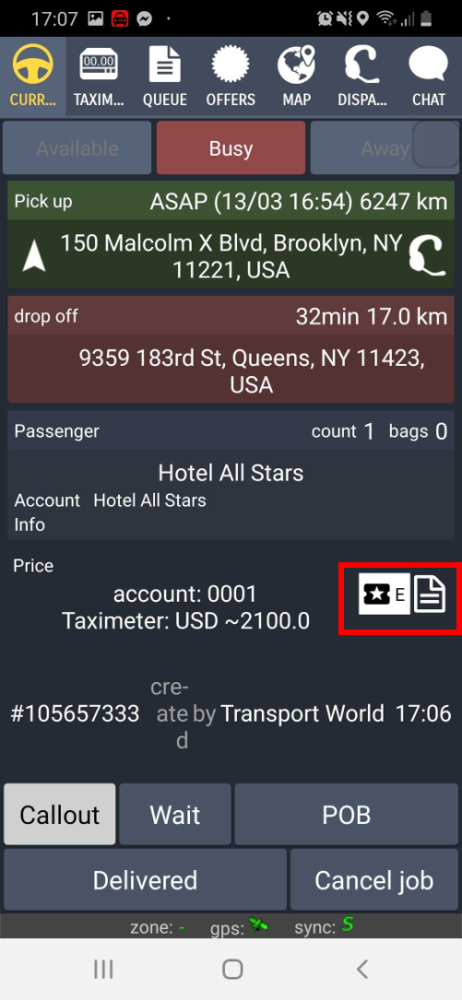
After having created the E-Tickets, you will be able to select them in the Dispatch when creating a new job under the plus sign in Payment Methods.
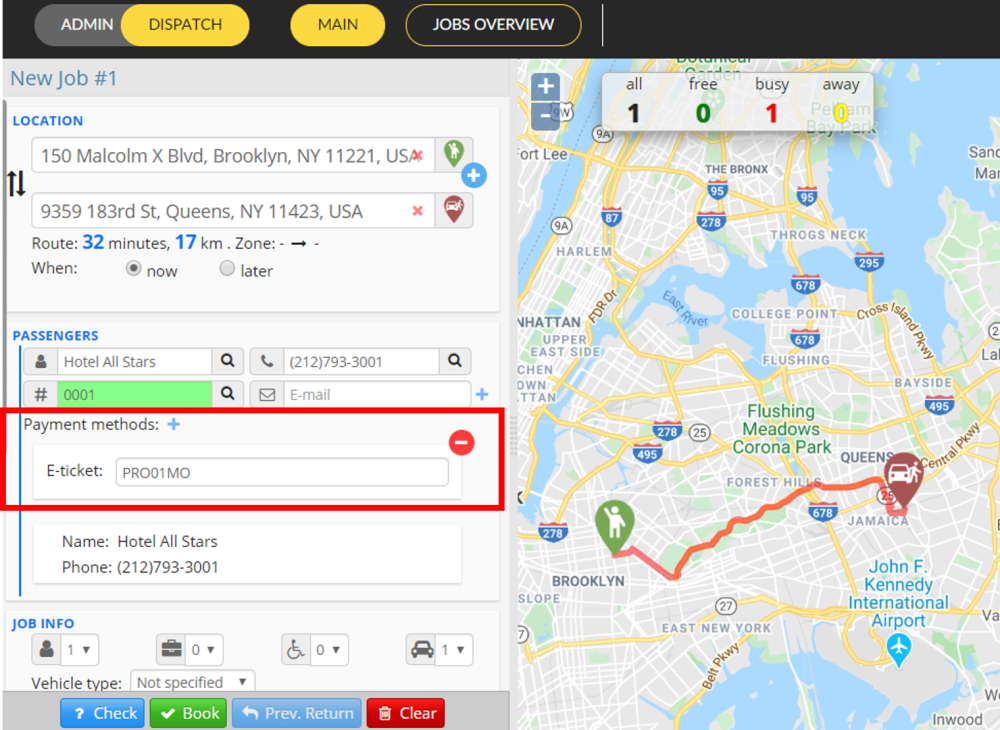
The selection of an E-Ticket under the Dispatch will be reflected in the Driver App with the following icon.
You can also choose an E-Ticket directly in the Driver App, for example when the driver does a street job, the E-Ticket option will be available during the Payment Process.
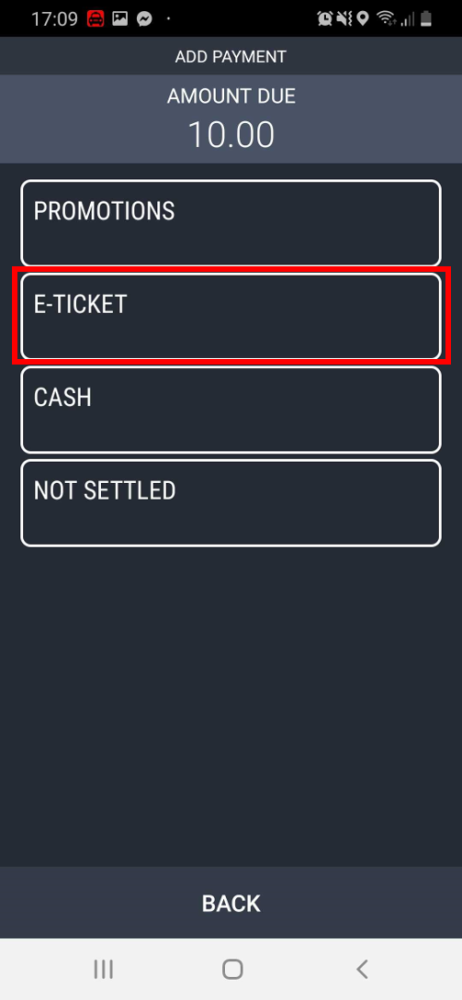
To be able to choose the E-Ticket option in the Driver App you must have enabled the advance payment flow under Settings>General>GeneralSettings>PaymentOptions.

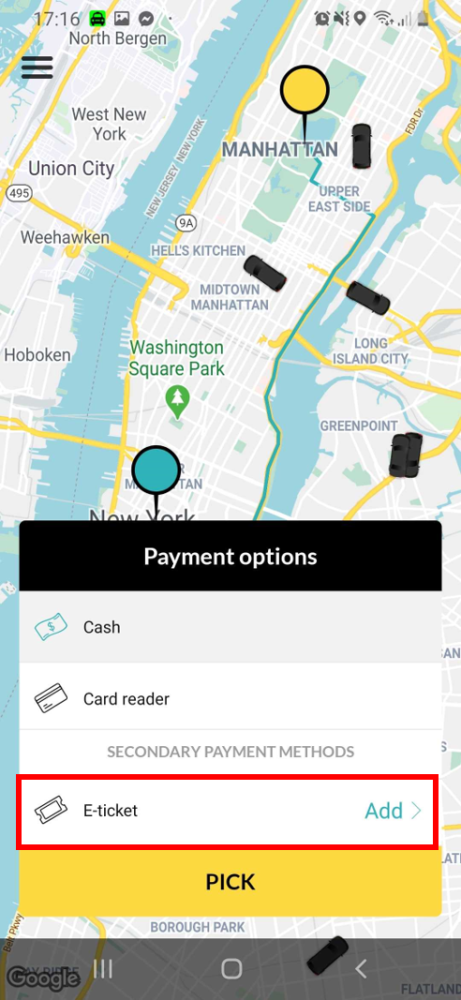
Finally, your customer will also be able to select the E-Ticket from the Passenger App.
Card present:
Card present is the option that will let your customer make the payment via a Card Reader when finishing the trip.
You can activate this option by setting up one of the providers that Taxicaller partner for this service.
Currently, our most used provider is SumUp.
To set up SumUp you will need to:
- Register for an account at: https://sumup.com/SumUp.
- Get a card Reader from them.
- Configure the service in your account.
For more information about how to enable SumUp please visit our section on How to enable SumUp.
This feature can also be configured with other card reader providers such as Square, Go Swift, and others.
Vouchers:
Vouchers is a setting only available for a Rebranded Passenger App.
To learn more about how to configure the vouchers, check the Vouchers Section under ACCOUNT -> VOUCHERS.
If you are interested in rebranding your application to show your own brand please contact us via sales@taxicaller.com or via our support chat 24/7 to know more about it.
Not Settled:
This option can be enabled if you have a different Payment Option from the above described.
It is important to highlight that these payment options will not be able to be integrated into the Taxicaller software, you can use them in parallel with TaxiCaller and in the Payments Options in the Driver App choose the Not Settled option.
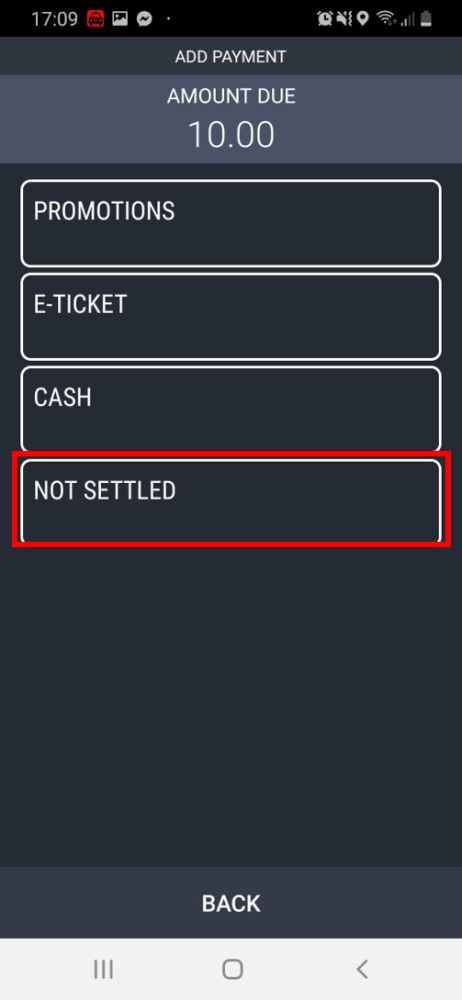
In the reports, the payment column will appear as Not Settled.
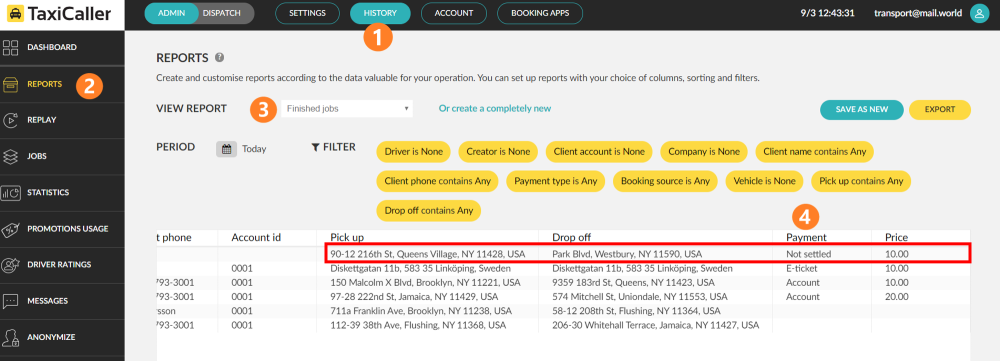
Please view the following article for additional information on Other card payment solutions
Skip:
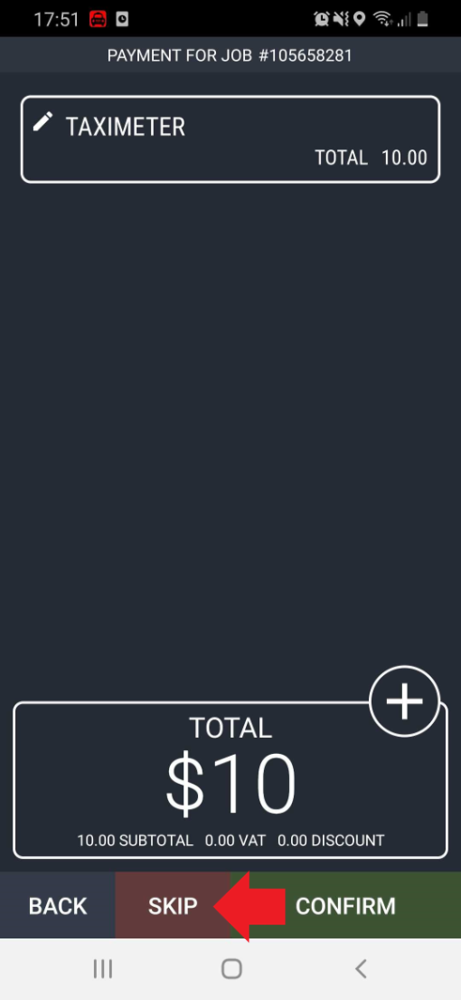
If this option is enabled it will allow the drivers to skip the selection of a payment method during the Payment Process.
This functionality can be used if you have your own payment process that Taxicaller does not support.
If this option is activated it will be visible in the Driver App showing an extra button at the bottom of the screen named Skip.
