
Configure alerts and appearance options for the dispatch console
Dispatch Console
Dispatch shows jobs for
This setting determines how far back in time the dispatch console will show the job history.
Alert dispatcher about special events that require attention
This setting will sound an alarm in the dispatch console depending on certain events, such as a job being cancelled or if a vehicle is unreachable.
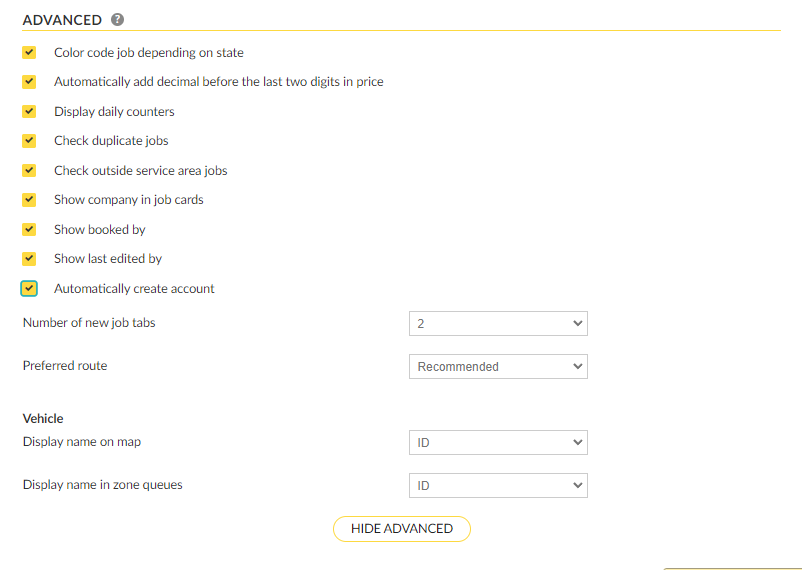
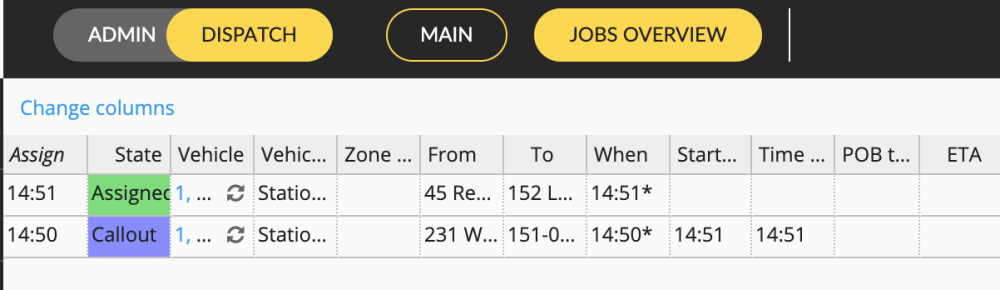
Color code job depending on the state
Will display jobs in different colors depending on the state:
- Green – Available / Dropped off
- Blue – Callout
- Orange/Yellow – Waiting
- Red – Passenger on Board
- Pink/Purple – Clearing
You will see this setting visible in the different parts of the Dispatch Console: zone queues, job details, and in the map the vehicle icon will also change color.

You will also see the color coding reflected in the Job Overview in the Dispatch Console:
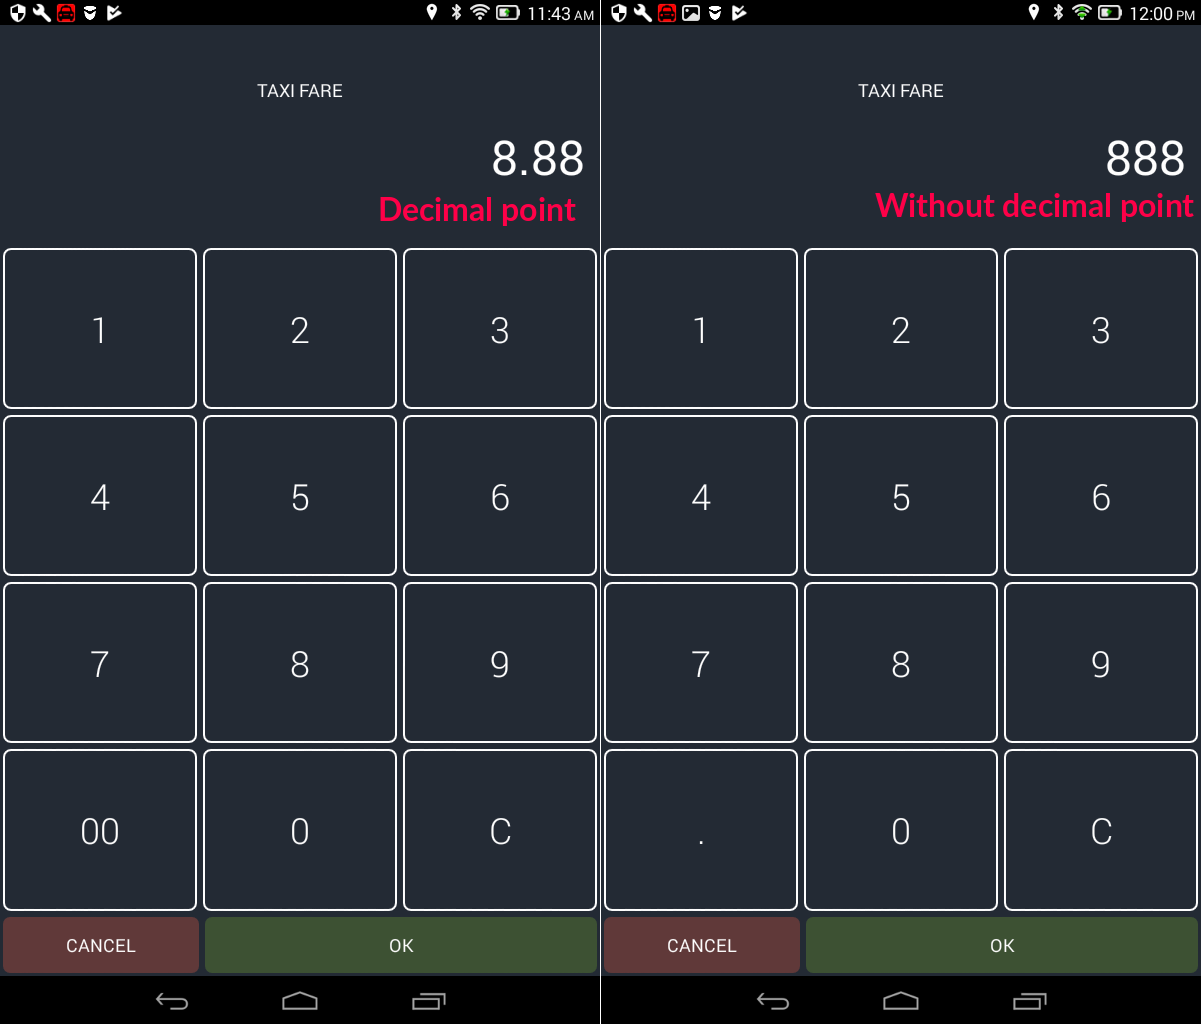
Automatically add a decimal before the last two digits in the price:
Will add a decimal point before the last 2 digits are entered in the Driver App. For example, with this option disabled, if you type the number 8 three times it will appear as “888” but if the option is enabled it will appear as “8.88”.
If the option is disabled you can always add the decimal point manually. This option only affects whether it happens automatically or not.
Display daily counters
This setting enables or disables the counters at the bottom of the Dispatch Console Map. The counters reset on a daily basis.
The counters that can be displayed are No show, Cancelled, No Cars, Dispatched, and Inputted, which will help you track and sort the jobs created during the day.

Check duplicate jobs
If this feature is enabled, when creating a new job the system will automatically search recent jobs to identify if the dispatcher is potentially creating a duplicate job. The system will warn the dispatcher and will ask to confirm if he/she wants to book the job anyway.

Check outside service area jobs
This feature will show a pop-up message to the dispatcher when a job is booked outside the service area.

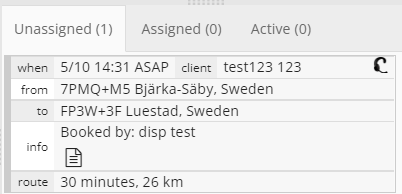
Show company in job cards
The system will display your company in the Job Card under Unassigned, Assigned, and Active in the Dispatch Console.
Especially if you have a multi-company profile this feature might benefit you more, as the company that will provide that specific job will then be visible in the Job Card.

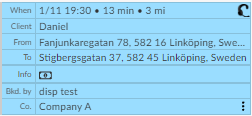
Show booked by:
When enabled, this feature allows you to see who booked the job. For companies operating more than 1 dispatcher, this can be useful, as allows one glance to know who booked which job.
Show Last edited by:

Use legacy job list:
When this is ticked the system will use the old-style job cards:

When is not ticked it will use the new style:
Enable the timeline tab
We have a feature that will make your life much easier if you have a lot of pre-bookings. For more information about the timeline, please click here
Number of new job tabs:
This feature will enable the number of Job Tabs that will display in the Dispatch Console. By default, the system will display two job tabs.
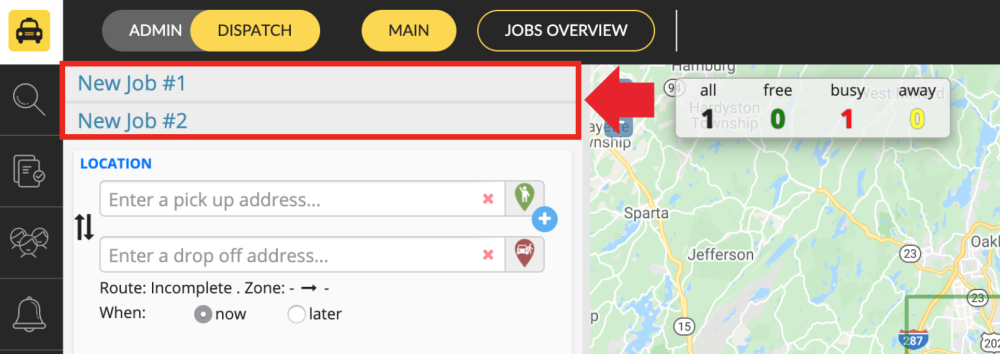
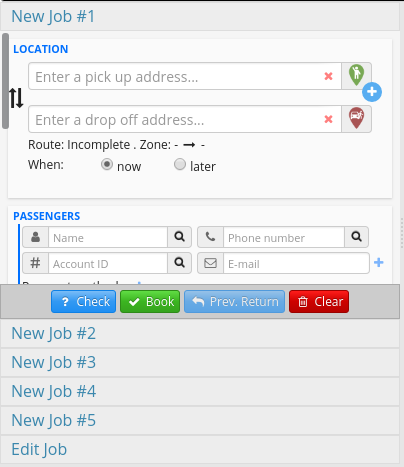
You will be able to customize the number of job tabs that you would like to display. You can set the number of tabs from 1 to 5. Which means the number of jobs that you will be able to create simultaneously.
In this example, we have selected 5 tabs, which results in the dispatch console looking as follows:
Preferred route:
You will be able to choose which route should the system select, the ‘‘Fastest’‘ or the ‘‘Shortest’‘, or can be left to ‘‘Recommended’‘ which is the default setting.

Vehicle
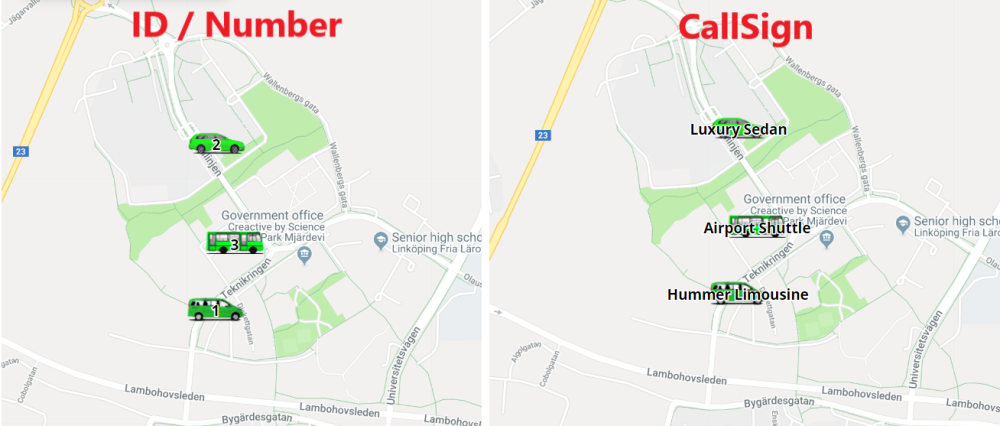
Display name on the map
When displaying the vehicle on the map, you can choose if you would like to display the Vehicle’s Name either as their number/ID or their call-sign assigned in the Vehicle Section in the Admin Panel.
These are simple ways to display the vehicles at your convenience.
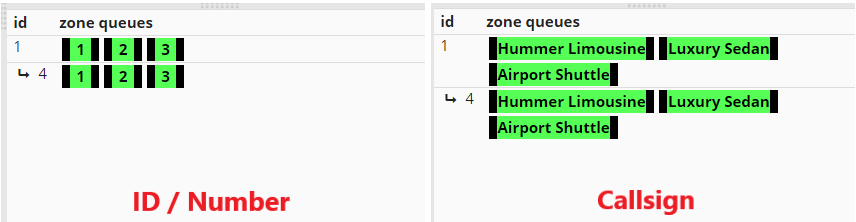
Display name in zone queues
You will also be able to choose how would you like to display the Vehicle Name under the Zone Queue Section in the Dispatch Console.
Vehicle symbol
You can choose how would you like to view your vehicles on the map in the Dispatch Console.
The options are: Dot, Perspective view and Side view.
Layout
This setting lets you choose the layout of the dispatch console. Hovering the mouse over each option will show you a preview of the layout with each option.
The layout options are:
- Default
- Split jobs overview
- Large job editor