
STEP 1: Add the Module to the PLC Network
| From the Catalog window, drag and drop the ConveyLinx-Ai in PLC mode with ConveyLogix DAP into the Network View window | 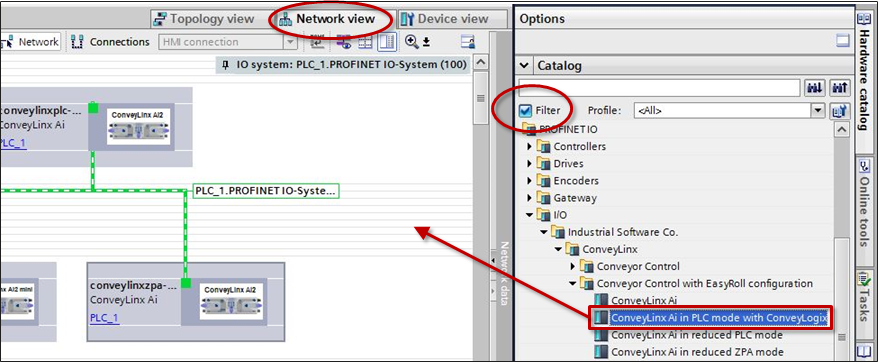 |
| To attach the module to the PLC, click on the Not Assigned link and select the desired Profinet Interface of the PLC |  |
| When attached, you will see the green graphic linking the PLC and the module together |  |
STEP 2: Assign the EXACT Profinet Name to the Module
Follow the same STEP 2 as in Full ZPA Example. For this example the correct Profinet Name per our Example Table is conveylogix-0-22
STEP 3: Enter the I.P. Address
Follow the same STEP 3 as in Full ZPA Example. For this example the correct I.P. Address per our Example Table is 192.168.0.22
STEP 4: Select Update Time Interval
Follow the same STEP 4 as in Full ZPA Example. Because this module is running a ConveyLogix program, the Update time interval is recommended to be set based upon the CPU usage the ConveyLogix program is causing on the module.
CPU Usage and Recommended Update Times
The following table provides the recommended Update times based upon CPU usage of your ConveyLogix program.
| CPU Usage | Minimum Recommended Update Time |
|---|---|
| < 50% | 8ms |
| 50% – 60% | 16ms |
| 60% – 70% | 32ms |
| 70% – 80% | 64ms |
| 80% – 90% | 128ms |