DeliverPoint interrogates both Active Directory and the SharePoint farm using two SharePoint timer jobs. You must ensure that the DeliverPoint Service Account that you entered in the DeliverPoint Configuration Wizard was granted Full Control permissions on all Web Applications you wish to crawl, and verify the ports 3268 and 389 are open between your SharePoint server(s) and your Active Directory server(s).
Use the following steps to configure DeliverPoint timer jobs to start a full crawl of your Active Directory and SharePoint farm.
- In the browser, open Microsoft SharePoint Central Administration web site.
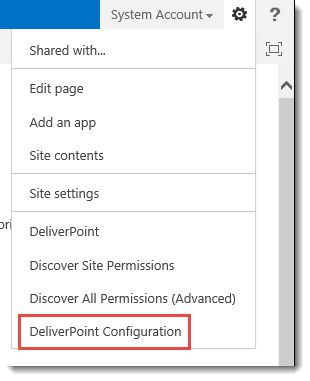
- Click Settings
, and then click DeliverPoint Configuration to display the DeliverPoint Configuration page
If you do not see the four new DeliverPoint options on the Settings menu, refresh the browser.
The DeliverPoint Configuration page is displayed.
- Click TimerJob Settings.
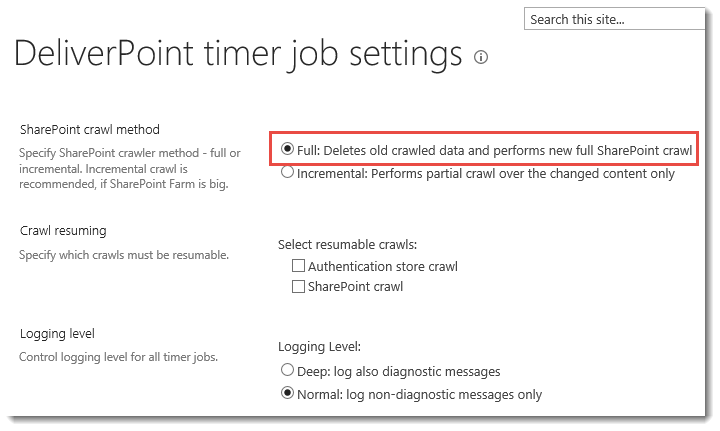
- On the DeliverPoint timer job settings page, in the SharePoint crawl method section, select Full.
- Scroll to the bottom of the page, and click OK to redisplay the DeliverPoint Configuration page.
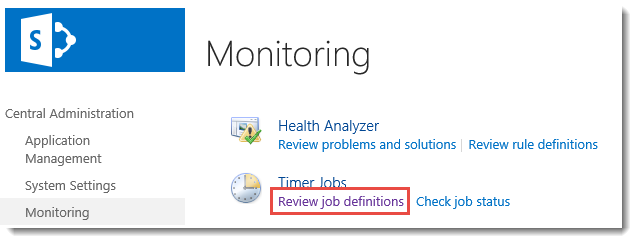
- In the breadcrumb, click Central Administration. On the Quick Launch click Monitoring, and then under Timer Jobs, click Review job definitions.
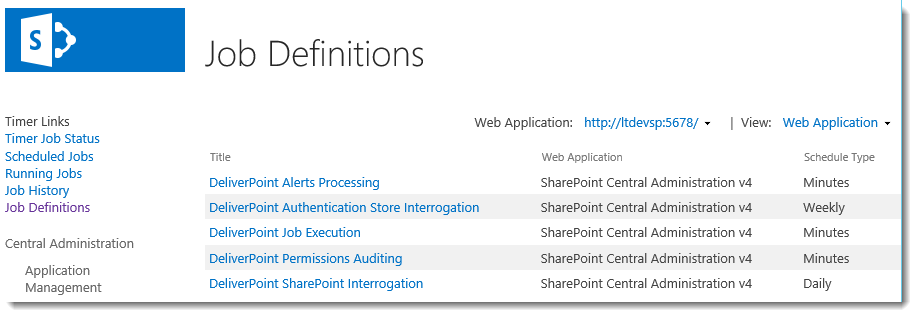
- On the Job Definitions page, check that the five Lightning Tools DeliverPoint timer jobs were deployed on the SharePoint Central Administration web application:
- DeliverPoint Alerts Processing.
- DeliverPoint Authentication Store Interrogation.
- DeliverPoint Job Execution.
- DeliverPoint Permissions Auditing.
- DeliverPoint SharePoint Interrogation.
Note: Use the View and Web Application filters to display only timer jobs associated with the SharePoint Central Administration web application, to quickly find these five timer jobs.
- Click DeliverPoint Authentication Store Interrogation to display the Edit Timer Job page.
- At the bottom of the page, click Run Now.
- The interrogation of your Activate Directory may take some time. To check when the authentication crawl is complete, on the Quick Launch, click Running Jobs under Timer Links. When the Authentication Store Interrogation timer job is no longer displayed on the page, continue with the next steps.
Note: If you are unsure whether the job ran, on the Quick Launch, click Job History under Timer Links, and check that the Authentication Store Interrogation timer job run and has a Status of Succeeded.
- On the Quick Launch, click Job Definitions and then click DeliverPoint SharePoint Interrogation.
- At the bottom of the Edit Timer Job page, click Run Now.
The interrogation of your SharePoint Web Applications may take some time. To check when the SharePoint crawl is complete, on the Quick Launch, click Running Jobs under Timer Links.
When the SharePoint Interrogation timer job is no longer displayed on the page, continue with the next steps.
- Click Settings
, and then click DeliverPoint Configuration to display the DeliverPoint Configuration page.
- Click TimerJob Settings.
- In the SharePoint crawl method section, select Incremental and then at the bottom of the page, click OK to redisplay the DeliverPoint Configuration page.
- If the default schedules for the five DeliverPoint timer jobs do not suit your organization, go to the Job Definition page, and modify them.


 , and then click DeliverPoint Configuration to display the DeliverPoint Configuration page


Post your comment on this topic.