Configuring POS with no preset shop data
- Start Initial Setup on the desktop:
- User: .\administrator
- Password: P@sSw0rD
- Click on ‘Online’ in ‘Get store details’
- If the ‘Online’ icon shows OK, please click on next:
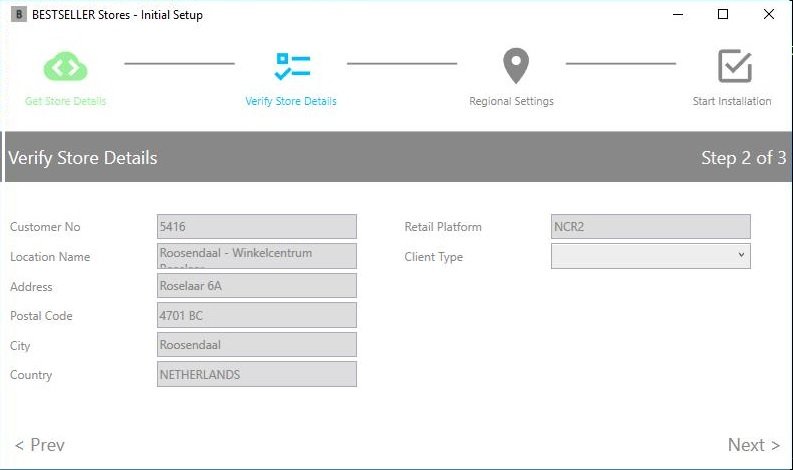
- Check that the store details (shop number, name) shown are correct for the store you are in (example below):
- From the ‘Client Type’ drop-down menu, choose ‘Point-of-Sales’
- Enter the correct POS number (1,2,3 etc.) into the POS terminal ID field, and choose the correct brand from the ‘Chain’ drop-down
- Check the regional settings. In some multi-lingual countries like Belgium or Switzerland you might have to change it to the correct language of the region
- Click on ‘Submit & Install’ – do not use the ‘Submit’ link in lower right corner as this is only doing a test run.
After the script has run, you should be able to see the pos.exe icon on the desktop:
You can now skip the ‘Set the Correct IP’ part and go directly to ‘Barcode Scanner’.


Post your comment on this topic.