
Preparation
1. Unpack the EFT

2. Check that the CHIP is in place


Connecting the EFT
3. Connect the Green LAN and the USB Cable

4. Patch the LAN cable and connect the USB cable to the POS / Connectivity HUB
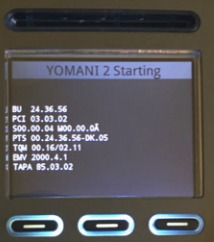
5. The EFT is now starting
Configuring the EFT
6. Press the lover right button when the word Admin is displayed

7. Enter the Password 746578 then press the Green button

8. Press 4 then press the Green button

9. Press 2 then press the Green button

10. Press 1 then press the Green button

11. Under Domain leave the field Empty and press the Green button
- No matter what Domain says just press the green button

12. Set DNS 1 to 10.45.0.11 then press the Green button

13. Set DNS 2 to 10.45.0.12 then press the Green button

14.Enter the Correct IP address for the EFT then press the Green button
- The IP address in the image is an example of an IP

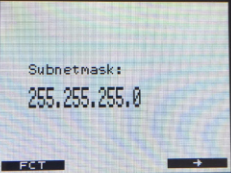
15. Enter the Correct Subnetmask for the network then press the Green button
- The Subnetmast in the image is an example of an Subnetmask
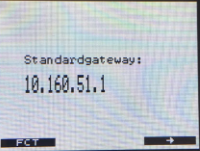
16. Enter the Correct Standard Gateway for the network then press the Green button
- The Gateway in the image is an example of an Gateway
17. Now you should see this menu, press the Red button

18. Enter 10 then press the Green button

19. The EFT is now restarting and the configuration on the EFT is done.

Configuring POS
20. Go to C:\gd90 on the POS

21. Open flxdrv.ini

22. Enter the Correct IP address for this POS’s EFT
- The IP address in the image is an example of an IP
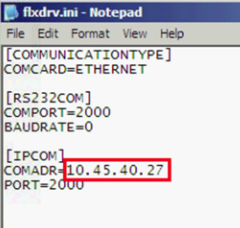
23. Save the file


Post your comment on this topic.