
You can easily add a new email channel by following a wizard. Press  in the top-right corner to open the wizard. The two first steps in the wizard are the same for both an inbound and outbound channel, while the last step differs slightly.
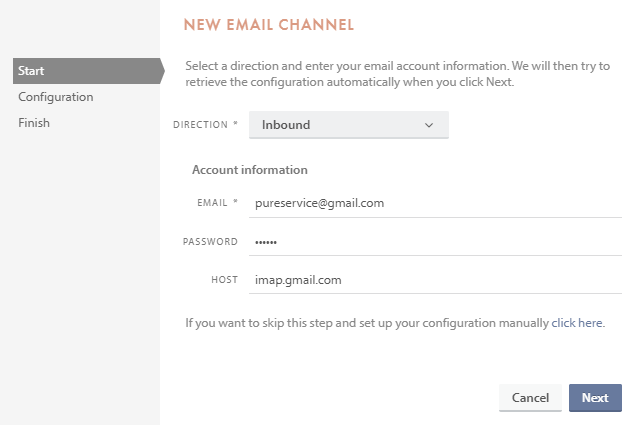
Step 1 – start
Select a direction, either inbound or outbound, for the new channel. The email field is mandatory, while password and host are optional. You can wait until the second step to enter a password, or enter a password after the channel has been created. Until you enter a password, the channel will not function properly. If you do not enter a host name, Pureservice will automatically search for one when you click “Next”. This search might take some time, so please be patient.
If you want to configure the service manually, simply click on the link.
Step 2 – configuration
Pureservice will search for the email provider and try to retrieve the configuration for the service automatically. If one or more channels are found for the requested email, a list will appear in which you can choose the preferred configuration. A red exclamation mark indicates that a configuration has been found, but the credentials could not be verified.
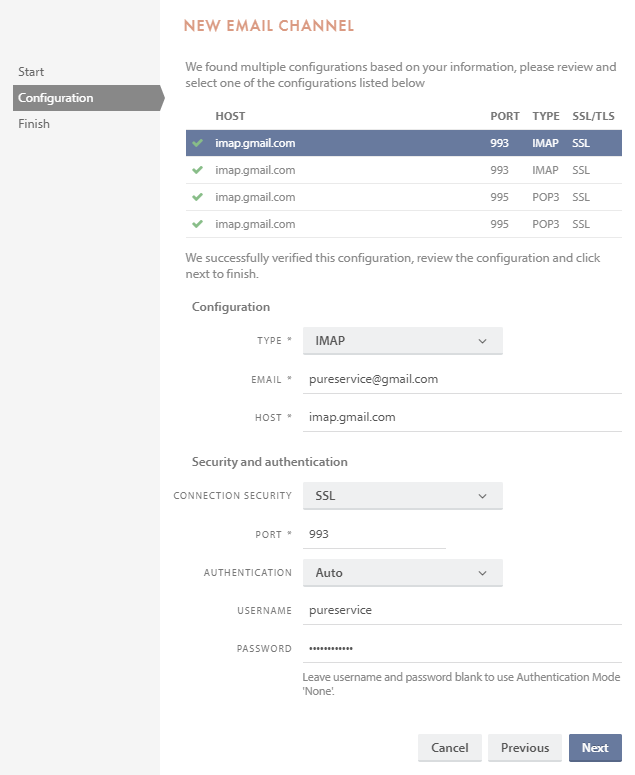
If Pureservice cannot find the configurations, you can enter the settings manually. The settings will be verified when you click “Next”.

URL is used instead of HOST
The following link can usually be used as default URL: https://outlook.office365.com/EWS/Exchange.asmx
Note that it can vary depending on how your EWS is configured.
You may use this template as reference: 
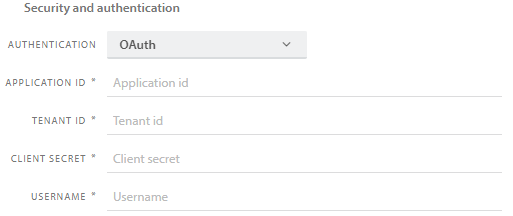
OAuth authentication
A channel set up using Exchange Web Services allows for OAuth authentication, while only Basic authentication is supported by the other protocols.
This setup will require an application to be generated in your Azure portal, in App Registrations.
This application will require the following permissions:
Exchange
- EWS.AccessAsUser.All
- full_access_as_app
Microsoft Graph
- User.Read
Further information regarding how to enable full_access_as_app is available here: https://docs.microsoft.com/en-us/exchange/client-developer/exchange-web-services/how-to-authenticate-an-ews-application-by-using-oauth?redirectedfrom=MSDN
Once the app has been set up, add the respective information to Pureservice:
Application ID and Tenant ID: Both can be found on the Overview page.
Client Secret: The Value of a secret generated in the Certificates & Secret menu.
Username: Enter the SMTP address of the user to impersonate when connecting to EWS. Pureservice will connect to this user’s mailbox for sending/receiving. Normally the same as the “Email Address” setting.
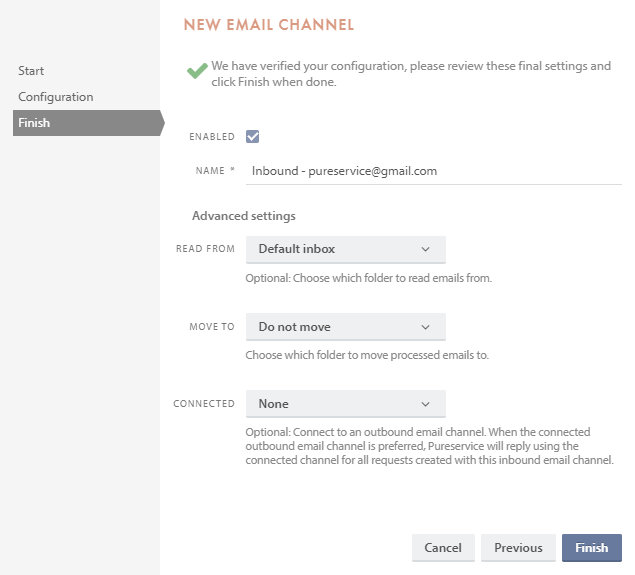
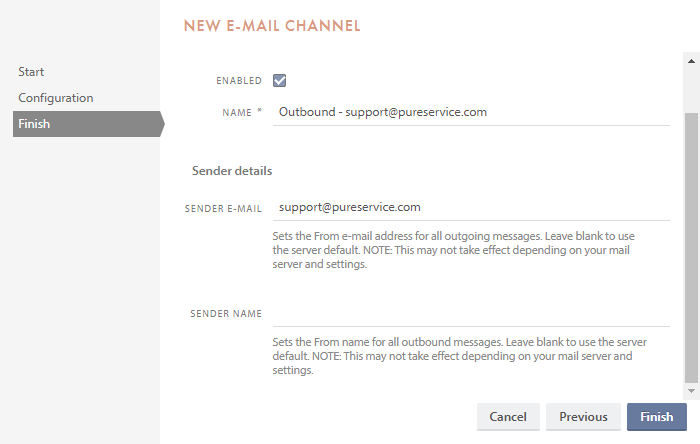
Step 3 – finish
In the finishing stage of creating an inbound or outbound channel, you can set some final settings. Upon creation, a channel can be enabled or disabled by checking/unchecking the “Enabled” box. It is mandatory to name the channel.
Inbound channel
For an inbound channel, you can configure Advanced Settings. You can choose a default folder to read emails from in the Read From drop-down list. Emails can be moved to a certain folder after they have been processed. To do so, choose a folder in the Move To drop-down list. If you have created any outbound email channels, it is possible to connect an inbound channel with an outbound. Pureservice will use the connected outbound channel when responding to tickets created by the inbound channel.
To save and create the email channel, click “Finish”.
Outbound channel
For an outbound channel, you can set Sender Details. Type an email in the Sender Email field to set as “From” address for all outgoing emails. You can also set a Sender Name for all outgoing emails. Sender name is the name seen by recipients of your emails. Leave both fields blank to use the server default.
To save and create the email channel, click “Finish”.
Need more help with this?
Ta kontakt med oss for videre spørsmål her!