
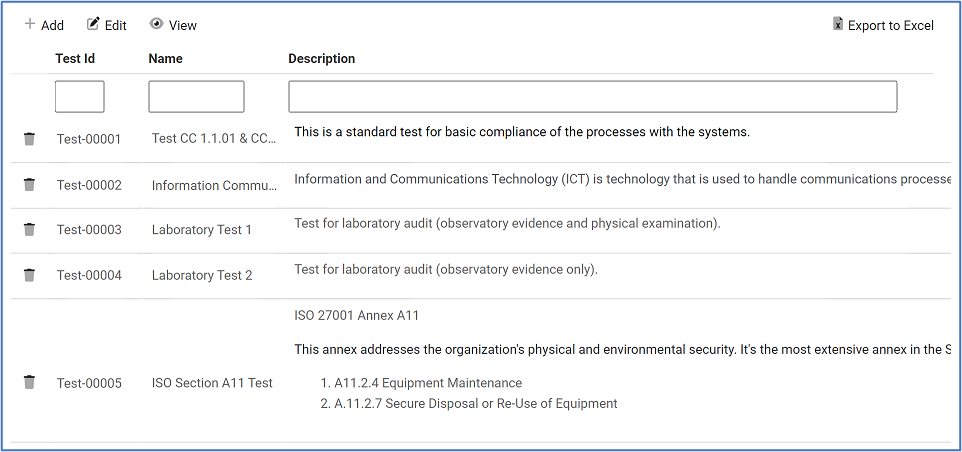
In this section of the Tests Management application, users can access the list of all tests created.

Search Panel

- Test ID: This is a numeric field that allows users to input the test ID.
- Name: This is a text field that allows users to input the name of the test.
- Filter: This button retrieves the list of requests that match with the search (based on the values you entered).
- Clear Filter: This button clears the filters that were used in the previous search.
Grid
Inside the grid, tests are organized by the values inputted in the New Test form.
- Add: This button allows users to add a new test.
- If selected, it will open a pop-up window with the New Test form.
- At the bottom of this form, users will have the following options:
![]()
- Save and Return: This button allows users to save the test and return to the main form.
- Save and New: This button allows users to save the test and open the form to create another test.
- At the bottom of this form, users will have the following options:
- If selected, it will open a pop-up window with the New Test form.
- Edit: This button allows users to edit an existing test.
- To edit, select the test that you want to edit from the grid and click on the Edit button. It will open a pop-window with the form Edit Test. This form is a duplicate of the New Test form, with the exception being that the fields are all populated with previously inputted information.
- To save your changes, click on the Apply button at the bottom of the form.
- View: This button allows users to view a test.
- To view, select the evidence request that you want to view from the grid and click on the View button. In viewing mode, users cannot make any modifications.
- Export to Excel: This button allows users to export selected columns from the grid to Excel.
- Delete: This button allows users to delete a test (see previous instance for details on this function).

Post your comment on this topic.