
There are 7 tabs to consider under Define Requirements:
Imported Requirements
This tab displays all the requirements defined in this system. Users need to deselect the requirements that do not apply to the audit.
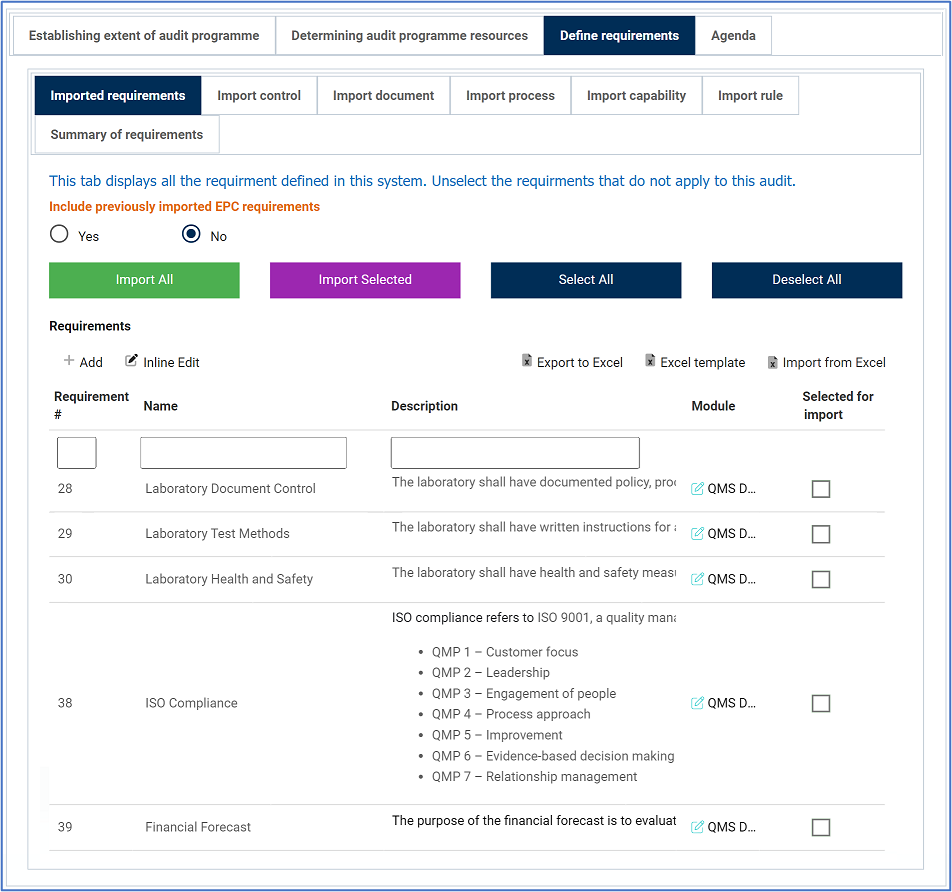
- Include Previously Imported EPC Requirements: This is a radio button that allows users to select only one option from a set of mutually exclusive options. Users can choose to include or not include previously imported EPC requirements.
- If Yes is selected, the previously imported EPC requirements will populate the Requirements grid.
- Import All: This button allows users to import all of the requirements to the Summary of Requirements tab .
- Import Selected: This button allows users to import selected requirements to the Summary of Requirements tab.
- Select All: This button allows users to select all requirements in the grid (for importing purposes).
- Deselect All: This button allows users to deselect all requirements in the grid (to cancel import).
- Add: This button allows users to add a new audit requirement.
- If selected, it will open a pop-up window with the Define a New Audit Requirement form. This form is largely a duplicate of the Define a New Requirement form, which will be explained later in this manual.
- At the bottom of this form, however, users will have the following options:
![]()
- Save and Return: This button allows users to save the requirement and return to the New Audit Definition form.
- Save and New: This button allows users to save the requirement and open a new form to create another requirement.
- At the bottom of this form, however, users will have the following options:
- If selected, it will open a pop-up window with the Define a New Audit Requirement form. This form is largely a duplicate of the Define a New Requirement form, which will be explained later in this manual.
- Inline Edit: This button allows users to edit inside the Requirements grid. Here, it specifically allows users to manually select/deselect the Selected for Import checkbox.
- To edit inline, select the requirement that you want to edit from the grid and click on the Inline Edit button.
- Click on either the Save button to save your changes or the Cancel button to cancel them.
- Export to Excel: This button allows users to export selected columns from the grid to Excel.
- Excel Template: This button allows users to generate an Excel template of the grid.
- Import from Excel: This button allows users to import data from an Excel sheet into the grid. Only the data inside the columns will be imported. If a control is not listed as a column, it cannot be imported

Import Control
In this tab, users can select which controls need to be audited.
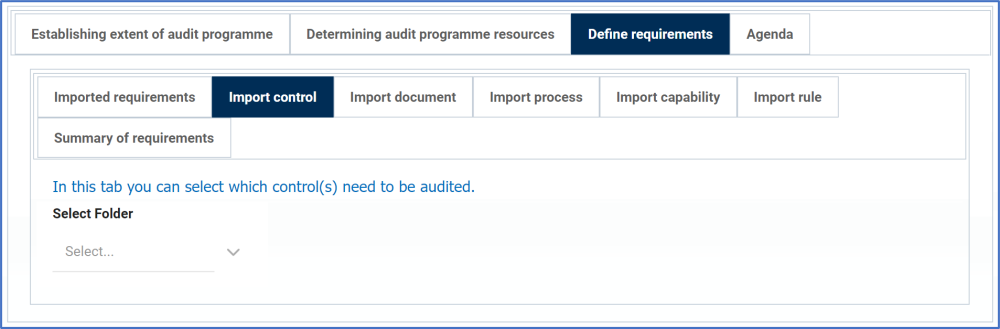
- Select Folder: This is a single-select field that displays a list of EPC control nodes. It allows users to select only one value from the list. Unlike most single-select examples, however, in which the arrow icon is used to release a dropdown menu, here, the arrow icon opens a pop-up window with a tree list selector instead.
![]()
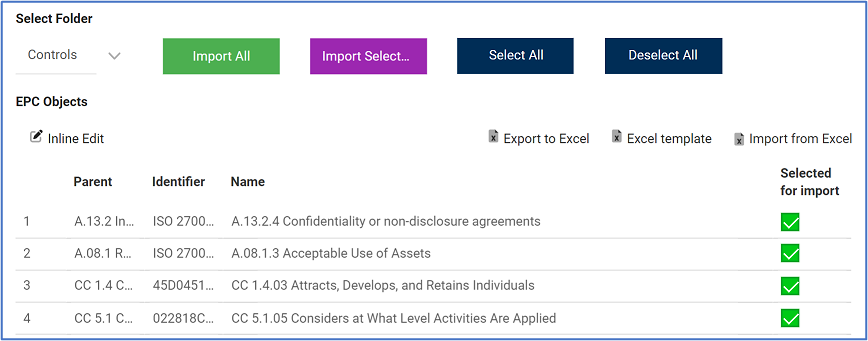
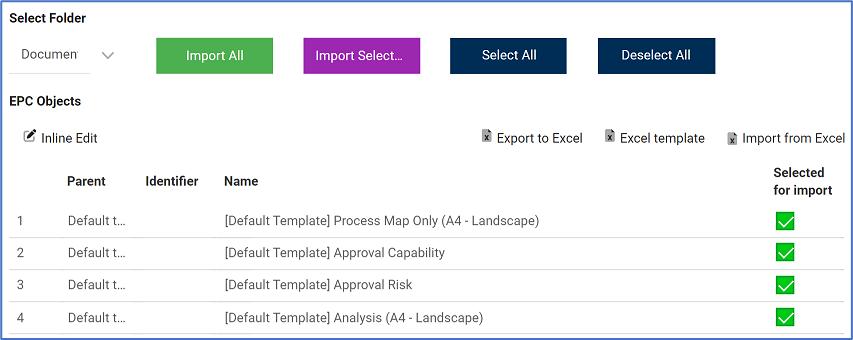
- Once a parent EPC control node has been selected, its child nodes will populate the EPC Objects grid.
![]()
- Import All: This button allows users to import all of the controls in the grid to the Summary of Requirements tab (to be “explained below).
- Import Selected: This button allows users to import selected controls to the Summary of Requirements tab.
- Select All: This button allows users to select all controls in the grid (for importing purposes).
- Deselect All: This button allows users to deselect all controls in the grid (to cancel import).
- Inline Edit: This button allows users to edit inside the EPC Objects grid. Here, it specifically allows users to manually select/deselect the Selected for Import checkbox.
- To edit inline, select the control that you want to edit from the grid and click on the Inline Edit button.
- Click on either the Save button to save your changes or the Cancel button to cancel them.
- Once a parent EPC control node has been selected, its child nodes will populate the EPC Objects grid.

Import Document
In this tab, users can select which documents need to be audited.
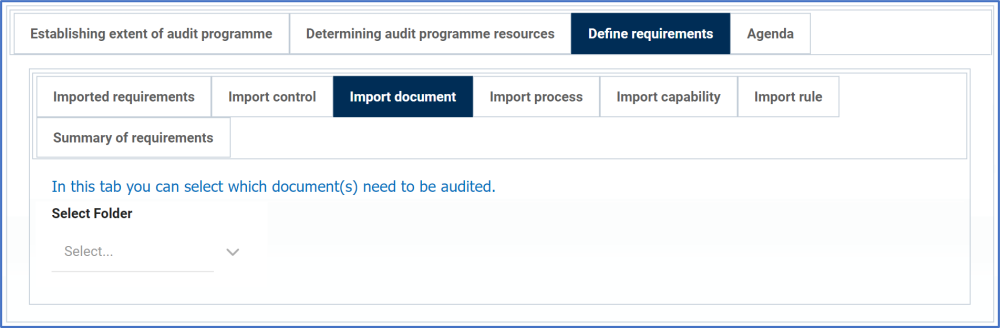
- Select Folder: This is a single-select field that displays a list of EPC document nodes. It allows users to select only one value from the list. Unlike most single-select examples, however, in which the arrow icon is used to release a dropdown menu, here, the arrow icon opens a pop-up window with a tree list selector instead (as shown with the previous tab).
- Once a parent EPC document node has been selected, its child nodes will populate the EPC Objects grid.
![]()
- Import All: This button allows users to import all of the documents in the grid to the Summary of Requirements tab (to be explained below).
- Import Selected: This button allows users to import selected documents to the Summary of Requirements tab.
- Select All: This button allows users to select all documents in the grid (for importing purposes).
- Deselect All: This button allows users to deselect all documents in the grid (to cancel import).
- Inline Edit: This button allows users to edit inside the EPC Objects grid. Here, it specifically allows users to manually select/deselect the Selected for Import checkbox.
- To edit inline, select the document that you want to edit from the grid and click on the Inline Edit button.
- Click on either the Save button to save your changes or the Cancel button to cancel them.
- Once a parent EPC document node has been selected, its child nodes will populate the EPC Objects grid.
Import Process
In this tab, users can select which processes need to be audited.
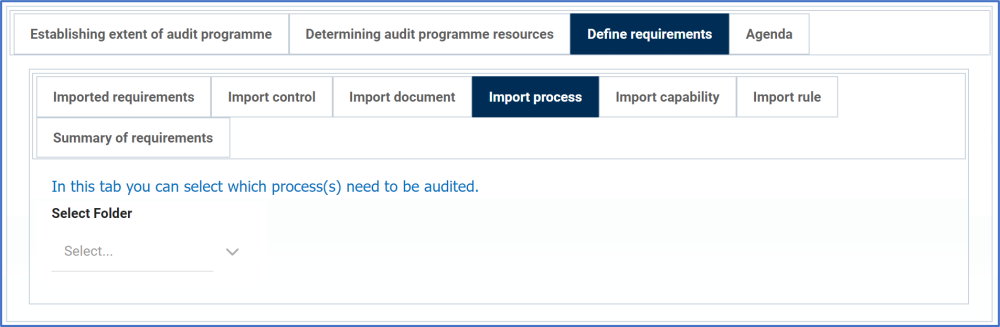
- Select Folder: This is a single-select field that displays a list of EPC process nodes. It allows users to select only one value from the list. Unlike most single-select examples, however, in which the arrow icon is used to release a dropdown menu, here, the arrow icon opens a pop-up window with a tree list selector instead.
- Once a parent EPC process node has been selected, its child nodes will populate the EPC Objects grid.
![]()
- Import All: This button allows users to import all of the processes in the grid to the Summary of Requirements tab (to be explained below).
- Import Selected: This button allows users to import selected processes to the Summary of Requirements tab.
- Select All: This button allows users to select all processes in the grid (for importing purposes).
- Deselect All: This button allows users to deselect all processes in the grid (to cancel import).
- Inline Edit: This button allows users to edit inside the EPC Objects grid. Here, it specifically allows users to manually select/deselect the Selected for Import checkbox.
- To edit inline, select the process that you want to edit from the grid and click on the Inline Edit button.
- Click on either the Save button to save your changes or the Cancel button to cancel them.
- Once a parent EPC process node has been selected, its child nodes will populate the EPC Objects grid.

Import Capability
In this tab, users can select which capabilities need to be audited.
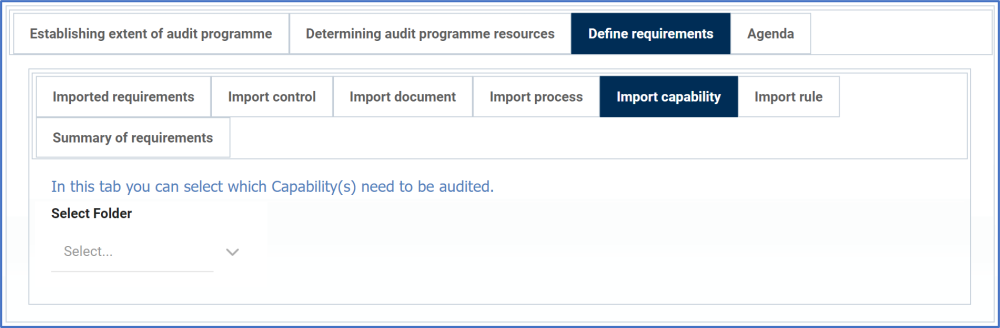
- Select Folder: This is a single-select field that displays a list of EPC capability nodes. It allows users to select only one value from the list. Unlike most single-select examples, however, in which the arrow icon is used to release a dropdown menu, here, the arrow icon opens a pop-up window with a tree list selector instead.
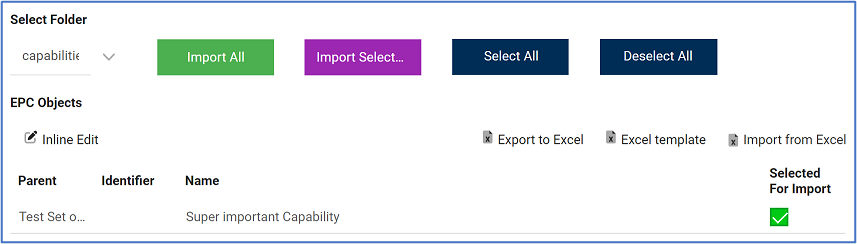
- Once a parent EPC capability node has been selected, its child nodes will populate the EPC Objects grid.
![]()
- Import All: This button allows users to import all of the capabilities in the grid to the Summary of Requirements tab (to be explained below).
- Import Selected: This button allows users to import selected capabilities to the Summary of Requirements tab.
- Select All: This button allows users to select all capabilities in the grid (for importing purposes).
- Deselect All: This button allows users to deselect all capabilities in the grid (to cancel import).
- Inline Edit: This button allows users to edit inside the EPC Objects grid. Here, it specifically allows users to manually select/deselect the Selected for Import checkbox.
- To edit inline, select the capability that you want to edit from the grid and click on the Inline Edit button.
- Click on either the Save button to save your changes or the Cancel button to cancel them.
- Once a parent EPC capability node has been selected, its child nodes will populate the EPC Objects grid.
Import Rule
In this tab, users can select which rules need to be audited.
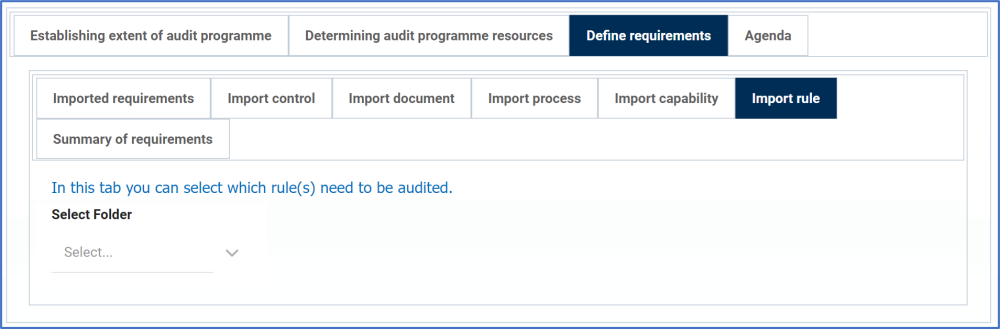
- Select Folder: This is a single-select field that displays a list of EPC rule nodes. It allows users to select only one value from the list. Unlike most single-select examples, however, in which the arrow icon is used to release a dropdown menu, here, the arrow icon opens a pop-up window with a tree list selector instead.
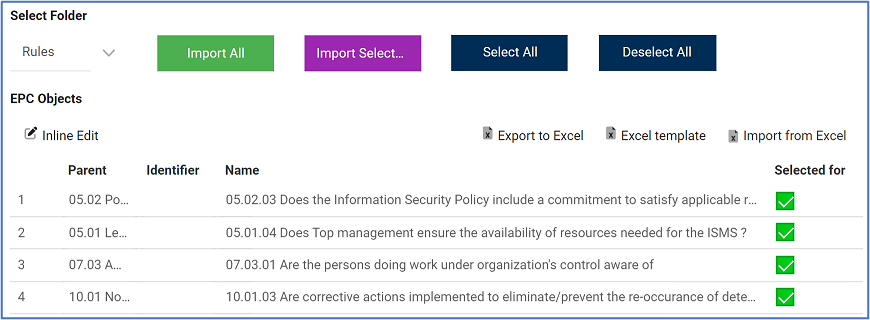
- Once a parent EPC rule node has been selected, its child nodes will populate the EPC Objects grid.
![]()
- Import All: This button allows users to import all of the rules in the grid to the Summary of Requirements tab (to be explained below).
- Import Selected: This button allows users to import selected rules to the Summary of Requirements tab.
- Select All: This button allows users to select all rules in the grid (for importing purposes).
- Deselect All: This button allows users to deselect all rules in the grid (to cancel import).
- Inline Edit: This button allows users to edit inside the EPC Objects grid. Here, it specifically allows users to manually select/deselect the Selected for Import checkbox.
- To edit inline, select the rule that you want to edit from the grid and click on the Inline Edit button.
- Click on either the Save button to save your changes or the Cancel button to cancel them.
- Once a parent EPC rule node has been selected, its child nodes will populate the EPC Objects grid.
Summary of Requirements
This tab displays all of the requirements that are to be executed during the audit.* Any controls, documents, processes, capabilities, and/or rules that were imported in the previous tabs can be found in this tab. Users can also add/select new requirements to be audited in this tab.
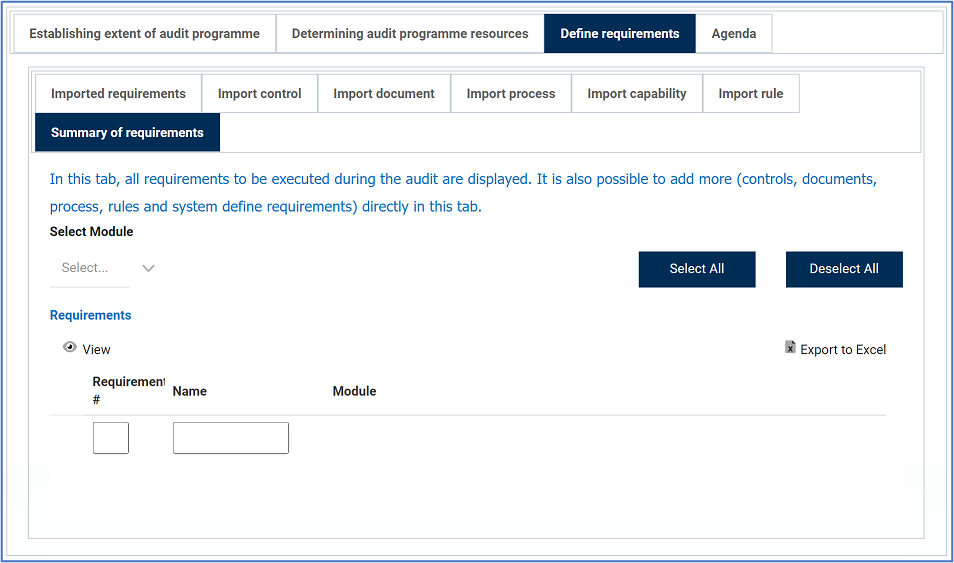
- Select Module: This is a single-select dropdown field that retrieves the list of EPC modules (Process, Document, Rule, Control). It allows users to select only one value at a time from the dropdown.
- Once a module has been selected, this field will be displayed next to it:
![]()
- Select Folder: This is a single-select field that displays a list of the selected module’s EPC nodes. It allows users to select only one value from the list. Unlike most single-select examples, however, in which the arrow icon is used to release a dropdown menu, here, the arrow icon opens a pop-up window with a tree list selector instead.
- Once a folder has been selected, the EPC Objects grid will be displayed as well as the import options. The grid will automatically be populated with the child nodes of the selected parent folder.
![]()
- Import All: This button allows users to import all of the child nodes in the EPC Objects grid to the Requirements grid below.
- Import Selected: This button allows users to import selected child nodes in the EPC Objects grid to the Requirements grid below.
- Select All: This button allows users to select all child nodes in the grid (for importing purposes).
- Deselect All: This button allows users to deselect all child nodes in the grid (to cancel import).
- Inline Edit: This button allows users to edit inside the EPC Objects grid. Here, it specifically allows users to manually select/deselect the Selected checkbox.
- To edit inline, select the node that you want to edit from the grid and click on the Inline Edit button.
- Click on either the Save button to save your changes or the Cancel button to cancel them.
- Once a folder has been selected, the EPC Objects grid will be displayed as well as the import options. The grid will automatically be populated with the child nodes of the selected parent folder.
- Once a module has been selected, this field will be displayed next to it:
- View: This button allows users to view a requirement.
- To view, select the requirement that you want to view from the grid and click on the View button. In viewing mode, users cannot make any modifications. They can, however, view details in supplemental forms and perform Excel-related activities (export selected columns from the grid).
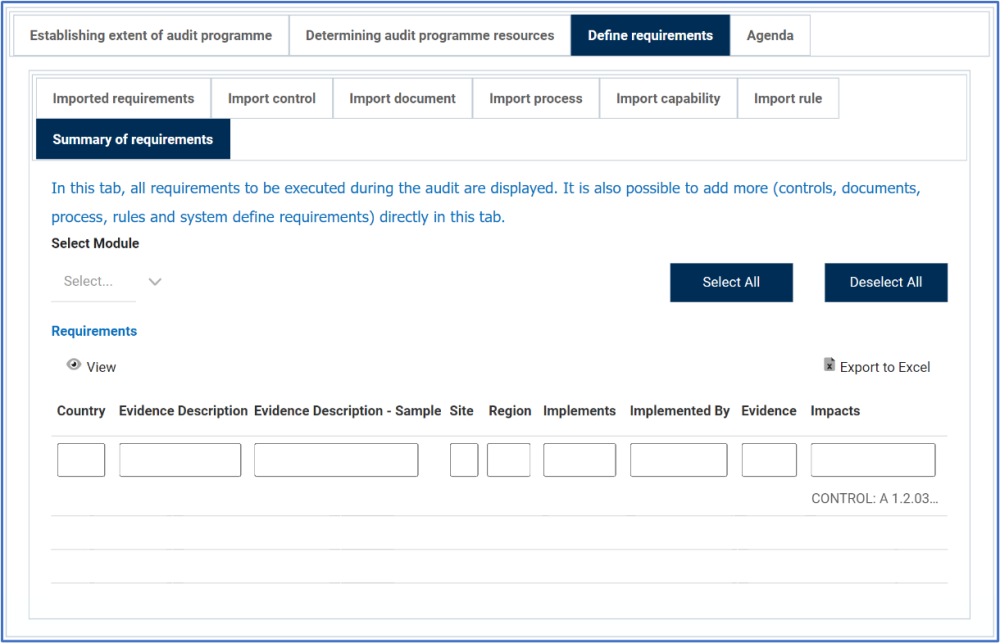
- Export to Excel: This button allows users to export selected columns from the Requirements grid to Excel.
- ** Once a control has been imported to the Requirements grid, the columns will be populated with information from EPC.
![]()
![]()


Post your comment on this topic.