
In this section, users can create new tests.
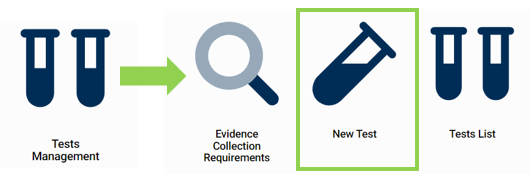
Create a New Test
The New Test form is composed of three main sections: (1) Test Details, (2) Requirements Attached to This Test, and (3) Evidence Requested.
1. Test Details
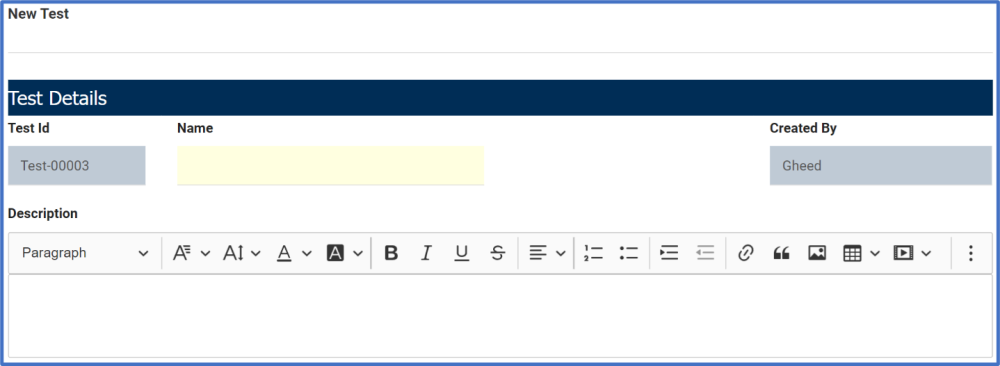
- Test ID: This field is automatically populated with the test ID whenever a new test is created. Users cannot modify the field.
- Name: This is a text field that allows users to input the name of the test. It is a mandatory field.
- Created By: This field is automatically populated with the user’s login name.
- Description: This is a description box that allows users to input a description of the test. In this field users can insert headings, bullets, images, tables, links, and media files (as well as change font colors, font sizes, background colors and more).
2. Requirements Attached to This Test
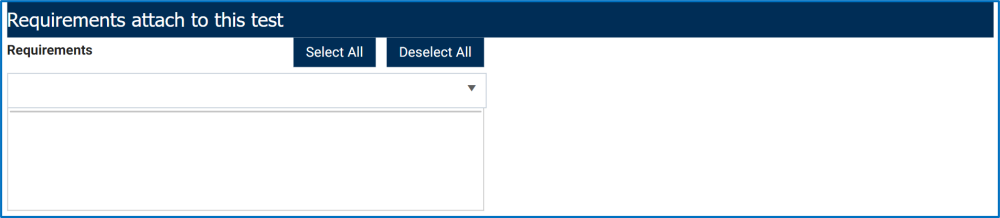
- Requirements: This is a multi-select dropdown field that retrieves the list of requirements (from the Requirement Management application). It allows users to attach requirements to the test. Users can select multiple values at a time from the dropdown.
- Select All: This button allows users to select all requirements.
- Deselect All: This button allows users to deselect all requirements.
3. Evidence Requested

- Assign All: This button allows users to assign all evidence requests to the test.
- If this button is selected, all evidence requests will populate the Assigned Evidence grid (indicated above in red).
![]()
- If this button is selected, all evidence requests will populate the Assigned Evidence grid (indicated above in red).
- Assign Selected: This button allows users to assign selected evidence requests to the test.
- If this button is selected, only selected evidence requests will populate the Assigned Evidence grid (indicated in red).
- Select All: This button allows users to select all evidence requests in the Available Evidence grid.
- Deselect All: This button allows users to deselect all evidence requests in the Available Evidence grid.
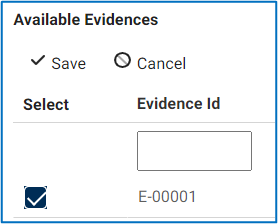
- Inline Edit: This button allows users to edit inside the Available Evidence grid. Here, it specifically allows users to manually select/deselect the Select checkbox.
![]()
- Click on either the Save button to save your changes or the Cancel button to cancel them.
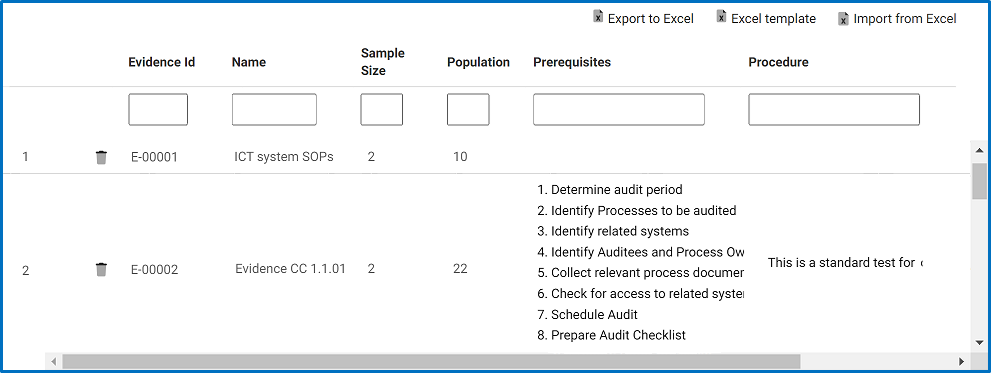
- Export to Excel 1: This button allows users to export selected columns from the Available Evidence grid to Excel.
- Export to Excel 2: This button allows users to export selected columns from the Assigned Evidence grid to Excel.
- Excel Template: This button allows users to generate an Excel template of the Assigned Evidence grid.
- Import from Excel: This button allows users to import data (inside columns) from an Excel sheet into the Assigned Evidence grid.
- Submit: This button allows users to submit the form.
Post your comment on this topic.