
If the Edit button is selected in the Collect Evidences form, it will open a pop-up window with the Collect Evidence form. This form is composed of five main sections: (1) Evidence Definition Details, (2) Audit Details & Test Details, (3) Collection, (4) Past Results Samples, and (5) Comments.
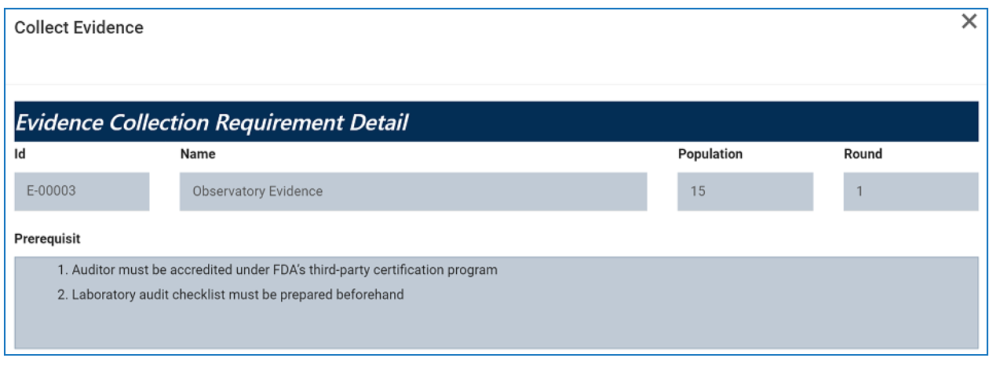
1. Evidence Definition Details
Users cannot make any modifications in this section of the form. It functions solely to provide users with details about the evidence request. (These details would have been inputted in the Create Evidence form.)
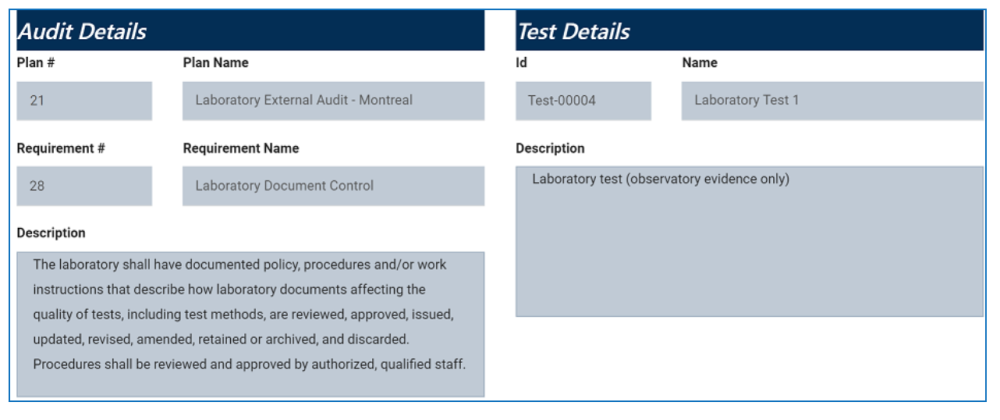
2. Audit Details & Test Details
Users cannot make any modifications in this section of the form. It functions solely to provide users with details about the audit and test.
- In the Audit Details section, users can access details about the audit plan and the requirement linked to the test. These requirement details would have been inputted in either the Define a New Audit Requirement or Define a New Requirement form.
- In the Test Details section, users can access details about the test—that is, the test for which evidence is being requested and to which the requirement is linked. These details would have been inputted in the New Test form.
![]()
Collection
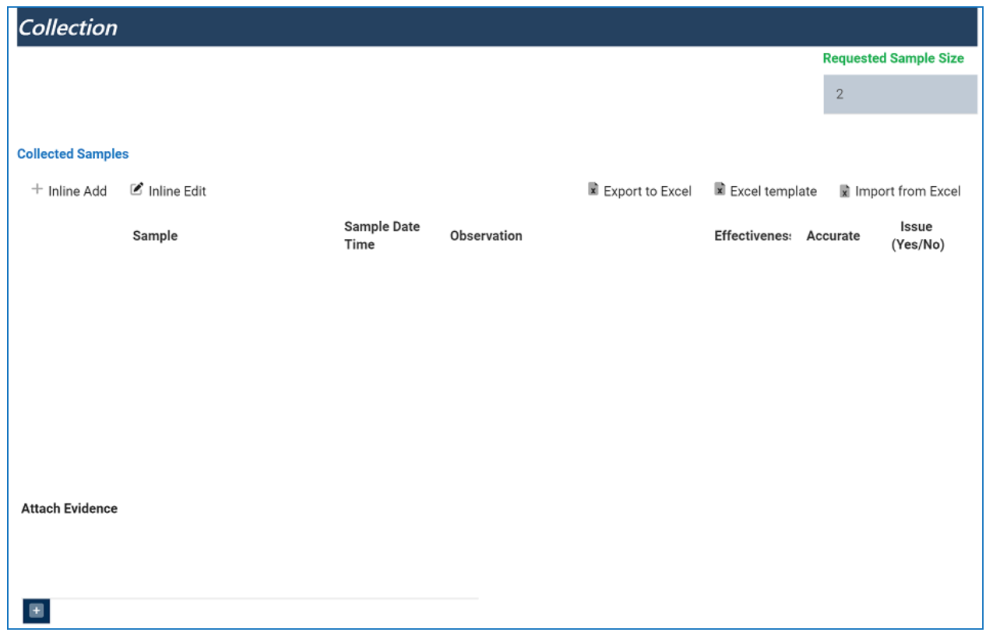
- Inline Add: This button allows users to add a new entry inside the Collected Samples grid.
![]()
- Sample: Once the entry has been saved, this field will automatically be populated with the sample ID. Users cannot modify the field.
- Sample Date/Time: Once the entry has been saved, this field will automatically be populated with the date and time at which the sample was collected. Users cannot modify the field.
- Observation: This is a text field that allows users to input their observation on the collected sample.
- Effectiveness: This is a single-select dropdown field that displays a list of answers either confirming or denying the effectiveness of the collected sample. (Users can choose either Yes or No from the dropdown).
- Accurate: This is a single-select dropdown field that displays a list of answers either confirming or denying the accuracy of the collected sample. (Users can choose either Yes or No from the dropdown).
- Issue: This is a single-select dropdown field that displays a list of answers either confirming or denying the presence of an issue with the collected sample. (Users can choose either Yes or No from the dropdown).
- Save: This button allows users to save their entry.
- Cancel: This button allows users to cancel their entry.
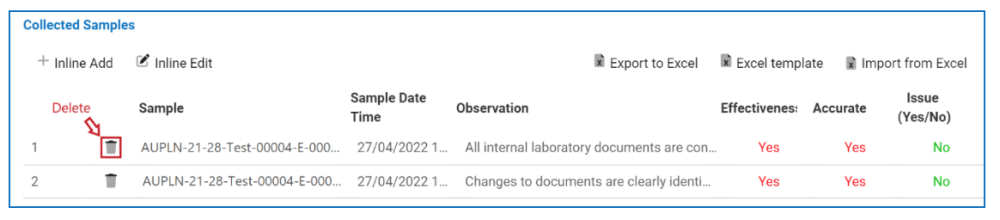
- Inline Edit: This button allows users to edit an entry inside the Collected Samples grid.
- To edit inline, select the entry that you want to edit from the grid and click on the Inline Edit button.
- All of the Inline Add fields will reappear and users can make, save, or cancel changes as desired.
- Delete: This button (pictured below) allows users to delete an entry from the grid. For more details on this function, see previous instance.
![]()
- Export to Excel: This button allows users to export selected columns from the grid to Excel.
- Excel Template: This button allows users to generate an Excel template of the grid.
- Import from Excel: This button allows users to import data (inside columns) from an Excel sheet into the grid.
- Attach Evidence: This is an attachment field that allows users to attach evidence for the collected samples (see previous instance for more details on this function).

4. Past Results Samples
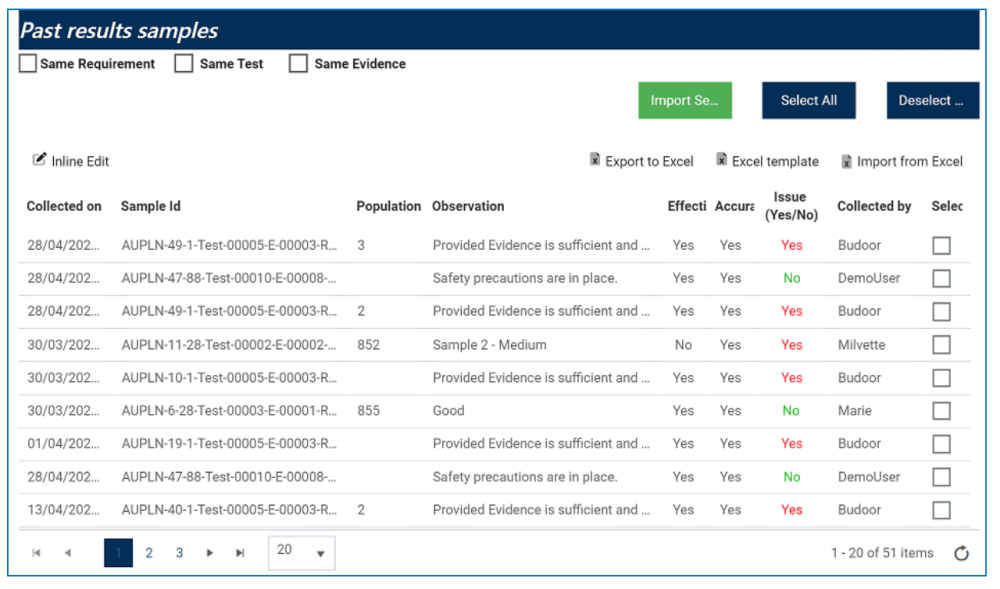
- Same Requirement: This is a checkbox which, if enabled, allows users to filter (the grid) by past sample results collected for the same requirement.
- Same Test: This is a checkbox which, if enabled, allows users to filter (the grid) by past sample results collected for the same test.
- Same Evidence: This is a checkbox which, if enabled, allows users to filter (the grid) by past sample results collected for the same evidence.
- Import Selected: This button allows users to import the selected samples from this grid to the Collected Samples grid (shown in the previous section).
- Select All: This button allows users to select all sample results (for importing purposes).
- Deselect All: This button allows users to deselect all sample results (to cancel import).
- Inline Edit: This button allows users to edit inside the grid. Here, it specifically allows users to manually select/deselect the Select checkbox.
- To edit inline, select the sample result that you want to edit from the grid and click on the Inline Edit button.
- Click on either the Save button to save your changes or the Cancel button to cancel them.
- Export to Excel: This button allows users to export selected columns from the grid to Excel.
- Excel Template: This button allows users to generate an Excel template of the grid.
- Import from Excel: This button allows users to import data (inside columns) from an Excel sheet into the grid.
5. Comments
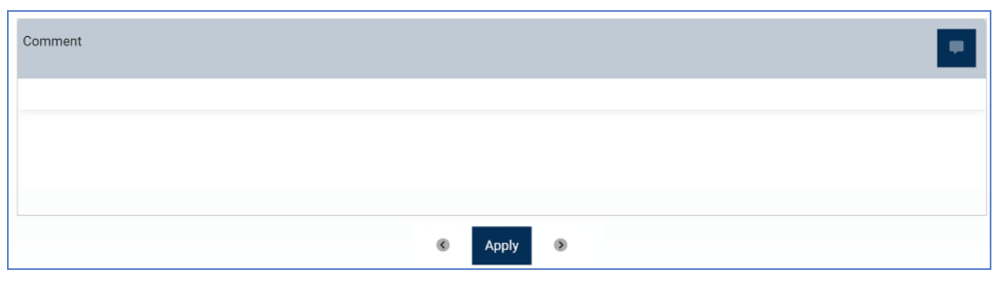
- Comment: This field allows users to input their comments (see previous instance for more details on this function).
- Any comments (or replies) inputted in this field will populate the Comments grid in the Collect Evidences form.
![]()
- Any comments (or replies) inputted in this field will populate the Comments grid in the Collect Evidences form.
- Apply: This button allows users to save their work and return to the Collect Evidences form.
- Users can navigate between different evidence requests by using the arrows on either side of the Apply button.
- Once changes have been applied, the Sample Count in the Evidence grid of the Collect Evidences form will be updated accordingly.

Post your comment on this topic.