
The steps for setting up a new sector with the corresponding device and settings can be found below.
1. Configuration policy
If a configuration policy that should be used is already available, this step can be skipped. Otherwise please find further instructions below:
- Create a new policy
![]()
Create the new configuration policy by pressing![]() on the top right. A new window will pop up with three screens. The first screen “General” will allow to define the general description and name, and enable the configuration policy.
on the top right. A new window will pop up with three screens. The first screen “General” will allow to define the general description and name, and enable the configuration policy.
![]()
On the second screen, the alarm rules for the device can be set up. The device’s internal temperature and humidity sensors and the temperature external probes have their own rules. You can set up multiple settings for each of them and also select between single or accumulated alarms (“single” means a single occurrence needs to meet the time constraint while “accumulated” means there can be multiple instances that violate the value for a shorter amount of time but will trigger the alarm due to them all being added up together exceed the time value). There are certain limitations regarding measurement intervals, however SmartView will indicate if a selecton is not valid and provide details on the nedded corrections.![]()
On the third screen, specific additional events and device settings can be defined. Not all settings do apply for all device types. In case you would like to limit the selection for a specific device, select the device type on the top of the screen.![]()
![]()
Once all the required settings are entered the configuration policy can be saved for further use by pressing![]() on the top right of the screen.
on the top right of the screen.

 on the top right. A new window will pop up with three screens. The first screen “General” will allow to define the general description and name, and enable the configuration policy.


2. Alarm profile
With the previously created configuration policy, we will now be able to create an Alarm profile. If you already have an Alarm profile you wish to use, this step can be skipped.
- Create a new Alarm Profile
To create a new alarm profile, go to the alarm profile menu item and click on the![]() button:
button:
![]()
Provide a name for the alarm profile and click OK.During the setup, a configuration policy has to be selected. The alarm rules will be imported from the configuration policy.
![]()
After creating an alarm profile, this can be applied to a sector or a shipment and can be reused as many times as required.


3. Create a Location
If a location that should be used is already available this step can be skipped.
- Create Location
To create a location, click on the Locations tab in the main menu. This button provides you with an overview of all the existing locations in SmartView.
![]()
Click on the![]() button and choose a name for your location.
button and choose a name for your location.
After creating a location, you can define optional detailed information for it, such as address, email, contact, and exact position (i.e., longitude and latitude information) of the location. Further on, if you are using SmartView for shipment monitoring, then you have the option to configure a location to be used as an origin and/or destination for shipments.![]()
If you are using the SmartView for shipment monitoring then you will see the Shipment Settings section in the modify location screen (as shown in the above image). This section allows you to mark a location for the usage of origin and/or destination.
If you want a location to be used as origins of shipment then check the box Use as Origin.
If you want a location to be used as the destination of a shipment, check the box Use as Destination.


4. Create a Sector
- Create a Sector
-
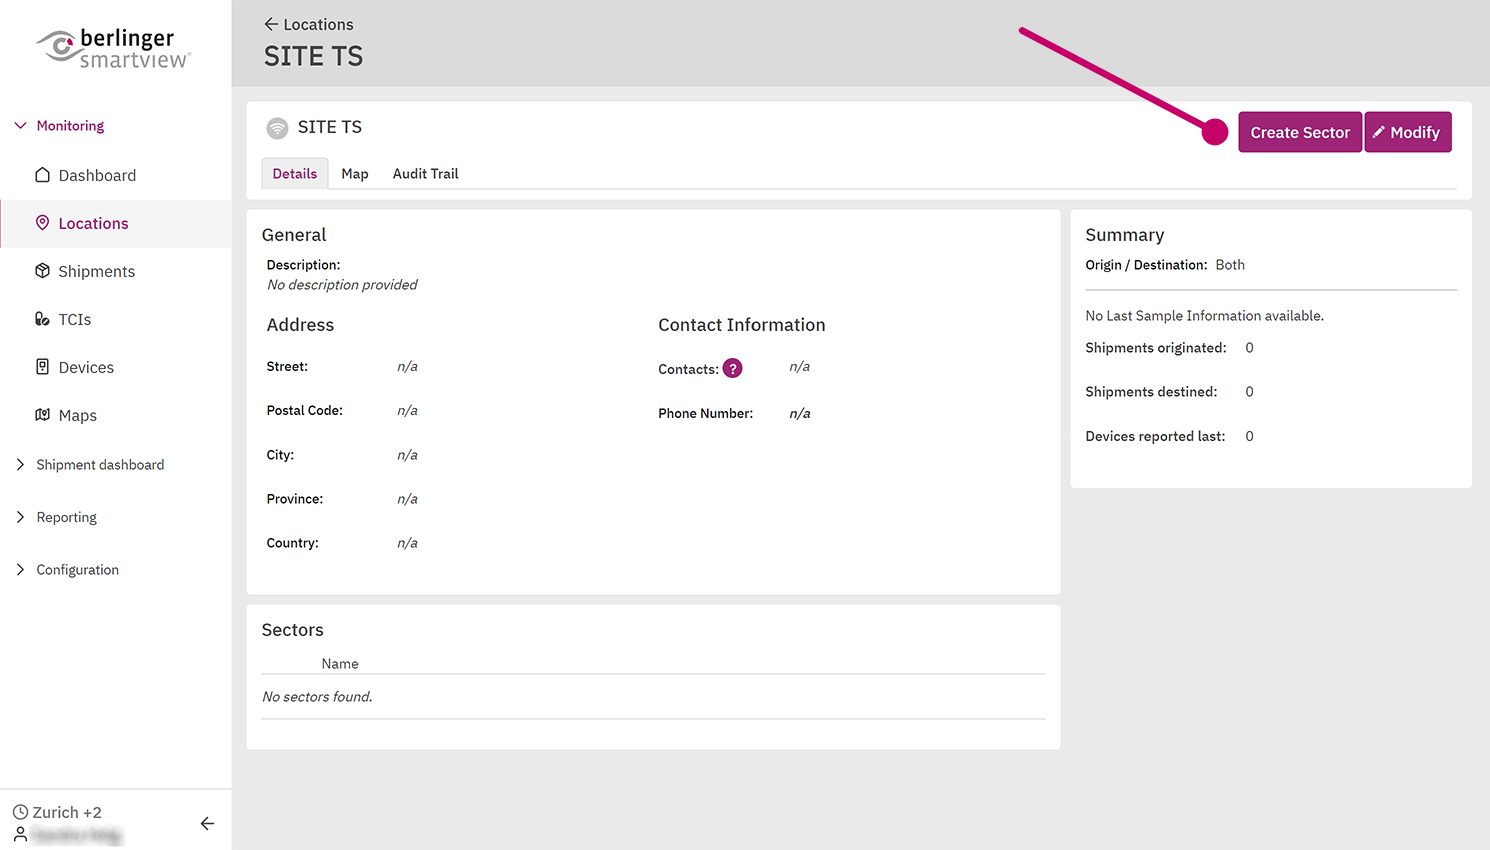
To create a sector, click on the![]() button in the Location:
button in the Location:
![]()
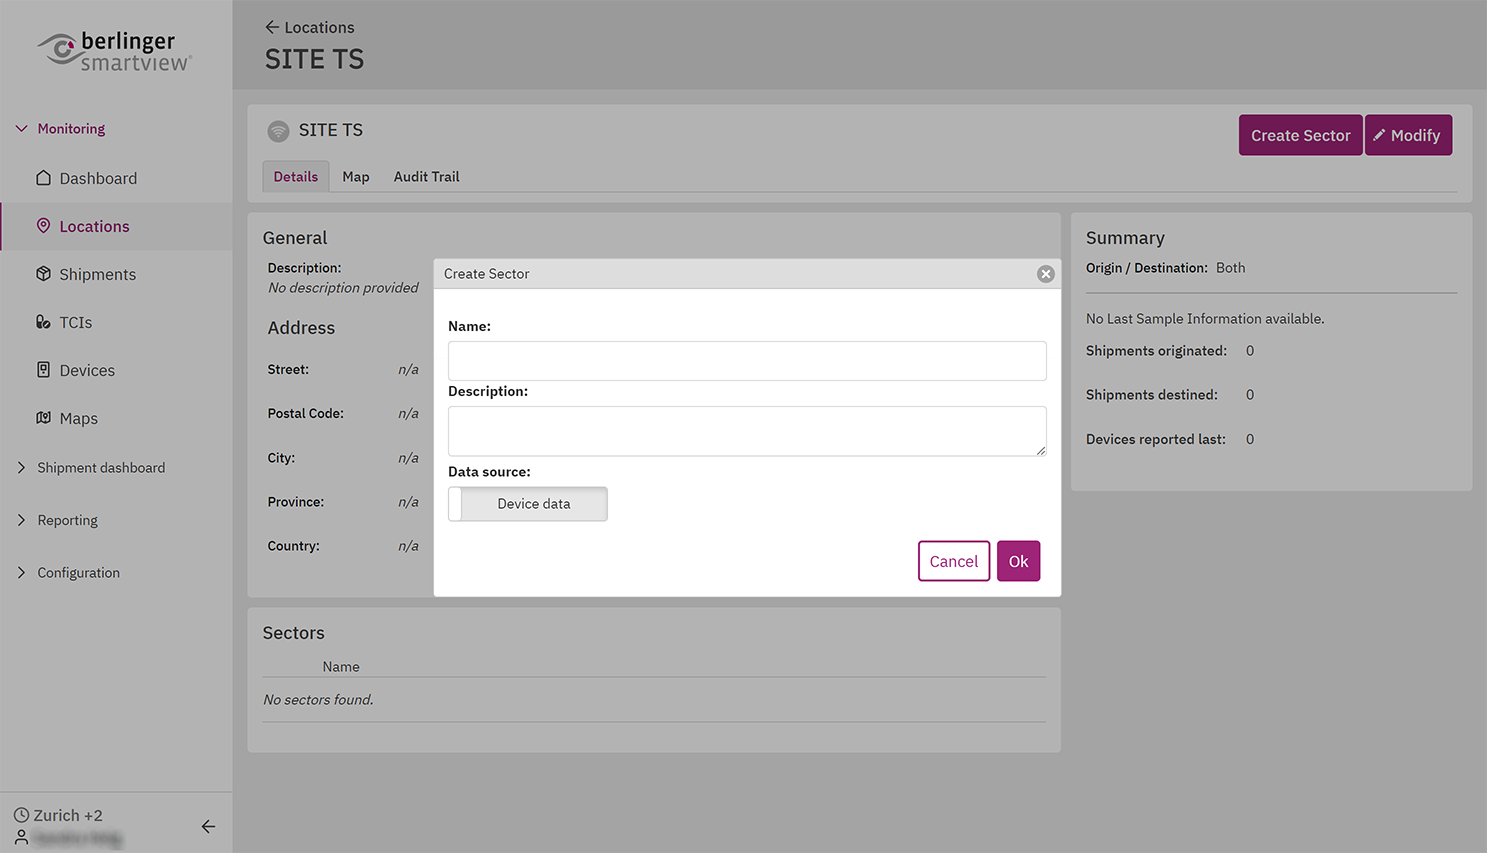
Choose a name for your sector and/or a description and select if the sector shall be used with a device or with manually entered data.Afterwars, confirm the entries by pressing OK.
![]()
5. Modify Storage Conditions
- Modify Storage Conditions
![]()
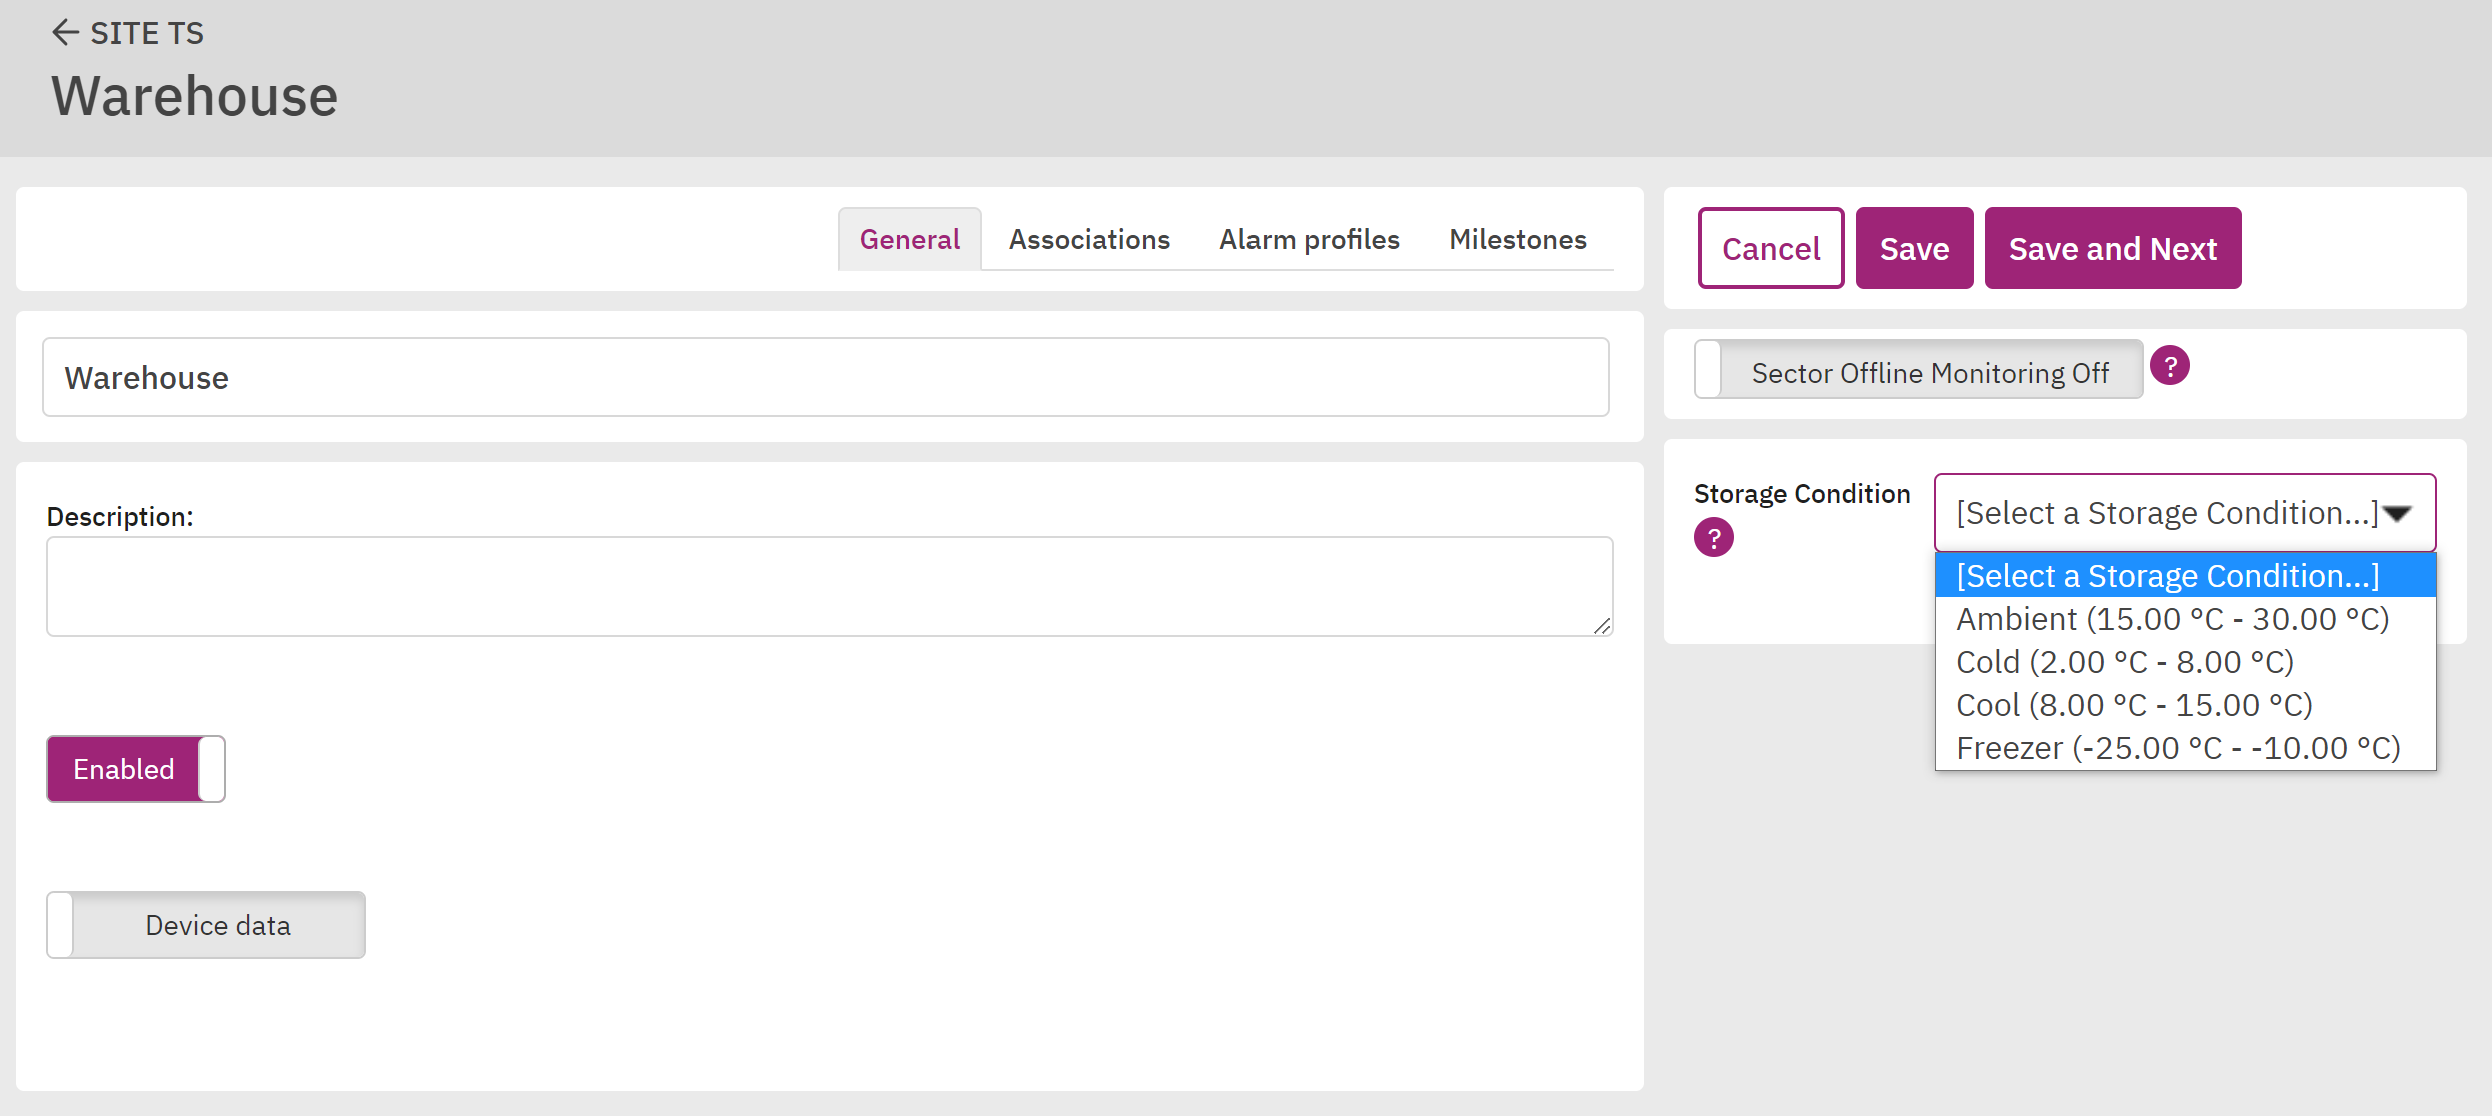
You can choose a storage condition for your sector which you have predefined under Site Settings / Storage Conditions.
6. Add a Device Association to a sector
- Add a Device Association to a sector
-
Choose the sensors that you would like to associate to the sector, by clicking on the Associations Tab – then click on the Create Association button.After creating a sector, you can associate a device to it by clicking on the
![]() button as shown in the following image:
button as shown in the following image:
![]()
Click in the serial no. field to choose your device for the sector.
![]()
*Confirm each association with the
![]() on the bottom right corner.
on the bottom right corner.You can repeat this process for as many devices as you would like to add to your sector.


7. Add an Alarm Profile to Sector
- Add an Alarm Profile to Sector
-
Adding an alarm profile to a sector can be done from the modify screen of the sector:
![]()
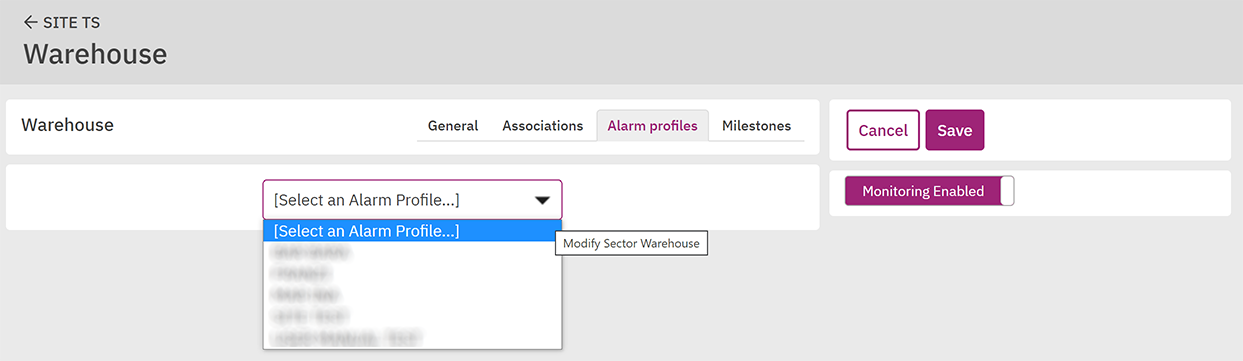
Click on the Alarm profiles tab in the modify screen:
![]()
Click on the Monitoring Disabled/Enabled button to enable alarm monitoring and select an Alarm Profile from the dropdown list:
![]()
Click on![]() to save your changes.
to save your changes.


8. Set up device
In the last step, the site personnel is required to active/start the device for this please refer the the SmartMonitor manual
Post your comment on this topic.