Every Table and Report is started by selecting a main table. You can join additional tables so the columns in those tables appear under the Select, Join, Where and Group By parts of the SQL Statement. You are provided with all columns with available joins and a list of tables that each can be joined to. TAD handles the logic behind what columns need to be joined for you.
Adding a Join requires three selections.
- Select an Available Column
- Select one of the Tables To Join
- Select one of the Join Types
In the example below, we will join the TAD Sandbox table with the HQ States table to select columns from that Table.
1. Make sure you already have the TAD Sandbox or another Table downloaded before getting started.

2. Click the Edit Query on the ribbon.

3. Click the Join button on the left side.
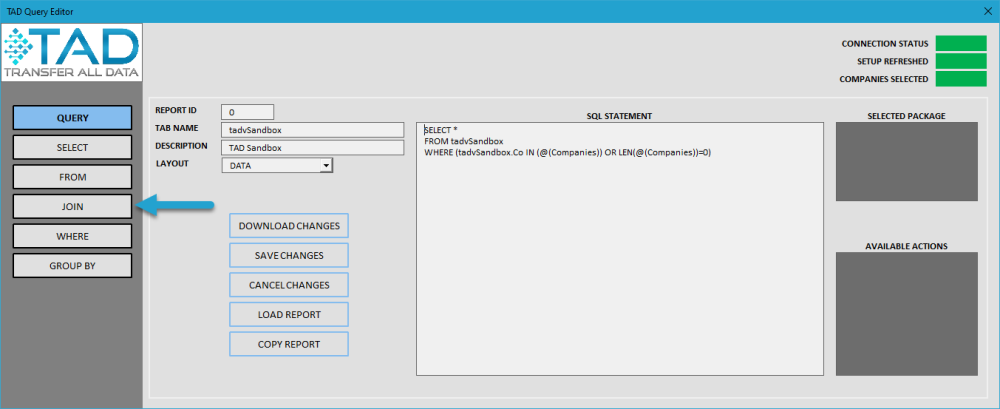
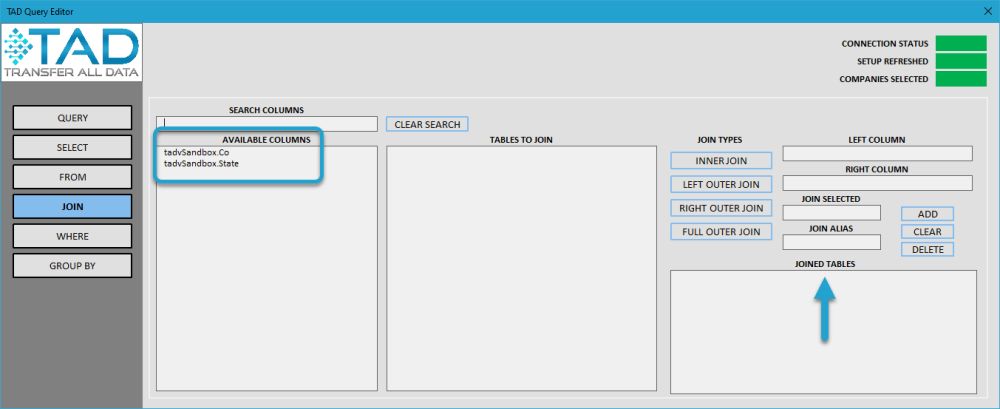
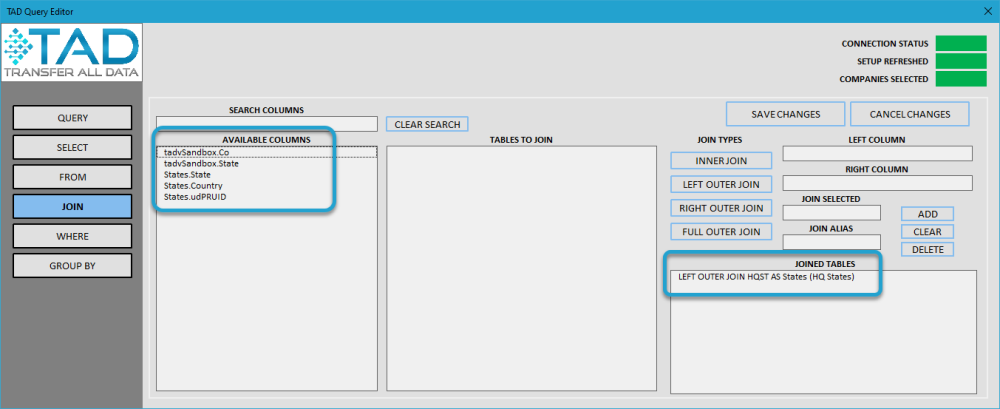
4. You will see the Available Columns based on the tables in your query and any existing joins in the Joined Tables box.
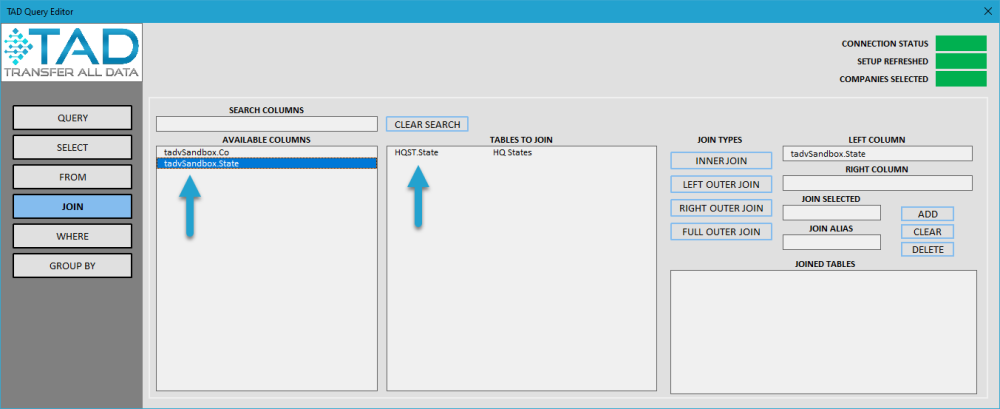
5. Select the tadvSandbox.State column to populate the Tables To Join section with the available tables.
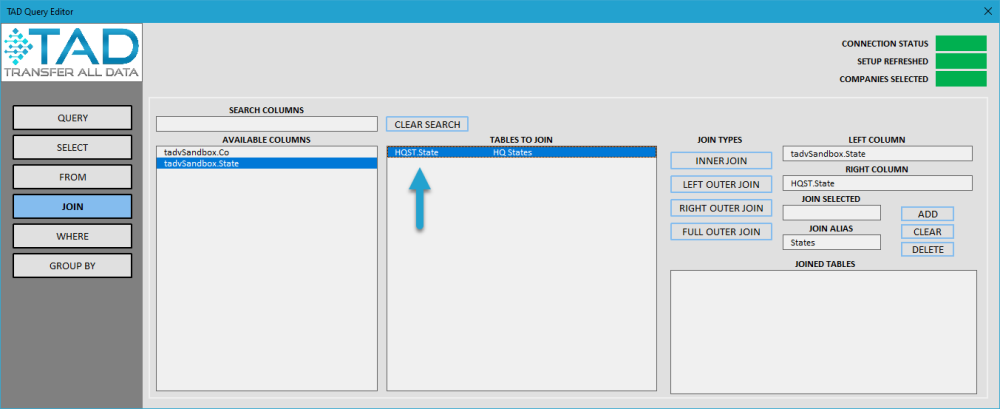
6. Select the HQ States table so we can pull the full State name.
7. Select one of the Join Types to complete the required selections. The Left Join Type is the safest option to select if you are unsure what to choose.
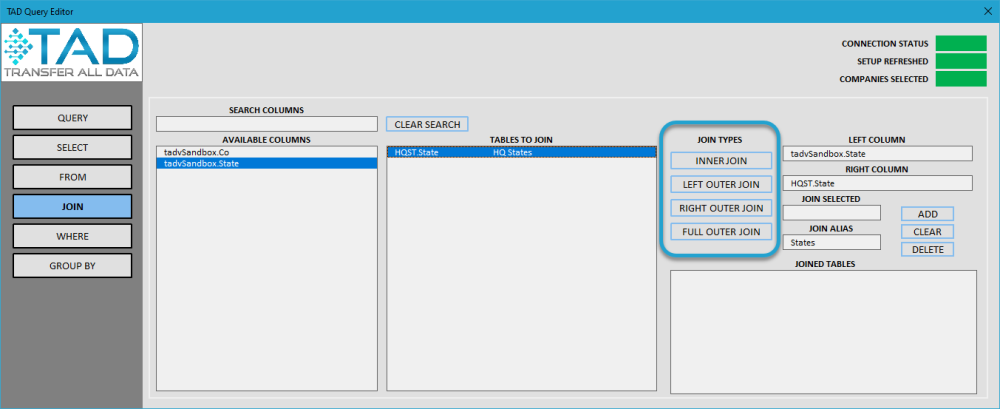
The different join types are below.
| Button | Description |
|---|---|
| Inner Join | This returns the matching row between the two tables. if either table has a record without a match it will be omitted. |
| Left Outer Join | This returns all rows from the left table and the matching row in the right table. |
| Right Outer Join | This returns all rows from the right table and the matching row in the left table. |
| Full Outer Join | This returns all rows from the left and right tables even if a matching record does not exist in the other. |
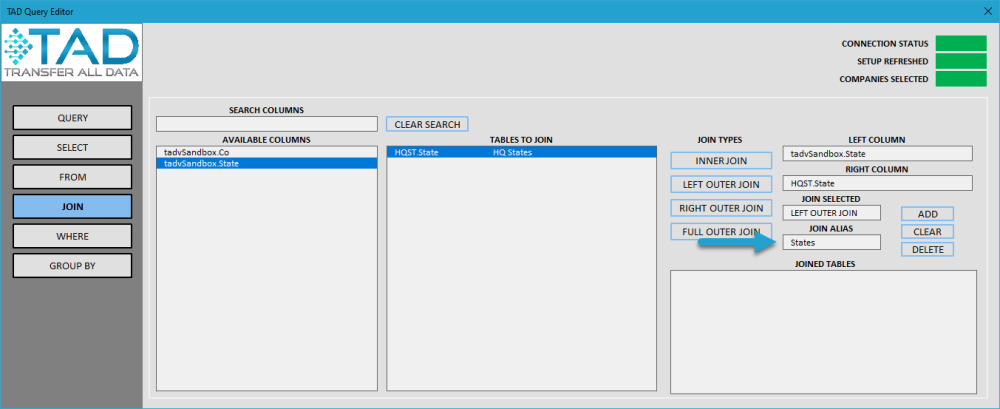
8. Before you add the join, you can review the Join Alias. This may populate with a default value that can be changed. The alias gives the table an alternate name to make it more readable.
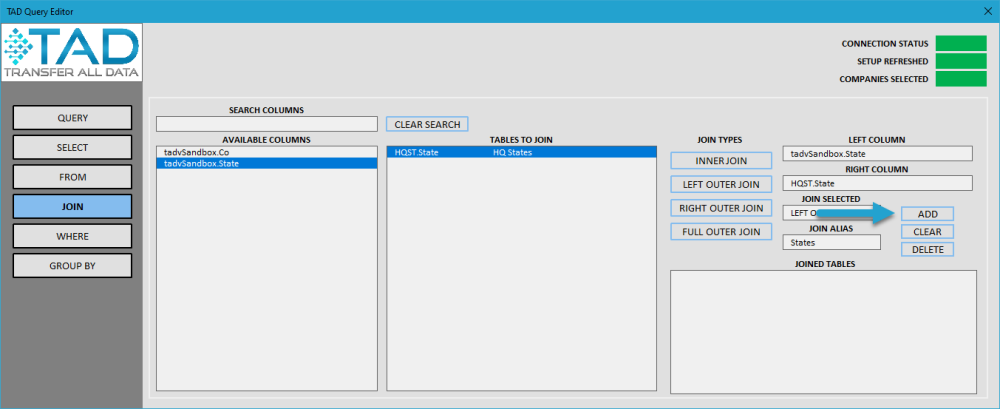
9. Click the Add button to add the new join.
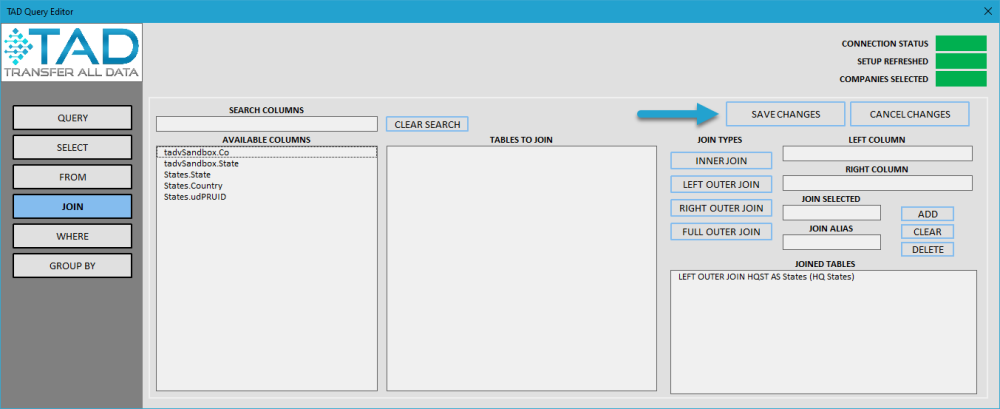
10. You now see additional columns from the new Table under Available Columns and Joined Tables shows the join we just added.
11. Click the Save Changes button to save the new join.
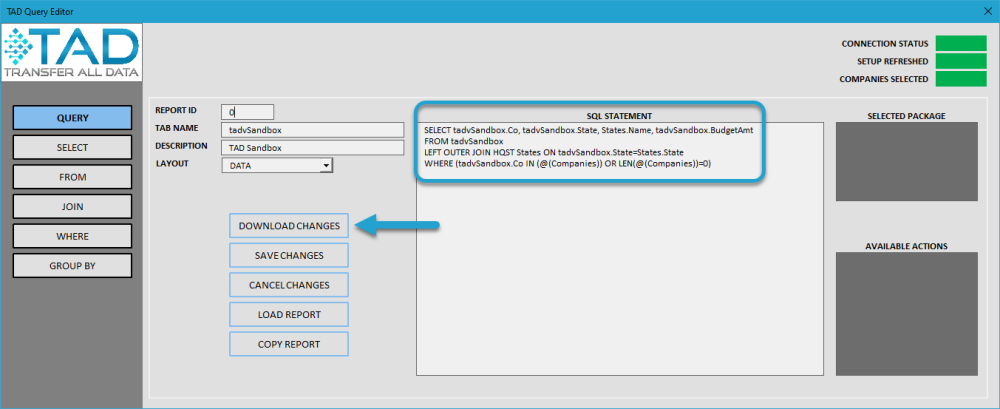
12. Back on the Query view you will see the changes to the SQL Statement. Click the Select button on the left side.
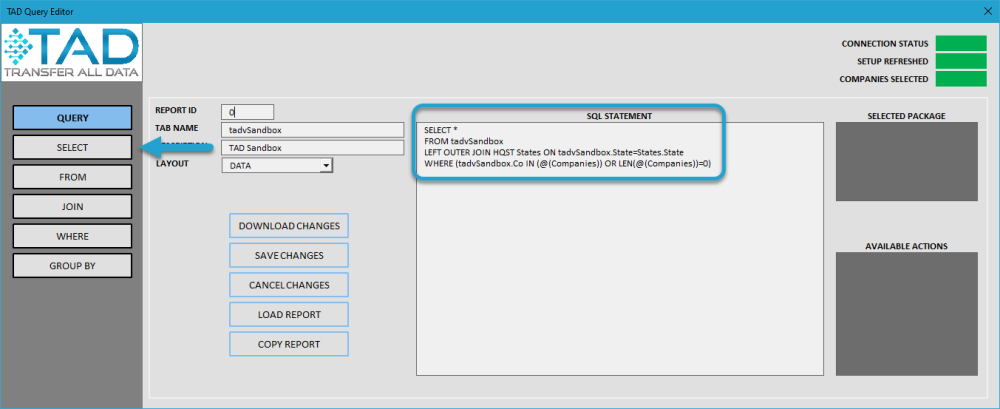
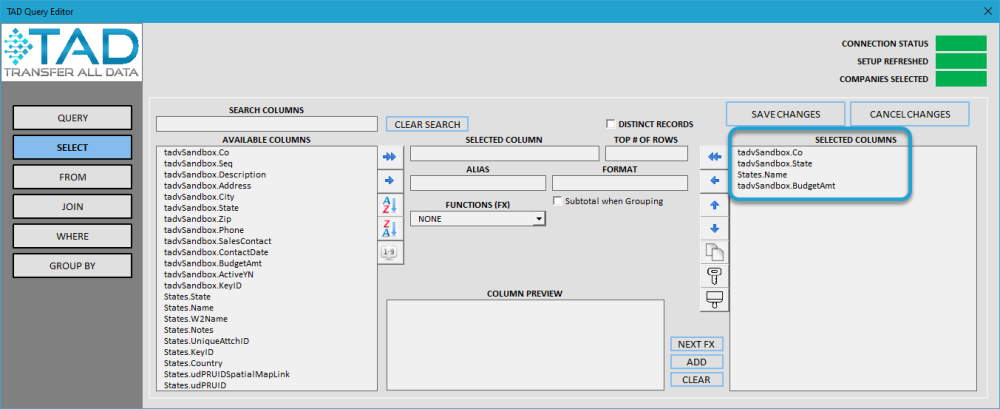
13. Columns from the joined table now appear in the Available Columns list.
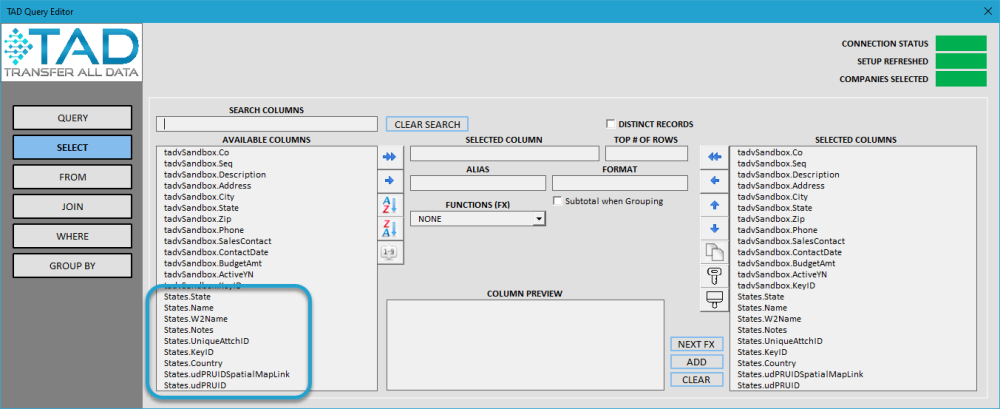
14. Click the double blue arrows left 
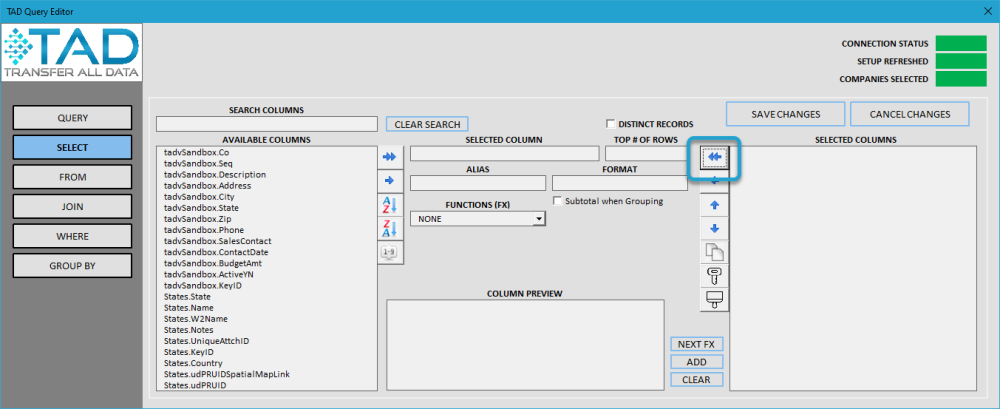
15. Add the following columns to the Selected Columns.
- tadvSandbox.Co
- tadvSandbox.State
- States.Name
- tadvSandbox.BudgetAmt
16. Click the Save Changes button to save the columns.
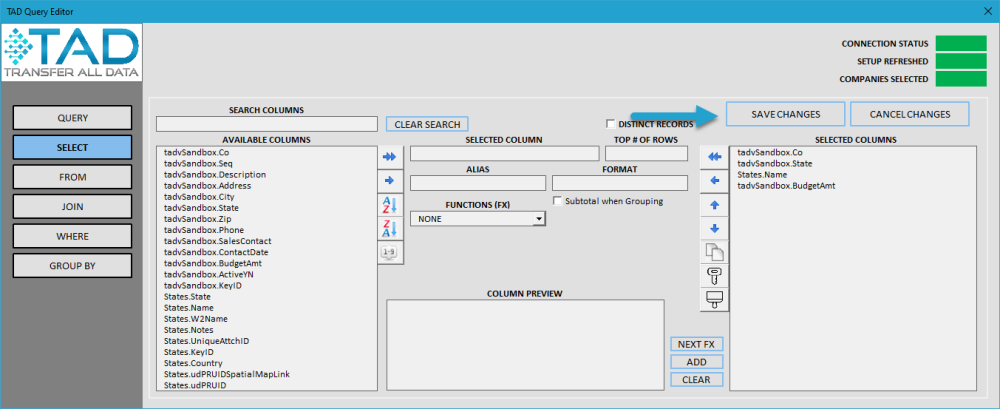
17. Back on the Query view you will see the changes to the SQL Statement. Click the Download Changes button to download with the new changes.


Post your comment on this topic.