MANAGING GROUPS
You will have the ability to create up to five Groups that contain any number of sub-groups. These groupings can be assigned to sites to allow you to filter based on those assignments. Within this section, you will learn:
• How to create new Groups
• How to modify existing Groups
• How to delete a Group
• How to add Sub-Groups to Groups
• How to edit or delete a Sub-Group
• How to assign Groups to sites
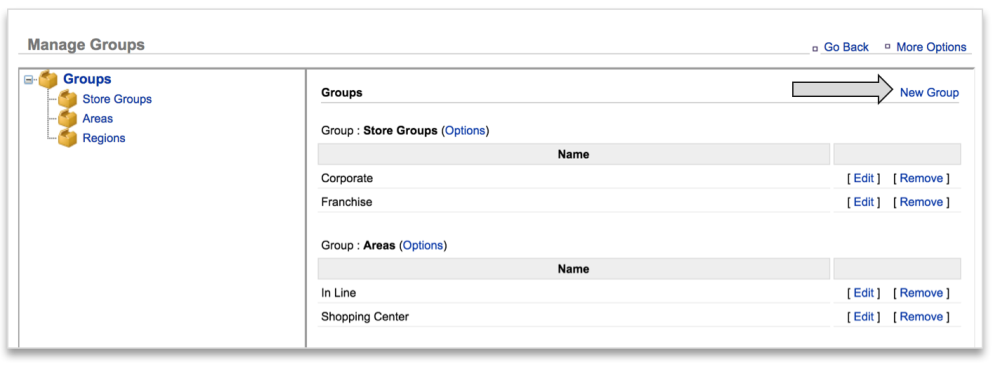
HOW TO CREATE A NEW GROUP
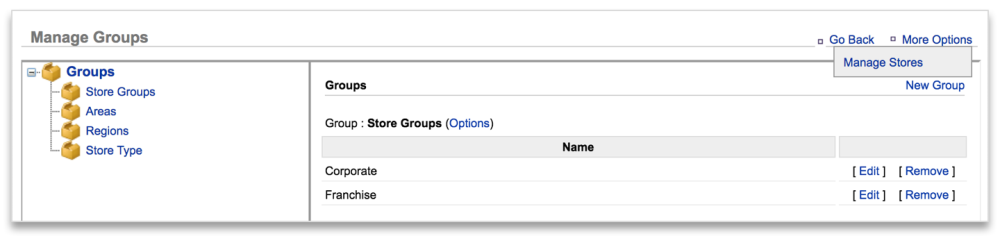
- Click More Options
- Click Manage Groups
![]()
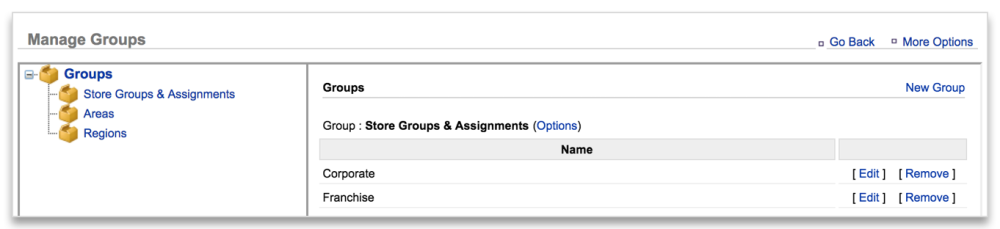
- To the left of the page, you will see three pre-defined Groups: Store Groups, Areas and Regions
(These pre-defined Groups can be edited at any time and any Groups or Sub-Groups previously created will be shown on the page.) - Click New Group
![]()
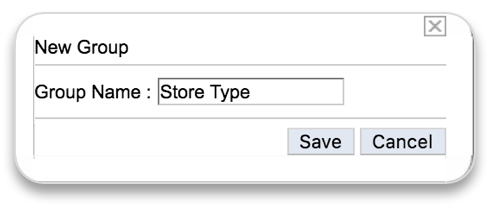
- Enter a group name and click Save
![]()
- The new Group will appear within the list of Groups to the left of the page
![]()

HOW TO MODIFY A GROUP
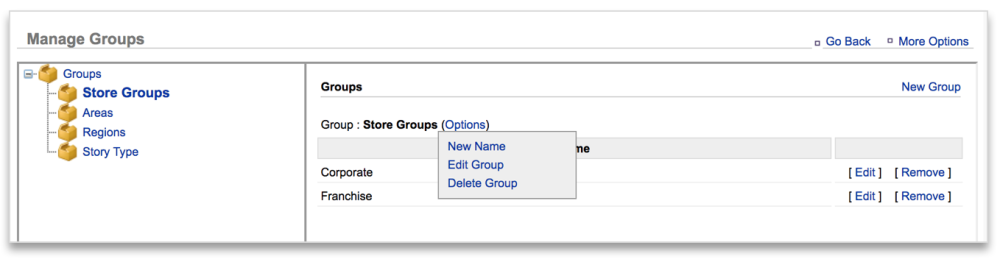
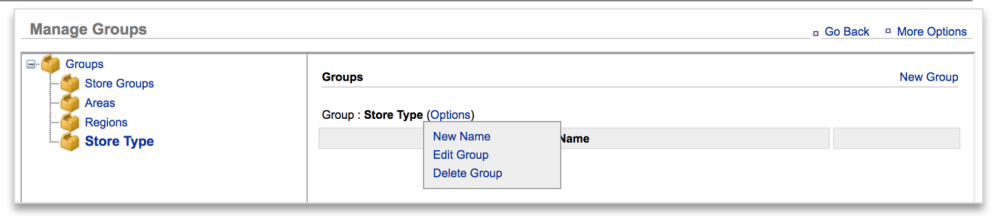
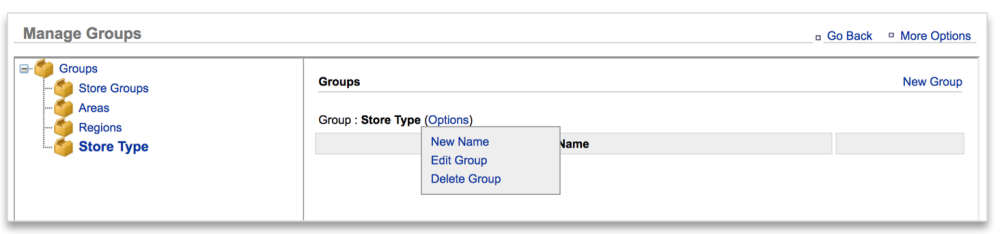
- Click Options to the right of the Group name
![]()
- Click Edit Group
![]()
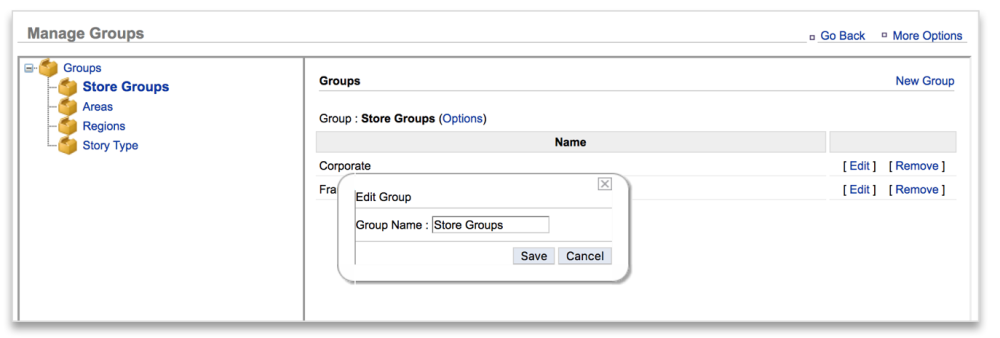
- Edit the group name and click Save
- The updated Group name should be reflected on the page
![]()
HOW TO DELETE A GROUP
- Click Options to the right of the Group name
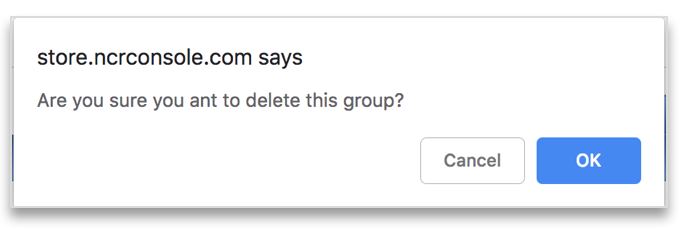
- Click Delete Group
![]()
- Click OK to confirm
![]()
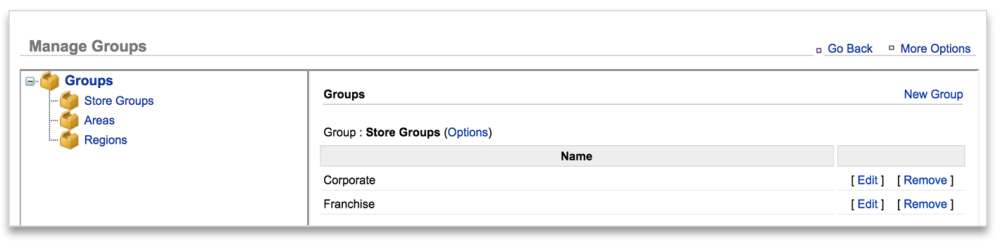
- The Group will no longer appear on the page
(If you delete a Group that contains Sub-Groups, all Sub-Groups will be deleted.)
![]()
HOW TO CREATE SUB-GROUPS
- Click Options to the right of the Group name
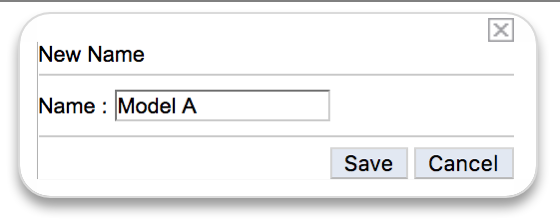
- Click New Name
![]()
- Enter a Name and click Save
![]()
- The Sub-Group will appear within that Group category
HOW TO ASSIGN GROUPS TO STORES
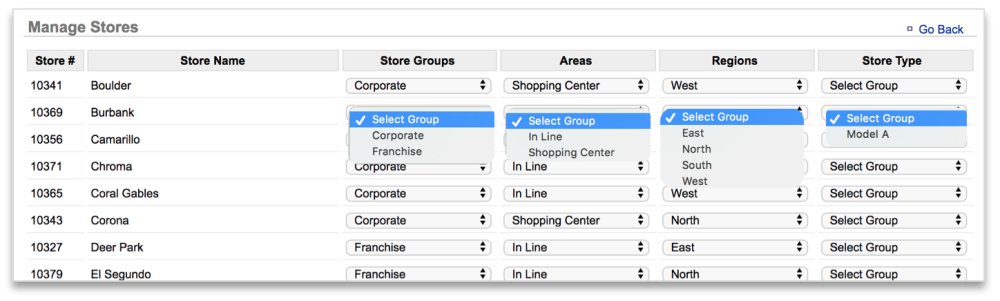
- From the Manage Groups page, click More Options
- Click Manage Stores
![]()
- Click the dropdown selections beneath the column headers and to the right of the stores to assign groups
![]()
- Click Save
![]()
- Click OK to confirm
![]()
- You will be returned to the Manage Groups page
(Changes to Group assignments can be made at any time by clicking More Options and Manage Stores)
![]()