
The purpose of this section is to guide a user on how to log into, and begin, using Console’s Employee Portal.
GENERAL
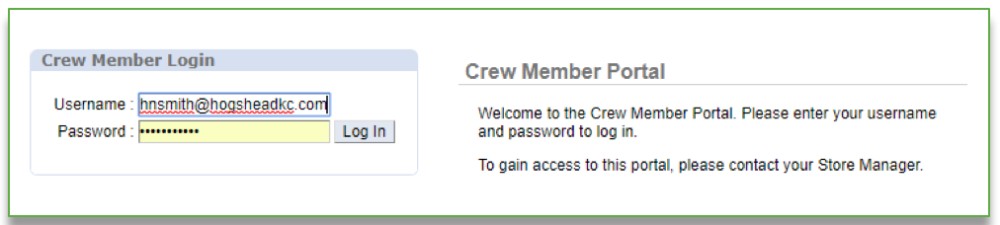
Login
- Navigate to Employee Portal
- Enter Username
- Enter Password
- Click Log In
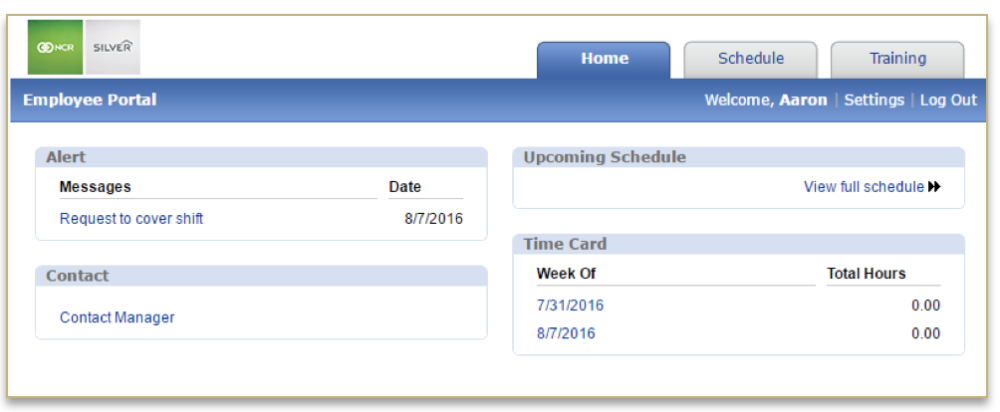
Accept Terms & Conditions
This will take you to the employee Dashboard. Click Settings at the top right corner of the page to navigate to all settings (includes settings to change your password, update personal information and enable select notifications).
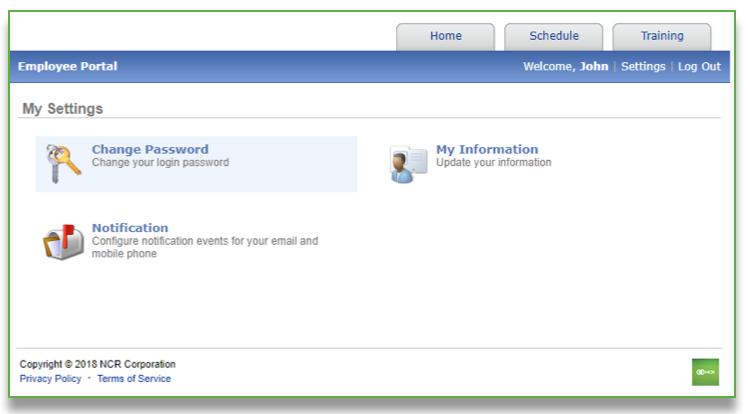
SETTINGS
Change Password
- Click Settings
- Click My Settings
- Click Change Password
- Enter current password
- Enter and confirm new password
- Click Save
Enter/Update Personal Information
- Enter Phone number
- Enter Mobile Phone number – required if you want to receive scheduling notifications via text messaging. You must select a Mobile Service Provider.
- Enter Email Address – required if you want to receive scheduling notifications via emails
- Enter address information
- Enter Birthday date
- Enter Emergency Contact information
- Click Save

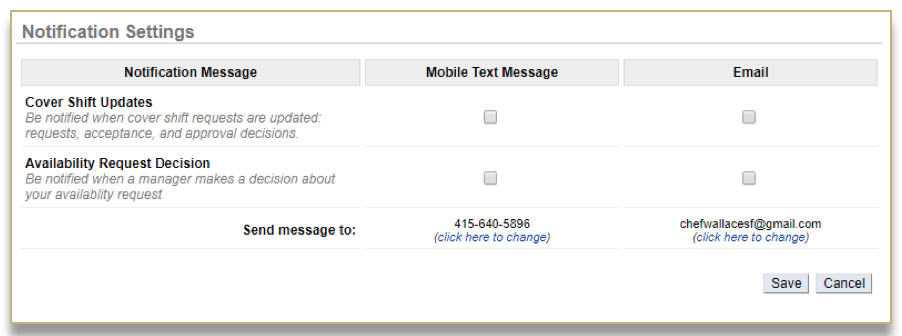
Enable Notification Preferences
- Click the boxes to the right of the Notification Messages and below Mobile Text Message to enable text notifications
- Click the boxes to the right of the Notification Messages and below Email to enable email notifications
- Click Save
SCHEDULE
Set Availability
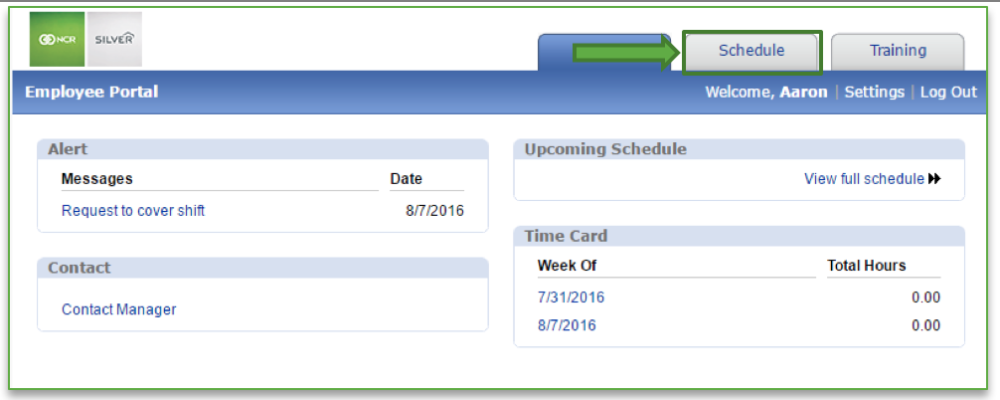
- Click Schedule at the top right section of the page
![]()
- Click Availability
![]()
- Select the week that the time off request applies to (this goes ahead 8 weeks in advance)
- Once time off has been submitted, it cannot be retracted or edited
- Note that once time off for a specific day of a week has been submitted, you cannot submit unavailability for additional days for that same week. Additional unavailability will need to be set by a Manager
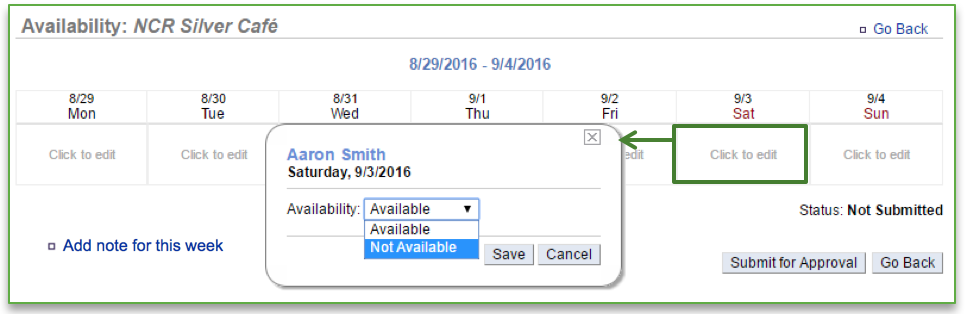
- Select Click to edit for the day you want to submit a time off request for
- If there are additional days during the week that you need to request time off for, you must submit them all at one time as you will not be able to modify requests for this week once submitted
- Click the dropdown arrow to the right of Availability and select Not Available
![]()
- Select All day or Specific times
- If you select specific times the window will expand for additional input
- If you are available all day, keep it set to Available
- Click Save
- Click Add note for this week to include additional details regarding unavailability or time off requests
- Click Submit for Approval
- You will be asked to confirm your submission. Click OK
- You will see your submission reflected in the Availability portal with a status of Pending Approval. If approved, the status will change to Approved and will be reflected in the store management work schedule.
- If rejected, the status will change to Rejected. At this time, the employee can go back in and resubmit new request(s) for that week.

ADDITIONAL RESOURCES
See the Employee Availability training module for more detailed information about managing availability.
See the Employee Shift Swap training module for information about how to request, and process, shift coverages.