In this module, you will learn:
- How to enable (or modify) display preferences within the Schedule
Set Display Preferences within the Schedule
To enable (or modify) display preference within a schedule, you will need to navigate to the Labor Management module and click Work Schedule.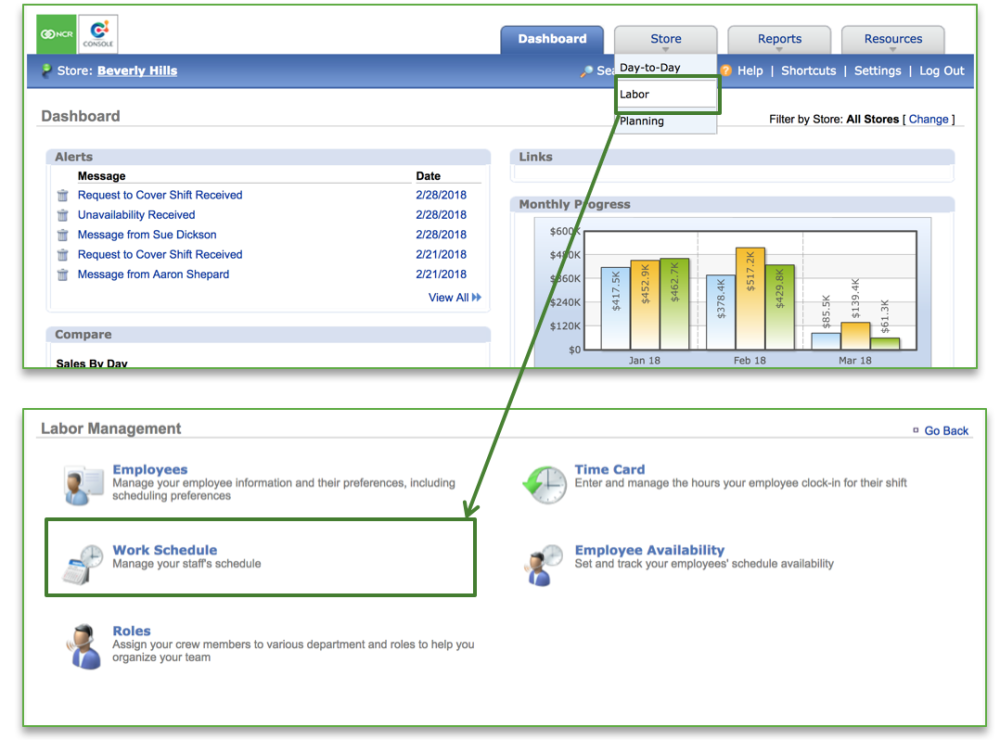
- Click More Options
- Click Schedule Options
![]()
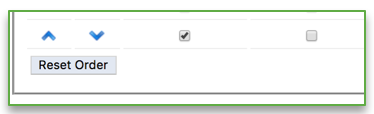
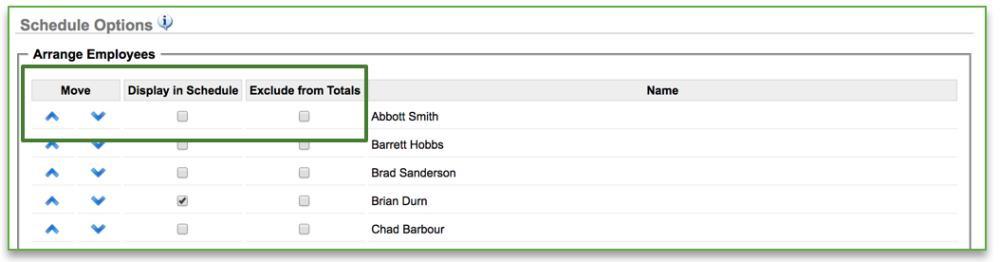
- Click the blue arrows (
![]() ) to the left of an employee’s name to move them to a fixed position within the Schedule. This feature allows you to arrange the order in which your employees are displayed. Note that you can reset the order of your employees at any time by clicking Reset Order at the bottom of the employee list on the page
) to the left of an employee’s name to move them to a fixed position within the Schedule. This feature allows you to arrange the order in which your employees are displayed. Note that you can reset the order of your employees at any time by clicking Reset Order at the bottom of the employee list on the page![]()
- Exclude employees from showing within the Schedule by deselecting (or unchecking) the Display in Schedule box to the left of the employee’s name
- Exclude employees labor costs from estimation totals by deselecting (or unchecking) the Exclude from Totals box to the left of the employee’s name
![]()
- Other Options:
Display Employee Positions: Will show all positions (job codes) that the employee is assigned to in the POS beneath the employee’s name within the Schedule
Display Position Colors: Allows any colors that have been assigned to a position (within Console) to display to left of the position name within the Schedule. See the Roles & Responsibilities training module for more detailed information about how to assign colors to positions
Display Detailed Labor Costs: Displays labor costs based on what you schedule. Detailed labor costs will not print on a published schedule; nor will they be visible on a published schedule within the Employee portal
Display Schedule Warnings – Overtime: Allows a warning to appear to the right of any employee that is scheduled for overtime![]()
- Click Save