
Attached is a detailed document on how to set up the Trident and Finish Lynx equipment to work together. This document was prepared by Mike Chatfield and presented at our user conference earlier this month.
CLICK HERE to download
Finishlynx sets up just like Ipico systems do with the exception of the port and the FS setting
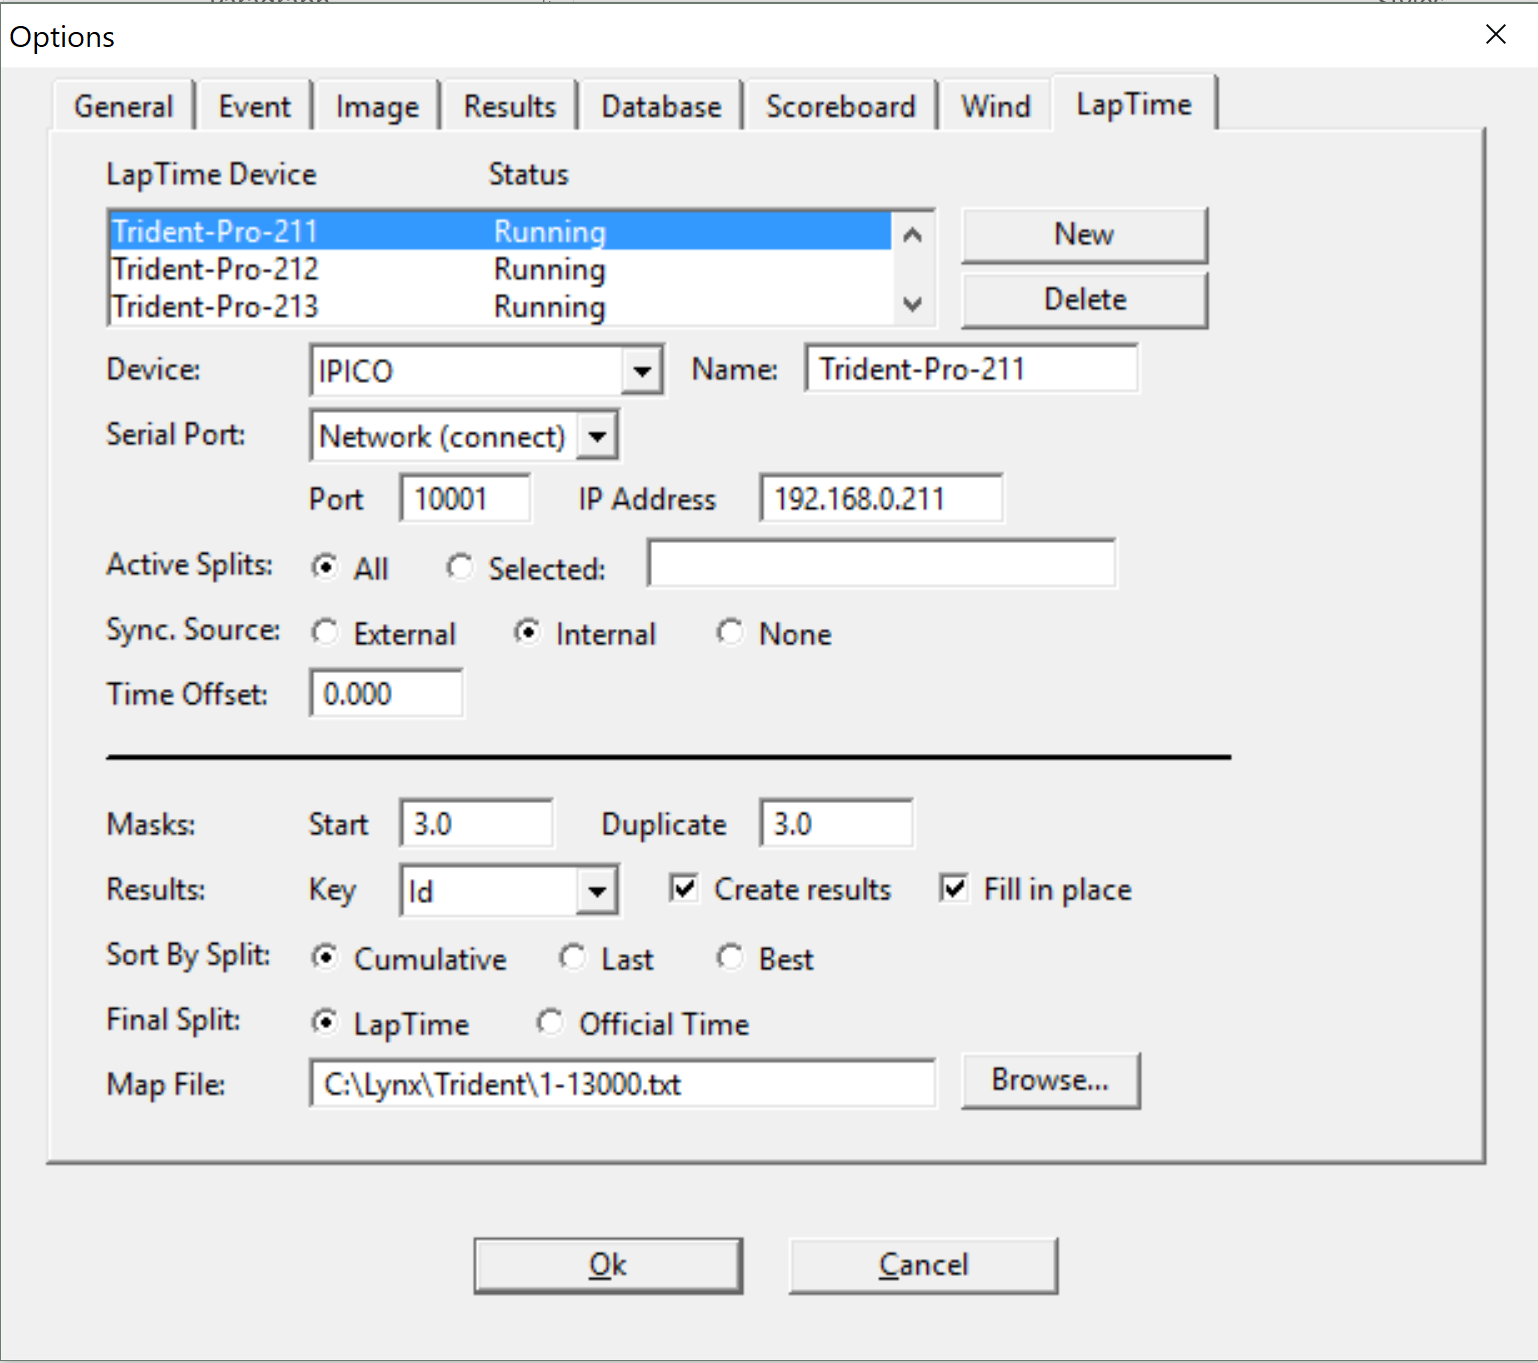
The sync source is crucial when using split points all on the same network. If set to internal then it will use the finishlynx time for each chip read that comes in.
If the sync source is set to none then you will need to make sure that each reader has its time set from the main finishlynx computer before putting out at the split point. This part is especially crucial if you are using the 3g card and trident gateway.
The create results checkbox needs to be active if you do not have any athletes entered into the race. This means that as soon as a chip is read it will populate the field with all athlete and time info.
If this is not checked nothing will populate and you need to make sure the event is seeded so that all athletes are showing in the event as you start it in finishlynx. This is the best way to use a UHF system with Lynx as the chips will pick up a ways from the mat so athletes standing cheering will not be entered into the event as a finisher.
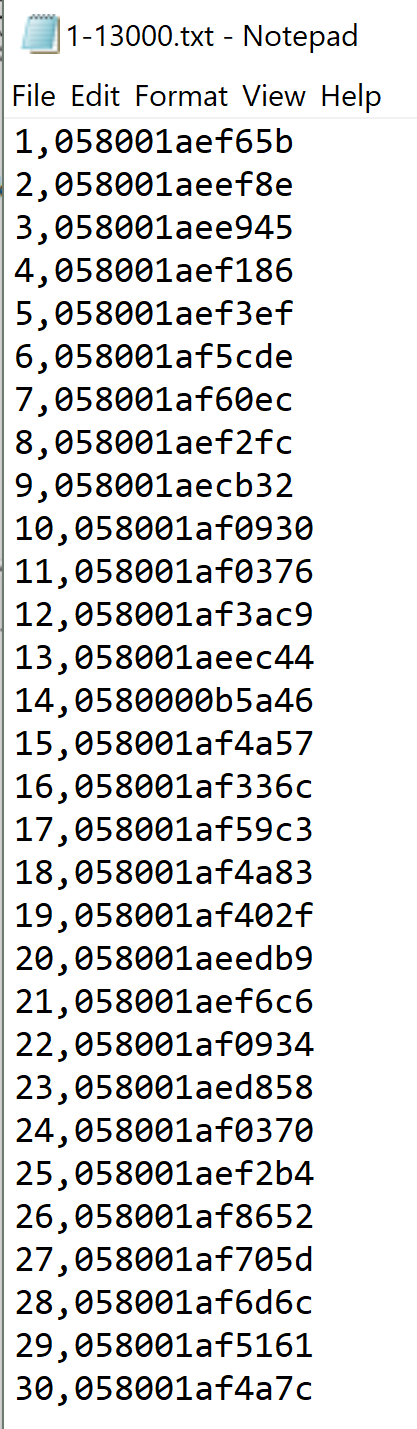
The chip file needs to be created for lynx in order to tell the system what chip number equals which bib number. Once created you need to locate the file and set it as your map file. If this is changed after starting lynx you will need to restart lynx for it to be seen.
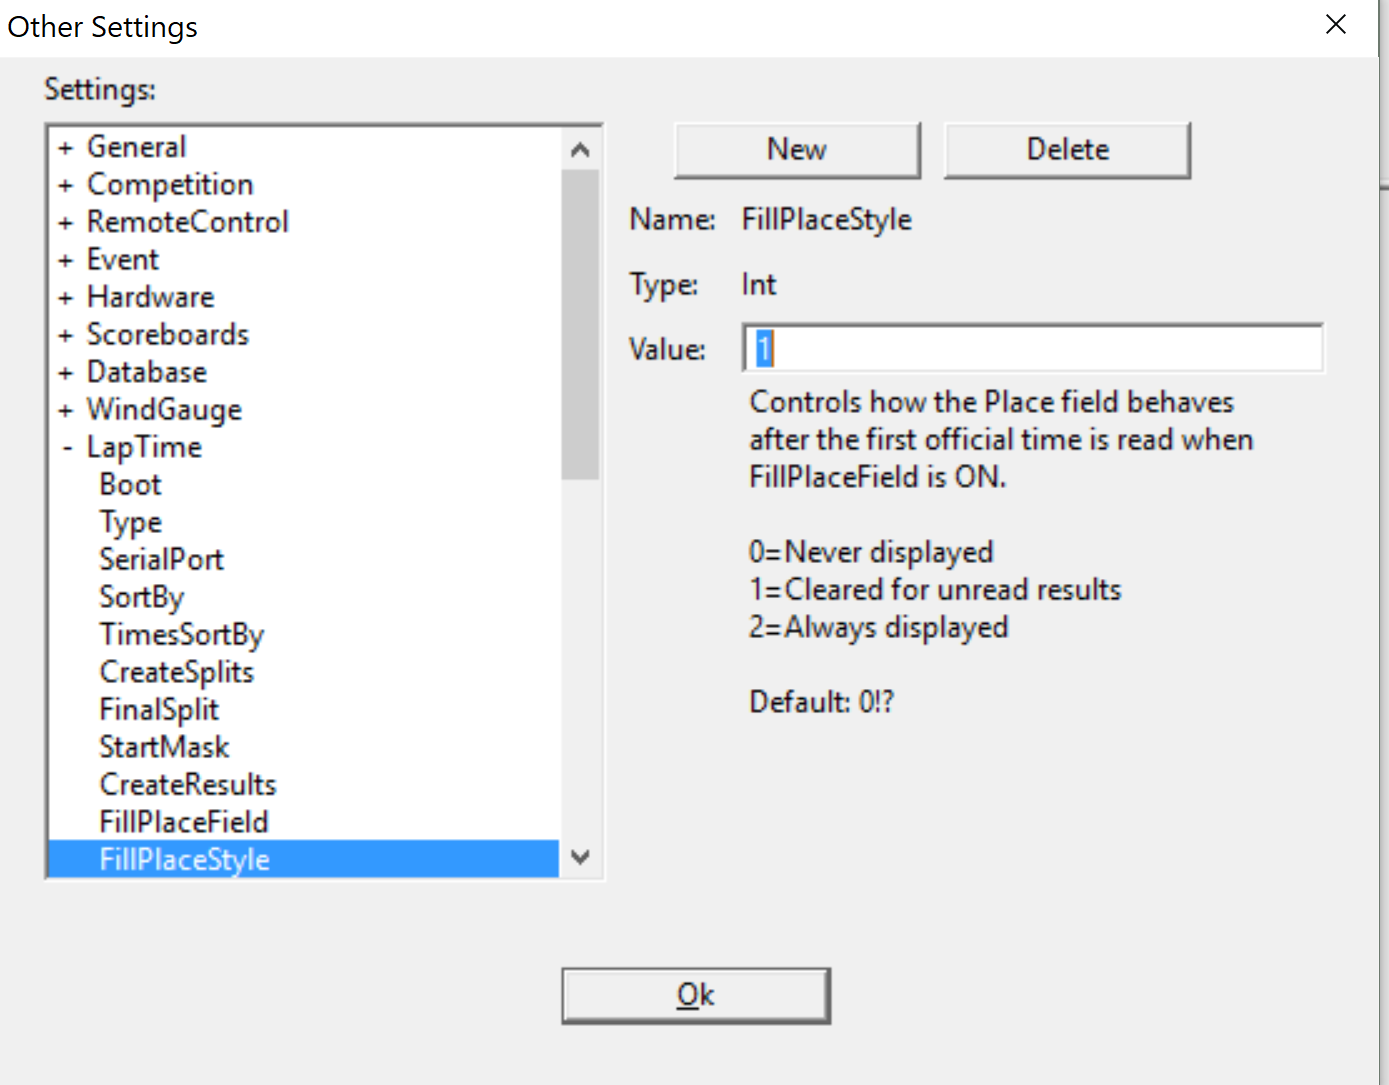
Finishlynx settings to check in your hidden settings.
Open finishlynx and then press and hold the shift, ctrl keys and then click file-options. Under laptime there are many different options but only a few that need to be changed.
The first is FillPlaceStyle needs to be set to 1 especially for a setup where all split points are on one network as this will reset each time the leader gets to a split point so you can see the runners coming across each line and keep track of how many.
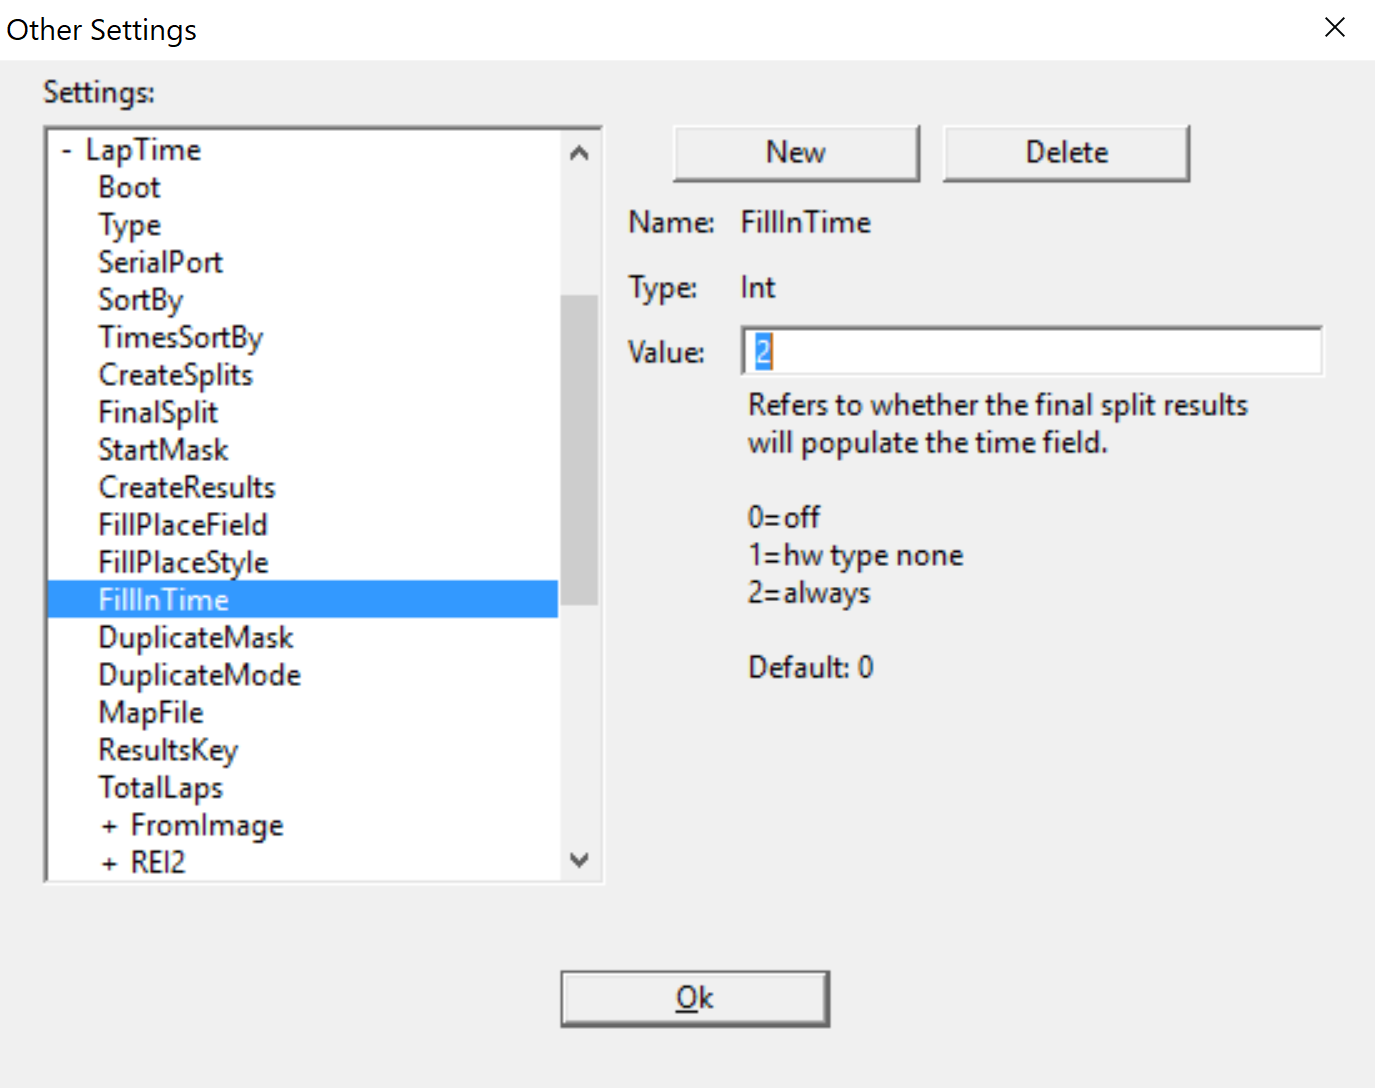
FillInTime should be set to 2=always
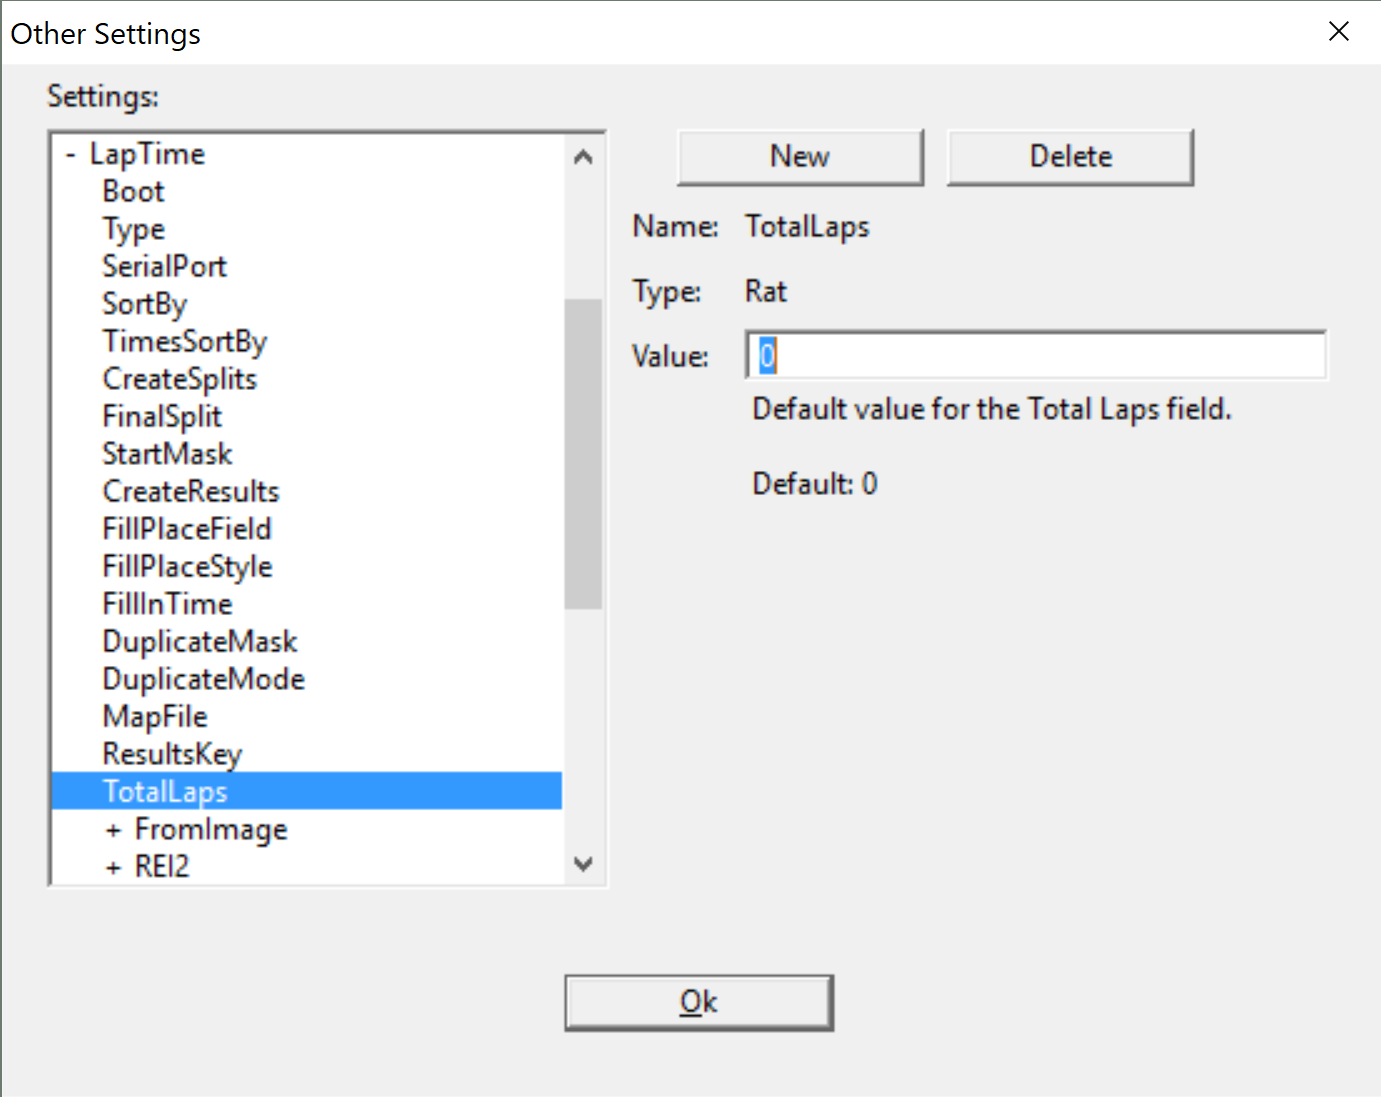
TotalLaps is used as a way to have the chips determine the final time for each athlete. When laps are set to one it will give the athlete the final time from the chips. If it is set to zero then you will determine final time from the cameras. This can also be set from the main finishlynx screen by clicking in the laps box and set it.
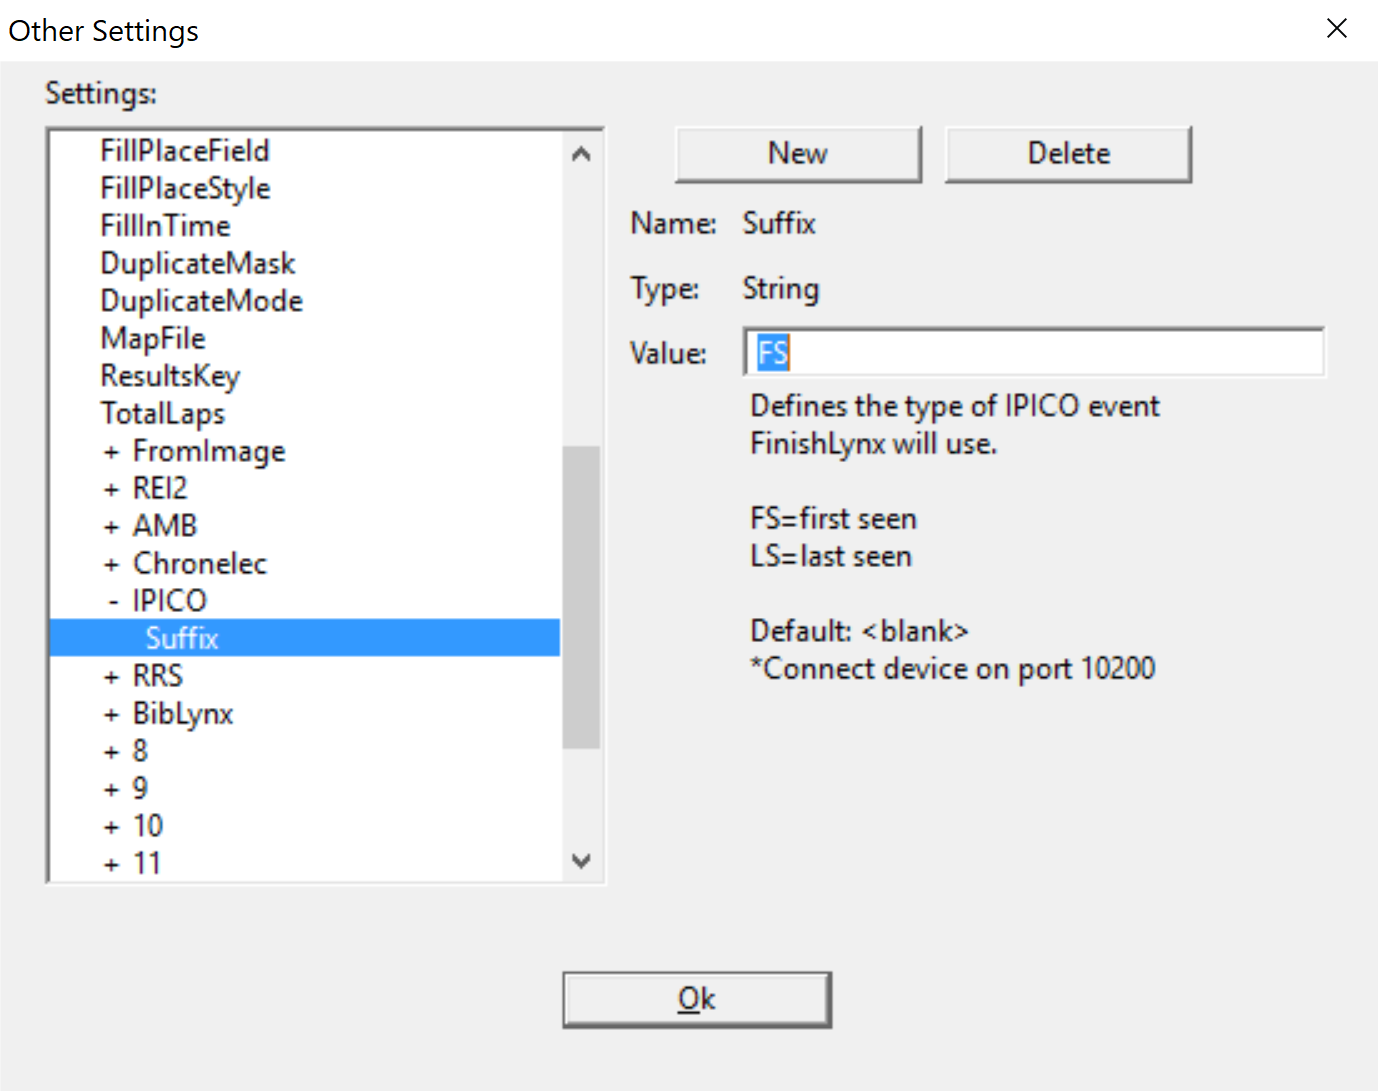
The last hidden setting that needs to be changed is for the suffix used to read the chip reads from the trident reader files. FS is the setting to be used for DF readers. For UHF readers you can use the BS setting (Best Seen) The only problem with this setting is that in order for trident to send the BS setting it takes about ½ a second to send to finishlynx so the lines on the camera and the chip times will be off slightly but order should be correct.
In the trident reader there are some settings in the config file that need to be verified.
p00=FinishTiming 1 //system name
p04=192.168.0.211 // local IP
p05=10000 // Raw Data Port
p07=F // DHCP Enabled
p08=T // Raw to SD
p09=T // Filtered to SD
p10=T // Raw to Ethernet
p11=T // Filtered to Ethernet
p12=T // Filtered to Serial
p13=S // Serial Output format
p14=115200 // Serial out baudrate
p15=5 // Tag timeout pref (whole seconds)
p16=F // Ethernet HTTP Post
p17=10001 // filtered port
p18=9998 // status port
p19=9999 // command port
p20=F //activate relay on tag
p21=F // beeper mode (A, N, F)
p22=04:12 //tx duty
p23=23 // tx power
p24=F // tune on alert
p25=70B3D573E02B // MAC Address
p26=I //Trigger Message Format (T=Trident, I=Ipico)
p27=T //Send Statistics Variables To Status File & Status Port (T=True, F=False)
p28=F //Delay start of TX task by 10 seconds (T=True, F=False)
p29=Trident // Custom Name on LCD Display
p30=A //Unique Reader ID (A-Z, a-z) Each reader should be different letter
p31=T //Immediate Mode (T=True, F=False)
p32=S //Tx Tuning Method (S=Sequential,T=Tiered)
p33=F //Trigger Edge Selection (F=Falling,R=Rising,B=Both)
p34=192.168.0.241 //Ethernet Gateway
p35=255.255.255.0 //Ethernet Subnet Mask
p36=0833,0471,0000 // additional tag prefix 0000 needs added when using uhf chips
p37=F //Log Filtered to USB (T=True, F=False) not yet implemented
p38=F //Log Raw to USB (T=True, F=False) not yet implemented
p39=G //HTTP Post Transport Mode (E=Ethernet, G=GSM) not yet implemented
p40=T //Verbose Debug
p41=1500 // TX Alert Voltage
P42=/splitdata.aspx?orgid=TriTest // HTTP Connection String 50 bytes
P44=mdata.net.au // HTTP GPRS APN Address 30 bytes
P48=F //Disable Router Configuration
P49=192.168.0.241 //Router IP address
P50=255.255.255.0 // Router Subnet Mask
P51=Finishtiming_1 //Router SSID
P52=12345678 //Router SSID Password
P53=192.168.0.121 //Router DHCP Pool Start
p54=F // UHF enabled
p55=G // UHF in ‘G’en2 mode (or ‘I’px)
p56=1 // UHF, active antenna ports (eg 1,2,3,4)
p60=trident // FTP username. Default is anonymous
p61=trident // FTP password. Default is an empty string. If the username is anonymous then this parameter is ignored
p62=12 // Low power setting, used when the switch is set to the ‘L’ position. Default is 12
p63=32 // High power setting, used when the switch is set to the ‘H’ position. Default is 32
When an event is ready to start
- Check to make sure the trident reader is on the network by pinging the reader
- Open Finishlynx (all readers must be on the network before starting lynx)
- Select the event to start in finishlynx.
- Set laps to either one or leave as zero.
- Start race by receiving the start signal or start with a manual signal in lynx.
- If laps are set to zero you will need to verify each runner as they cross with the camera.
a. As a runner crosses and shows up in the camera drag a line to torso of the runner and then hold the shift key and click the left mouse button and a box of numbers and athlete info will pop up. You can select the correct number that matches the athlete in your camera and it will populate the time from the camera. - If laps are set to 1 then the chip will determine the final time and you can use the camera to verify all close finishes.