
After you select Workspaces from the Administration main page, you’ll see all the workspaces for your pyramid. If you used the Guided Setup you will see the workspaces that you previously created. If you skipped Guided Setup you will only see your Level1 workspace.

Creating a New Workspace
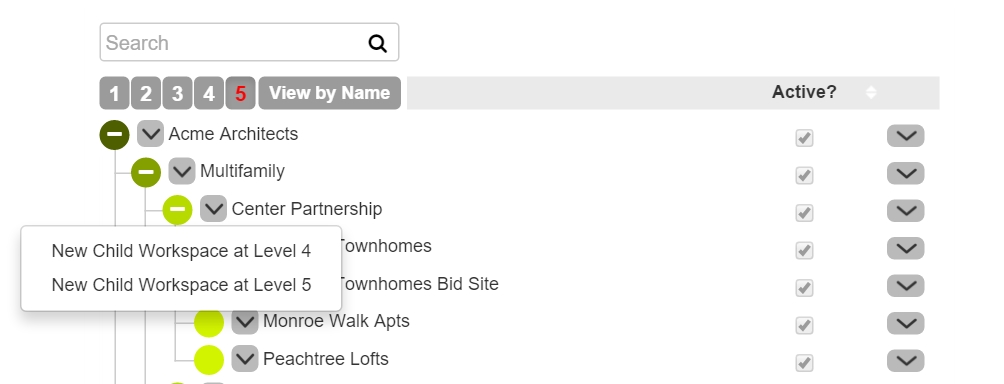
To create a new workspace you must create a child of another workspace. On each row to the right of the colored workspace square, you will see a New workspace button which creates a child to the current workspace. The options of what level of workspace you can create varies depending on the level of the workspace for which you are creating a child for. In the example below you are creating a child for a Level3 workspace. Your options are a child at Level4 or a child at Level5.
Row Action Menu
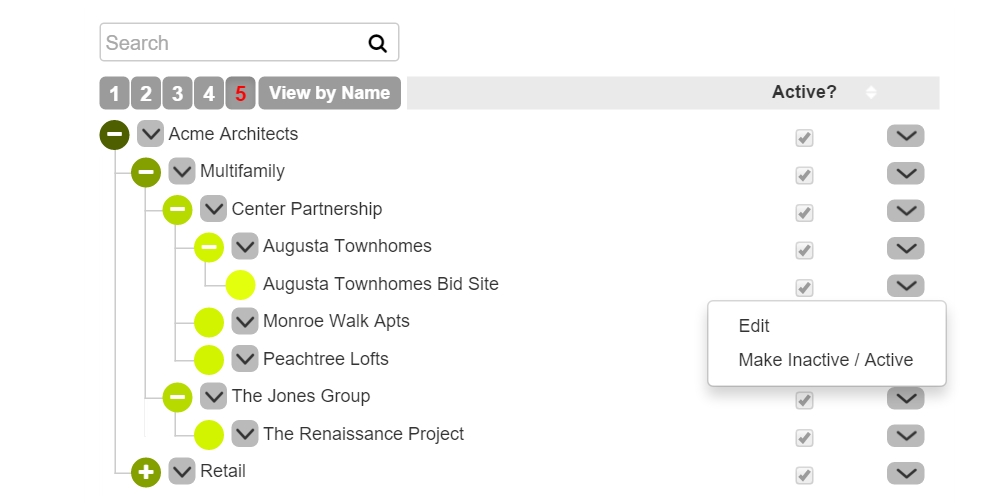
Edit allows you to confiture the workspace. For more information see Editing a Workspace.
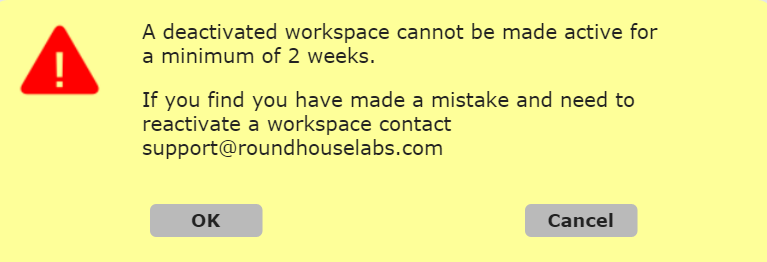
Make Active / Inactive toggles the state of a workspace. In doing so this changes how the storage of this workspace is invoiced for this month. If you make a workspace inactive you will see the following dialog warning you that if you make a workspace inactive you cannot re-activate it for 14 days.
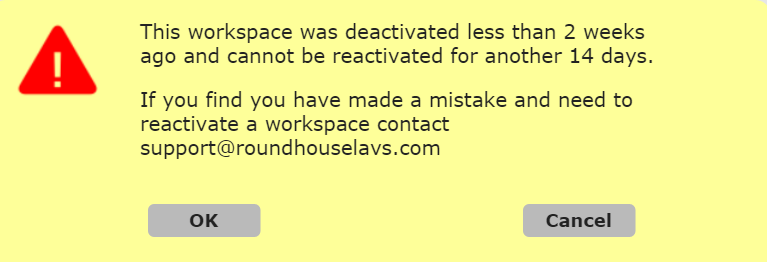
If you try to activate a workspace within the 14 day period you will see the following dialog.
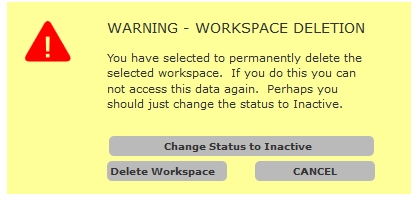
Delete Workspace allows you to delete a workspace. If you select this action you will be presented with the following dialog.
Next: Adding a new Workspace →
Post your comment on this topic.