
If you used the Guided Setup some of these attributes will already have been set for you. There are two locations in RoundhousePM to create a new worksspace:
1. The Administration Workspace, and
2. The Add Workspace screen. This is what we will review below.
Step 1 – Workspace Name and Level

Step 2 – Workspace Users
In this area you can select the names of the existing users that have access to this workspace. If a user is not a member of your pyramid you must add them by invitation or by adding them manually. For more information on this see Adding Users.

Step 3 – Modules of the Workspace
In this area select which Modules are part of this workspace.

Note: The screen above is from TestDrive and contains names of modules which are duplicates of the Documents module.
Workspace Summary Page Layout
In this area you define which elements are to appear on the Summary page.
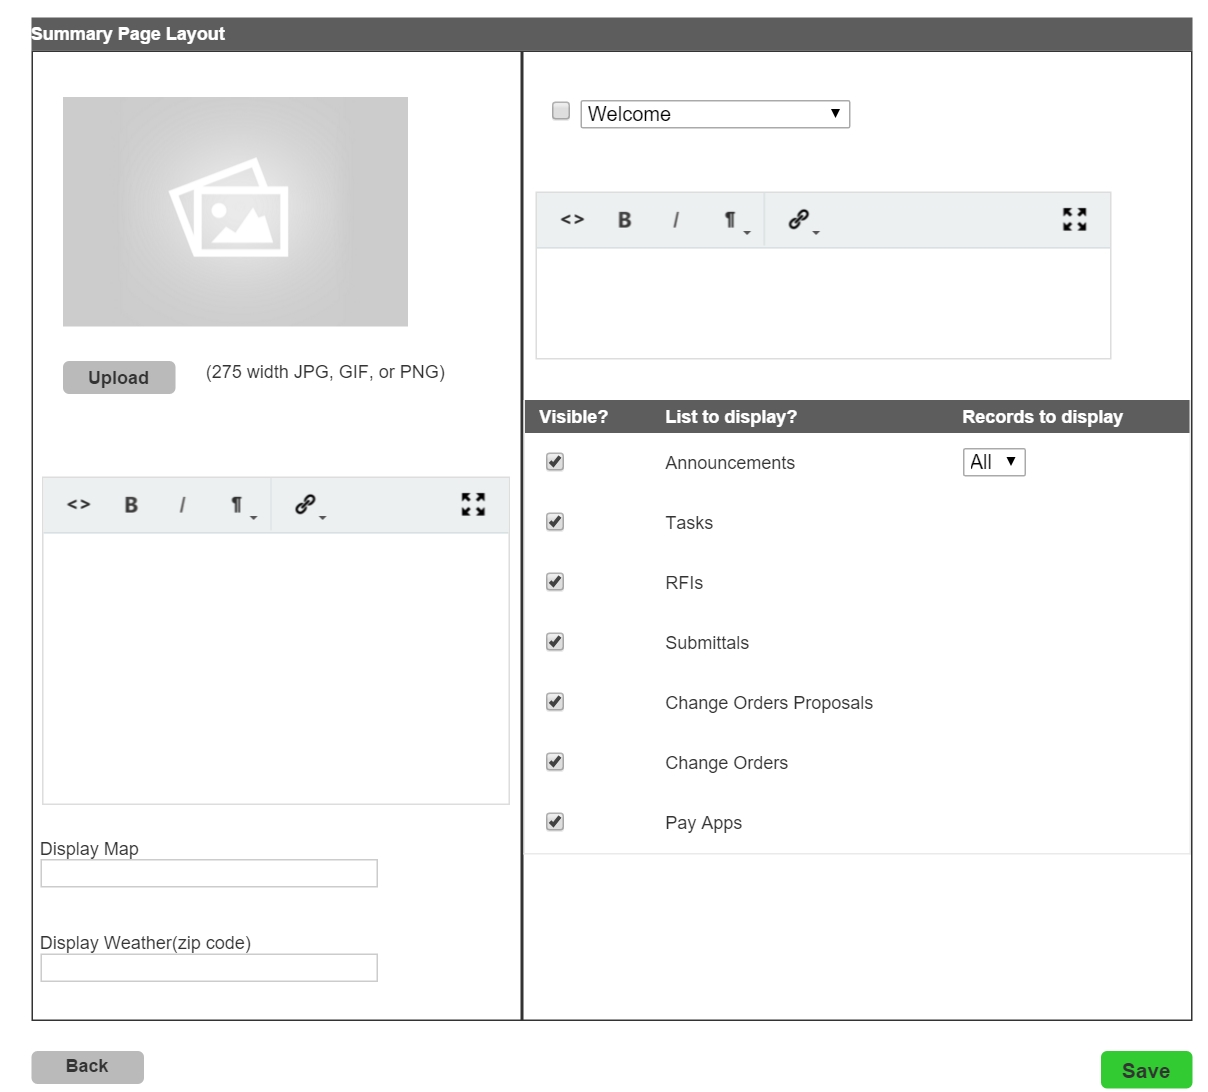
Upper Left Image – Upload logos, renderings or what ever type of graphic you want to appear on the Summary Page.
Left side text box – This text field can be used for a variety of information but is typically for things like project numbers, etc.
Map
If you enter an address here a map will display with a pin marking the address location.
Weather
If you enter a zipcode the current weather will appear appear on the Summary page.
Main Text Box
At the top of this box you can select the header text. The choices are: Introduction, Welcome *and *Instructions to Bidders.
In the large text box you are free to enter any text that you may like and format the text using the tools provided.
Modules and Open Items
In this area you can select which items you want to display on the Summary page. Only the Announcements module allows you to select the number of most recent items you want displayed. The remaining modules, if displayed, will show all open items.
Next: Users →
Post your comment on this topic.