
This process allows you to define documents with a retention period. When the definition of the retention is defined, any record with that criteria is part of the retention process. It does not matter when the documents were added to the system. When you access the retention maintenance, all retention values are calculated with the current date.
Adding a New Retention Record
 |
From Maintenance, select MAINTAIN RETENTION RECORDS. If this option is not listed in your maintenance menu, you have not been authorized. See instructions for Setting Up Authorization for Option Code F – Purge Files and Data at the end of this topic. |
 |
Enter System and/or Document Type, Days or Years then click Submit. Select System from the drop-down list. Only authorized Systems will be displayed. Select Document Type from drop-down list. Only Document Types for the selected System will be listed. Select exportation Days or Years. Click Submit to finalize. |
Maintain a Retention Record
Once the retention record is created, right-click the entry to access the following options:
| View Unexpired | Displays the details of documents not yet expired and allows you to put documents on hold. If you know that you don’t want a particular document to expire on the specified expiration day or year, you can hold the document. Enable Hold Selected Record to move the document to hold status.  |
| View Expired | Displays the details of expired documents and allows you to documents on hold. These are documents that have reached the expiration days or years set for this system and /or document type. When the purge runs to delete the expired documents, these documents will be flagged as deleted. If you know that you don’t want a particular document to be purged, you can hold the document. Enable Hold Selected Record to move the document to hold status.  |
| View Held | Displays documents that have been put on hold and allows you to remove the hold. These are documents that were manually selected to be skipped during the purge process. They may or may not have reached the expiration days or years set for the system and/or document type. When the purge job runs to flag as deleted, these documents will be skipped. Enable Release Selected Records to move these records to the unexpired or expired queue.  |
| Run Retention Purge | Runs the purge process which flags expired documents as deleted. This menu option is controlled by User/Group option security message received when attempting to run the purge with Suspend Purge = Y.  First confirmation message when running the purge. First confirmation message when running the purge.Click Yes to continue or No to exit.  Second and final message when running the purge. The user must type the system description of the System to be purged. The description must match the exactly. Second and final message when running the purge. The user must type the system description of the System to be purged. The description must match the exactly.Click Run Retention. This job will only flag the records as deleted. You must run Remove Deleted Records In System to permanently delete the records and images from the server.  |
| Delete Record | Allows you to delete this retention definition. |
Edit an Existing Retention Record
 |
Single, left-mouse click the record to maintain Days, Years, or Suspend Purge. |
Setting Up Authorization for Option Code F – Purge Files and Data
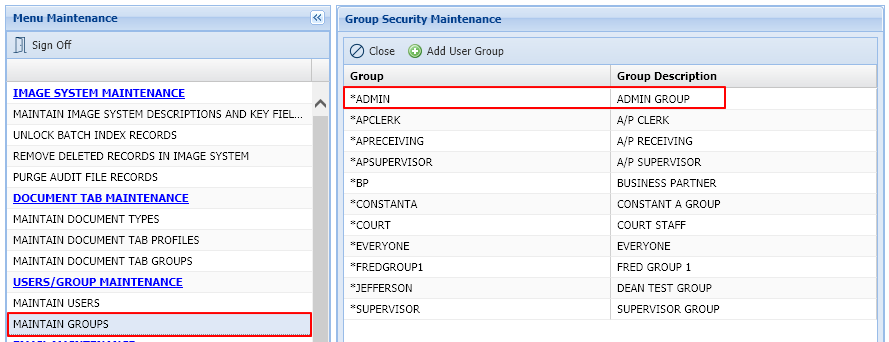 |
Select MAINTAIN GROUPS Choose the group that will be authorized to purge documents. For this example, we will authorize the *ADMIN group. |
 |
Select Options |
 |
Select the System Code you want to authorize the user or group to purge. You will need to repeat this process for each System Code you want to authorize. Even if you have an * – ANY SYSTEM, you will still be required to define the individual System Code. |
 |
Option Code F – Purge Files and Data controls which user/group has the authority to purge documents by System Code from server. |
Post your comment on this topic.