
Auto-Stapling is a feature that allows for the automatic grouping of images into a bundle. The bundling process occurs at scan upload time or at batch indexing time.
Setup Auto Staple:
Example:Assume that you have Image System L set up for Loan Processing. Index 1 is Division, Index 2 is Document Date, and Index 100 is Document Type. The possible document types for the Loan Processing system are APP (Application), CR (Credit Report), and EV (Earnings Verification). For purposes of this discussion, we want to automatically staple the customer’s Credit Report (CR) to the customer’s application (APP) as soon as the Credit Report is scanned. It is further assumed that the customer’s application (APP) will always be scanned before the credit report (CR) is scanned.
- Navigate to Menu, Maintenance, Maintain Image System Descriptions and Key Fields.


- Right-click on the desired System.
- Select Maintain Stapling.


- Click Add.


- Enter the conditions under which the secondary document will be stapled behind the primary document then click Submit.
 In our example, when document type CR is scanned into System L (the secondary document criteria), it will be stapled behind the first document found in System L where index 1 is the same as index 1 of the DOCSTAPLE document.
Notes on Index Comparisons (assume that a document was scanned to System L with Division # (index 1) of S0001, Document Date (index 2) of 10/22/2015 and Document Type (DT) of DOCSTAPLE.
- If the Comparison 1 and Comparison 2 entries are both blank for an index, that index will not be used in the stapling determination process. In our example, the values of indexes 2-7 are not used in the comparison process. If an image exists in System L with index 1 of S0001, index 2 of 10/22/2015, our newly scanned secondary document would be stapled behind that primary document, REGARDLESS of the values of indexes 2-7 of the primary document.
- If the comparison for any specified index fails (index 1 and index 7 in our example), the newly scanned secondary document will not be stapled.
A record will be created showing the new staple setup.


Auto Staple Process:
- Scan and upload the Primary staple document.


- Scan and upload the Secondary document(s).
![]()
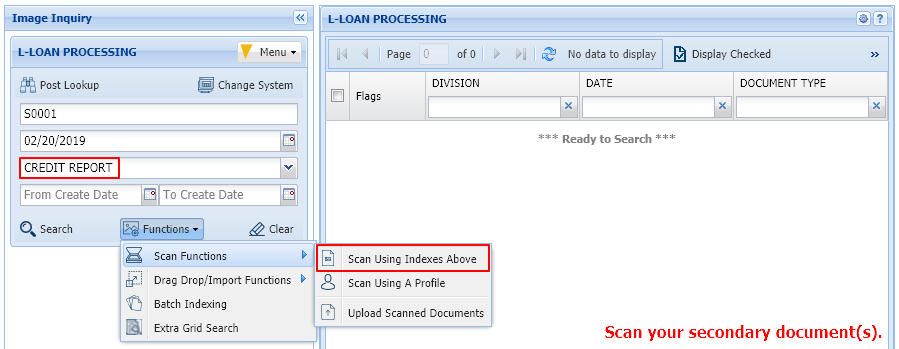
Based on the staple profile, the system will automatically staple the documents.
An “S” appears in the Flags column indicating that this is the Primary staple record.

If you click the Primary document for viewing, the Primary and ALL stapled documents will be displayed.
Post your comment on this topic.