
Asbestos Survey Report shows you all the information about a job which has been done.
Report Cover Page
Property Address Field: This value comes from the properties tab under data management. To alter this value in your report, you must navigate to Setup -> Data Management -> Properties tab and locate your property and press edit. Dependent on your configuration, each column should represent a particular field, e.g. House number, street name, postcode etc.
Survey Unique Number : This is the unique number of your survey. This field automatically populates itself upon job creation. This is done in order to make sure that the Job has its unique Identity. The actual value can be found under the jobs Information tab. To view the tab, you must open the Job and navigate to the job tab.

Survey Date : This field gets populated automatically by the system when a survey is completed.
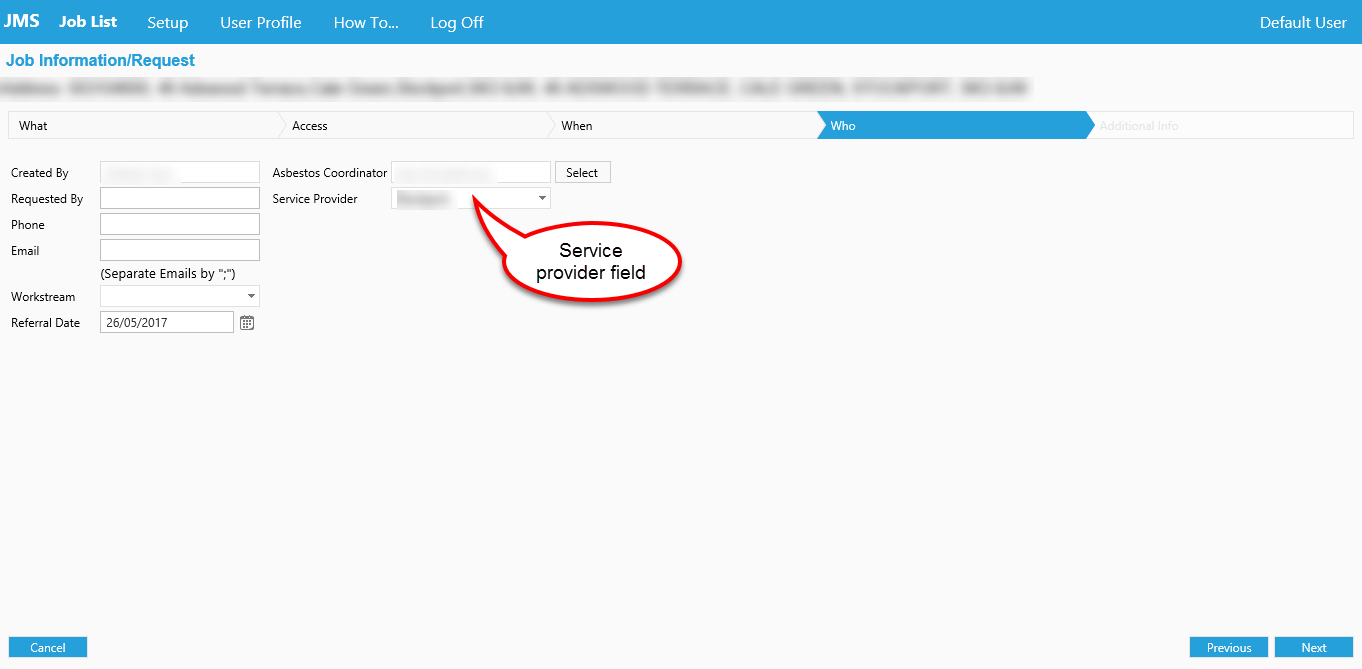
Survey Company : This field gets chosen by the user who is creating a job in JMS. This falls under the service provider field.
Surveyor Details : Surveyor details are dependent on the survey company inspecting the Job. To be able to alter Surveyor details, you must know who is responsible for a survey company. After you know who the person is, you can find their information under the Setup -> user tab in the JMS application and alter them there accordingly.
Quality Checker Details: These details automatically populate when someone with the right role (Admin, Coordinator or Surveyor) QC checks the Job.
1. Executive Summary
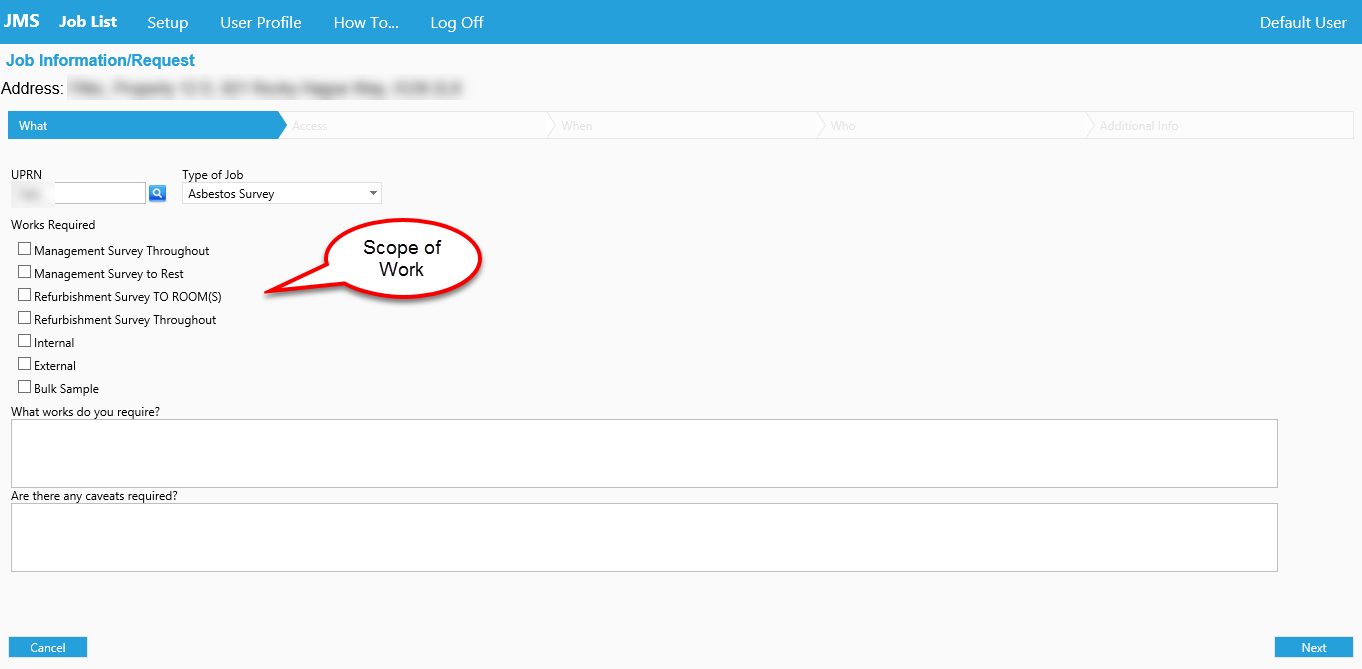
Scope of work: This field gets chosen upon job creation.
These fields can differ due to different client configurations.
Areas Containing Asbestos
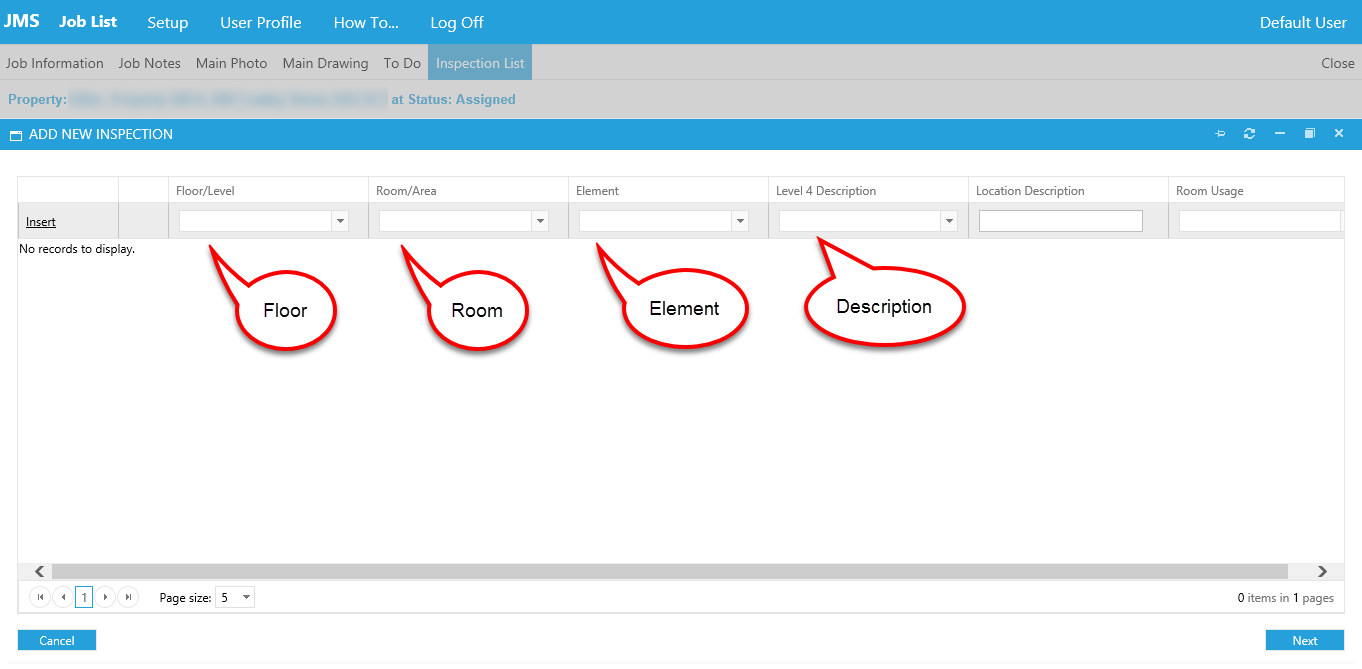
- These fields are populated in the inspection wizard menu. To access the inspection menu, you must sign in JMS -> Open a job -> Browse to the inspection tab -> Press new.
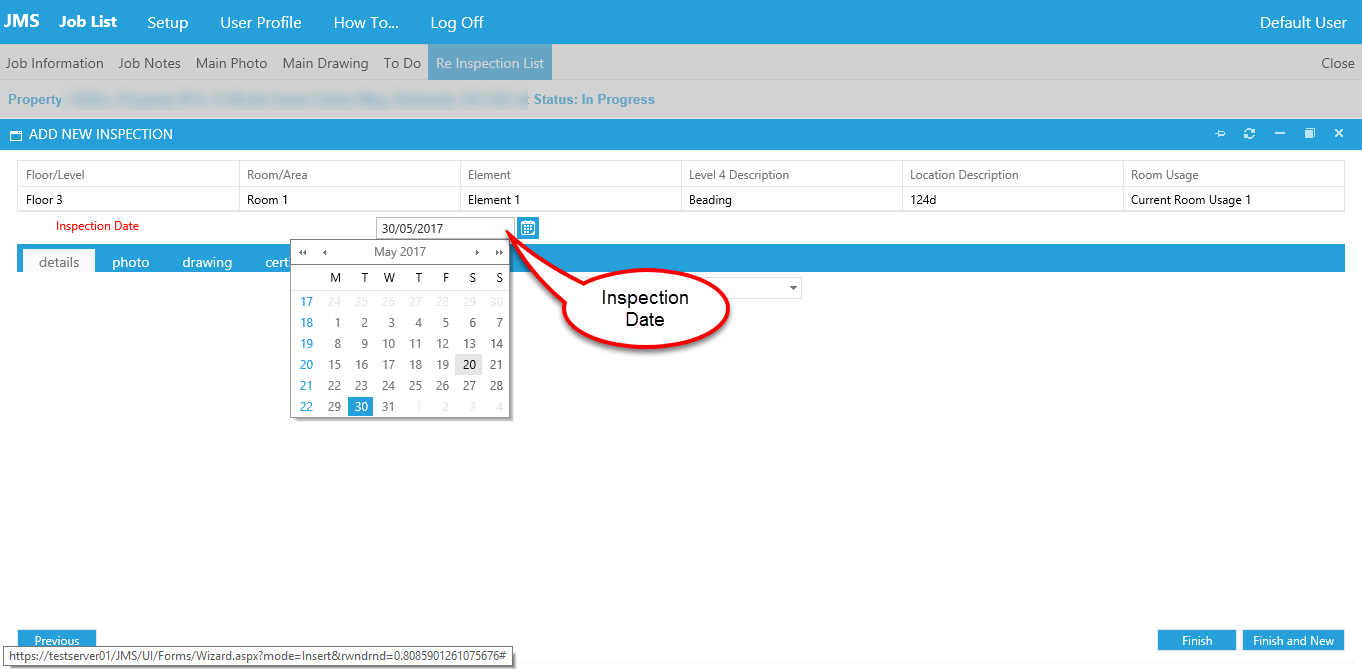
Floor/Level: This field can be edited in the inspection wizard.
Room/Area: This field can be edited in the inspection wizard.
Element: This field can be edited in the inspection wizard.
Description: This field can be edited in the inspection wizard.
Areas of no Access
- These fields are populated in the To Do wizard menu. To access the To Do list, you must sign in JMS -> Open a job -> Browse to the To Do tab -> Press new.
Floor/Level: This field can be edited in the To Do wizard.
Room/Area: This field can be edited in the To Do wizard.
Element: This field can be edited in the To Do wizard.
Description: This field can be edited in the To Do wizard.

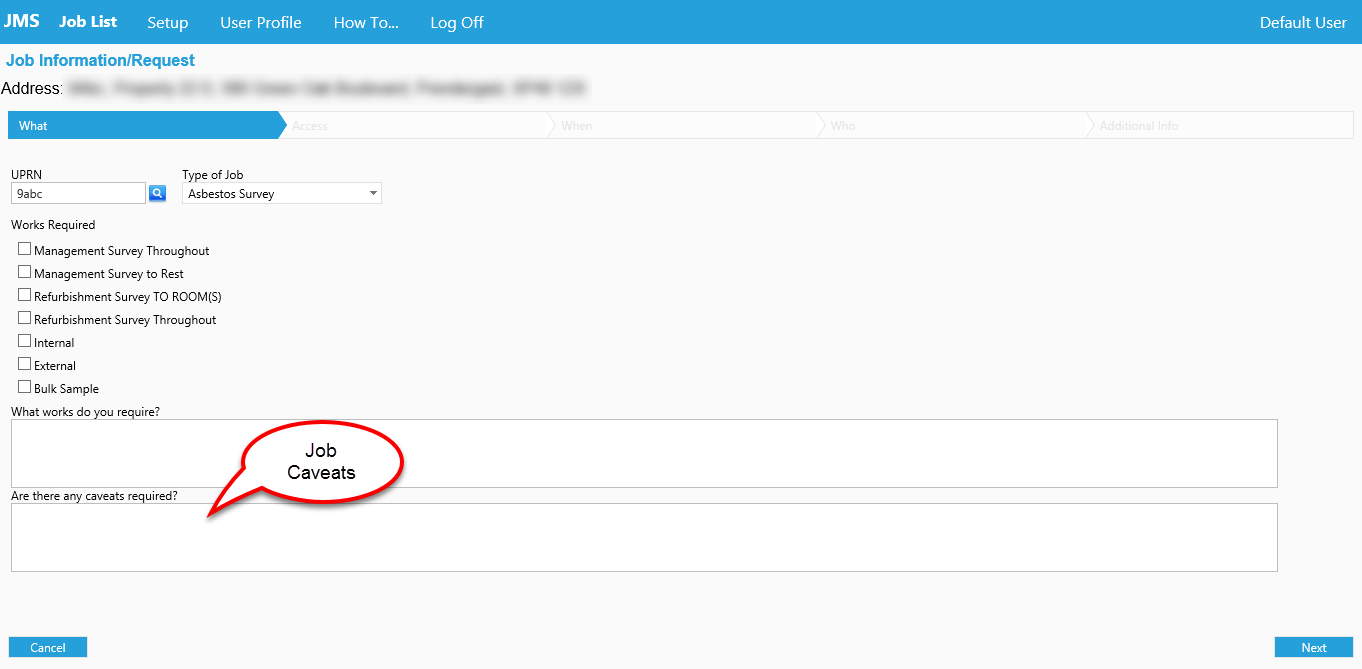
Caveats: This field can be populated upon job creation.
Inspection Details
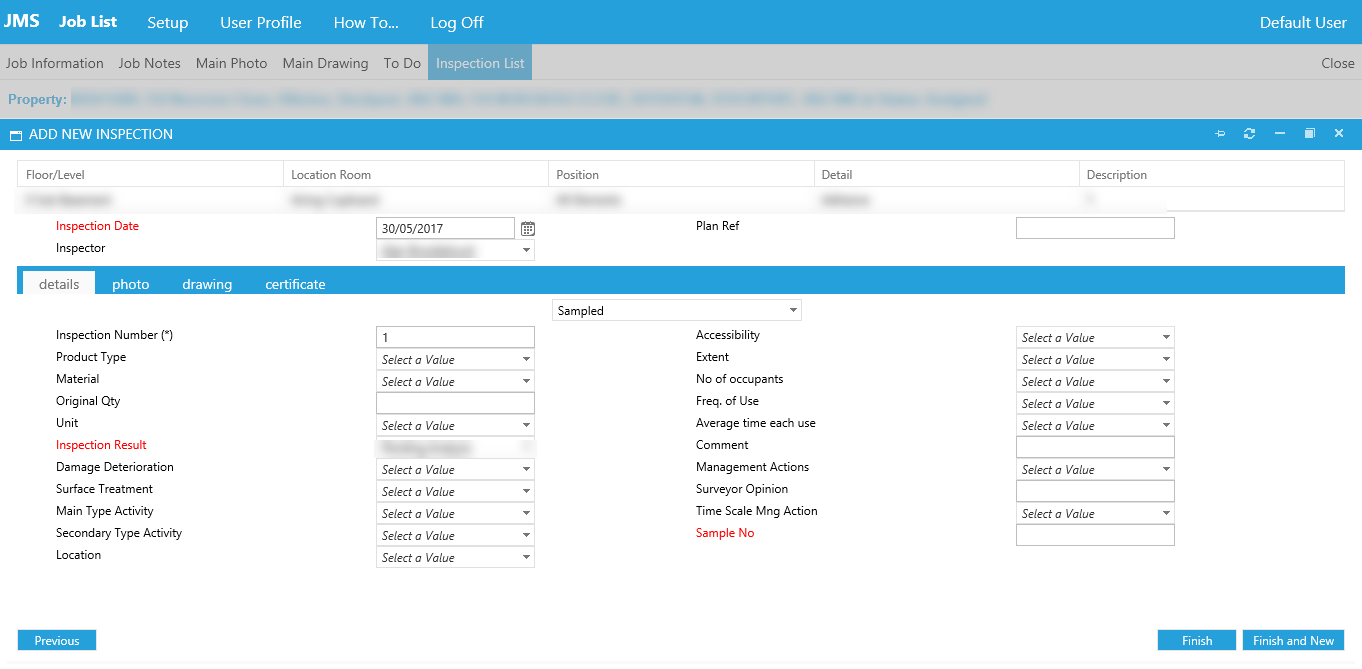
Inspection Number: This field automatically populates after an inspection is created in the inspection wizard.
Inspection Date: This field is populated upon inspection creation. To edit this field, you must sign in JMS -> Open a job -> Browse to the inspection tab -> Press new -> Populate the Inspection location fields -> Press Insert -> Press next -> Locate the date field.
Floor/Level: This field can be edited in the inspection wizard.
Room: This field can be edited in the inspection wizard.
Element: This field can be edited in the inspection wizard.
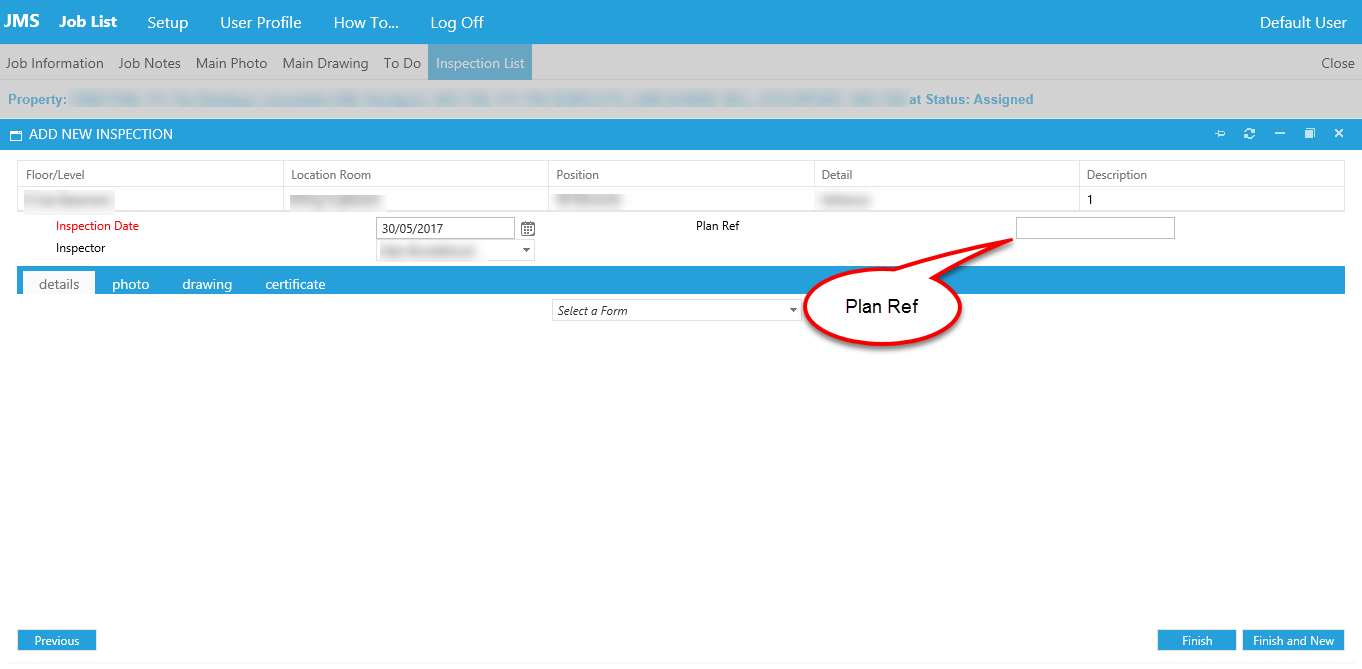
Plan Ref: This field is populated upon inspection creation. To edit this field, you must sign in JMS -> Open a job -> Browse to the inspection tab -> Press new -> Populate the Inspection location fields -> Press Insert -> Press next -> Locate the date ref.
Location: This field can be edited in the inspection detail wizard.
Position: This field can be edited in the inspection detail wizard.
Material: This field can be edited in the inspection detail wizard.
Original Quantity: This field can be edited in the inspection detail wizard.
Unit: This field can be edited in the inspection detail wizard.
Inspection Type: This field can be edited in the inspection detail wizard.
Inspection Result: This field can be edited in the inspection detail wizard.
Asbestos Type: This field can be edited in the inspection detail wizard.
Comment: This field can be edited in the inspection detail wizard.
Sample Number: This field can be edited in the inspection detail wizard.
Referred Sample No: This field can be edited in the inspection detail wizard.
Below is an example of an inspection detail wizard configuration.
Material Assessment
Product Type: This field can be edited in the inspection detail wizard.
Damage Deterioration: This field can be edited in the inspection detail wizard.
Surface Treatment: This field can be edited in the inspection detail wizard.
Asbestos Type: This field can be edited in the inspection detail wizard.
Material Assessment Total: This field can be edited in the inspection detail wizard.
Priority Assessment
Occupancy: This field can be edited in the inspection detail wizard.
Likelihood of disturbance: This field can be edited in the inspection detail wizard.
Human exposure potential: This field can be edited in the inspection detail wizard.
Maintenance activity: This field can be edited in the inspection detail wizard.
Priority Assessment Total: This field can be edited in the inspection detail wizard.
Recommendation: This field can be edited in the inspection detail wizard
Appendices
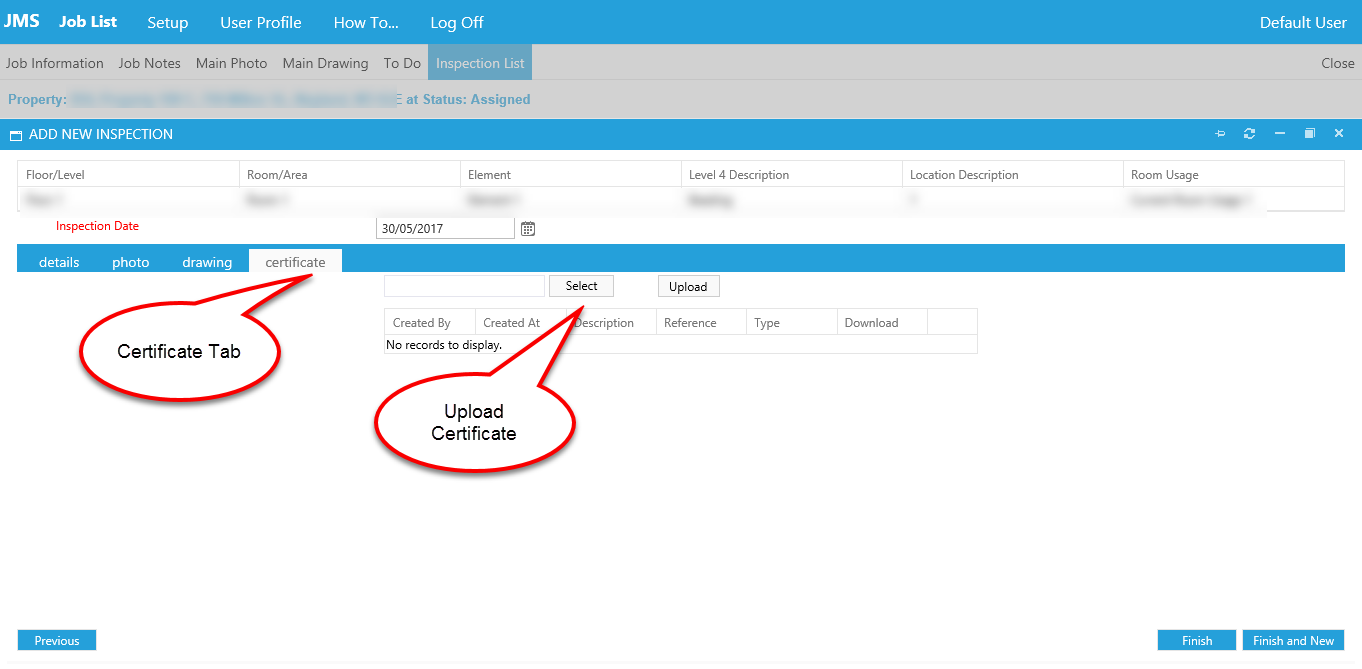
Appendix 1 : The certificate which is attached to this property appears here. You can alter this certificate by logging into JMS -> Opening a job -> Opening an inspection -> Browsing onto the certificate tab & Uploading certificate
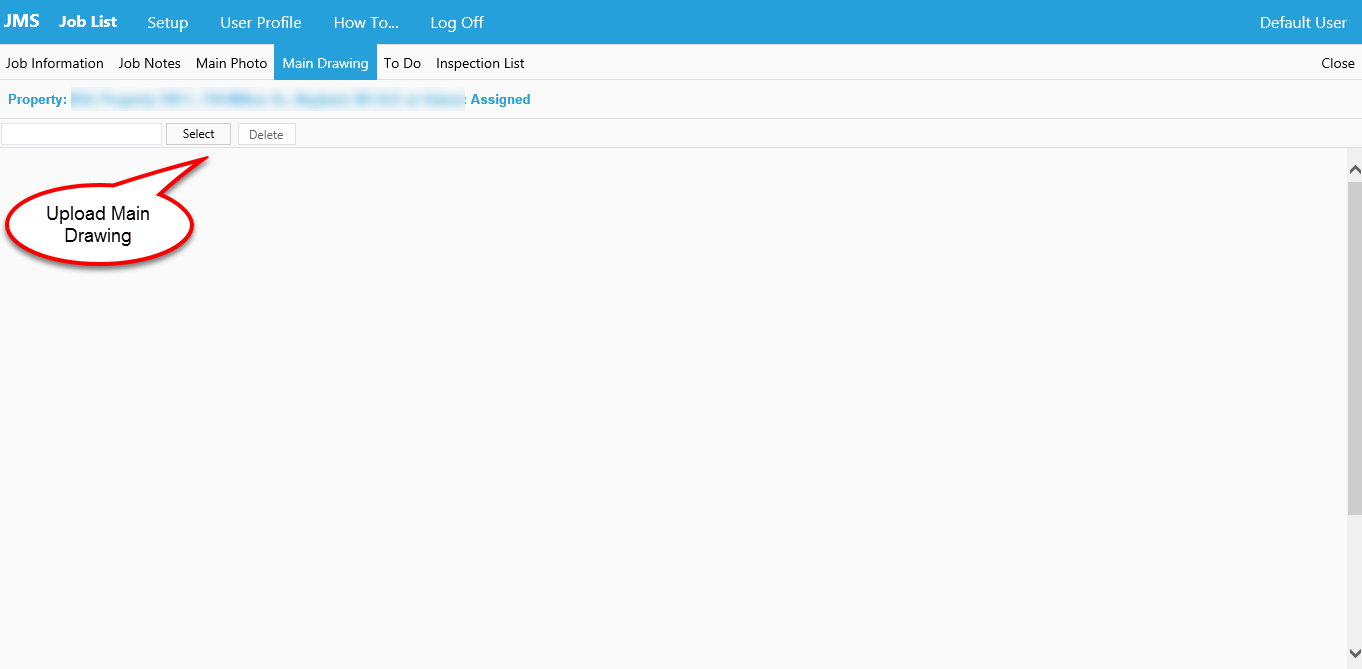
Appendix 2 : The main drawing of the property for the Job appears here. You can alter this photo by logging into JMS -> Opening a job -> Browsing onto the Main Drawing tab & Inserting a photo
Post your comment on this topic.