
1. Log in the platform.
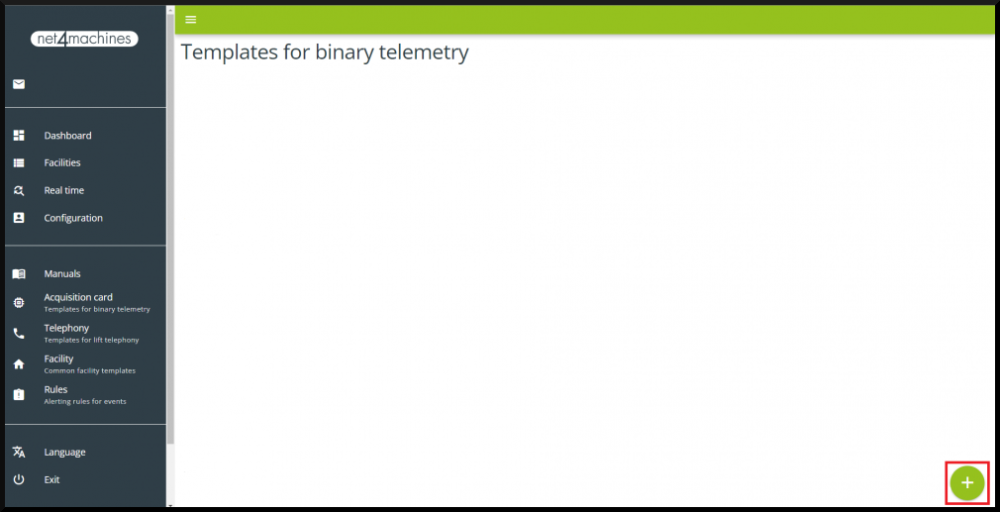
2. Click on “Acquisition card” on the side menu.

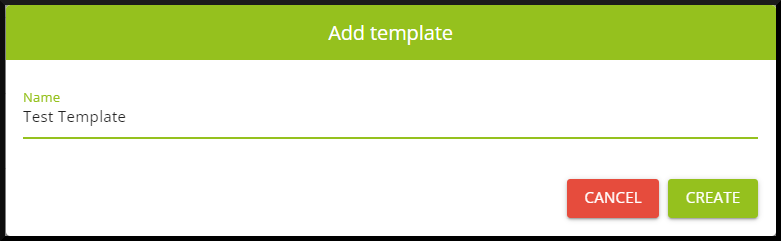
3. Create a new template.
4. Assign a name and create it.
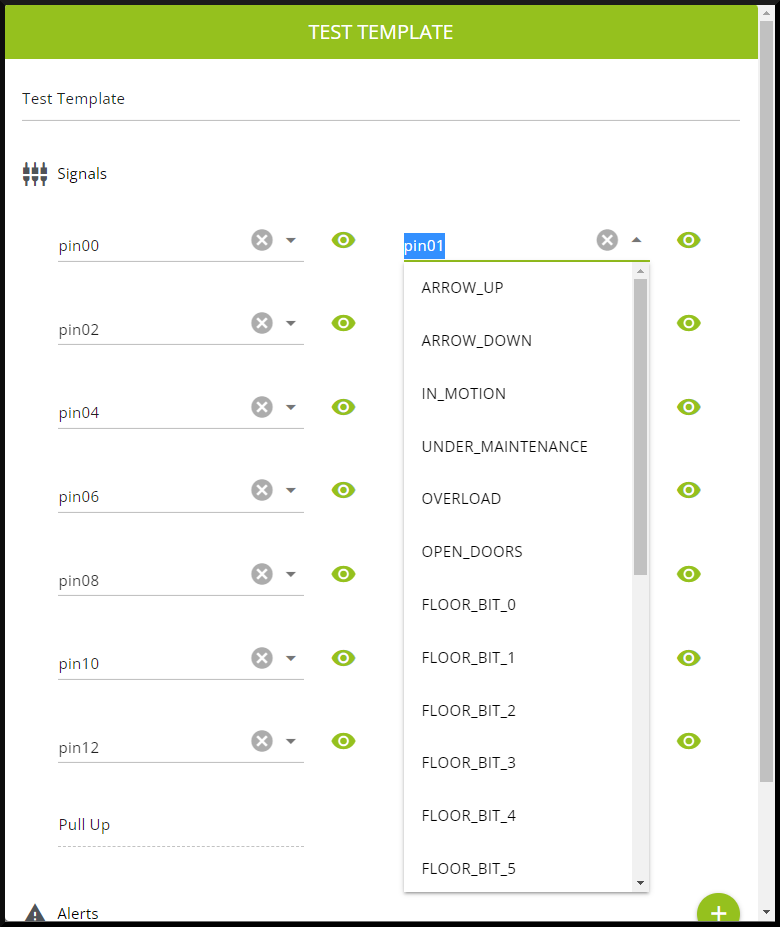
5. Click on “Actions” and “Edit”.

6. Enable the pins you want to use and assign a name or select from the menu.
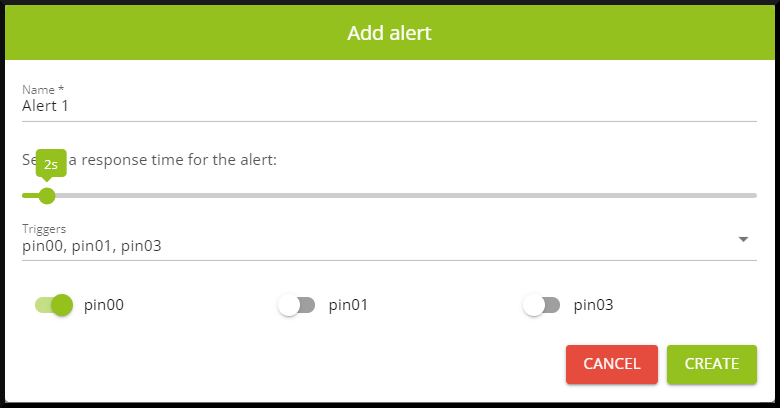
7. Create an alert.
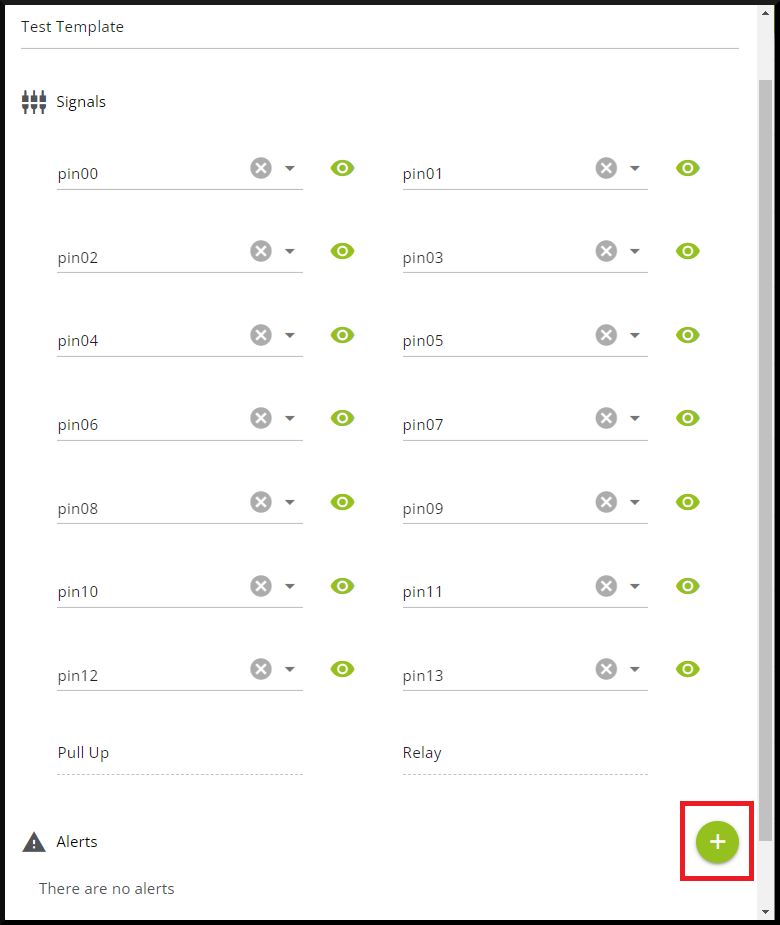
8. . Assign a custom name, time (optional) and pins indicating their state. In this example, an alert called “Alert 1” will be generated after the acquision card detects that “pin00” is HIGH while “pin01” and “pin03” are LOW for over 2s.
9. Repeat as many times as alerts you need to create.
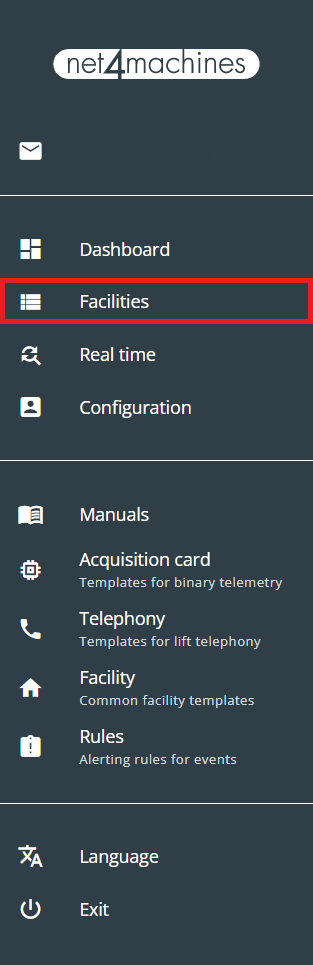
10. Click on “Facilities” and locate the facility you want to configure with an acquisition card.
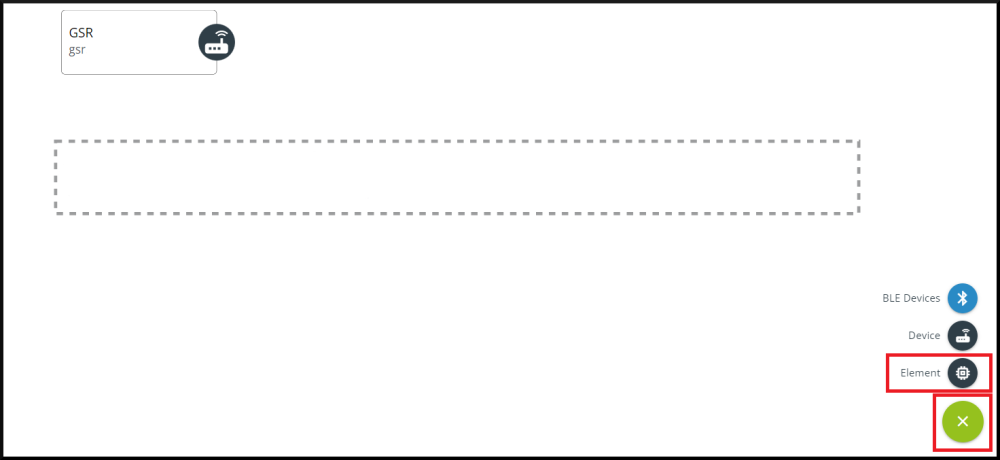
11. Create a new element.
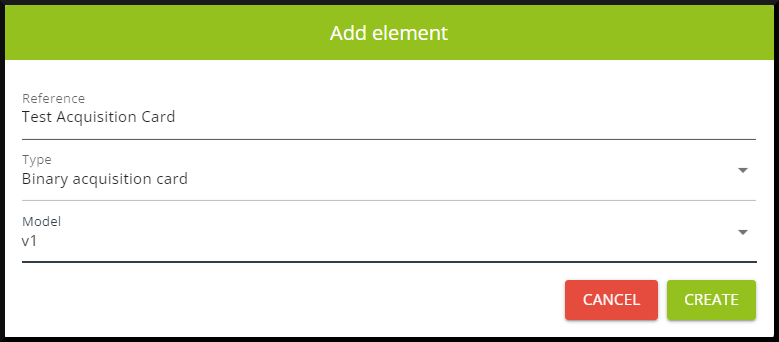
12. Assign a reference and define the type and model as described.
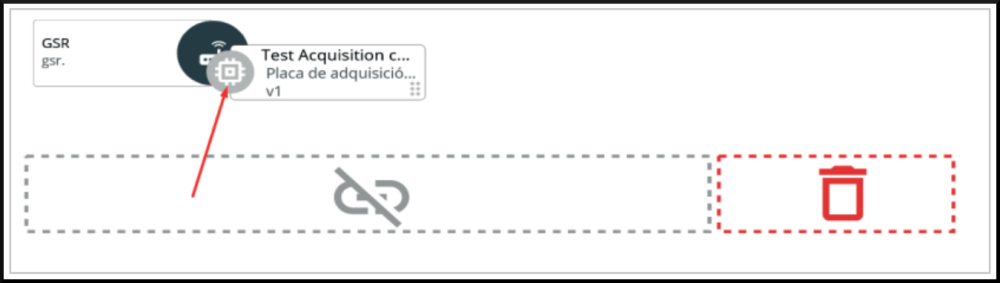
13. Drag and drop the element in order to assign it.
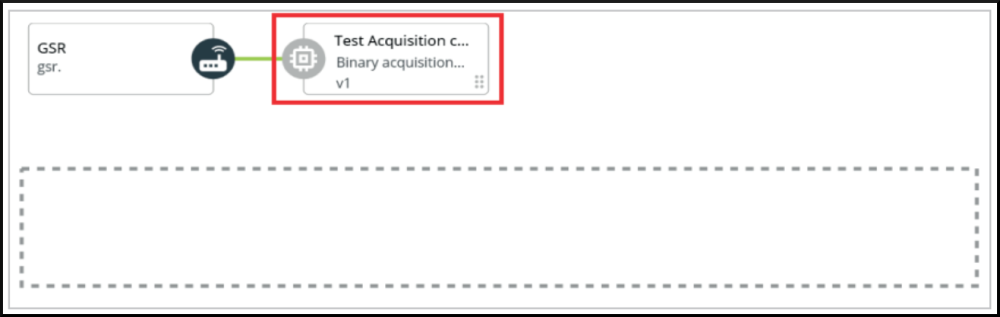
14. Follow the steps in the assistant, select the template created previously and complete the process until the element is linked correctly.
15. Click on the element, console and “Load console” in order to see the state in real time.
