
 To stop the device, long-press the multifunctional button.
| No. | Screen | Description |
| 1 | 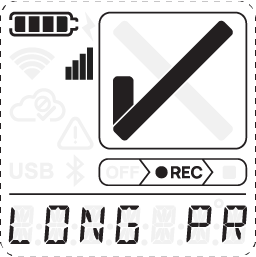 |
Upon device interaction, the device will indicate to the user that a long-press of the multifunctional button is required for stop. ! If long-press is released too early during the stop process, the same screen will be displayed and the LED lights up red. |
| 2 |  |
Upon long-press device interaction, the stop screen will be loaded. |
| 3 | 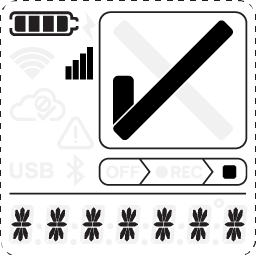 |
Hold the button until the letters are replaced with stars (“*******”) from left to right and the LED signal has blinked once. The stop icon indicates that the device has been successfully stopped. |
Automated read out
| No. | Screen | Description |
| 1 | 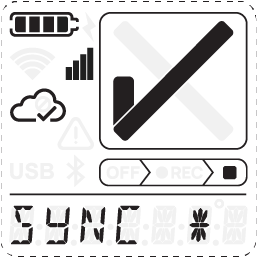 |
Establishing connection to SmartView. Cellular or WiFi symbol is blinking. |
| 2 | 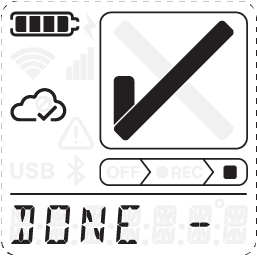 |
All data has been uploaded to the cloud. |
Manual read out
If the device is not able to establish connectivity with SmartView to upload monitoring data, it is required to manually upload the data to SmartView via USB. In the next step, connect the device to your computer and wait for the device to appear in your driver. In the next step, download the data file manually to the computer.
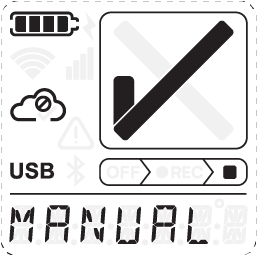
Device indicates that manual transfer of monitoring data to SmartView is required.
Review SmartView manual to find out how to upload the monitoring data to SmartView.
- Manual read out
-
Step Screen Description 1 ![]()
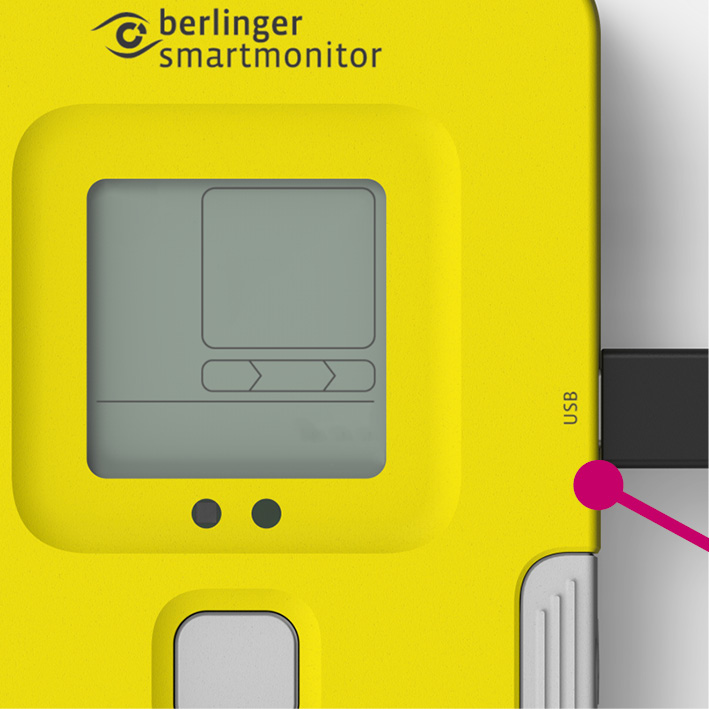
Connect a USB-C cable to SmartMonitor. 2 ![]()
Connect USB cable with computer. The SmartMonitor display indicates REPORT if successfully connected. 3 ![]()
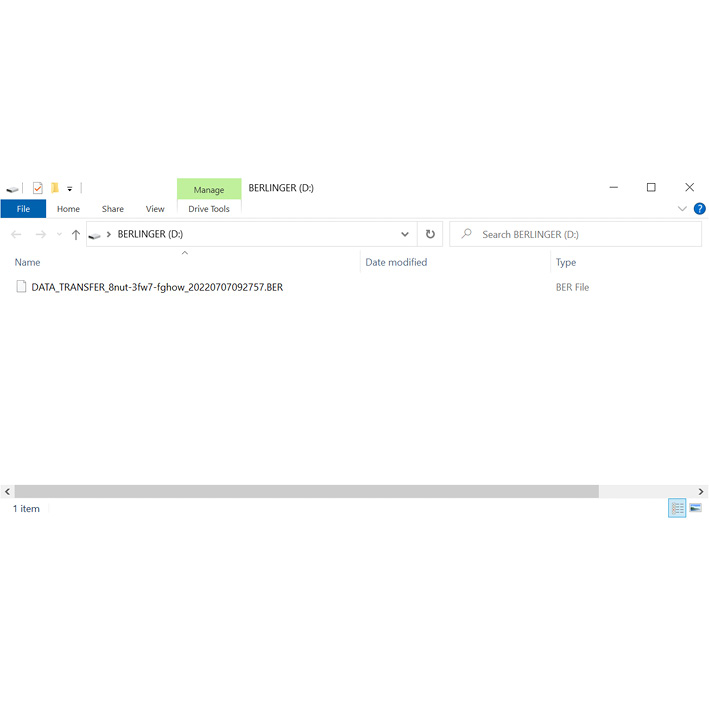
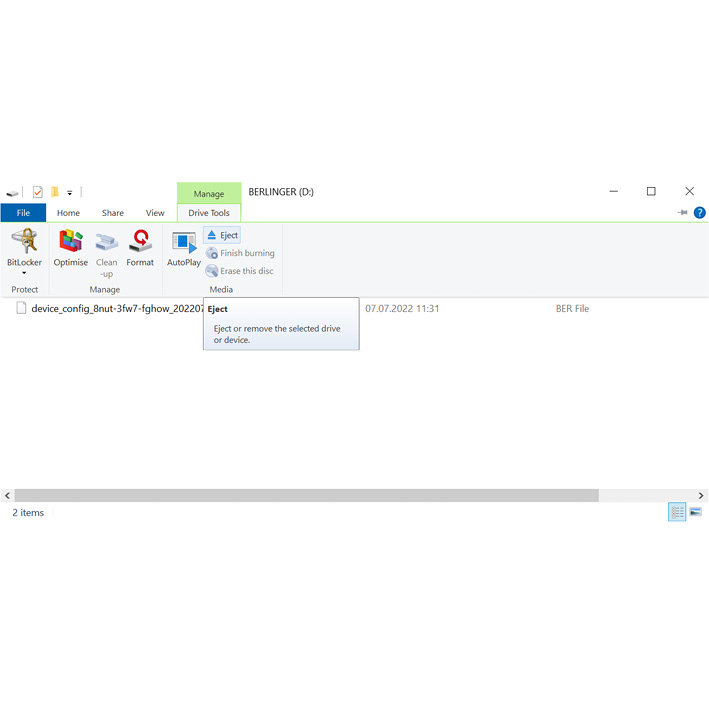
When connecting the SmartMonitor to the computer a pop-up window of SmartMonitor (BERLINGER) will appear. If the pop-up window does not appear, locate the BERLINGER USB Drive on your computer and open it. 4 ![]()
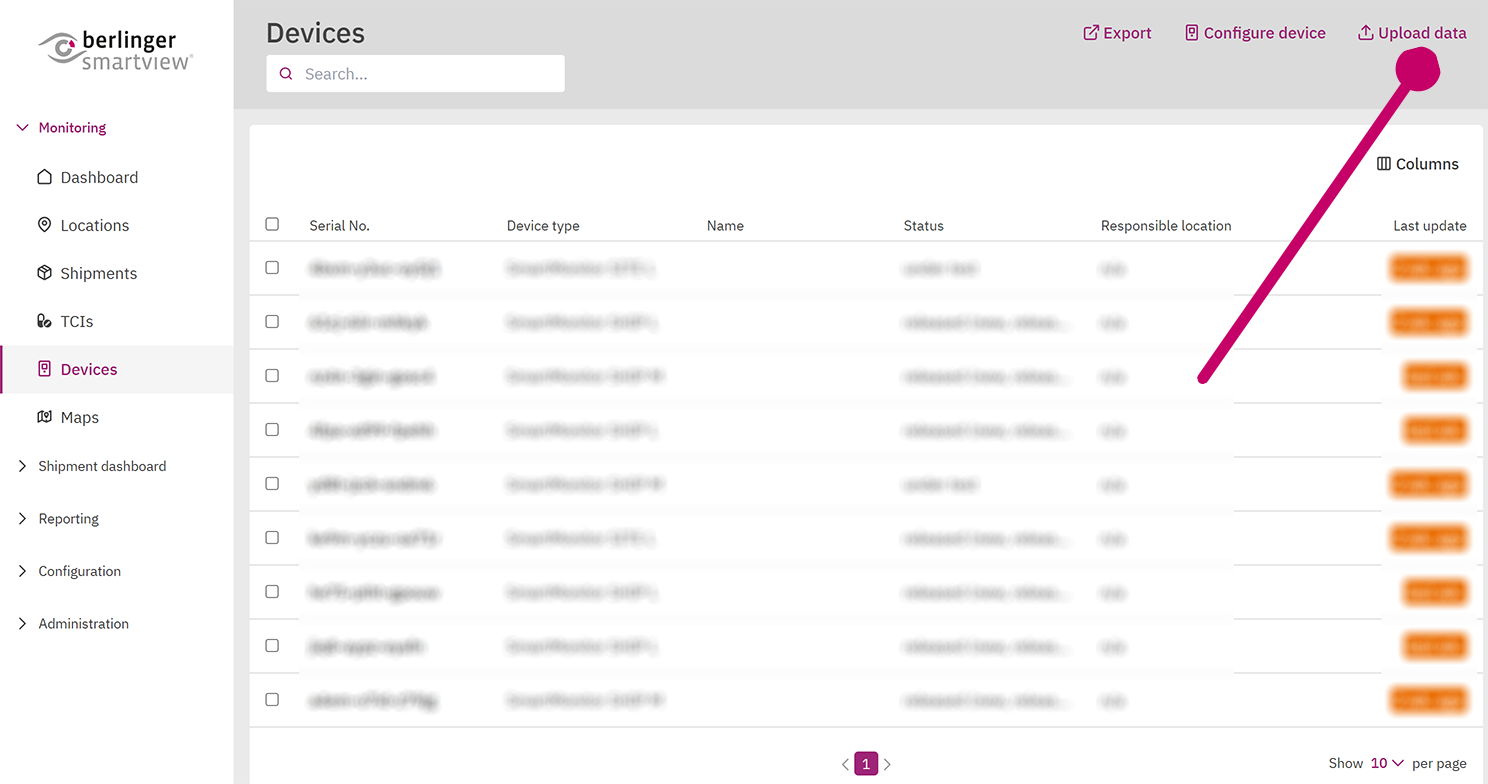
Log into SmartView and locate the “Data upload” functionality under the tab “Monitoring”, “Devices”.
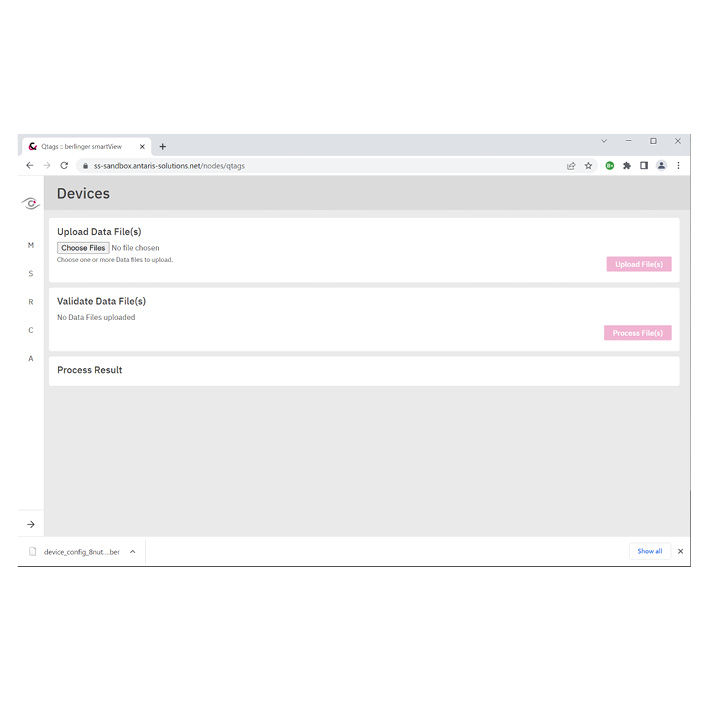
Choose “Data upload” on the top right corner.5 ![]()
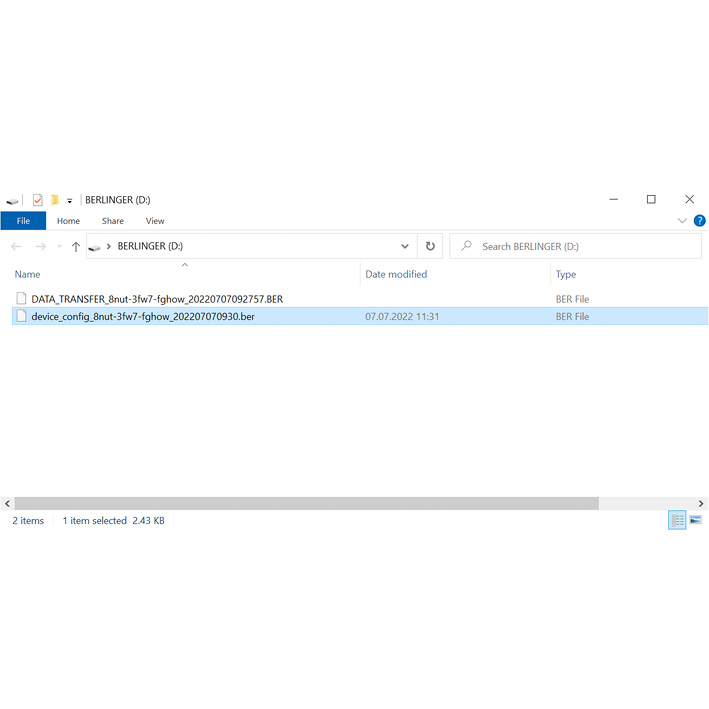
Click “Choose Files and select the files displayed in the BERLINGER USB-Drive. 6 ![]()
Click “Choose Files and select the files displayed in the BERLINGER USB-Drive. 7 ![]()
Once the files have been added select “Upload File(s)”.Check Process Result to see if your files have been successfully uploaded. SmartView will provide a file that needs to be placed on the SmartMonitor to confirm the successful receipt of data. 8 ![]()
Disconnect the SmartMonitor from your computer. 9 ![]()
When the upload has been successfully completed, the display of the SmartMonitor indicates “DONE”, otherwise repeat 1-9 to ensure that all data is available in SmartView.

Status when stopped
| No. | Screen | Description |
| 1 | 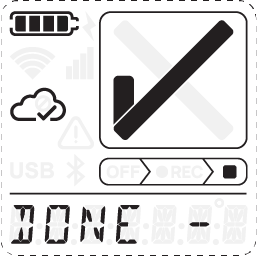 |
|
| 2 | 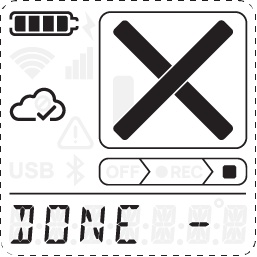 |
|
| 3 |  |
Infinite scroll on alarm source. SmartMonitor vs. SmartSensor Temperature vs. Humidity Cloud |
How to wipe your device
(For SmartMonitor SHIP M only)
Feedback
Copyright © 2025 Berlinger & Co. AG
—
Powered by 
Post your comment on this topic.