
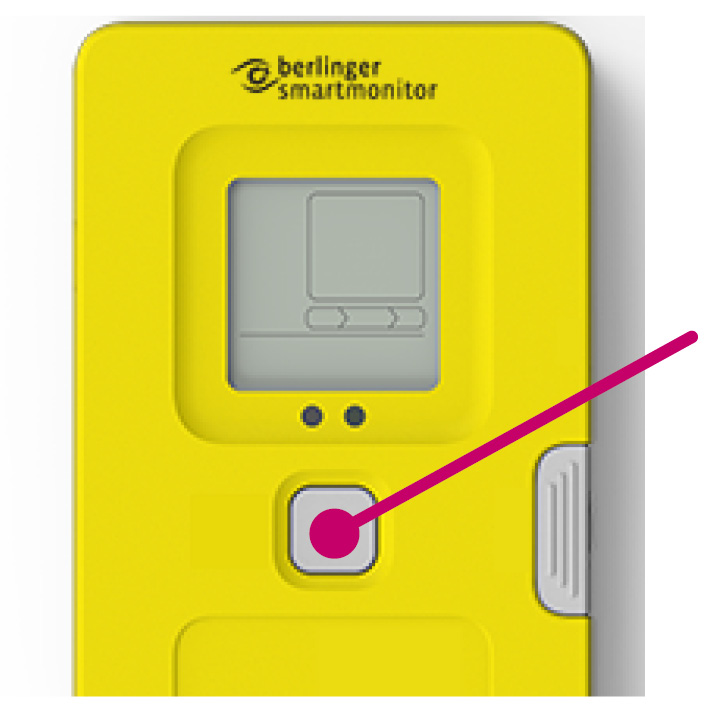
To configure the SmartMonitor device with the desired configuration (see user manual SmartView for instructions), wake up the device from sleep mode with a short press of the multifunction button and then triple push in quick succession. This will initiate cloud synchronization to download the configuration.
Automatic configuration
 3 times short press the multifunctional button
| Nr. | Screen | Description |
| 1 | 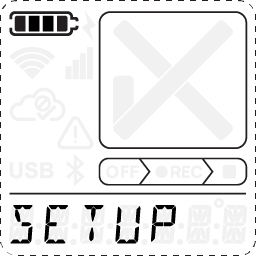 |
The configuration is initiated. |
| 2 | 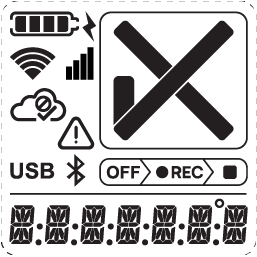 |
All display symbols are loaded. |
| 3 | 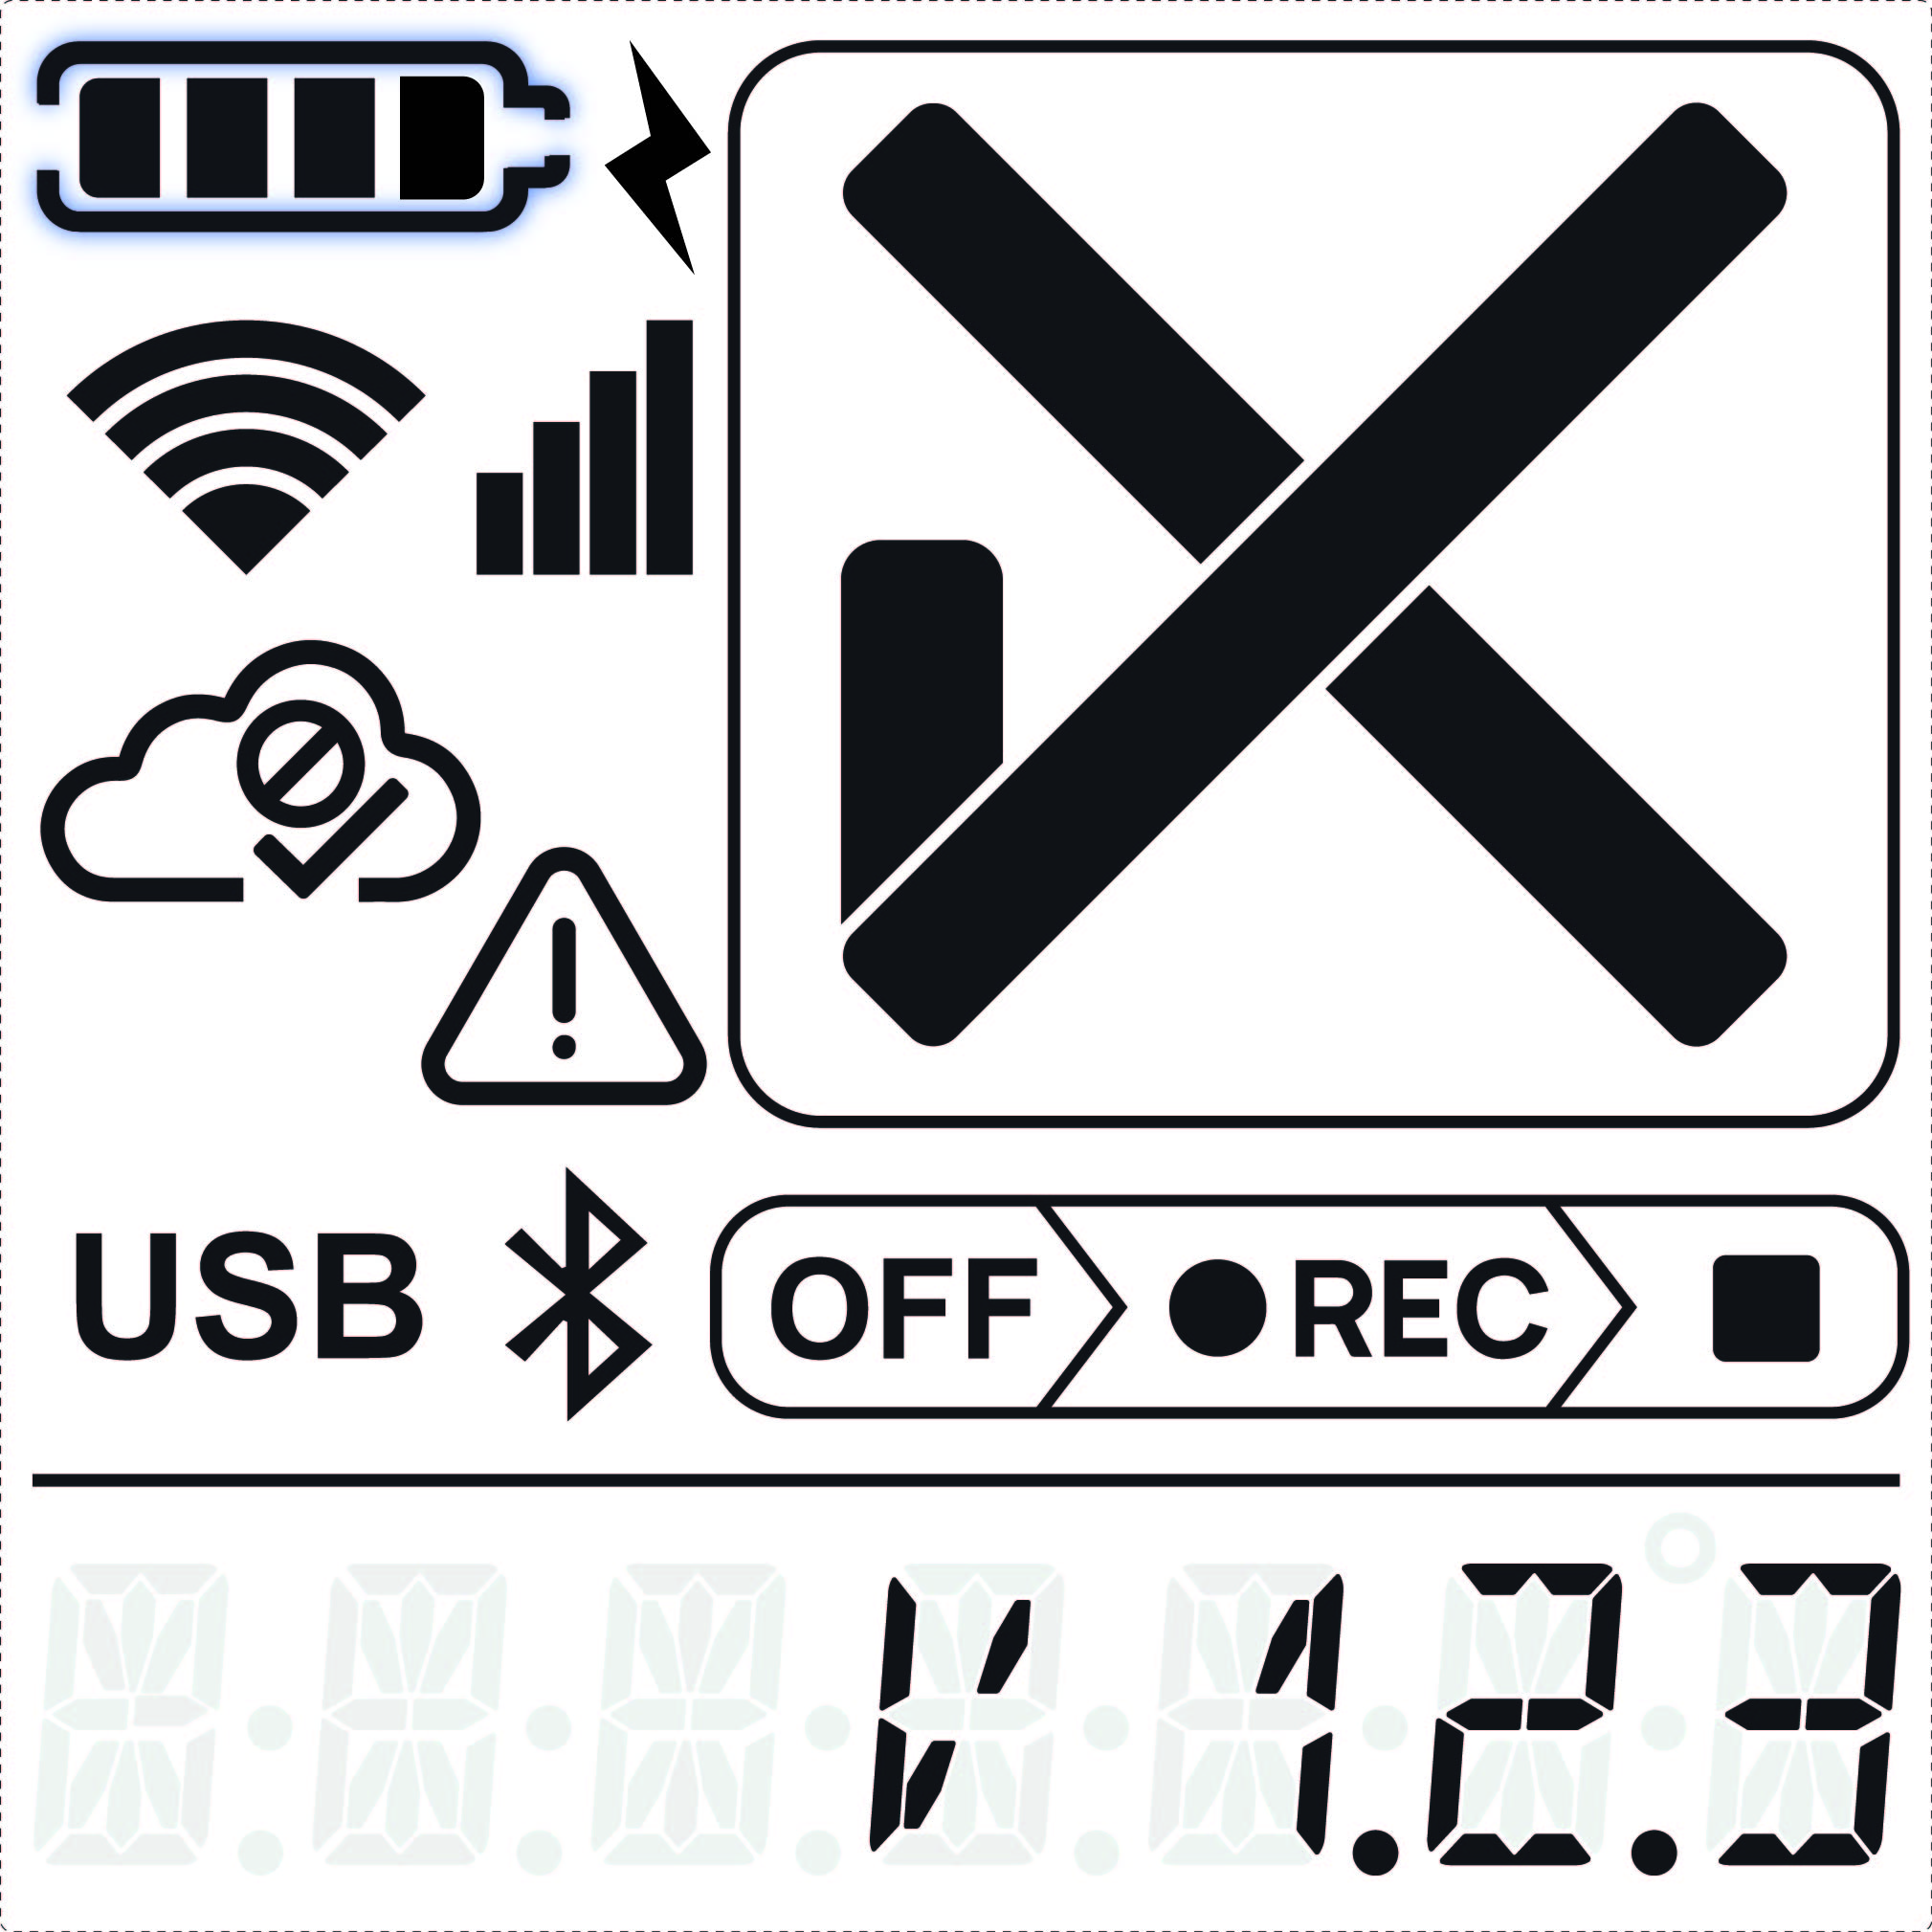 |
The firmware version on the device is displayed. |
| 4 | 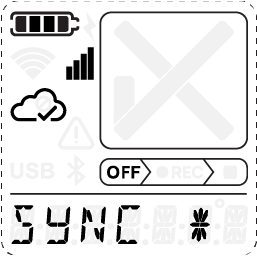 |
The connection to SmartView is established. The tick ( The configuration is downloading. |
| 5 | 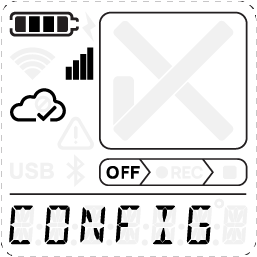 |
The configuration is successfully downloaded to the device. The cloud ( ! A short press of the multifunction button displays the correct configuration name. ! If the name of the configuration is not showing up on the display, manual configuration is required. |
The device is now ready to be started. Continue with placing your device.
Manual configuration
If the display indicates this information, automatic configuration was not successful. Follow the manual configuration steps below.
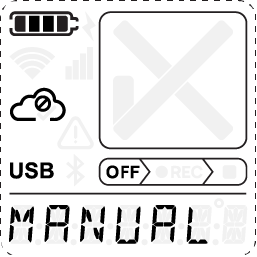 Device indication that manual download for configuration is required.
- Manual configuration
-
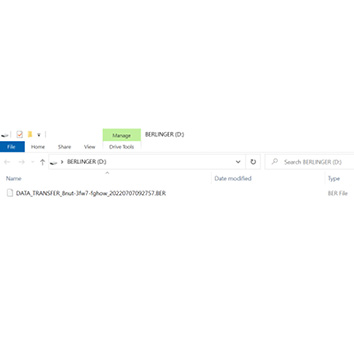
If the device is not able to establish connectivity with SmartView to download configuration, it is required to manually upload the configuration file to the device via USB. In a next step, connect the device to your computer and wait for the device to appear in the explorer of your computer. In a next step, add the configuration file manually to the SmartMonitor.
Step Screen Description 1 ![]()
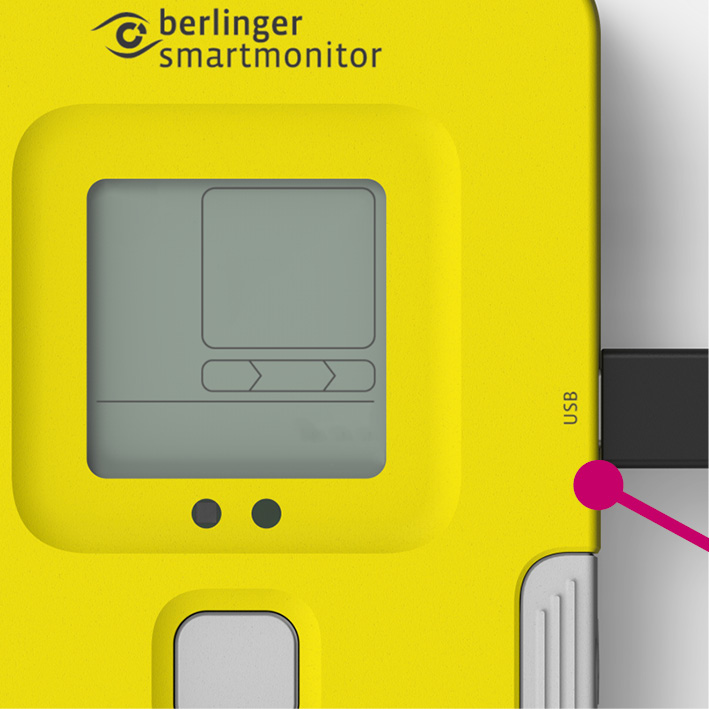
Plug in a USB-C cable at the right-hand side of the SmartMonitor device. 2 ![]()
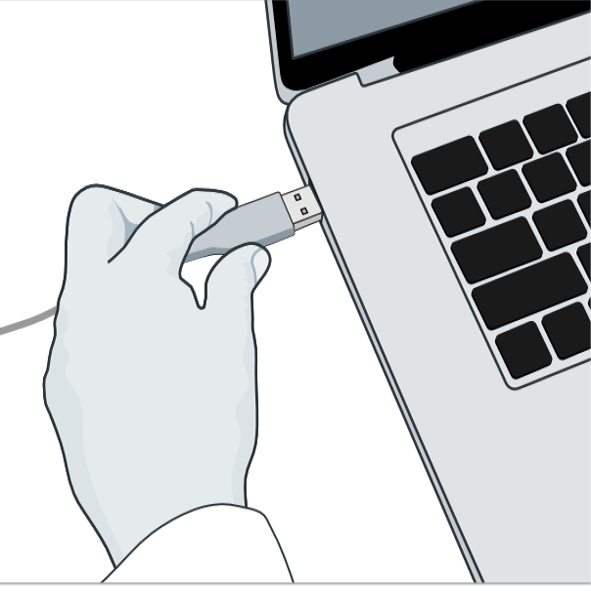
Connect the other end of the cable via the USB port with your computer. 3 ![]()
When connecting the SmartMonitor to your computer, a pop-up window of SmartMonitor (BERLINGER) will appear.
If the pop up window does not appear, locate the BERLINGER USB-Drive on your computer and open it.4 ![]()
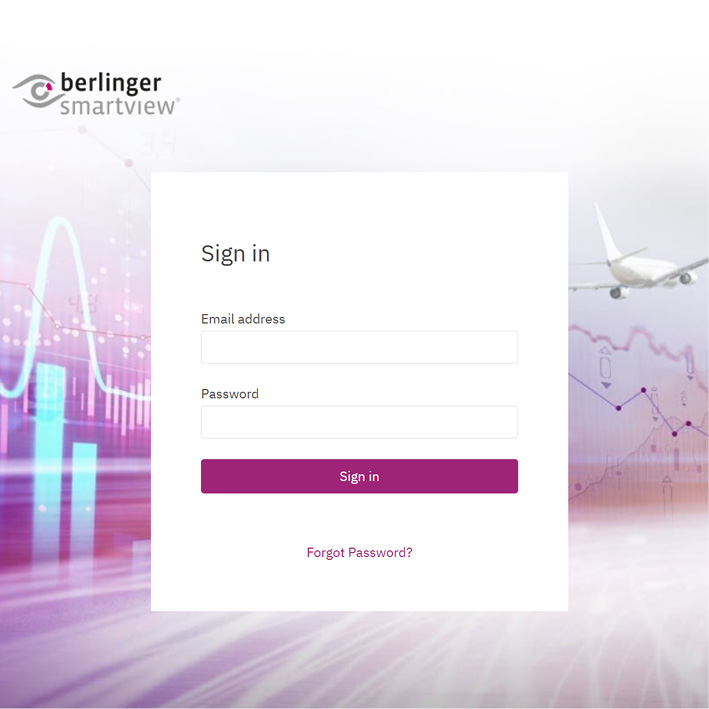
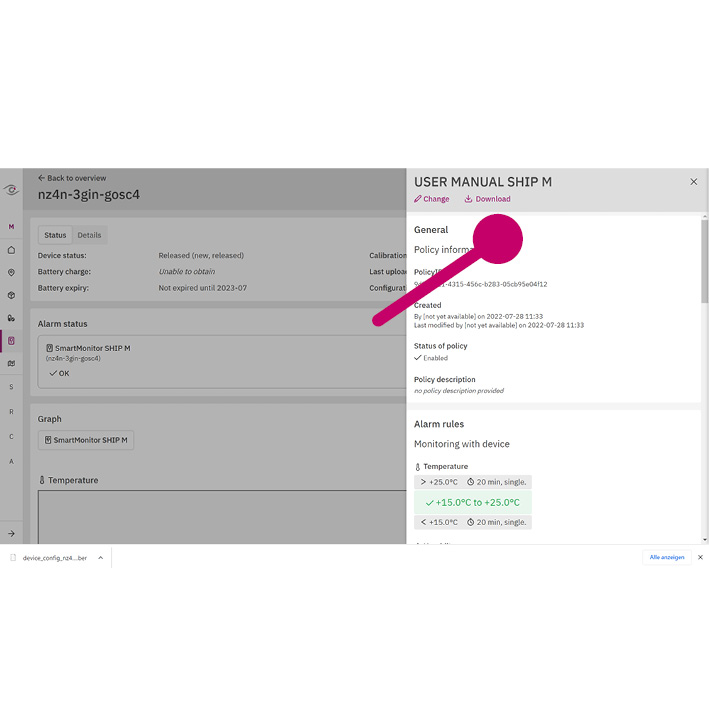
Log into SmartView with your credentials. In SmartView, navigate to “Devices” under the section “Monitoring”.
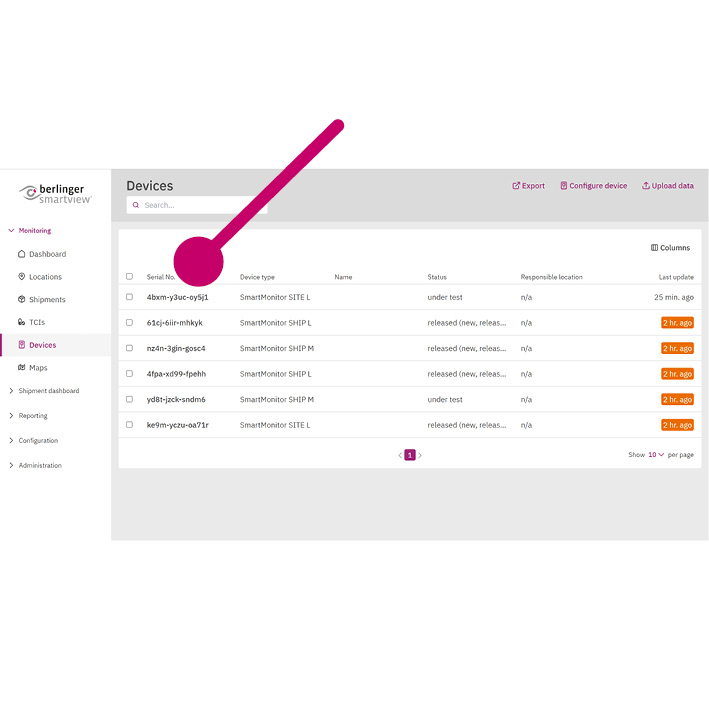
In the search function, type in the serial number of the device that you would like to configure. It is printed on the front of the SmartMonitor.5 ![]()
Click on the serial number to open the device page. 6 ![]()
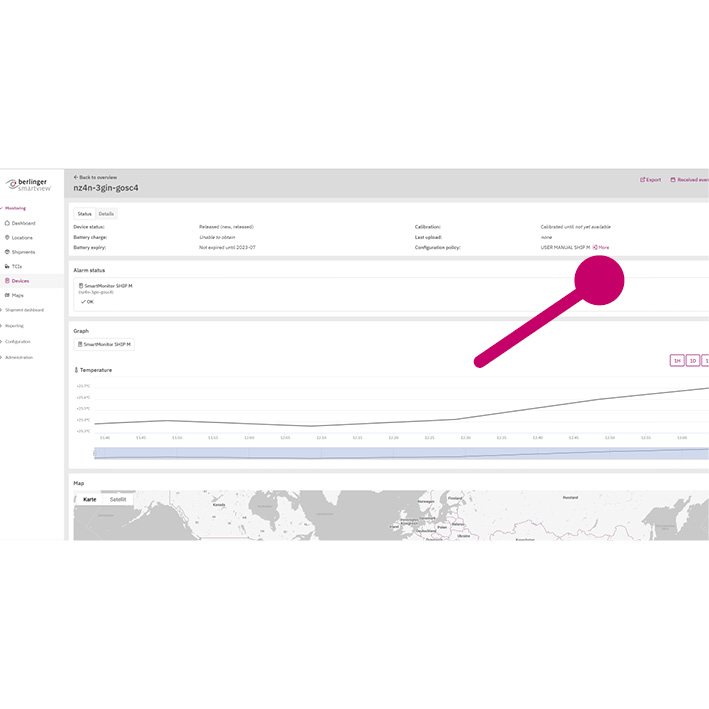
Click the “More” button under “Status” next to the configuration policy. 7 ![]()
Select “Download”. The configuration policy file has been downloaded to your computer and can be found in the Download folder. 8 ![]()
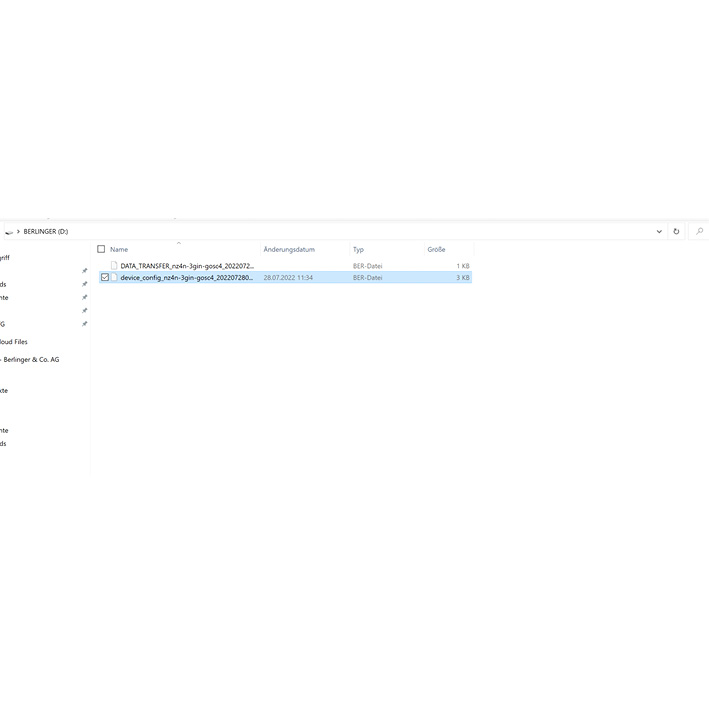
Save the device configuration file in the BERLINGER USB Drive. 9 ![]()
Disconnect the SmartMonitor from your computer. 10 ![]()
To check if the download has been successfully completed, short press the multifunction button. The scroll text should display the correct configuration name. The device is now ready to be started.
! If the download was not successful, the display of the SmartMonitor indicates CONFIG NAME, but not the actual name that was given in SmartView.
If more help is needed with configuring your device, contact Berlinger support at support@berlinger.com
Next step: Place your device
Post your comment on this topic.