
In order to ensure the SmartMonitor functions according to the technical specification, the SmartMonitor device must be fully charged upon device start.
To charge the SmartMonitor, the USB-C cable of the SmartMonitor Power Adapter must be connected to the device and plugged into power.
| Screen | Information |
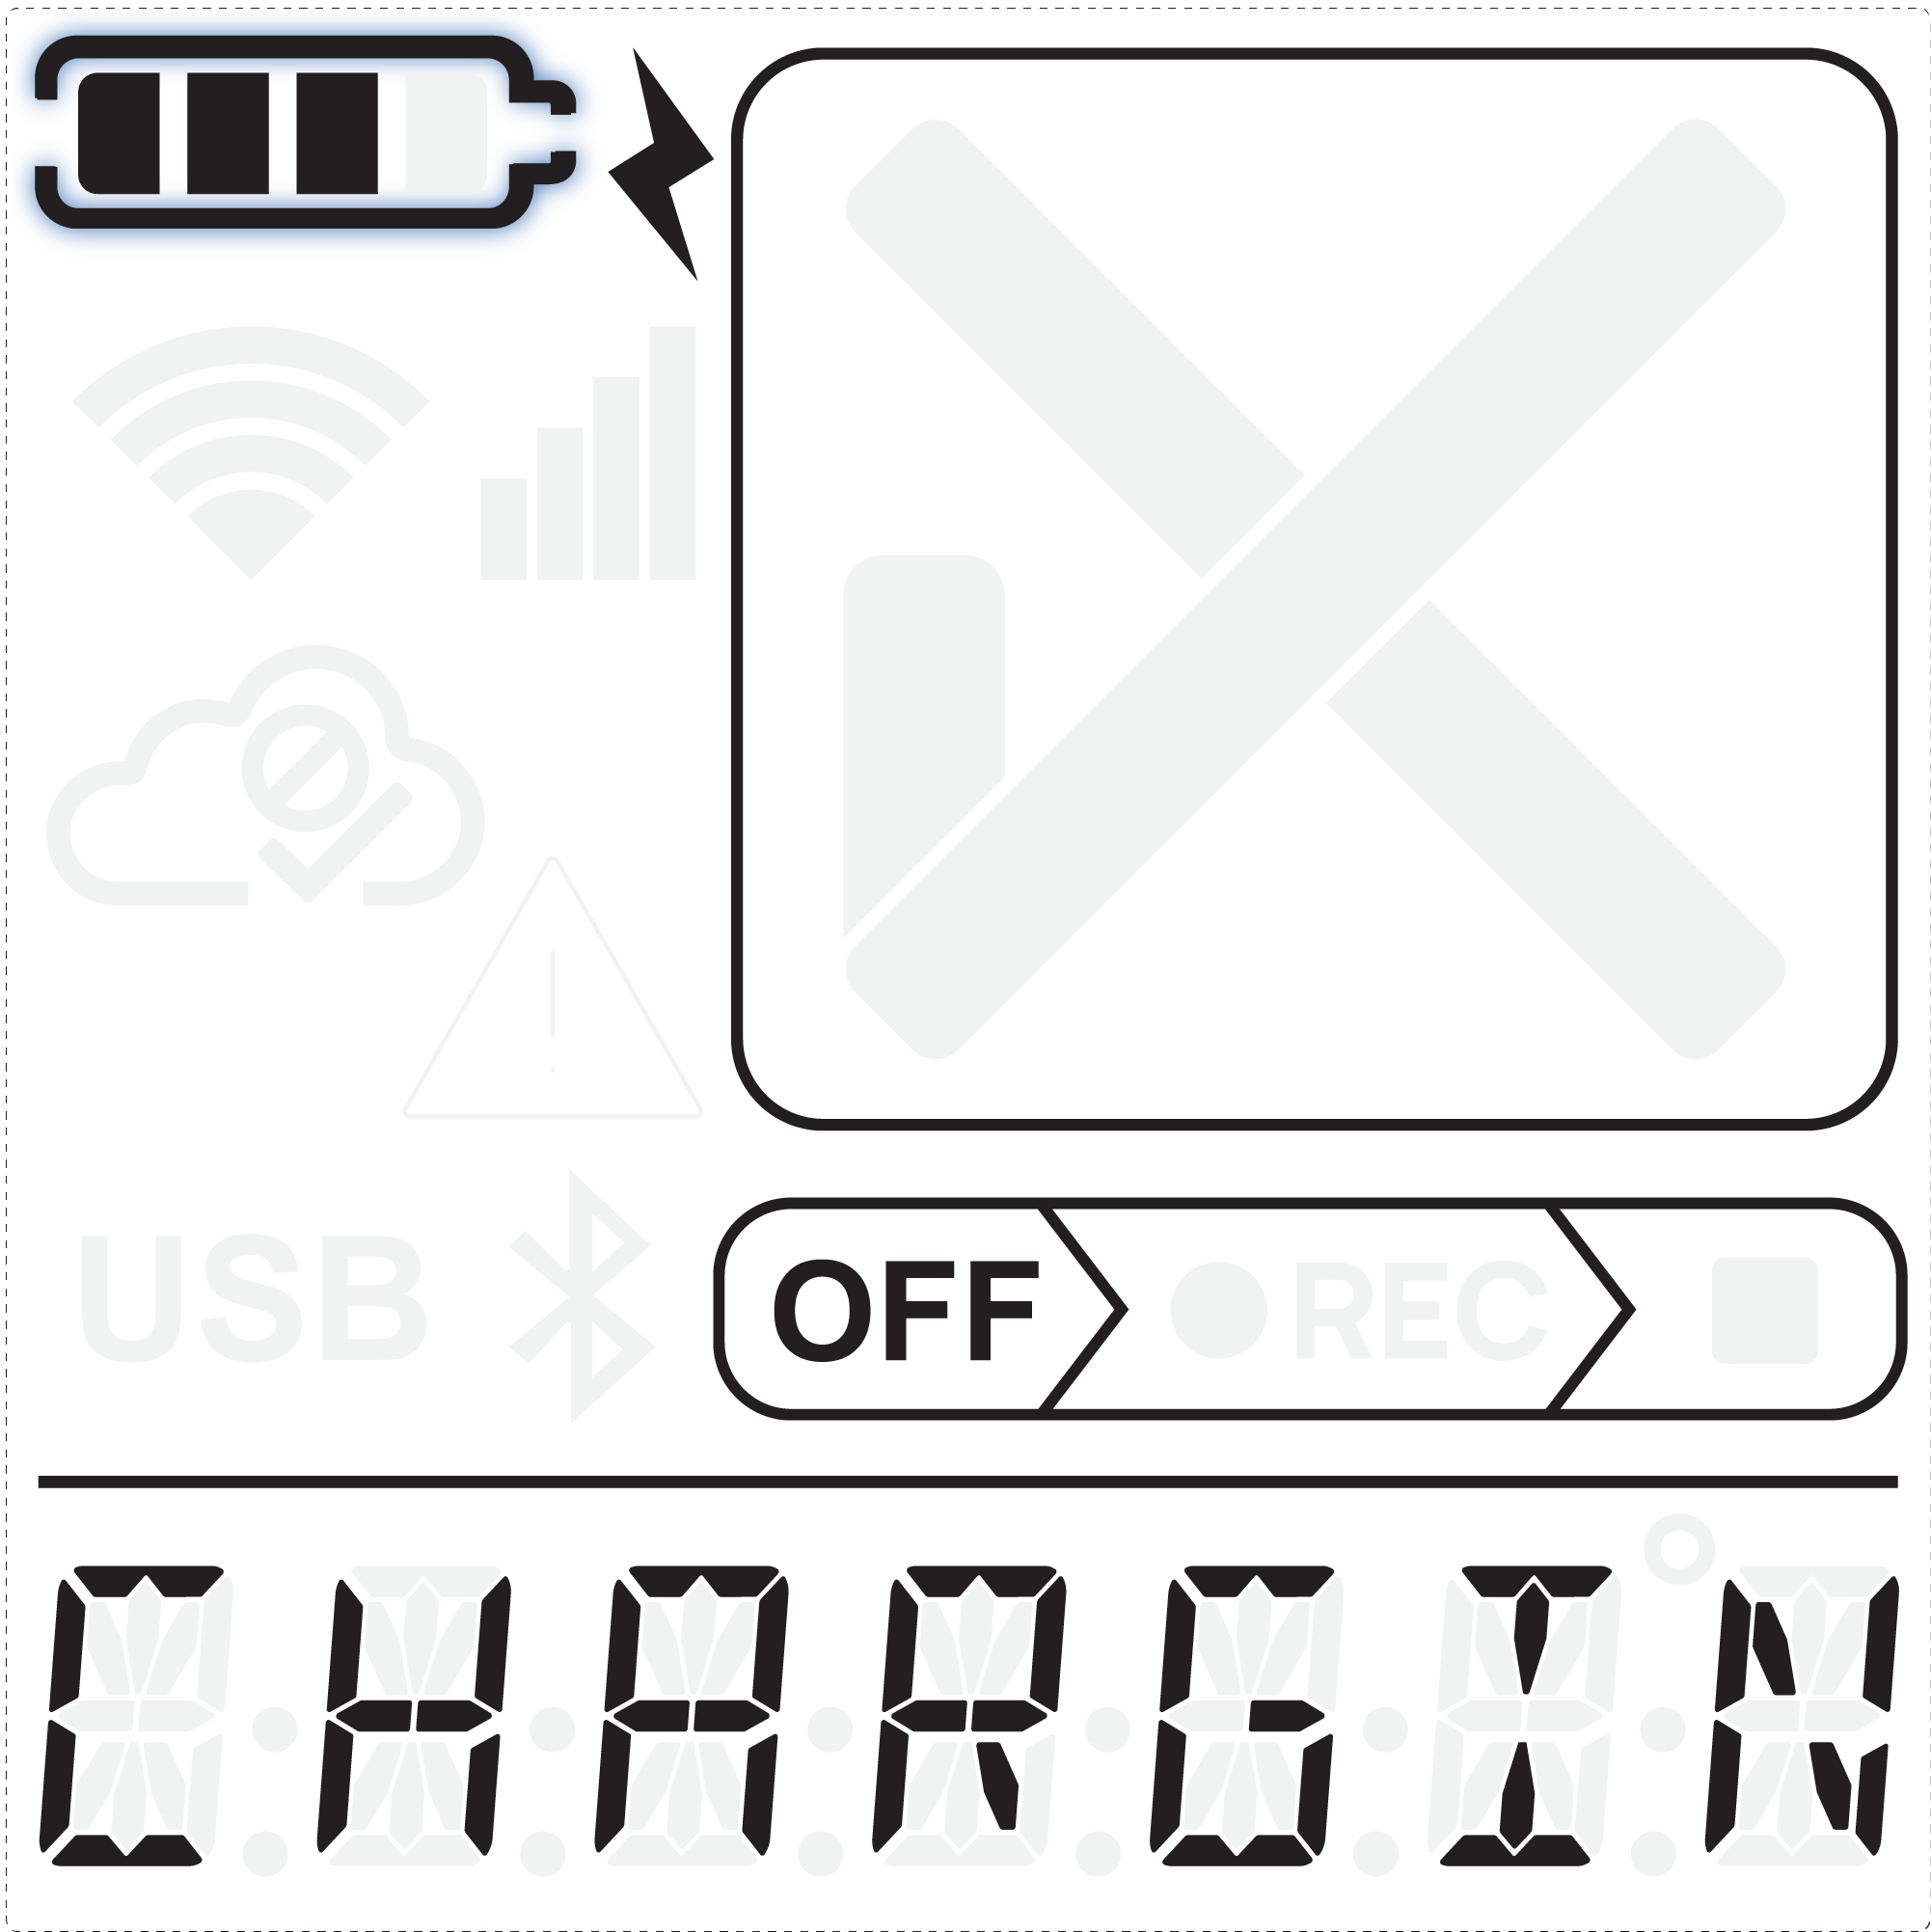 |
The displayed text, combined with the lightning icon and the scrolling battery bars indicates that the device is connected to power and charging. |
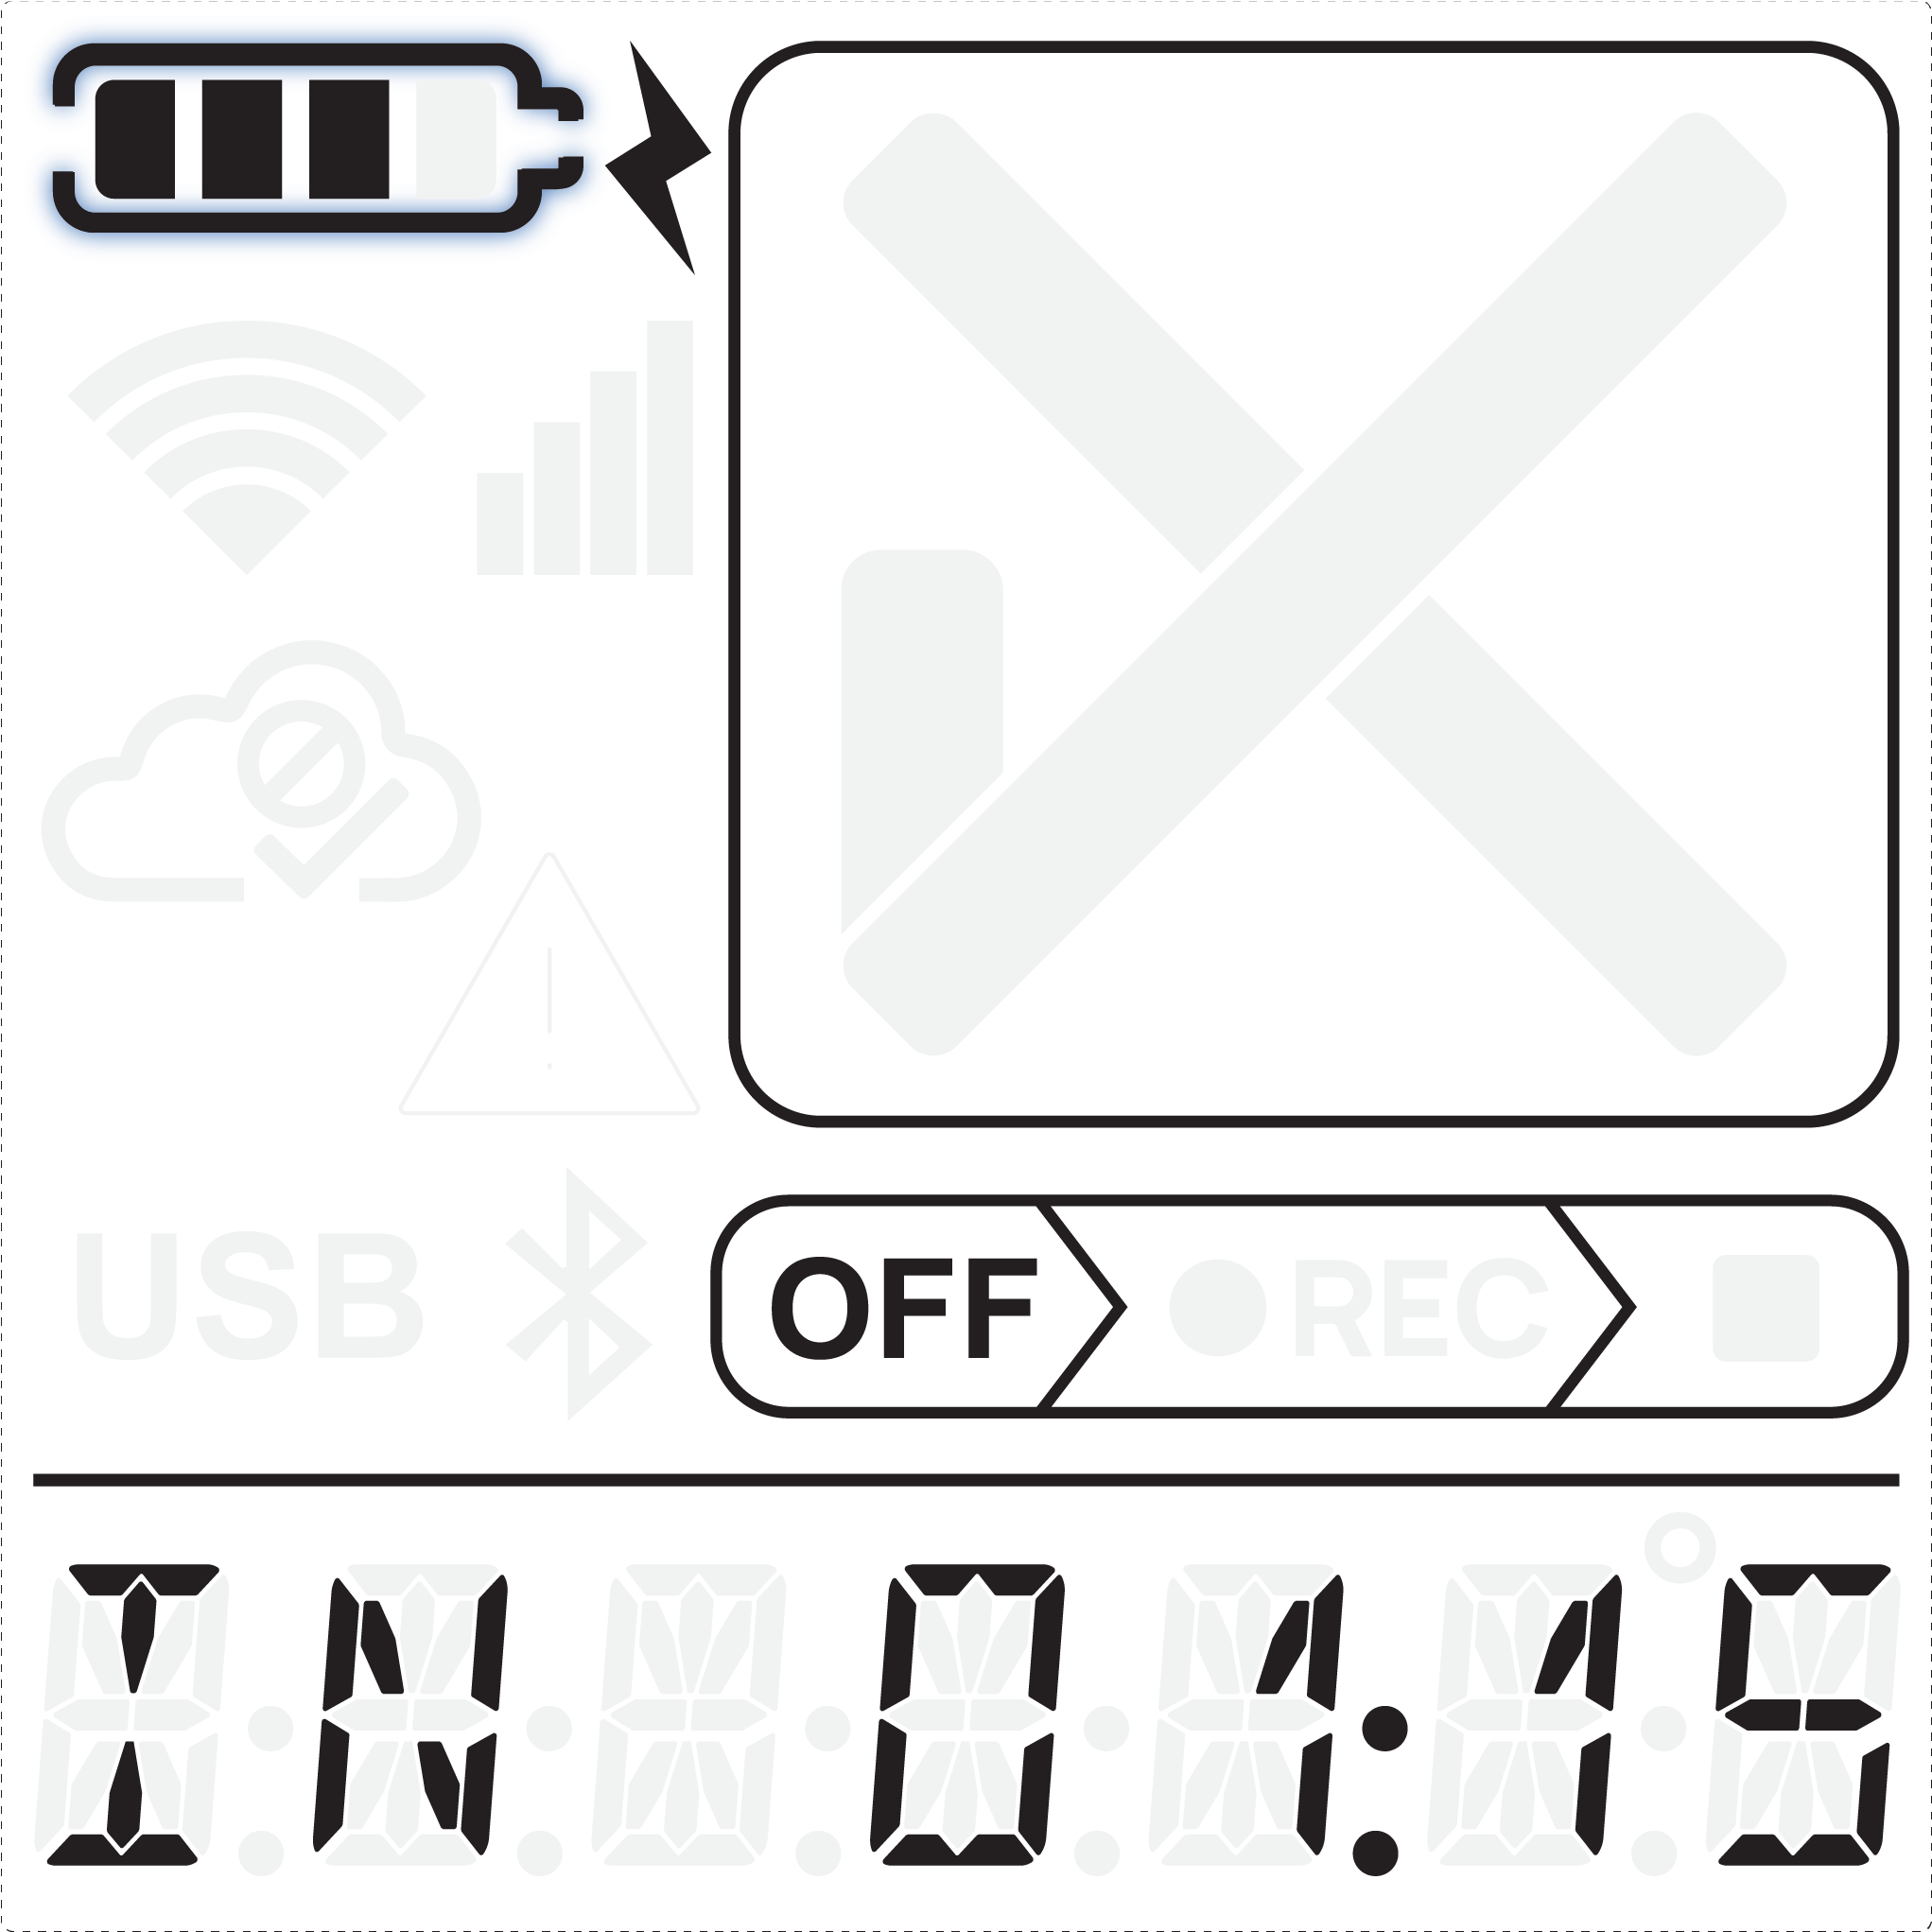 |
The time until the battery is fully charged is indicated on the display. Scrolling text: CHARGING – READY IN 01:23 / COOLING – READY IN 00:12. |
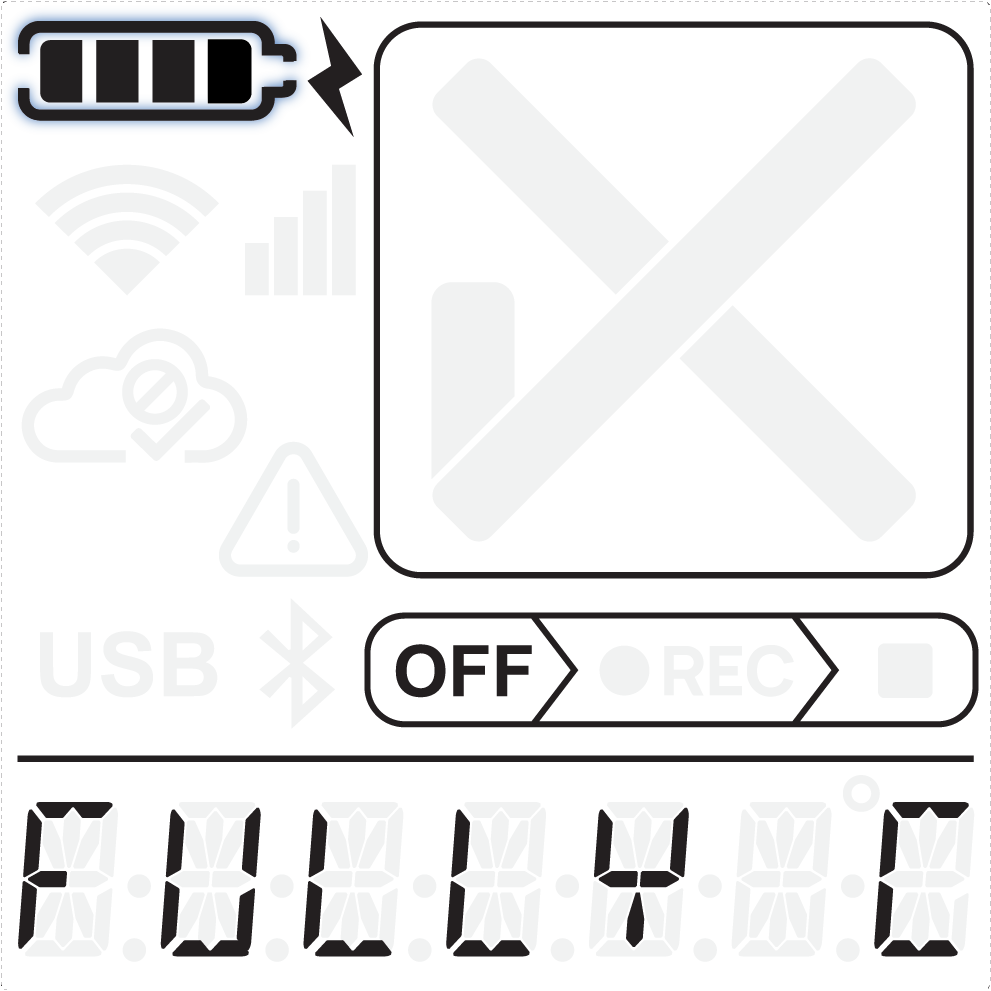 |
Once the battery is fully charged, it will be indicated in the display text, the green LED will light up and all battery bars will be full. Scrolling text: FULLY CHARGED AND READY TO START. |
SmartCharger MINI for SmartMonitor SHIP L and SITE L
With the SmartCharger MINI (available as a separate accessory), up to five devices can be charged at the same time, ensuring fast charging.
Key Feature: Auto Start Functionality (SHIP L only)
When a device is removed from the SmartCharger MINI docking station, the Auto Start feature initiates instant start as soon as the device is unplugged.
| Screen | Information |
 |
The scrolling text on the display indicates the start of the device. |
 |
If you want to stop the process, long press the multifunctional button. The LED light flashes red. |
 |
Once the stop is successful, the devices shows “START ABORTED” on the display. |
Feedback
Copyright © 2025 Berlinger & Co. AG
—
Powered by 
Post your comment on this topic.