
From the task context menu, users can access the Planner, a tool which enables them to create and manage plans for tasks.
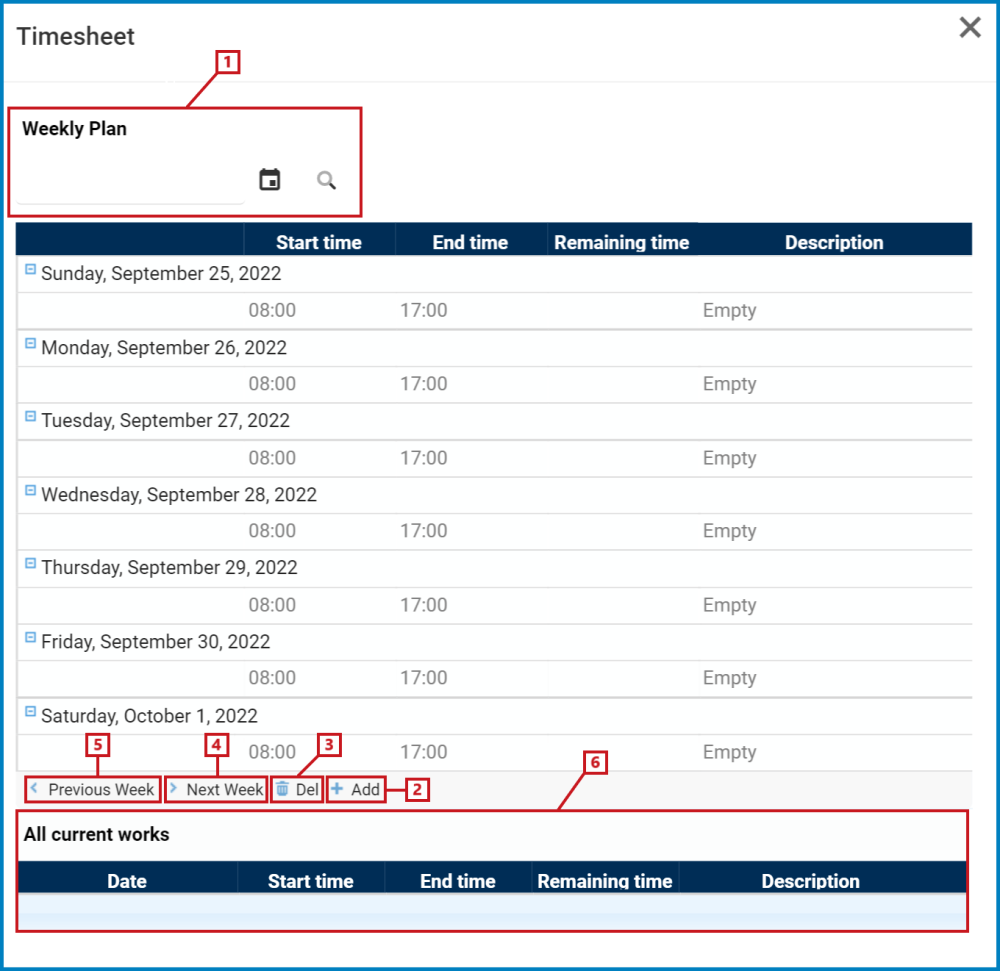
- Weekly Plan: This is a date picker that allows users to input/select the required date.
- This field acts as a search box. Any date inputted in this field will be, upon request, searched for in the grid and retrieved.
- To select a date, click on the
![]() icon.
icon. - To run the search, click on the
![]() icon.
icon.
- To select a date, click on the
- This field acts as a search box. Any date inputted in this field will be, upon request, searched for in the grid and retrieved.
- Add: This button allows users to add a new entry.
- If selected, it will open a pop-up window with the following form:
![]()
- Date: This is a date picker that allows users to input/select the date of the plan.
- Start Time: This is a numeric field that allows users to input the start time.
- End Time: This is a numeric field that allows users to input the end time.
- Remaining Time: This is a numeric field that allows users to input the remaining time—that is, the time remaining to complete the task.
- Description: This is a text field that allows users to input a description of the task plan. It can be expanded to encompass multiple lines.
- By default, the name of the associated task will automatically populate this field. Users, however, can modify the field as needed.
- Save: This button allows users to save the entry.
- It will populate the Timesheet grid in the following fashion:
![]()
- It will populate the Timesheet grid in the following fashion:
- If selected, it will open a pop-up window with the following form:


- Delete: This button allows users to delete an existing entry.
- To delete, select the entry from the Timesheet grid and click on the Delete button. This will remove the entry from both the Timesheet and All Current Works grid.
- Next Week: This button allows users to view the timesheet for the next week.
- Previous Week: This button allows users to view the timesheet for the previous week.
- All Current Works: Tasks that have been assigned a remaining time will be displayed in this field.
- These tasks are considered still in progress/to be done.
![]()
- These tasks are considered still in progress/to be done.
