
1. Contact Tab Page
If the user elects to click next, the application automatically moves to the contact tab page.
2. Check Database
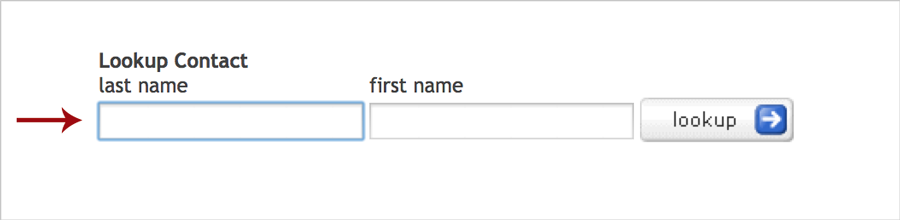
The first step to adding a contact to the location is to check to see if the contact is already in the database. To do this, enter the contact’s first and/or last name and click the LOOK-UP button.
3. Select Existing Contact
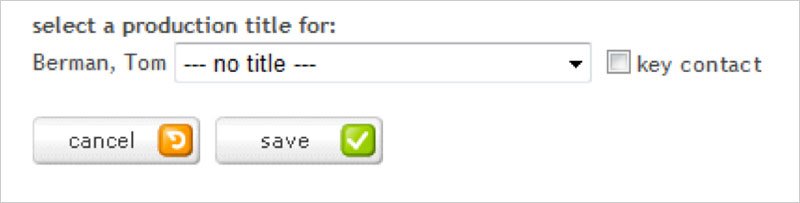
When the look-up button is clicked, a set of results will be returned to you in a new window. If you see the contact that you are looking for, click the green select arrow next to the appropriate name. You will be prompted to provide the production title for this individual for this project. See #7 below for additional explanation.
4. Search Again
If you do not see the contact you are looking for, you can either search again by entering variations of last/first name and clicking the search button.
5. Enter New Contact
If you are entering a contact person’s information from scratch, the only required fields are first name and last name in order to add a new contact record. Adding a contact record here automatically links the contact person to the project and places them into a generic contact database so that you can pull their record up again should they be relevant to another location or project.

6. The Title & Organization Fields
The title and organization are free-form text fields and are not required.
7. The Production Title Field
Unlike the location contacts, project contacts have an additional field called production title which records the person’s title as it is strictly associated with this project. There may be cases where the individual’s title is only appropriate while the production is active, therefore the system records this title and associates it with the contact only for this particular project.
8. The Phone1, Phone2, Mobile, Home, Pager & Fax Number Fields
The phone1, phone2, mobile, home, pager and fax number fields are free-form fields to allow for both US-based and international phone numbers. Please apply appropriate Connecticut-based phone number standards.
9. The Website Field
The website field is a web-oriented field that will automatically be created into a hyperlink once the done or next button is clicked. You do not need to enter in ‘http://’ to ensure that Reel-Scout™ recognizes the hyperlink field. The ‘http://’ will automatically be concatenated to the field value to ensure that the link works when clicked in view mode.

10. The Email1, Email2, Address, City/Town & Zip Fields
The email1, email2, address, city/town, and zip fields are all free-form text fields. Please note that email fields will automatically launch of the user’s subscribed email system (e.g., Outlook) when the address is clicked in view mode.
11. The State/Province Field
The state/province is a free-form field to accommodate both domestic and international addresses.
12. The Notes Field
The notes field is a free-form text field with a 4000 maximum character limit. This field should be used sparingly for non-critical data regarding the contact.
13. The Contact Type Field
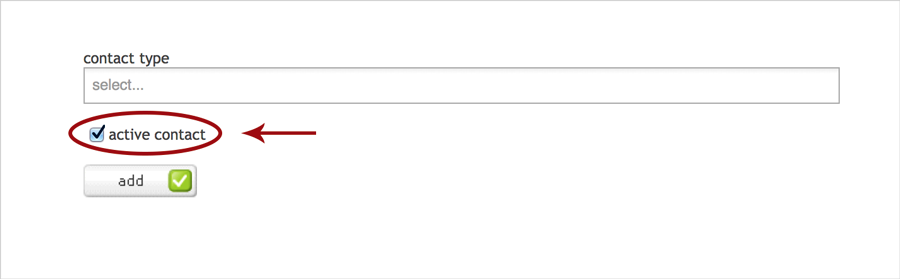
The contact type field is a multi-valued selection list that includes values customized for the Film Office. These contact types are used to categorize and group various types of Film Office contacts and are helpful when searching.
14. The Active Contact Check-Box
The active contact check-box defaults to being checked. This field indicates whether this contact person is still effectively in the role/position with the designated organization. It is recommended that all contacts remain in the database for historical point-in-time referencing.
15. Click Add
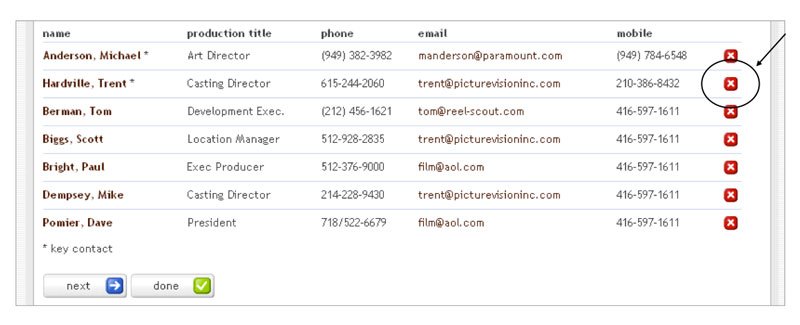
Once you are finished with entering all the data on the contact person, click the add button. You will notice that the contact now appears in a listing below the look-up contact section. A red ‘X’ button appears beside the contact name to allow the user to remove the relationship between the project and this particular contact.
16. Click Next or Done
Click on the next or done button once you have completed all the data entry for the contact. Clicking next moves the user to the package tab of the project entry. Clicking done moves the user back to the Browse project listing.
Laissez votre avis sur ce sujet.