
All project records can be exported out of Reel-Scout™ RS Studio (“RS Studio”) so that your studio can efficiently create reports and analyze data. Your project information can be exported from RS Studio as an Excel spreadsheet, making data transfer to other applications fast and simple.
Here’s a quick video tutorial on How to Export a Project Report:
Begin by searching for the project or set of projects whose information you wish to export. For more information, see Browsing Projects and Searching for a Specific Project.
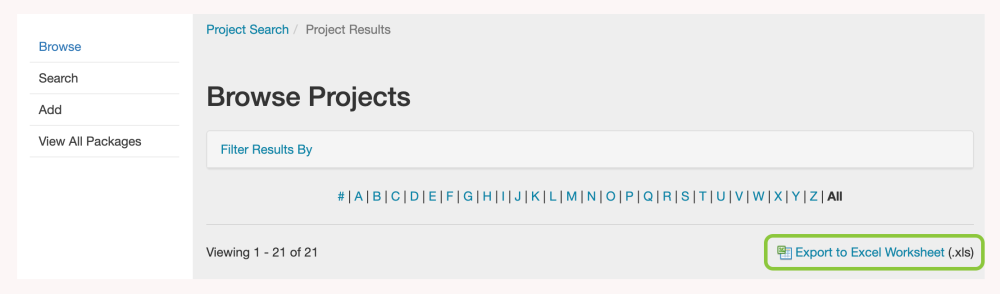
1. Select the Export Link
Locate the Export to Excel Worksheet (.xls) link on the top right-hand portion of the Browse Projects page. Click on this link to open a dialog box.
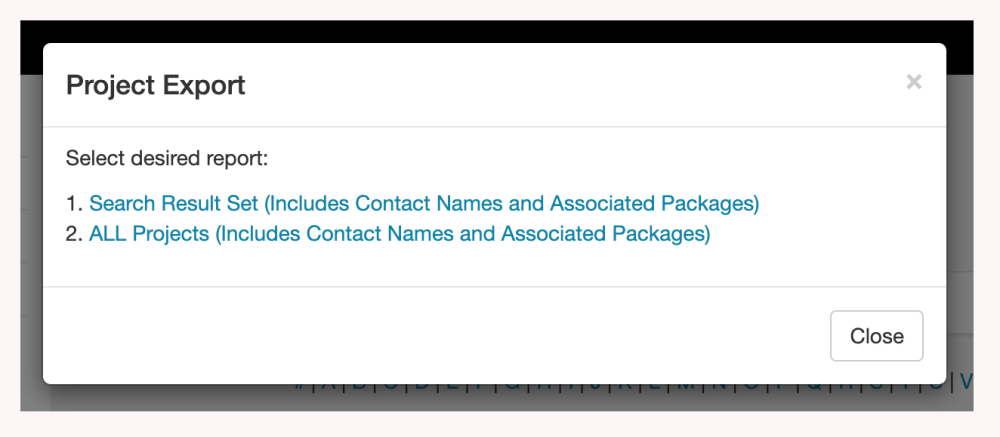
2. Project Export Dialog Box
Once you have selected the Export to Excel Worksheet (.xls) link, a dialog box will appear. The Project Export box will offer you two export options: You can export all of your studio’s project, or you can export only the results of your search. Click on the option that is right for the task that you are working on.
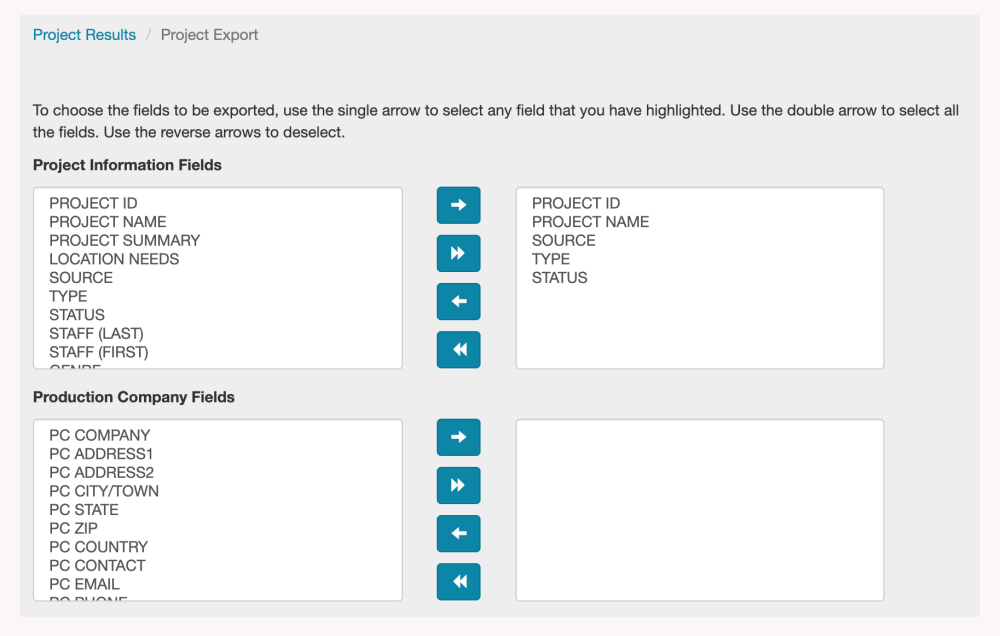
3. Selecting the Data to Export
Because project files contain a voluminous amount of information, exporting the files in their entirety is not recommended. The numbers of columns and rows on the resulting spreadsheet would quickly prove to be unmanageable. On the Project Export page, RS Studio offers you the opportunity to customize the data sets that will appear in your Excel spreadsheet. The boxes on the left-hand side of the screen contain all of the possible data selections, organized into general categories. The boxes on the right-hand side of the screen contain the data elements that will be exported into your spreadsheet. Commonly exported fields have been pre-entered by RS Studio to save you time.
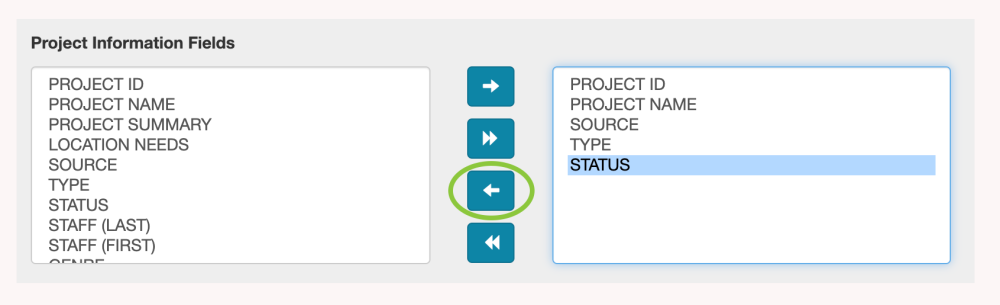
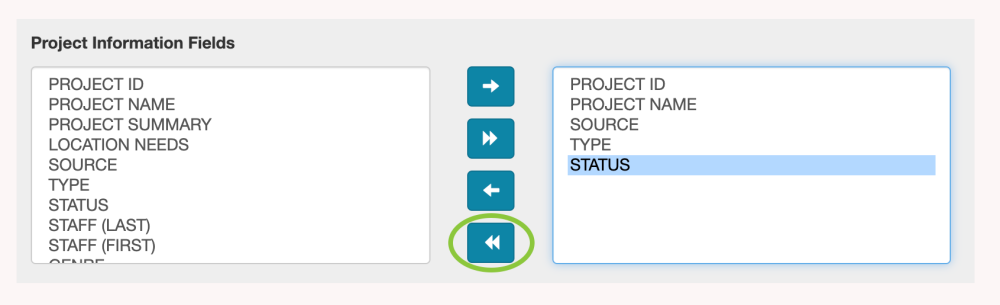
a. Deleting Fields
To delete a single field from your export, click on the data type that you wish to remove. Once the data type is highlighted in blue, select the arrow pointing to the left. This field will not appear on the spreadsheet that contains your exported data.
To delete all of the data in a box, click the double triangle pointing to the left. There is no need to highlight any of the data types in the export column to accomplish this task.
b. Adding Fields
To add a single field from the available options to your export, click on the data type that you wish to add. Once the data type is highlighted in blue, select the arrow pointing to the right. This field will now appear in the Excel worksheet that is downloaded.
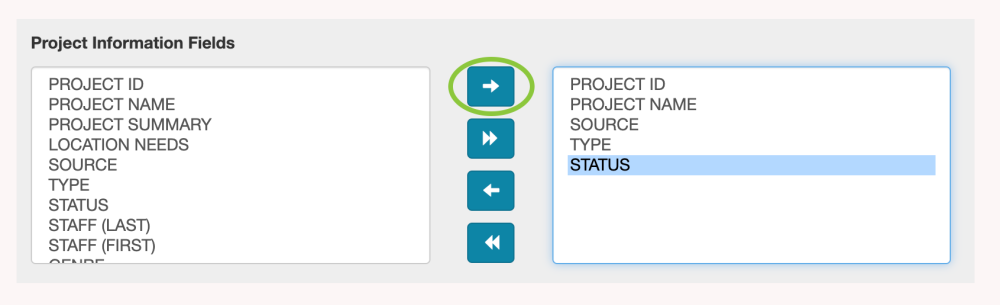
To add all of the data types in a box to your export, click the double triangle pointing to the right. There is no need to highlight any of the data types in the column of available fields to accomplish this task.

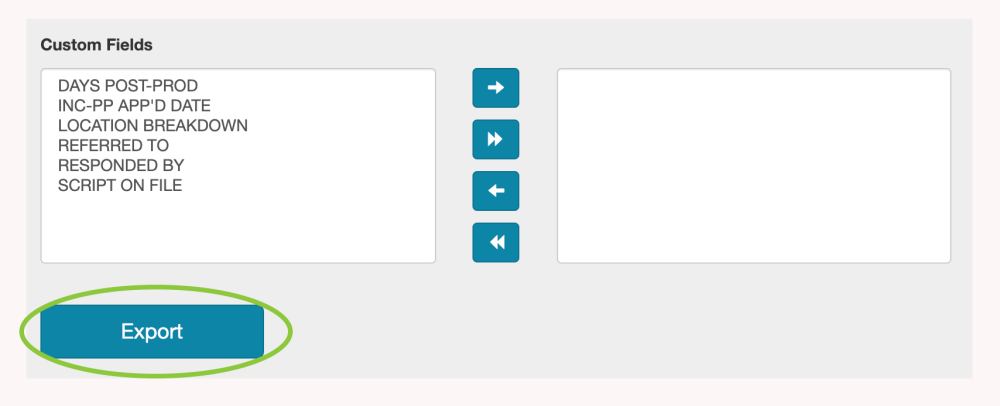
4. Export & Save
When you have selected the data fields that you wish to export, click the Export button at the bottom of the Project Export page. The download will begin automatically. Be sure to save the file to your desktop so that you can manipulate your spreadsheet to meet your requirements. Changing the data found in your Excel spreadsheet will not affect the information in RS Studio.
5. Data in Excel
When the file is opened in Excel, data will appear in pre-defined columns that are self-explanatory. Any manipulation or change of the data in the Excel file will not impact the data in RS Studio.

Contact Reel-Scout
If you experience any problems or errors, please fill out this form. We will get back to you shortly.
Post your comment on this topic.