
- To add server tags in bulk, click the Add Server Tag button.
The Add Server Tag screen will appear. This screen provides access to all of the existing server tags, and allows you to add new tags, any of which may be assigned to one or more server.
- If you want to add a tag, first click into the Server Tag Name field. A list of existing tags will appear.
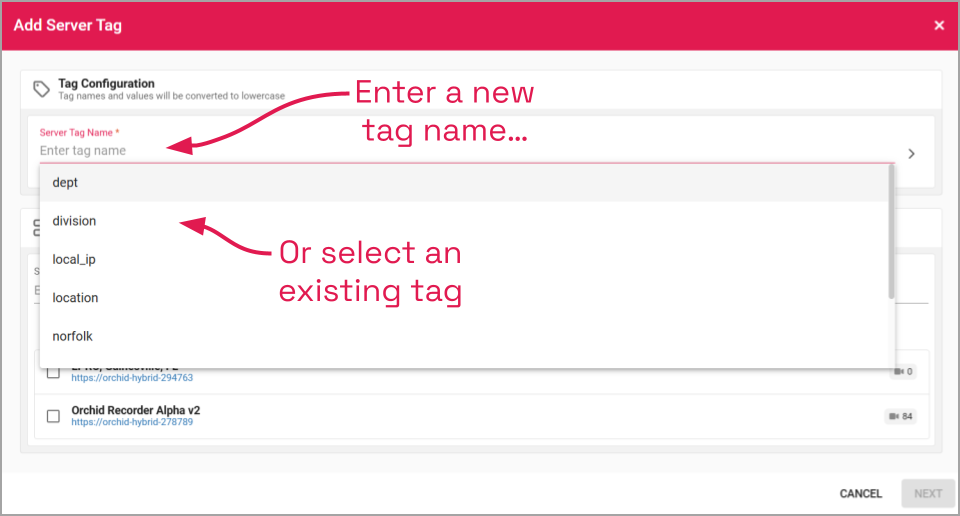
- If you want to manage an existing tag, click on the tag in the list. (Please note: If you want to edit an existing tag, IPConfigure recommends closing this dialog and selecting the tag from the table.)
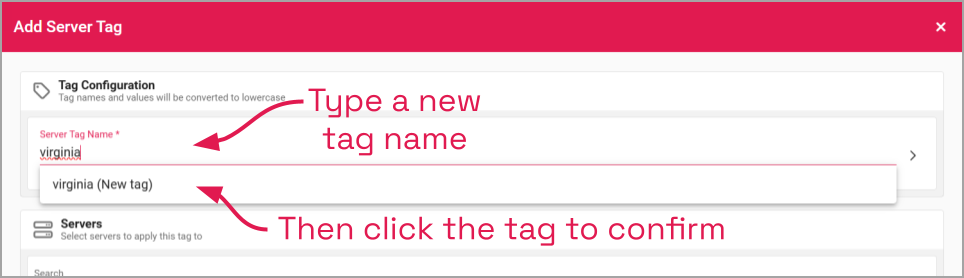
- To add a new tag, type the new tag name into the Server Tag Name field.
- Then click on the new tag name to confirm it.
- If you want to add a value to the selected tag (which will further define the tag), click the expand icon to the right of the Server Tag Name field.
- Then type the value in the Server Tag Value field.

- Now use the lower part of the dialog to select the server (or servers) to which you want to apply the selected tag.
- If you want to add this tag to all of your servers, mark the Select all… checkbox.
- You may use the Search field to find a specific server. (This is especially helpful when you’re working with a large number of servers.)
- Enter the Orchid Recorder name or its IP address into the Search field.
- If the desired server appears, click the checkbox to select it.
- You may also use the server list at the bottom of the screen to select your server (or servers).
- Mark one or more checkboxes to select your servers.
- Once you are done with tag and server selection, click Next.
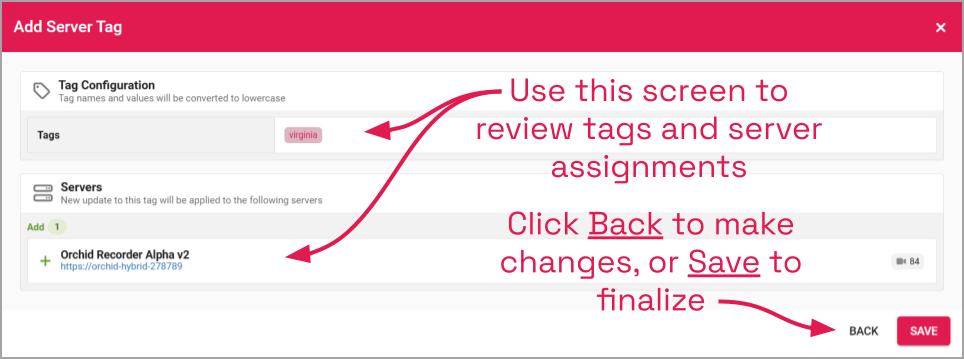
This screen displays the tag you have selected, and all of the servers to which the tag will be applied. Use this screen to review your choices.
- If you need to make changes, click the Back button.
- When you are done making changes, click the Save button.
- The system will indicate if the addition is a success. Click the Close button.
Post your comment on this topic.