
- Once you select the ONVIF type, enter a name for the subscription. You may want to use a name specific enough that you can easily identify it in the list (such as Receiving Entrance Motion).
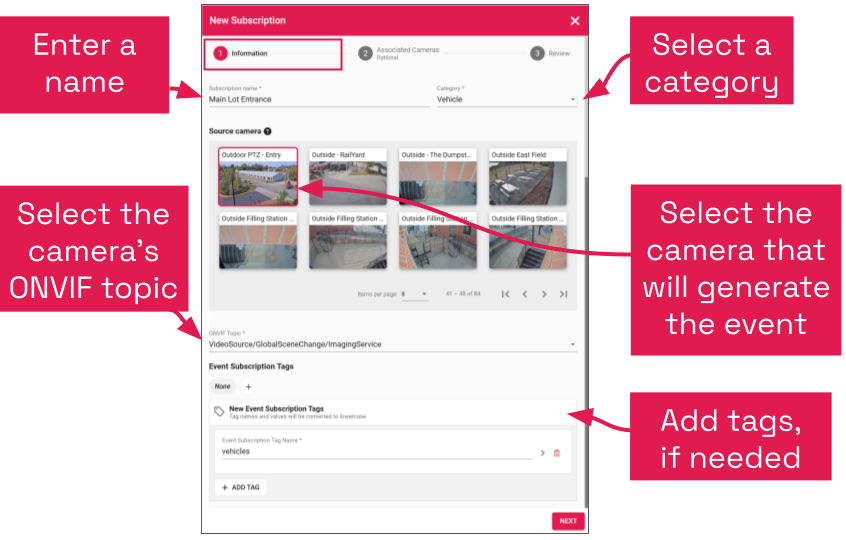
- Next, use the drop-down list to select a category. The category will provide additional information about the subscription and will improve sorting. (Refer back to the earlier topic for category definitions.)
- Next, you need to select the source camera. This is the camera that will generate an event whenever the ONVIF topic is triggered.
- Click on the source camera thumbnail to select it.
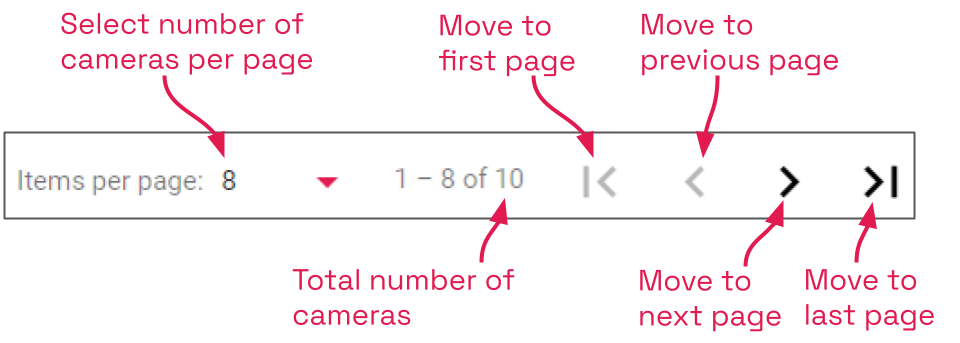
- You may need to move to another page to find the camera you want to use. (Use the paging toolbar, if needed.)
- Below the cameras, use the drop-down list to select the ONVIF topic. The drop-down list should include all of the data points available from the selected camera.
- Select the ONVIF topic that will trigger the event.
- To add tags (available with Orchid Recorder versions 24.9 and later), click the + icon under Event Subscription Tags.
When the New Event Subscription Tags section appears, you will have the ability to assign a new or existing tag to this subscription. (All of the subscription tags that have been created on this Orchid Recorder will appear in a list for easy selection.)
- To add a new tag to the system, click into the Event Subscription Tag Name field.
- Type the new tag name into the field.
- Click on it to select it.
- If you want to add a value to this tag (which will further define the tag), click the expand icon to the right of the Event Subscription Tag Name field.
- Then type the value in the Event Subscription Tag Value field.
- If this is the only tag you need to add, move to step 10.
- If you want to add another tag to this subscription, click the Add Tag button.
- To select an existing tag, click on one of the tags in the list.
- If you want to add a value to this tag (which will further define the tag), click the expand icon to the right of the Event Subscription Tag Name field.
- Then type the value in the Event Subscription Tag Value field.
- If this is the only tag you need to add, move to step 10.
- If you want to add another tag to this subscription, click the Add Tag button.
- If you want to add a value to this tag (which will further define the tag), click the expand icon to the right of the Event Subscription Tag Name field.
- To remove a tag from the selected subscription, click the X to the right of the tag name.
- To clear a tag from the list, select the tag, then click the Trash Can icon to the right of the list.
- When you are done with the subscription Information, click Next.
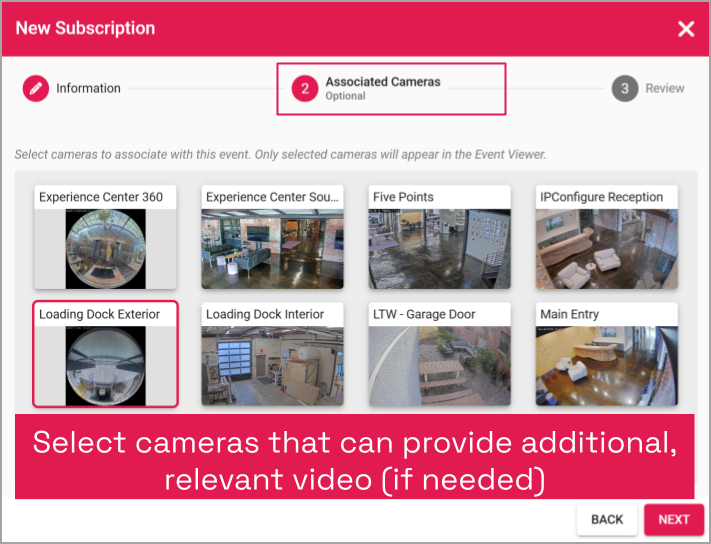
- Now, you may select one or more associated cameras. Consider selecting cameras adjacent to the source camera that may provide video relevant to the event.
- The source camera will be preselected. (This camera may be de-selected, if desired.)
- Having associated cameras is optional, but an event notification with video is a win-win.
- Video available in the Event Viewer will be limited to the cameras you select here.
- When you’re finished selecting cameras, click Next.
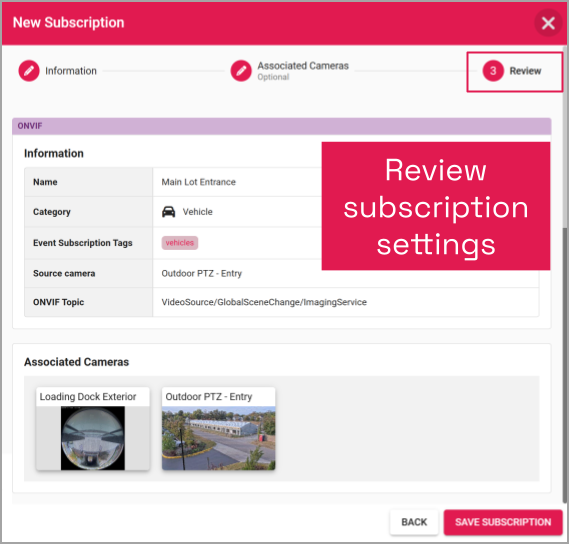
- The last step is to review your selections.
- If you need to change anything, click on the step you want to return to (Information or Associated Cameras).
- When you are satisfied with your settings, click Save Subscription. The new subscription will be added to the Event Subscriptions list.
Post your comment on this topic.