
| |
This is the Add icon. |
- Click the Add Permission Group button in the top-right corner of the Permission Groups list. A New Permission Group screen will open.
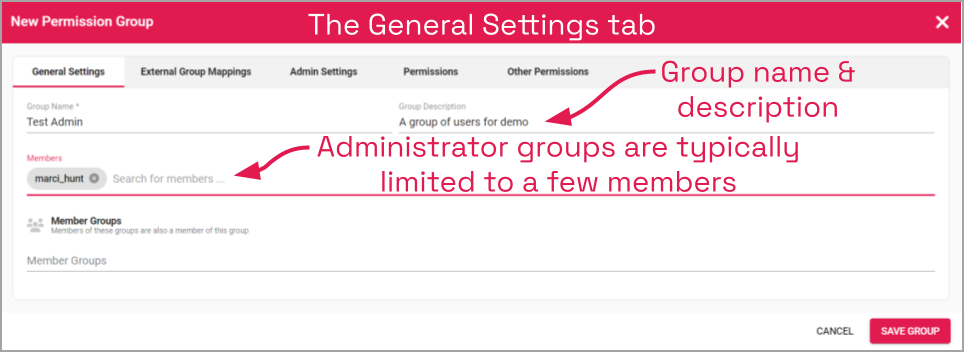
The General Settings Tab
- Enter a name and a description for the new Permission Group in the Group Name and Group Description fields.
- In the Members field, select a member for the new Permission Group by clicking on Search for Members to open a drop-down list of Orchid Hybrid/Fusion VMS users. Find and click on a member. As soon as you select a member, another list will appear so you can make another selection (if needed).
- Press Esc if you don’t need to make another selection.
- To remove a member, click the X to the right of the member name.
- If members of this Permission Group will include other Permission Groups, click on Member Groups to open a drop-down list of existing Permission Groups. Find and click on a Permission Group. As soon as you select a Permission Group, another list will appear so you can make another selection (if needed).
- Press Esc if you don’t need to make another selection.
- To remove a Permission Group, click the X to the right of the Permission Group name.
- If you need to pull one or more users from an external system, use the External Group Mappings tab for that.
- Once all of your members are selected, click the Admin Settings tab to continue configuring this group.
The Admin Settings Tab
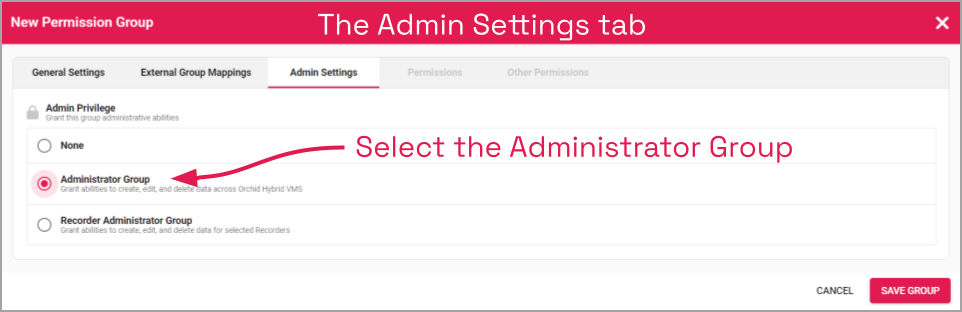
- Since this Permission Group is an Administrator group, mark the Administrator Group radio button. In addition to all-server access and video abilities, this Permission Group will be able to do things such as add and delete Orchid Recorders, Users, and Permission Groups. (No other settings are required for an Administrator group. You will notice that the other two Permissions tabs are now grayed out.)
- Once all settings are complete, press the Save Group button.
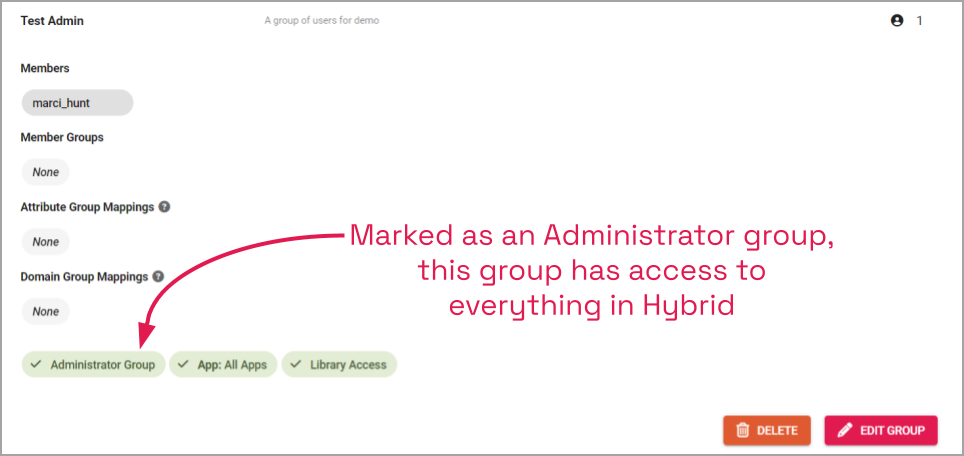
Here is a view of the new Permission Group once it has been saved.
Post your comment on this topic.