
To make it easier for EPC users to do record management, they can now create records of their documents in the Documents module. This feature allows users to create records of a folder of documents, filter the documents based on its attributes and also edit the attributes that the users wants in its records.
Users with read published/latest security permissions can also create records of documents if they are a Modeler and have write permission in at least one folder. This allows users to create copies of templates, for example, in the hierarchical tree where they have write or delete permission, so that they can edit it according to their needs.
To use this feature, please follow the steps below:
Creating Records of a Document Set (with Write, Delete or Env./System Admin Permission)
1. Navigate to the Document module, select a set in the documents tree and click on the Details page.
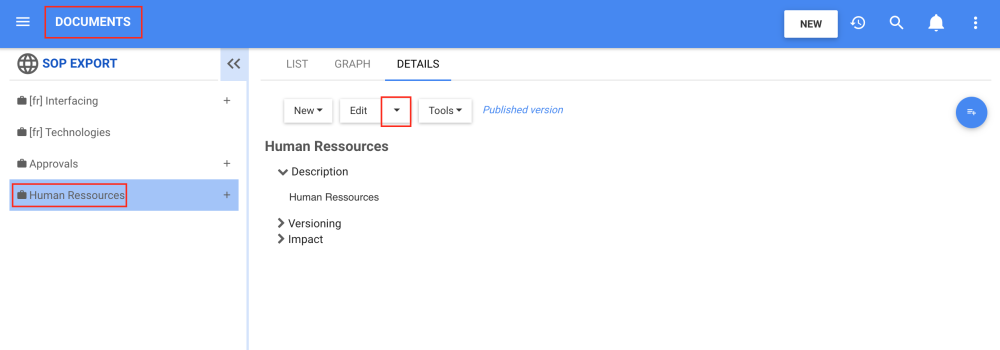
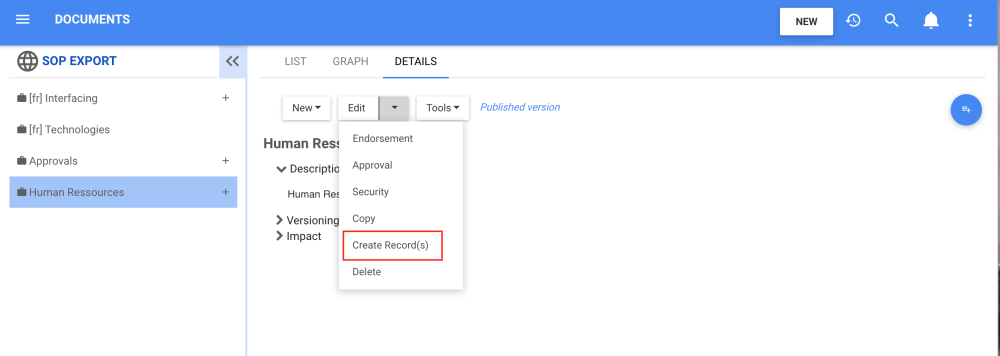
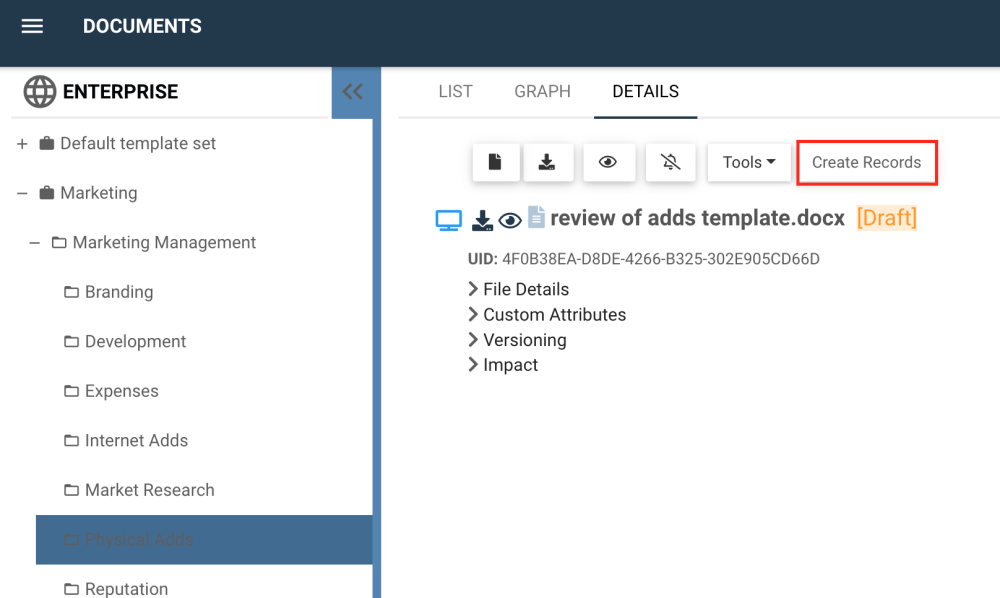
2. Click on the arrow next to the Edit box. Once the extendable list appears, click on Create Records
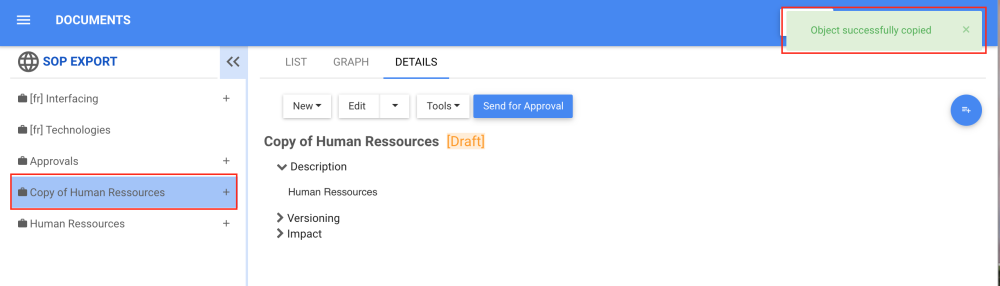
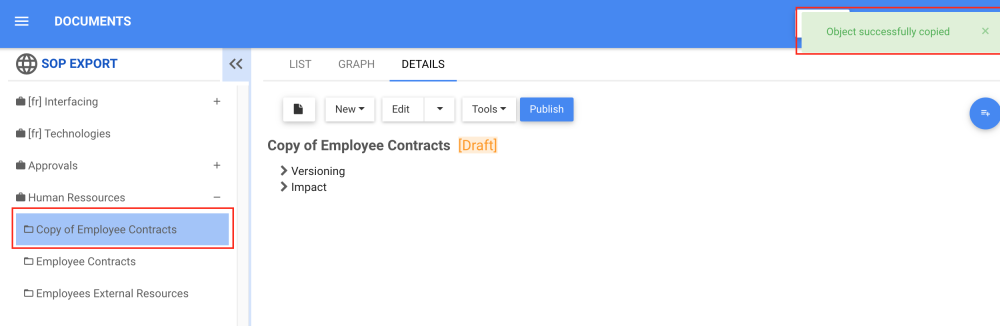
3. The record will be created and the user will receive a confirmation message. Please note that this operation can take a few moments if the file is large.
Creating Records of a Document or Document Folder (with Write, Delete or Env./System Admin Permissions)
1. Follow the same steps as the Document Set, but select a Document or Document Folder.
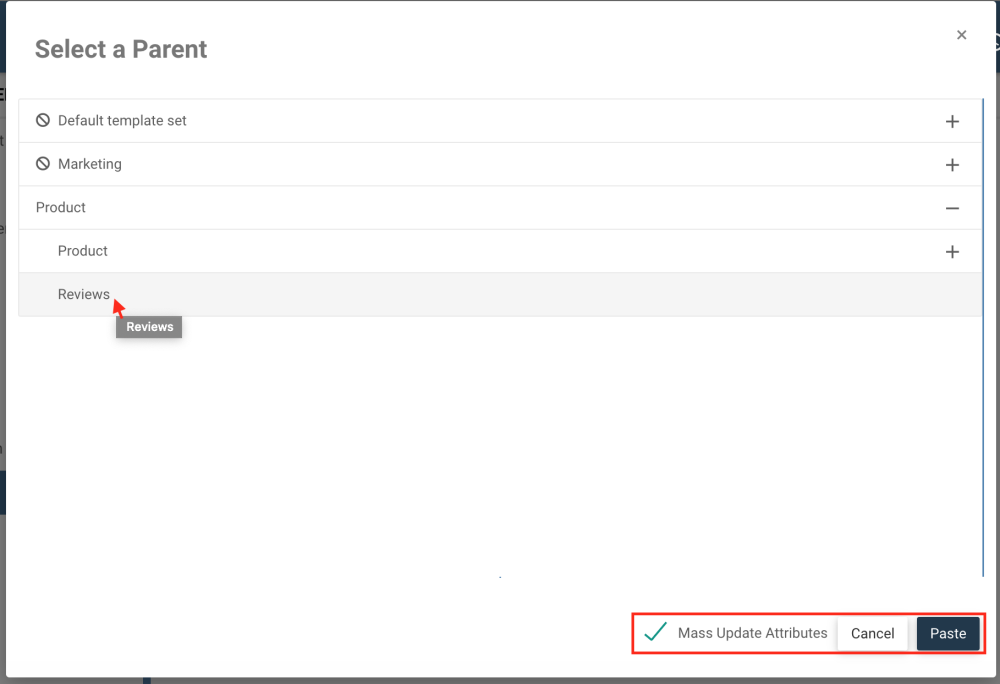
2. After Clicking on the Create Records button, the user will be prompted with the Select a Parent window. There, the user will choose where to create the Document Folder, if they want to filter the copy and if they want to mass update the attributes.
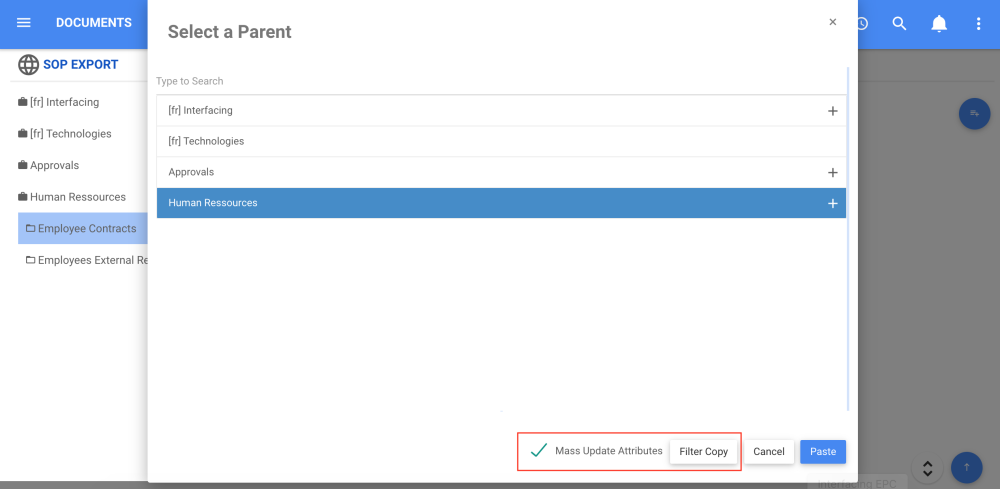
3. The Filter by Attributes Values form is the same as the attributes form. There, the user can select the attribute to filter the document with those characteristics.

4. If the Mass Update Attributes is not selected, then the objects are successfully copied.

5. If the Mass Update Attributes is selected, then the form Add attributes to copied objects opens after saving. There, users can edit the attributes of the copied document and save them.
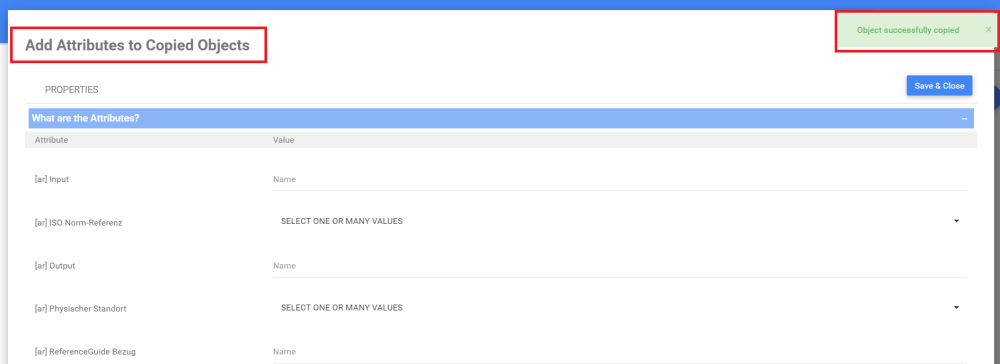
6. After editing the attributes, users receive the message “All custom attributes were modified successfully”
Creating Records with Read Latest/Published Permissions
1. Navigate to the desired document’s Details page.
2. Click on the Create Record(s) button.
3. You’ll be prompted with the same “Select a Parent” window as mentioned above but you’ll have this icon:  on sets or folders to where you do not have the “Write” permission. You can create your records anywhere else. Next, choose if you want to mass update the attributes (mentioned above) and click paste when ready. If you chose to update the attributes, the Filter by Attributes Values form will open.
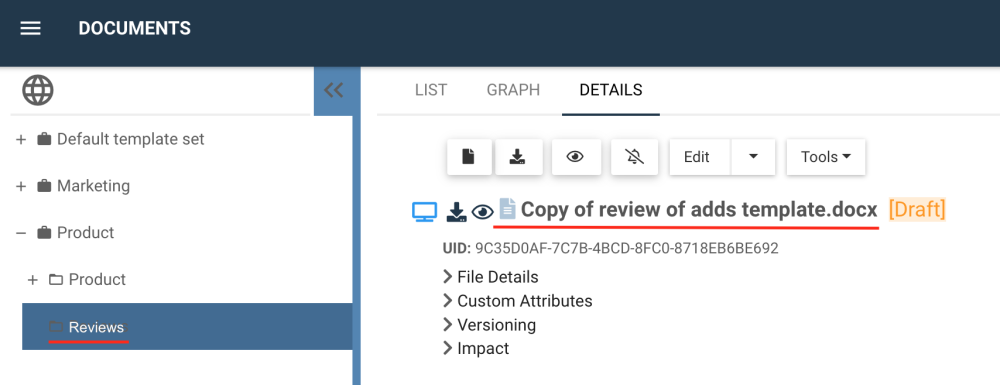
4. You’ll automatically be redirected to the copy you created. Here, you can edit the document as desired.
Need more help with this?
Visit the Support Portal