
The primary use case for the document archival feature involves integrating the provided code into a post-form action, automatically triggering archival upon form submission.
Before diving into the step-by-step instructions for this use case, please make sure that you have the necessary prerequisites in place.
- Prerequisites
- Application: Ensure that you have created an application.
- For information on how to create an application in the Designer program, click here.
- Starter Form with File Attachment: Ensure that you have created and designed the initial form for your workflow. This form must include a file attachment control, enabled at the applicable stage of the workflow.
- For information on how to create and design a form in the Designer program, click here.
- Application Workflow: Ensure that you have created and designed a process or workflow for your application. Your workflow should include a start object, at least one human state, an end object, and events linking these components.
- For information on how to create and design a process in the Designer program, click here.
- Form Behaviors: Ensure that you have configured form behaviors for each human task in your workflow.
- For information on how to create form behaviors in the Designer program, click here.
- Form Template: Ensure that you have assigned a template for the relevant form behaviors.
- Application: Ensure that you have created an application.
To implement the primary use case, follow these steps:
Step 1 – Create Post-Form Action
- Launch the Designer program and log in.
- From the Application Tree, navigate to Business Logics > Actions > Post-Form Actions (double-click to open). This will display the Post-Form Actions tab.
- In the Post-Form Actions tab, click the button in menu bar corresponding to the action type you need:
![]()
- For non-starter forms: Click New Form Post-Action.
- For starter forms: Click New Starter Form Post-Action.
- In the Post-Form Action Properties window:
![]()
- Provide a name and title for the post-form action.
- Select the Active checkbox.
- Select the form entity associated with the relevant form.
- Click OK to save the post-form action and close the window.


Step 2 – Launch Code Designer
- Launch the Code Designer for the post-form action by either:
- Selecting the post-form action and clicking the Edit Code button from the menu bar.
- Right-clicking on the post-form action and choosing the Edit Code option from the context menu.
![]()
Step 3 – Add, Build, & Save Code
- In the Code Designer, input the following code snippet:
var errors = new List<string>(); if (bpmAppService.BPMSServices.EPCService.Login(out errors)) { bpmAppService.BPMSServices.EPCService.ArchiveTemplateWithAttachments("EPCFolderID", new List<string> {domainObject.FileAttachmentAttribute}, domainObject.ReferenceID); }![]()
- Click the Build button to compile and check for any errors.
- Save the code and close the Code Designer.

Step 4 – Link Post-Form Action to Form Behavior
- Navigate to Forms > Form Behavior (double-click to open). This will display the Form Behavior tab.
- Inside the Form Behavior tab, double-click on the form behavior for the form to which you want the feature applied. This will open the Form Behavior Properties window.
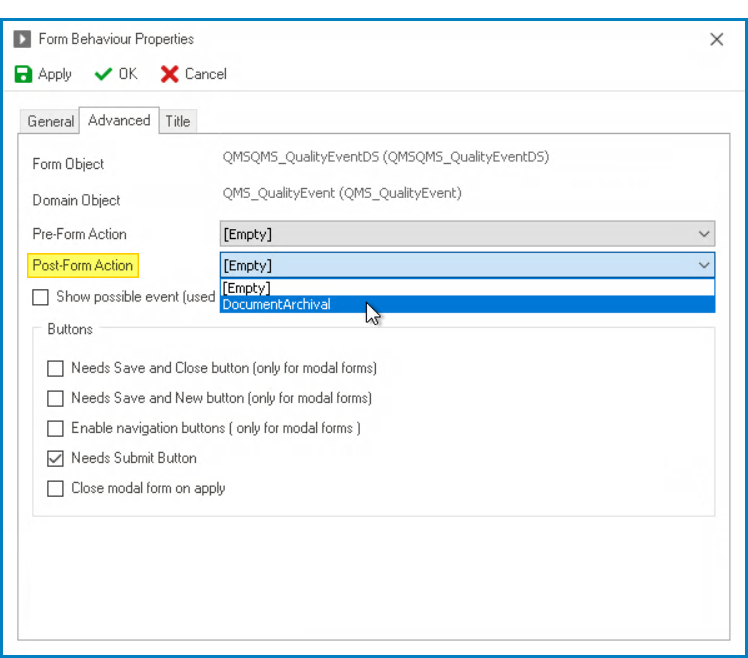
- In the Advanced tab of the Form Behavior Properties window, select the post-form action from the Post-Form Action dropdown.
![]()
- Click on the OK button to save your changes and close the window.
Step 5 – Deploy Application to Web
- In the menu bar of the Designer program, click on the Deploy button to deploy the application. This action ensures that the latest changes, including the configured post-form action, are accessible on the web.