At the top left of the page are the main navigation menu options.

The SELECT button lets you navigate back to the Project Selection page, or change configuration files (if you have more than one stored).
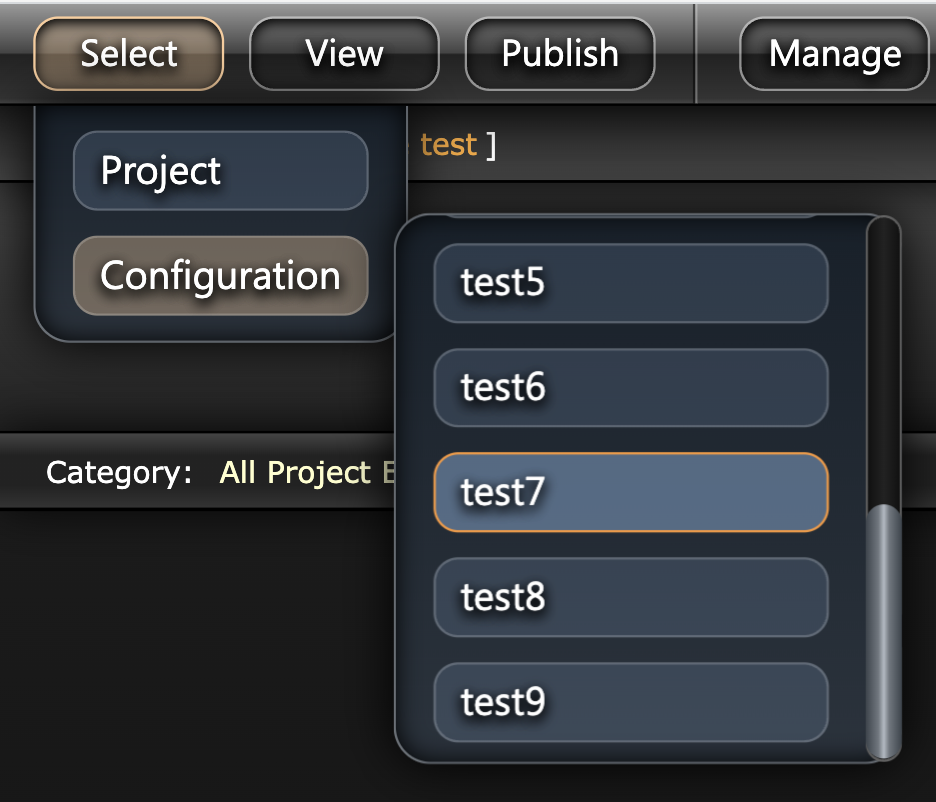
If you have multiple configuration files, the selected configuration file is displayed by the light blue highlight (see image to the right). Select a different configuration file to change the layout, heading names and quick insert option lists. The default configuration is shown by an orange outline. You can change the default configuration anytime in Configuration Mode.
 The
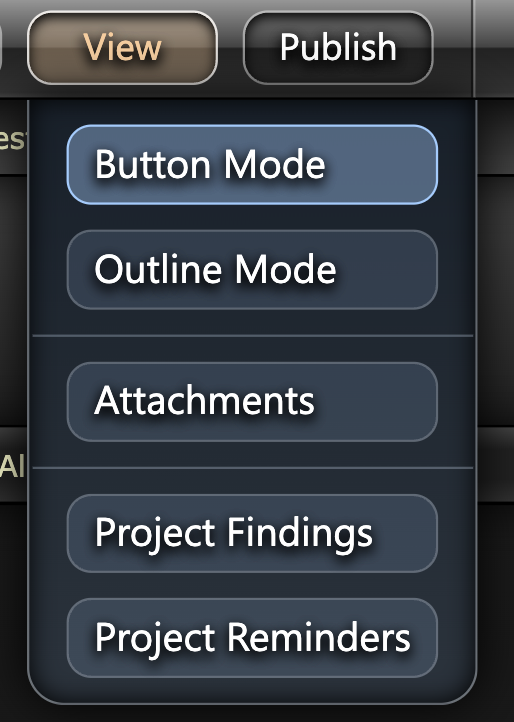
The VIEW menu lets you choose the page you wish you view.
The primary options here are the Button View and the Outline View. Both can be used to build your survey report. I would suggest the button view is most applicable when jumping between different sections of the report to add information (as you would onboard a boat).
The Outline View is most useful when working at a computer and your entries may be made in a more linear fashion (moving from one heading to the next down the page). These viewing ‘modes’ can be reached in several ways (under the view menu, at the exit menu, etc.) so you can choose to work in whichever view most suits your workflow.
Also in the view menu you have access to the attachment manager (for editing attachments).
The project findings for seeing an overview of all your Findings and recommendations.
The project reminders for seeing an overview of all the project reminders created in each section.
The PUBLISH button takes you directly to the publish page regardless of your view. From the publish page you can control the specifics of how you want your report published into a PDF document for distribution.
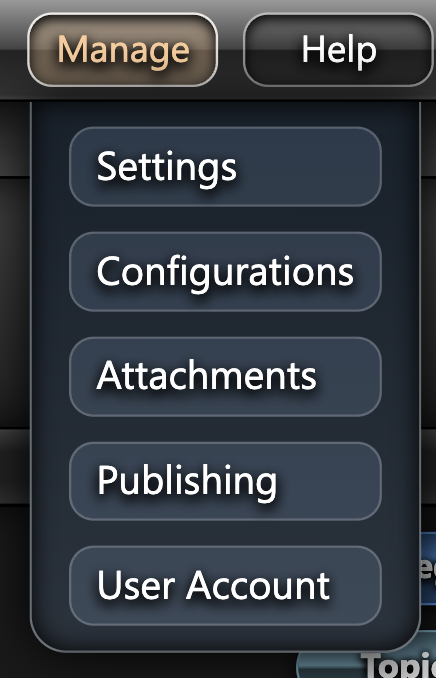
The MANAGE menu also lets you move between sections of the report, but this is the primary access for several settings and controls for the program.
The Settings contain various controls but also hold information that you’d want repeated amongst several reports regardless of their type. For example, your company logo, inspector signatures, backup location etc.
The Configurations let you manage your selected configuration files. A configuration file contains the names and position of all the buttons used throughout the report, as well as the quick insert options saved to each heading.
The Attachments links directly to the attachments manager just like the view menu.
The Publish links directly to the publish page, just like the main button.
The User Account links directly to your user account panel online, for viewing and making changes to your account (the online user account page is still under construction).
 The
The HELP menu contains the About InspectX window (for version details and remote access IP details).
This button also links directly to the website with links for remote assistance or to the user manual.
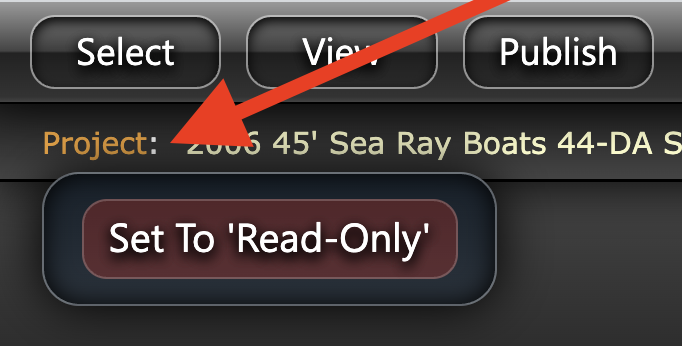
*The text Project in the upper left of the page can also clicked to mark this project as ‘read only’.