
Measuring curved walls is very straightforward with Flexijet.
Before measuring, some consideration should be taken to the desired outcome. Is only a 2D-floorplan layout required? Or, is a 3D-representation of the curved wall with variations at different heights preferred? In each of these cases, adjustments should be made to the procedures below to ensure the measurement is appropriate for the project.
This tutorial will cover common measurement techniques noting the variations at different elevations on a curved wall.
Note: The ‘Measure Floorplan’ command will not create curved walls. However, Measure Floorplan or Room from 2D layout can be used in conjunction with these techniques to measure the straight wall portions.
Measure the straight walls.
- Begin the measurement as usual: Auto-Level Flexijet, Align to Object, and measure the straight walls using Measure Floorplan or with Vertical folders, as desired. If measuring an open room with ‘Measure Floorplan’, begin the room at the right edge of the curved wall, and measure clockwise to the position of the curved wall.
![Room measurement first and last points]()
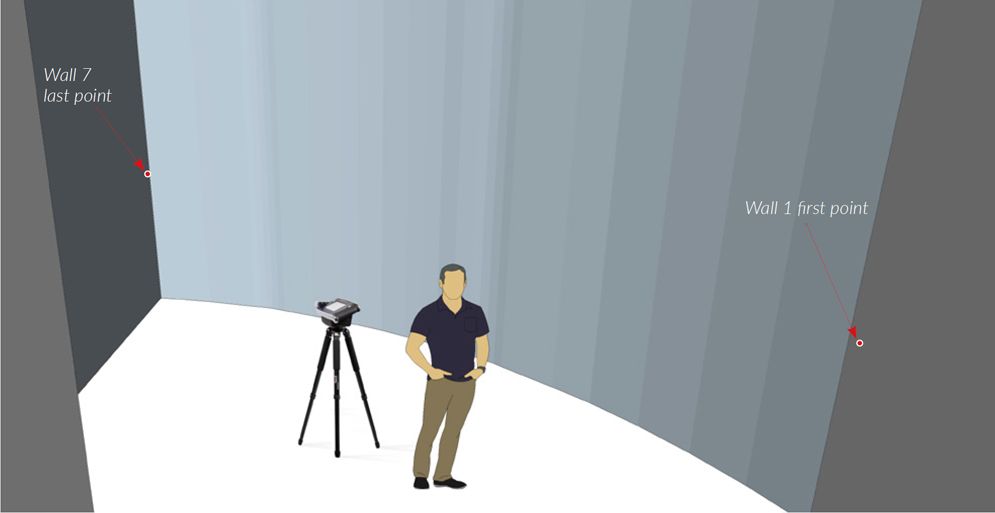
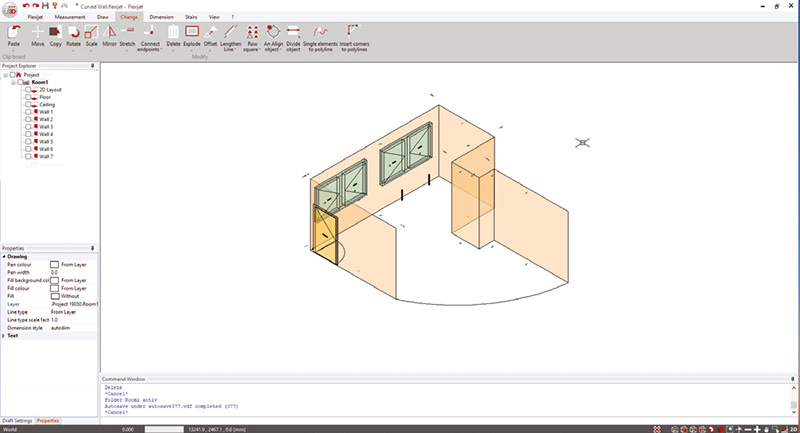
The measurement should look something like this:
Measure the curved wall
- It is generally best to measure a curved wall on a horizontal folder. You may use the ‘Floor’ folder, or create a new folder for this wall.
_If creating a new floor folder, suggest using the options to ‘Copy plane from existing plane’ to use the same plane as the floor folder.
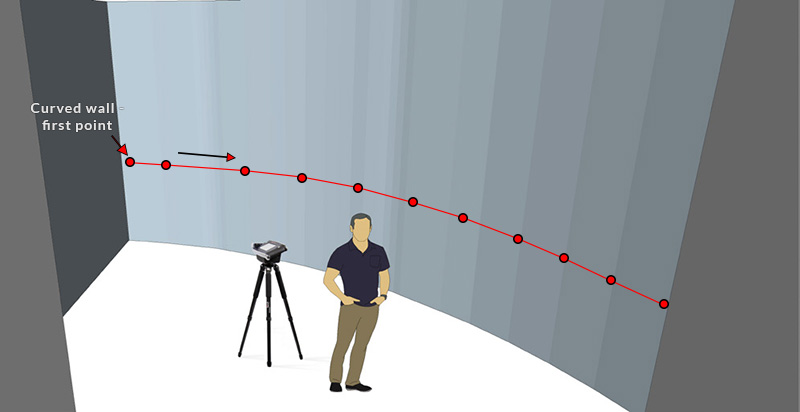
- With this horizontal folder selected, select ‘Polyline’ and measure on the curved wall to capture the curvature of the wall. Hint: you can also use Horizontal – series of measurements to have Flexijet measure these points at a predetermined interval.
![Where to measure on a cuved wall]()
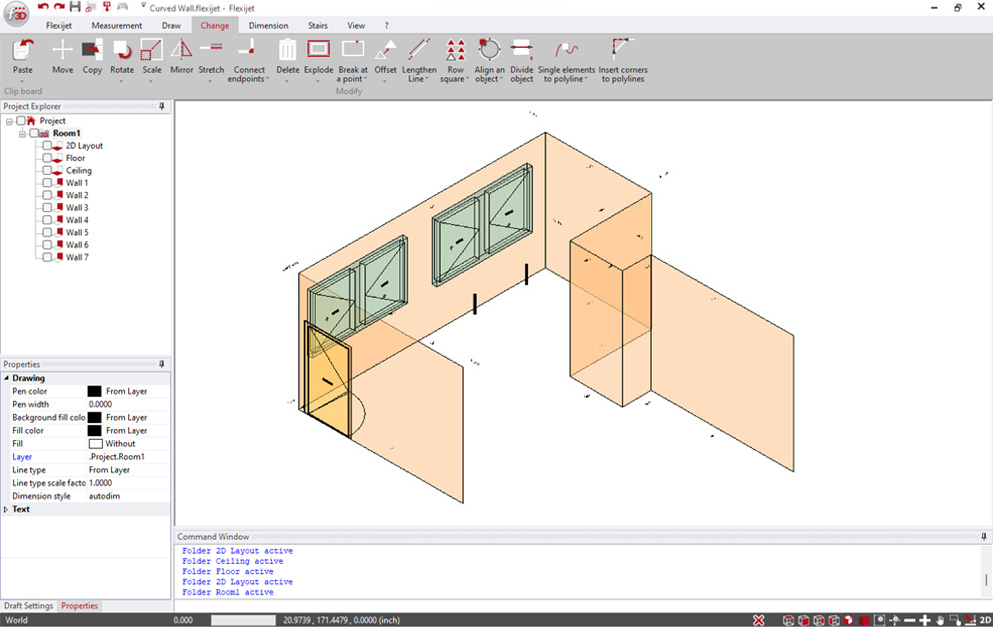
- From the 3D Room folder, the results should look like this:
![Curved wall software view with contour on the floor]()
Options for finishing:
The next steps depend on the desired output for your measurement project.
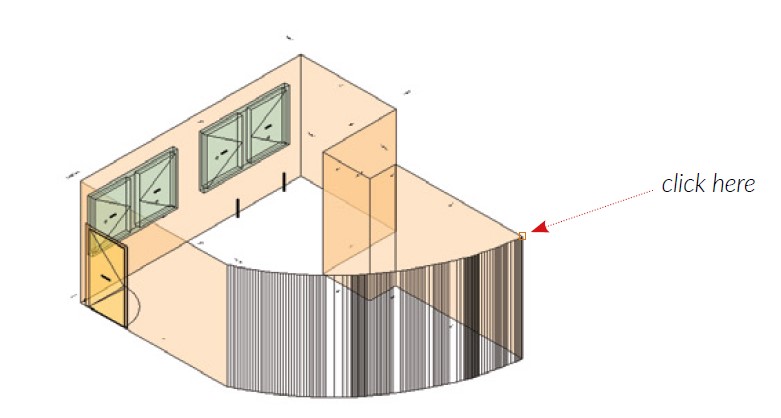
- If you wish to visualize the curved wall, you might use Explode Polyline to Arcs on the polyline to simplify to a series of arcs. Then, turn the arcs into a polyline using Single Elements to polyline, and from the 3D folder, select the polyline, and select the ‘…’ next to Object height in properties, and set the height by clicking the top corner of another wall.
![Clicking to set curved wall height in drawing]()
- If you would like a more detailed scribe at different heights, you might create additional horizontal folders (or a 3D folder) and measure the curvature at different heights.
![Curved wall multiple polylines at different heights]()

- Note: You might also capture the variations in floor and ceiling height at the curved wall by measuring Distance Point to Plane on the floor or ceiling in their appropriate folders.
Feedback
Copyright © 2025 Flexijet GmbH
—
Powered by 
Post your comment on this topic.