
Complete the following steps to import records:
1. Download the Table
2. Enter New Records
3. Format Table
4. Validate Import
5. Execute Import
Download the Table
Make sure to download the “TAD Sandbox” Table for Company 0 so you see the records below.

Enter New Records
In order to Import records, you must fill out all required columns and pass the additional validations. You can catch these issues up front using the conditional formats, otherwise when trying to import, the validations will call out any columns with data issues.
For this example, we will add a new record with your initials.
1. To add a new record, click below the last record in Column I (Seq).

2. Enter the next Seq value and press the Tab key. The cells conditionally filled in red represent Required Cells.

The available Conditional Formats are comprised of the following. If any issues are not resolved then you will not be able to import the records.
| Format | Description |
|---|---|
| Required Cells | If a required cell is missing a value it will be red. |
| Max Length Exceeded | If a cell’s field length is exceeded it will be green. |
| Invalid Number or Date | If a cell has an invalid number or date it will be orange. |
| Number Outside Allowable Range | If a cell’s value is outside the allowable range it will be purple. |
| Duplicate Records | If duplicate records exist in the table they will be highlighted gray. |
3. Click the Format Table button on the ribbon.

4. This will add default values for the Co, BudgetAmt and ActiveYN columns.

The Format Table button is controlled by the Options below.
| Option | Description |
|---|---|
| Apply Conditional Formats | If you want conditional formats applied to the sheet leave this checked. |
| Add Default Values | Field Default values will be applied to empty cells only. Y/N will default for check boxes and 0.00 will default for most numeric fields. |
| Add Missing Co/Groups | Company/Group values will be applied to empty cells only. These values are controlled by the Destination Company. |
| Change Data Format | This converts certain fields to uppercase, changes Month fields to be Day 1 and applies the appropriate formats to Job, Phase, GL Account, etc. fields. |
5. Click in the State column and press the F4 key.

6. That will open the TAD Lookup form showing you a list of States.
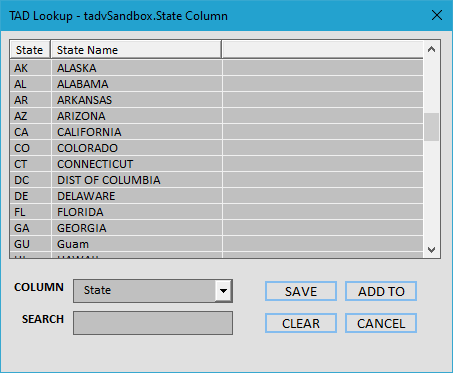
7. Select a value from the list and click the Save button.
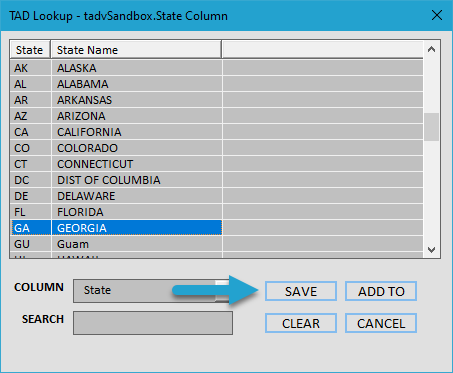
8. You should now see the value in the field.

9. Click in the ContactDate column and press the F4 key

10. That will open the TAD Calendar form.
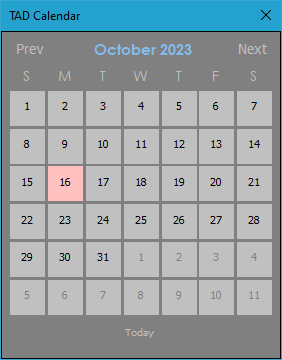
11. Select a date on the calendar and that will return the value to the field.

12. Click in the SalesContact column and enter your initials.

13. Lastly, click in the Phone column and enter 10 numbers without any separators.

14. With all required fields populated, change the Action column to Import to mark the record for processing.

Format Table
Always click the Format Table button on the ribbon one last time to make sure all cells are formatted properly.
1. Click the Format Table button on the ribbon.
2. The value in the Phone column should now be formatted like ###.###.####.

Validate Import
The Validate Import button imports the records into the database to see if the transactions will be successful. If the transactions fail, then an error message will be returned for each individual record.
1. Click the Validate Import button on the ribbon.

2. You want to see Validated in the Result column. If you see Failure then you should see an error in the ErrorMsg column. Make the appropriate corrections before validating until successful.

Execute Import
Once all records validate then you can use the Execute Import button on the ribbon to import them into the database.
1. Click the Execute Import button on the ribbon.

2. You will be prompted with the message below. Click Yes to continue with the import.
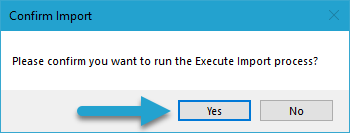
3. If you see Imported in the Result column then the record was imported into the database.

4. We can now Download the table again to see the imported record.
Option 1 – Using Download Button on Ribbon

Option 2 – Using Download Action Button

5. When prompted for Parameters, remove the value for the (Companies) parameter so that you download records across all companies. Click the Download button.
![]()
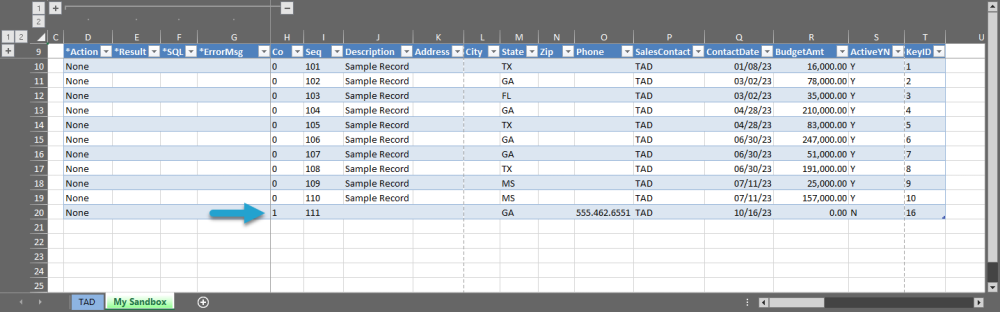
6. Once downloaded, you should see the record that you imported.
Post your comment on this topic.