

COMPONENTS
A. TCU
B. 10” Screen
B. HDMI cable
C. Antenna GSM (Optional)
D. Wireless USB adaptor (Optional)
E. USB Extender cable
F. Power adaptor
G. Die cut
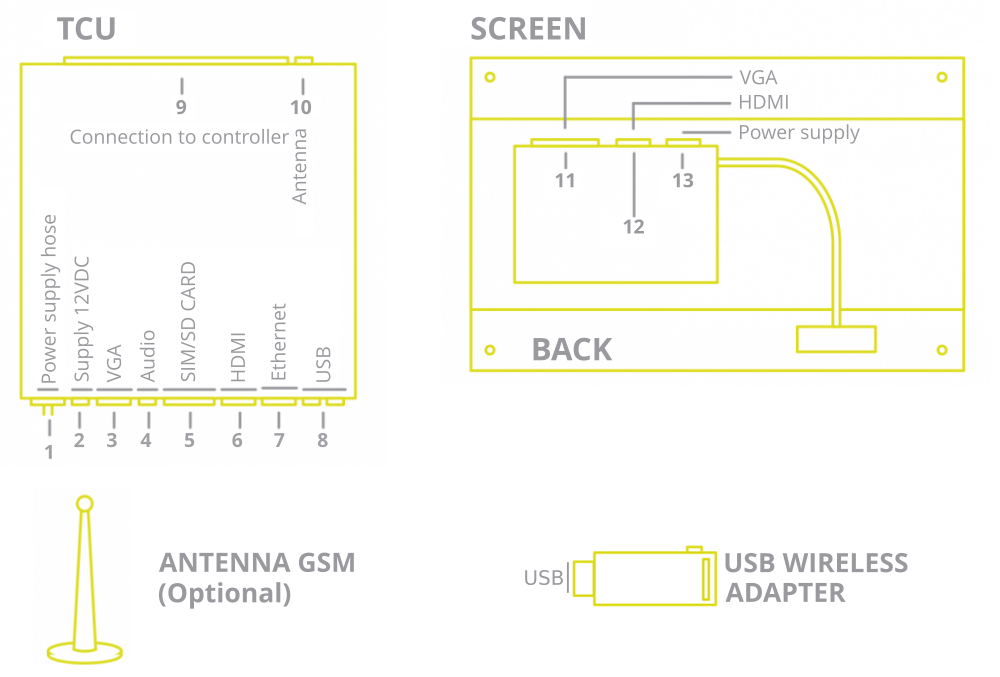
CONNECTORS
INSTALLATION
If you have purchased the Advertisim hardware without screen go directly to 3.3.
1. Use the die included in the box to mark the anchor points and the necessary hole for the placement of the Advertisim.
2. Remove the die cut, drill the elevator cabin surface and place the screen and the brackets.
3. To connect the Advertisim screen to the TCU follow the steps.
3.1. Through the HDMI cable (included in your Advertisim pack) connect the TCU (6) to the HDMI input (12) of the board located at the rear of the screen.
3.2. Plug the power supply cable (1) to the board located at the rear of the screen (13).
3.3. Plug the power supply hose to power outlet of 220V (2) (grounding included). Plug the USB Wireless adaptor in one of the USB inputs of the TCU (8). Screw the WiFi antenna to the Wireless USB adaptor.
3.4. Connect the Antenna (if it is included) to the MDA antenna connector (10).
4. Place the TCU (preferably on top of the elevator car) and tight up the screw nuts.
5. Make the connections to the controller.
6. Plug the adapter into a mains socket and connect it to the Advertisim (2).
7. Configure the devide using the Manager.