
This is a tab designed to:
1. Keep track of all the tasks that do not have a specific due date.
2. Balance your schedule.
In other words, Opus One provides you with two lists of tasks:
- Daily Tasks, everything you need to do Today; and,
- Master Tasks List, where you can store all those tasks you need or want to do eventually, until you find and assign them to a specific date Master Tasks can be arranged by Priority, divided into Categories and rearranged by dragging & dropping items to new locations.
With the help of the Planner you can visualize the activities, tasks & appointments for the weeks & months ahead. Here you can plan and distribute the workload (with a few drag & drops) in a most efficient & balanced way.
Picturing the weeks ahead also helps fitting tasks from the master list into your schedule. When you find the appropriate day & time simply drag the task from the list to the Planner (or the Calendar below) to assign it a due date or to the Schedule to save the task as an Event.
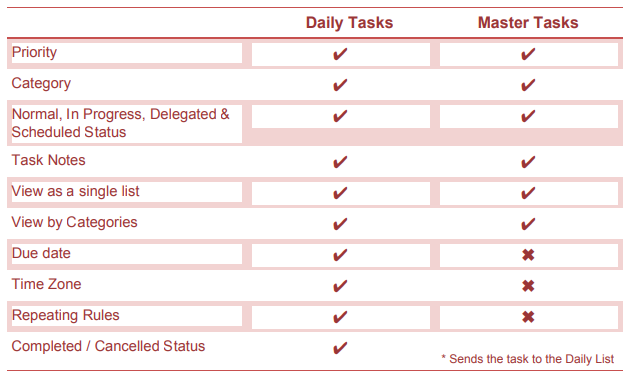
Similarities & Differences between Daily & Master Tasks
Master Tasks are tasks that do not have a due date and because of this are kept on a separate list until you mark them Complete, Cancelled or assign them a Due Date – when any of this is done, the task will move from the Master Task List to the corresponding Daily Task List.
Much like your daily tasks, Master Tasks can have a Priority, Category, Status, Notes and a Start Date. What you cannot add to this kind of tasks is neither Repeating Rules nor a “Forward Until” date.
Also adding a Time Zone or will have no effect on this kind of tasks. And the Forward Count will not work until a Due Date is added.
The following chart illustrates better the difference:
Adding a Master Task
Master Tasks can be added in several different ways:
• Enter the task on the blank space below the date and click the plus sign (+).
• Enter the task on the blank space below the date and press the Enter key.
• Give a secondary click on the Master Task List and select “Add Task”
For Mac: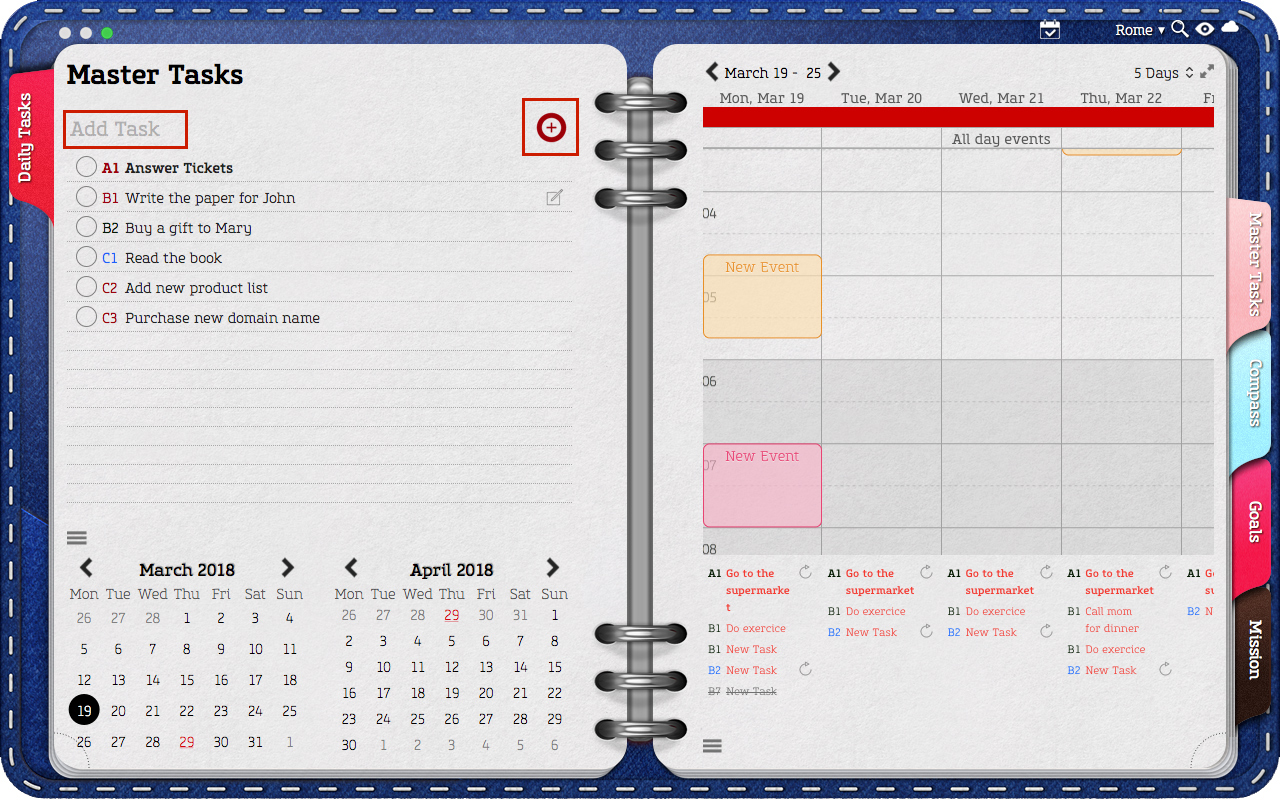
For iOS: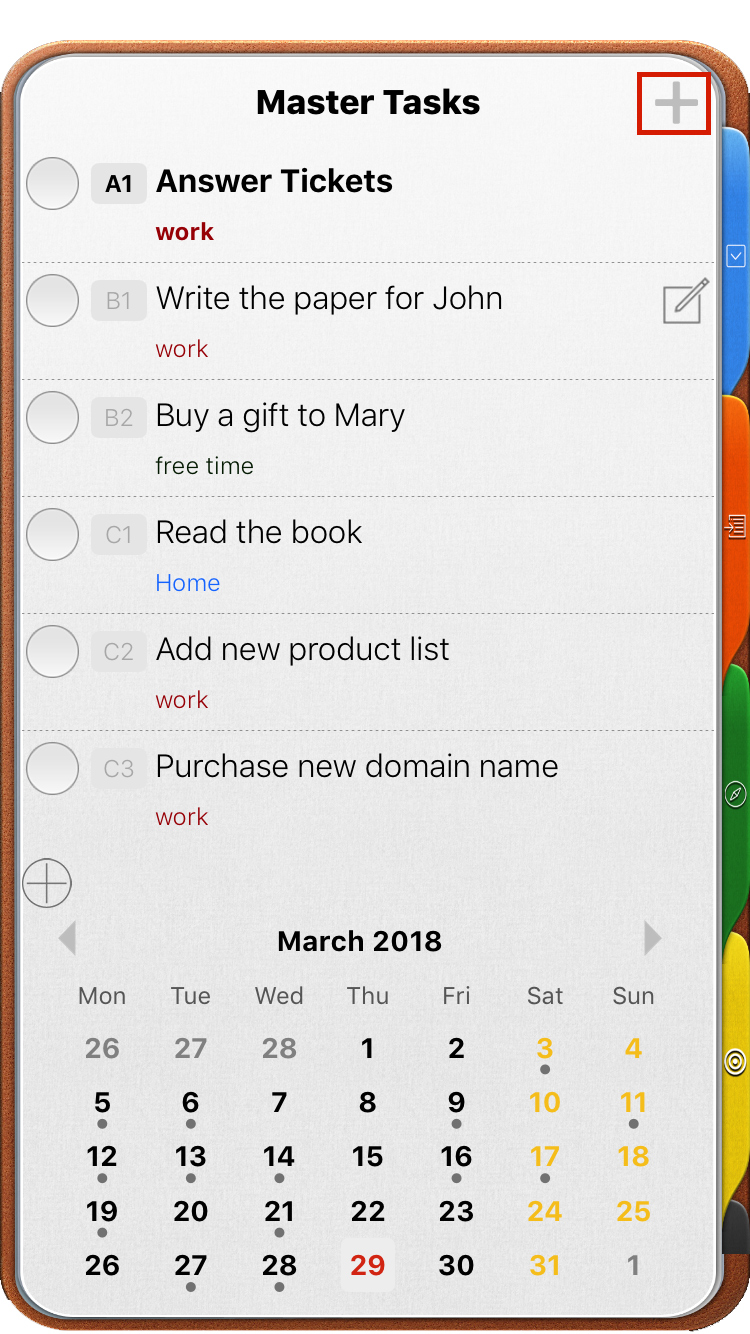
• Remove the due date from a daily task.
For Mac: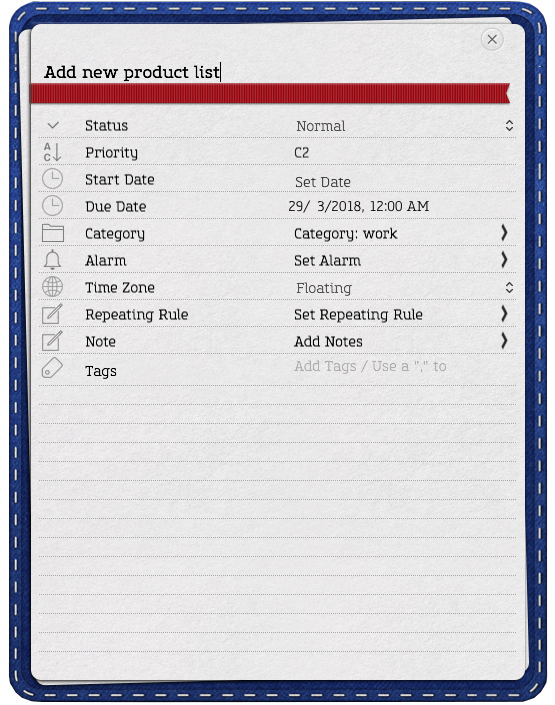
For iOS:
 |
 |
• Select a daily task, give a secondary click and select the “Send to Master Tasks” option from the menu.
For Mac: 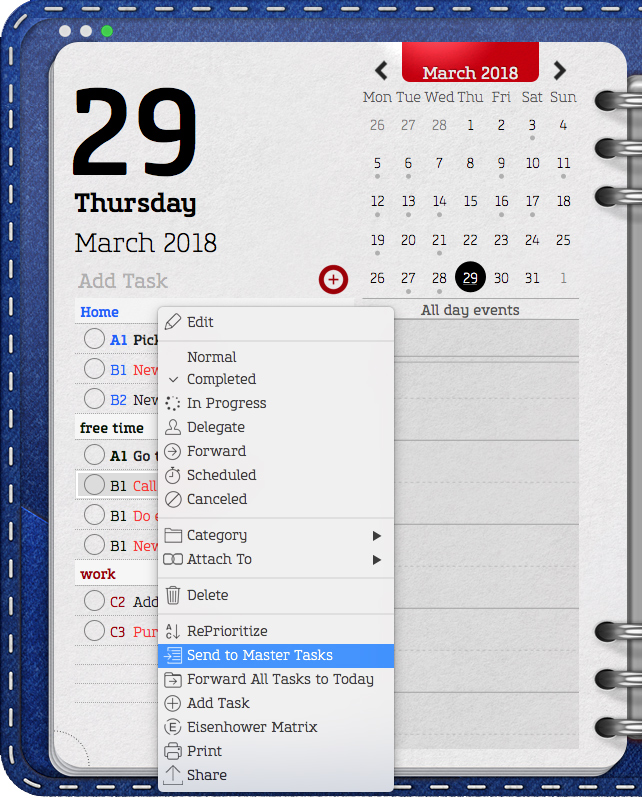
When adding a Master Task you can also add a priority and category. To add a priority simply type the chosen priority before the tasks name separating both with a space. To add a category type the category name between brackets.
For instance, instead of Master Task, type A1 Master Task or A1 [Opus One] Master Task
For more information on Task’s Priority & Category please refer to Chapter 4, “Daily Tasks”.
Editing a Master Task
You can add a Priority and Category while entering the Master Task, however if you’d like to add these later, or edit other information you can do so as follows:
1. Double click the task’s name or Priority to edit these;
2. Give a secondary click to access the task’s Information Menu and edit the task’s Status, Priority, Start Date, Category and Notes; or
3. Drag & drop the task to a new location in the list (to change priority & category) to any date on the Calendar (to transform the task into a Daily Task) or into the planner either as a Scheduled Event or as a Daily Task.
There are several ways in which you can edit a Master Task.
For Mac:
 |
 |
- A click to the circle located before the task’s priority will mark a task as completed.
- Double clicking the task’s name or priority will allow you to quickly edit these.
- Dragging the task to a new category will change the task’s category.
- Dragging the task to a new place on the list will change the task’s priority. The task will take the priority from the task above +1.
- Dragging the task to a date will remove the task from the Master Task list and send it to that day’s Daily Task List.
For iOS you just need to click on the Master Task to edit the information.
For more editing options open the Master Task’s Quick Option menu or the Master Task’s Information Card. Both of which are described with detail in the following sections of this manual: “For information on adding notes to Master Tasks”.
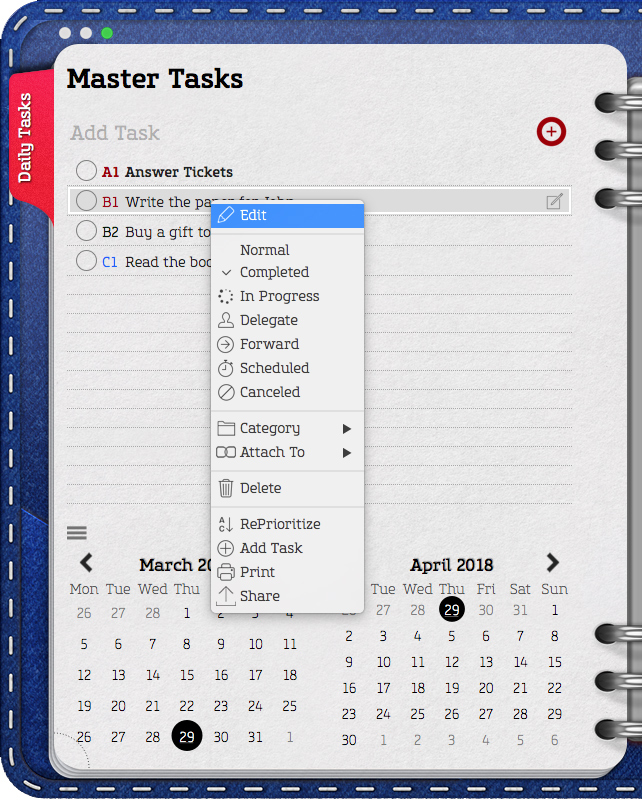
Master Task’s Quick Option Menu
A secondary click to the master task’s priority will open the Quick Option Menu, where you can quickly:
• Change the task’s status. Choose from: Normal, Completed, In Progress, Delegate, Forward, Scheduled or Canceled.
• Select a Category
• Detach the task from its parent Goal
• Delete the task
• Re-prioritize your task list
• Print
• Share
For Mac: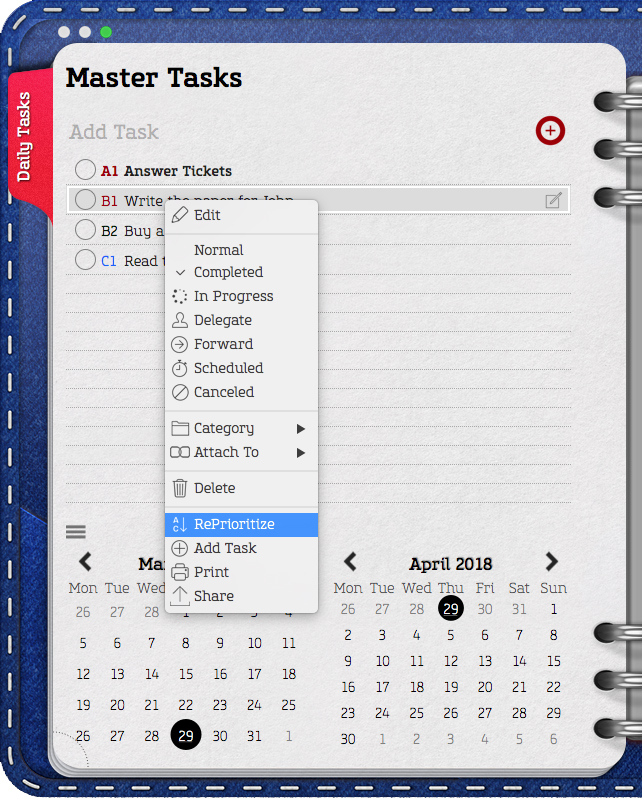
For more options access the master task’s Information Card as follows:
1. Open the master task’s Quick Option menu.
2. Select “Edit.”
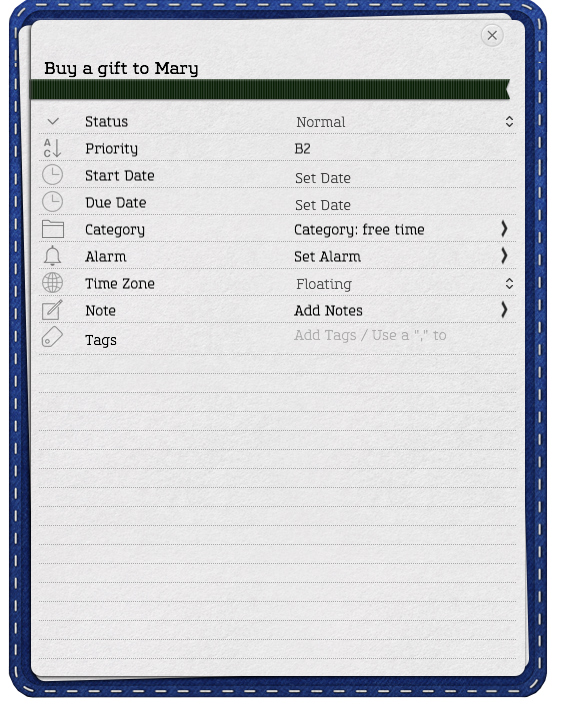
Master Task’s Information Card
To access the master´s task Information Card:
1. Select a task.
2. Give a secondary click.
3. Select “Edit”.
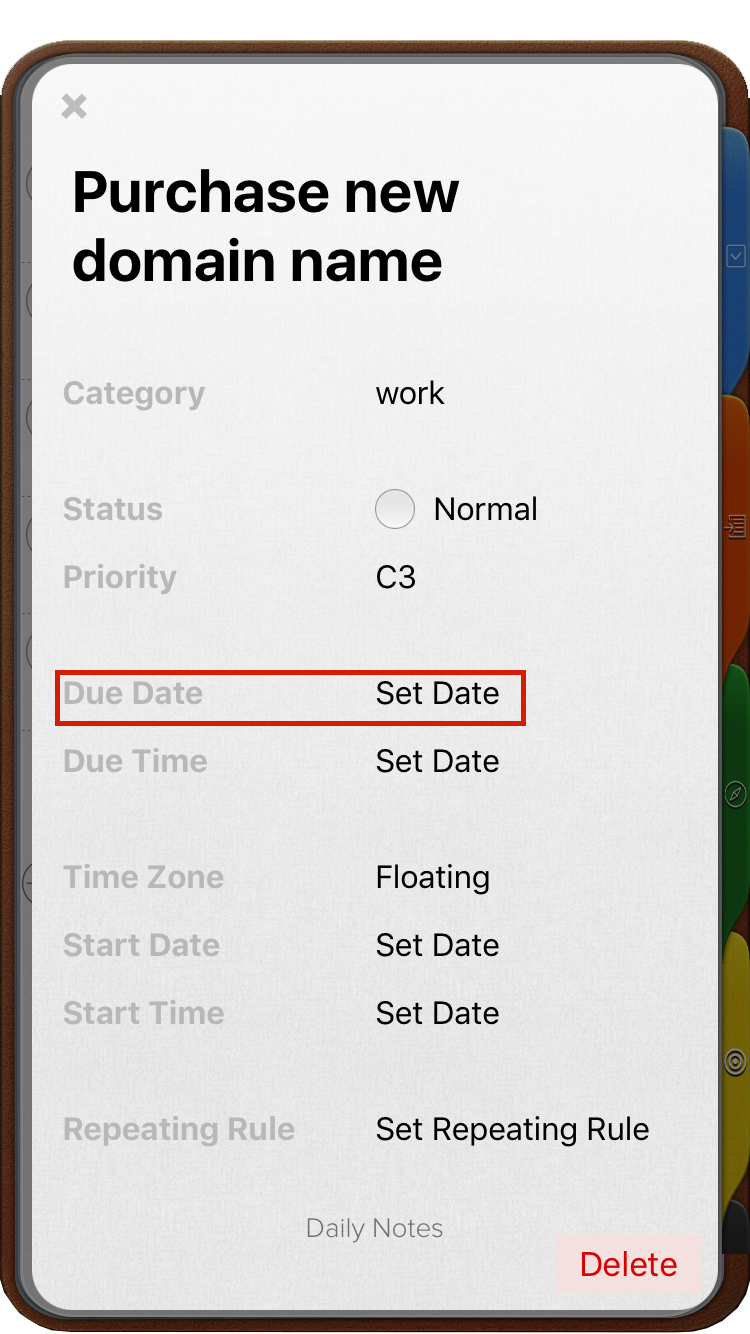
The following information will be shown and may be edited:
• Status
• Priority
• Start Date
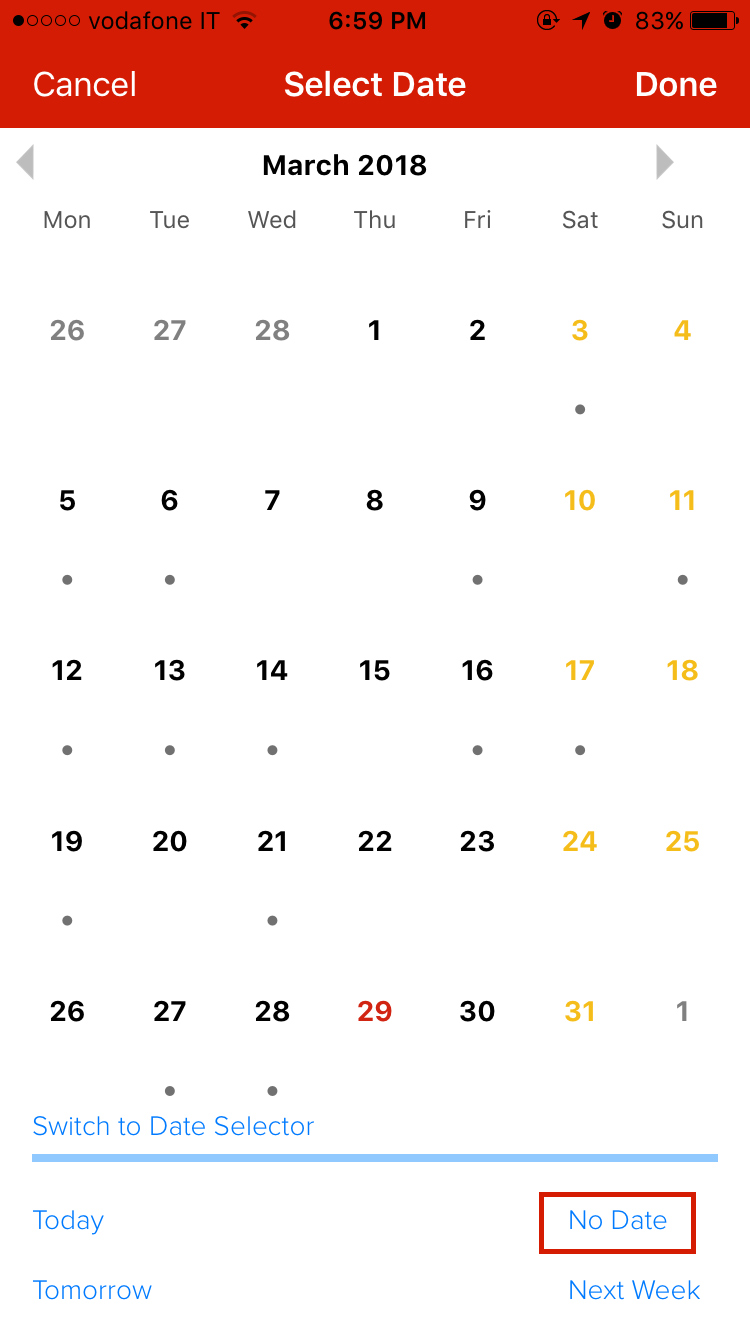
• Due Date
• Category
• Alarm
• Time Zone
• Repeating Rule
• Forward Count
• Notes, and
• Tags
**IMPORTANT: Adding a “Start Date” or “Due Date” to any master task, as well as changing the status to “Completed” or “Cancelled” will remove the task from the Master Task List and send it to the corresponding Daily Task List.
For additional information on how to add & edit a task’s Status, Priority, Category, Due Date or Notes please refer to the Daily Tasks or Daily Notes sections, the process is the same for both kinds of tasks.
Adding Notes to Master Tasks
To add a note to any of your master tasks proceed as follows:
1. Give a secondary click to open the Quick Option Menu.
2. Select Edit for the task’s Information Card to open.
3. Click anywhere on the Notes line.
For Mac: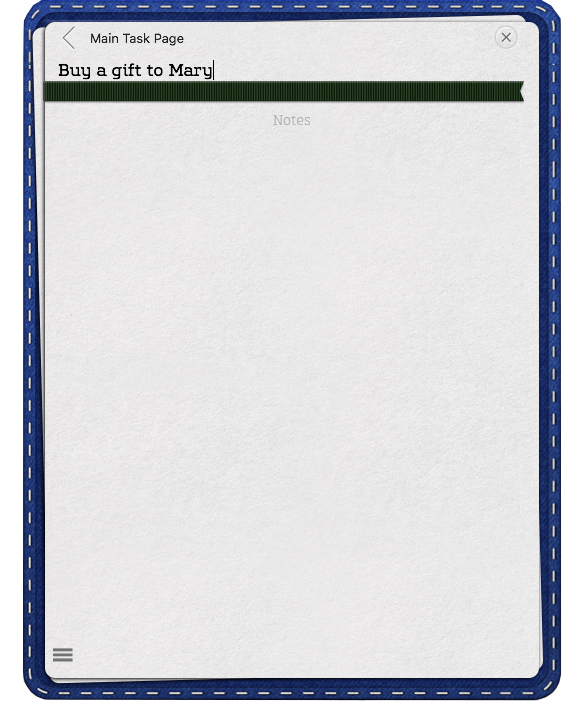
For iOS: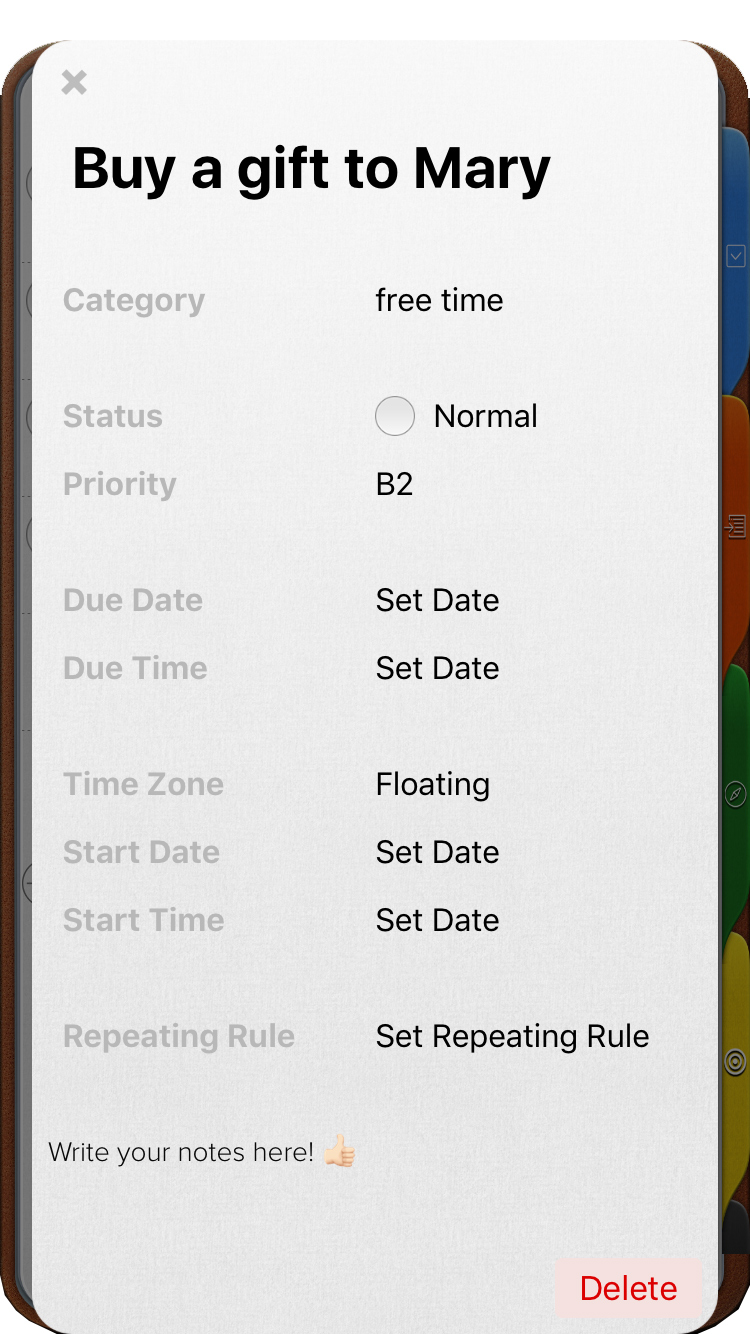
4. A new window will open. You can either start typing or scroll down to the bottom for more options (Add pictures, checklists, etc). You can add notes on any of the following formats:
● Text
● Pictures
● Checklists
● Drawings
● Audio Notes
6. When finished simply close the window using the “x” button. When adding an audio note, press Stop (☐) before closing the window.
For more information on each kind of notes, please refer to the “Daily Notes” section of this manual.
Completed, Cancelled & Deleted Master Tasks
Completing a master task will remove the task from this list and place it as a completed item inside the Daily Task list of the date in which the Status was changed. Task’s information such as: Priority, Category, Time Zone and Notes will not be affected.
Cancelling a master task will remove the task from this list and place it as a cancelled item inside the Daily Task list of the date in which the which the Status was changed. Task’s information such as: Priority, Category, Time Zone and Notes will not be affected. Deleting a task will remove it from Opus One along with its information.
Changing the status of Cancelled or Completed Master Tasks back to “Normal” status will cause the task to appear, once again, in the Master Task List.
To complete, cancel or delete several master tasks:
1. Press the Command Key (⌘) and select the tasks.
2. Give a secondary click for the Quick Option Menu to appear.
3. Select “Cancel” or “Delete”.
On iOS you have to select one by one.
For Mac: 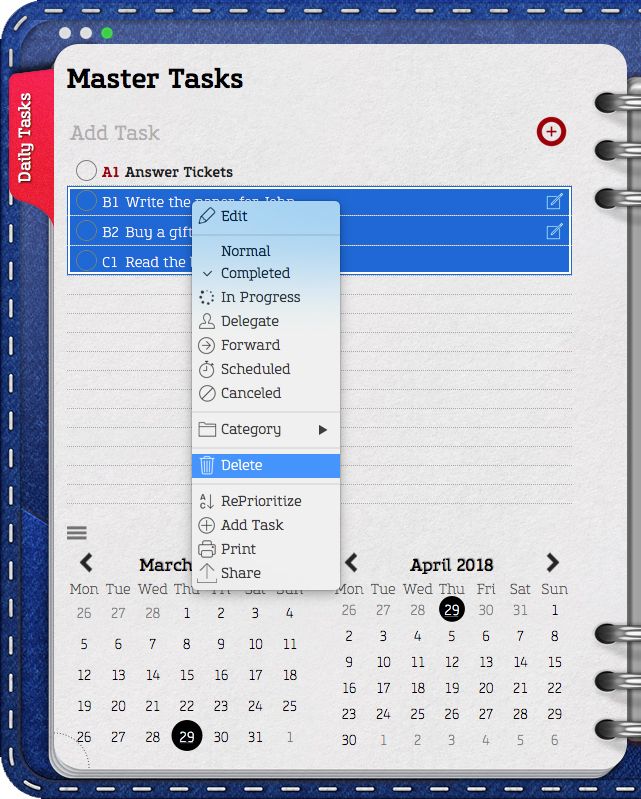
For iOS: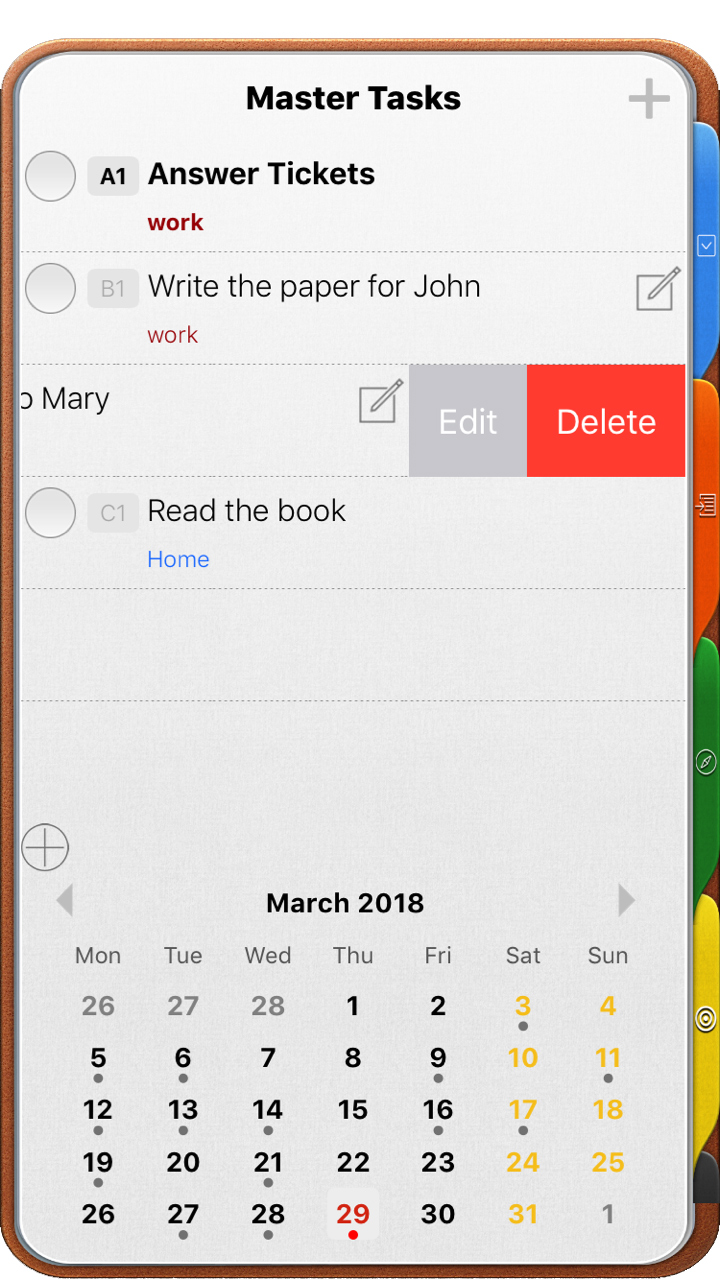
Post your comment on this topic.