
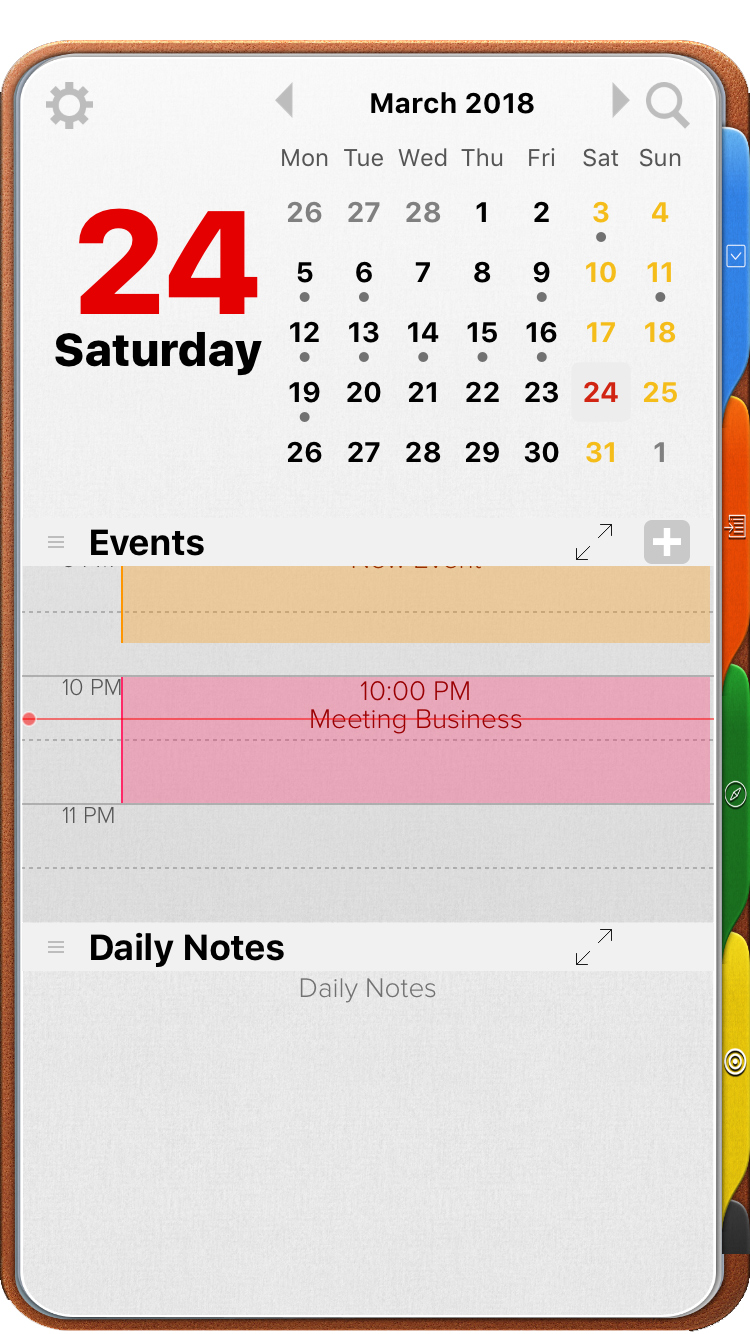
Selecting a Date
The planner will always open to the current date, according to your device’s
general settings.
To see the Tasks assigned to other days go to the calendar located at the top of
the Daily Schedule and click over the desired date. Use the arrows to change
months.
To go back to the current Daily List click over the month’s name.
Adding an Event
You can add Events in your Daily Schedule and in the Planner Views.
You can add an Event in two different ways:
1. Double click on a selected time slot from the Schedule; or,
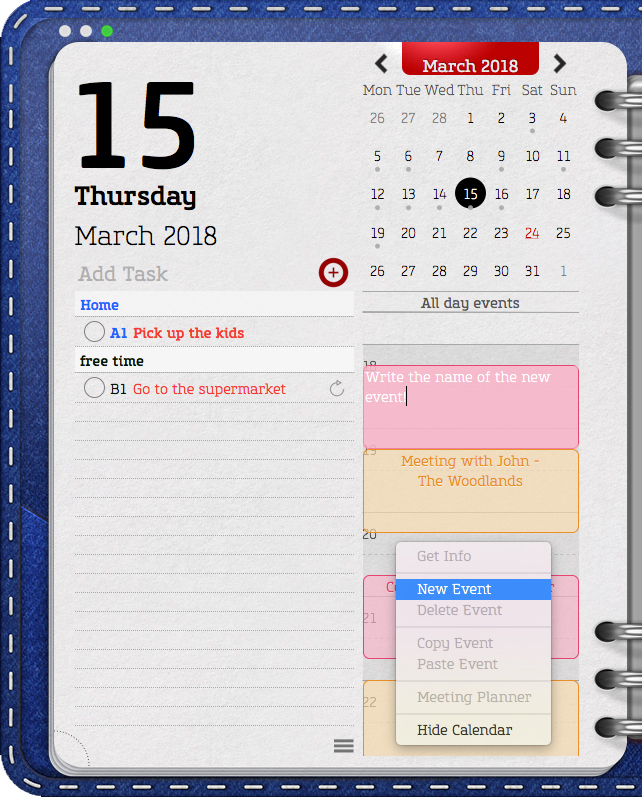
2. Give a secondary click to any time slot on the Schedule and select New
Event. And proceed to type the name of the Event.
For Mac:
 |
 |
For iOS:
 |
 |
To create an Event from a Task, simply:
- Click over the Daily Task or Master Task to select it
- Hold the click, and
- Drag the task to a specific time slot from your Daily Schedule or Planner.
To automatically assign events created from tasks to a specific calendar, open the
categories panel and set the Calendar for each Category. For more information
refer to the “Categories” section of this manual.
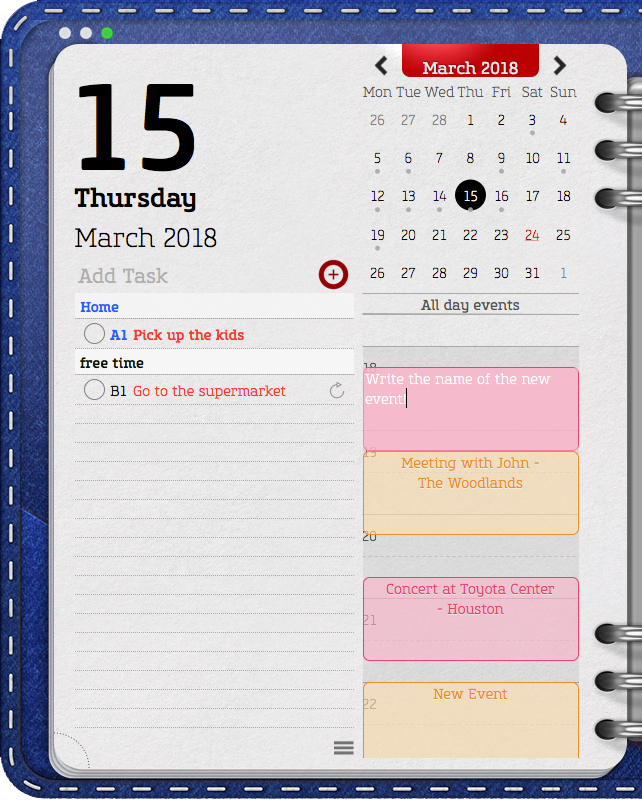
All Day Events
All Day Events are found at the top of the Daily Schedule.
Several ways in which you may add an All Day Event:
1. Double click on the space provided for “All day events” and enter the
event’s information;
2. Create an event anywhere in the schedule, drag & drop it into the space
provided for “All day events”; or,
3. Create an Event, give a secondary click, select “Get Info” and proceed to
check the box next to the ”all day” legend.
 |
 |
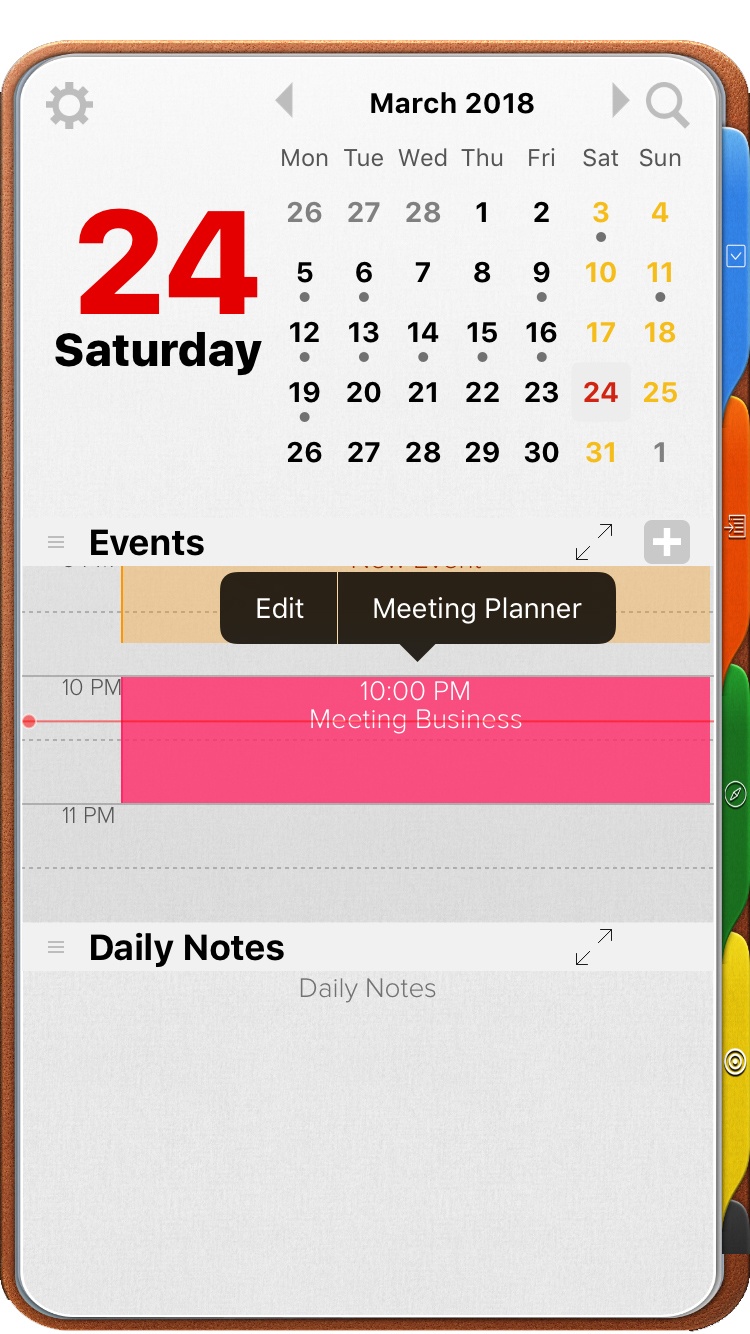
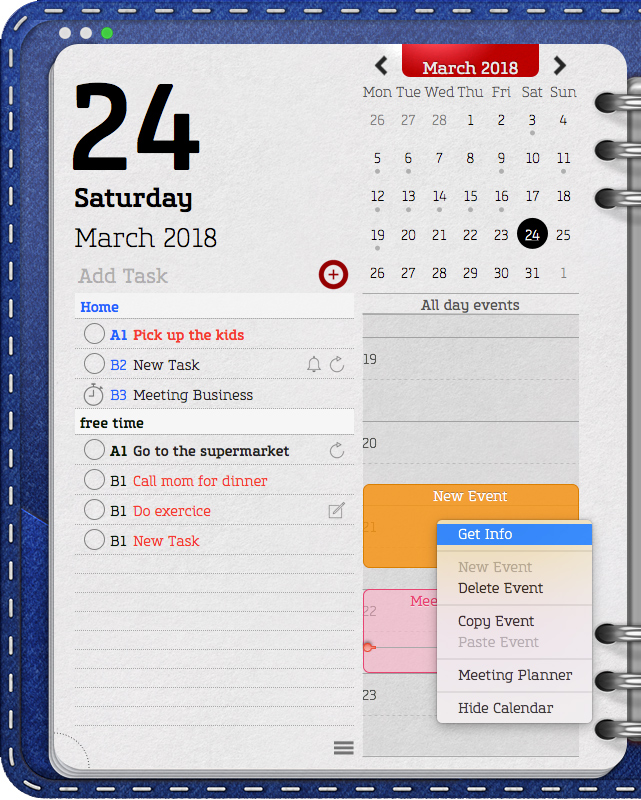
Event – Quick Menu
The event’s quick menu shows the following options:
- Get Info
- New Event / Delete Event
- Copy Event / Paste Event
- Meeting Planner
To access an event’s quick menu, select the event and give a secondary click. For more options select “Get Info”
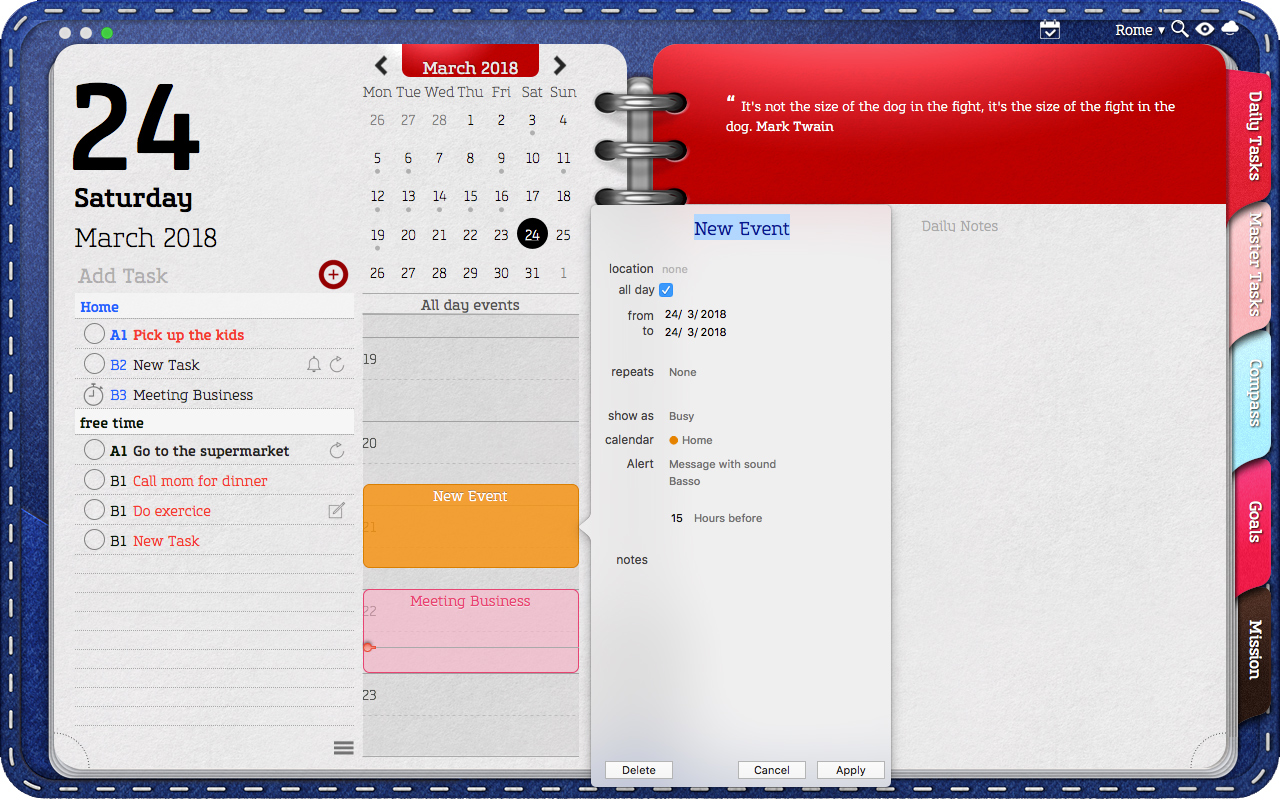
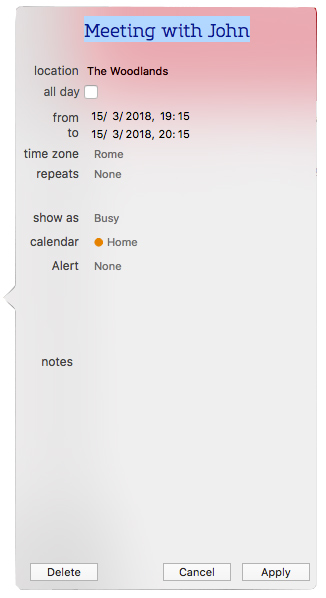
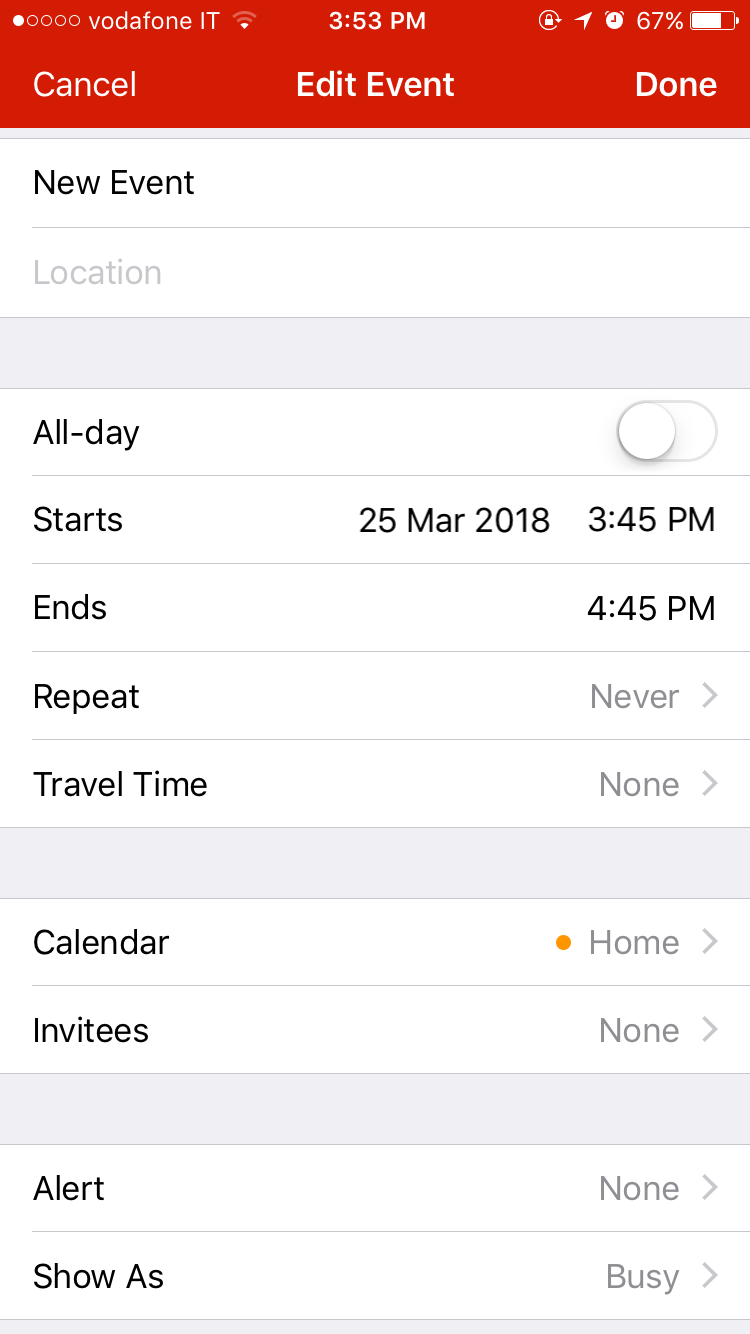
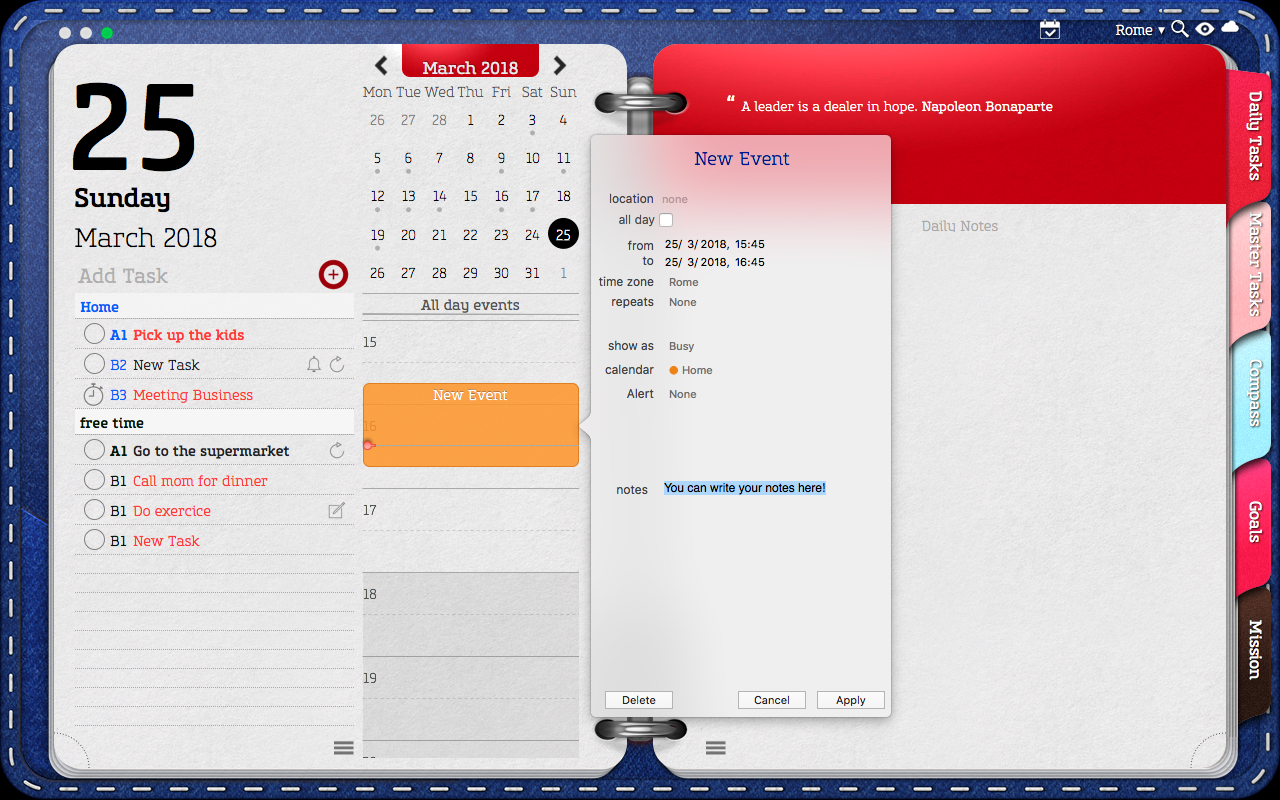
Event’s Properties / Information Menu
All events have the following properties, which are shown in the event’s Information Menu:
- Title
- Location
- All-day
- Beginning & End Time
- Time Zone/Travel Time
- Repeats
- Calendar
- Alert
- Invitees
- Show As
- Notes
To access an event’s Information Menu, select an event, give a secondary click and select “Get Info.”
 |
 |
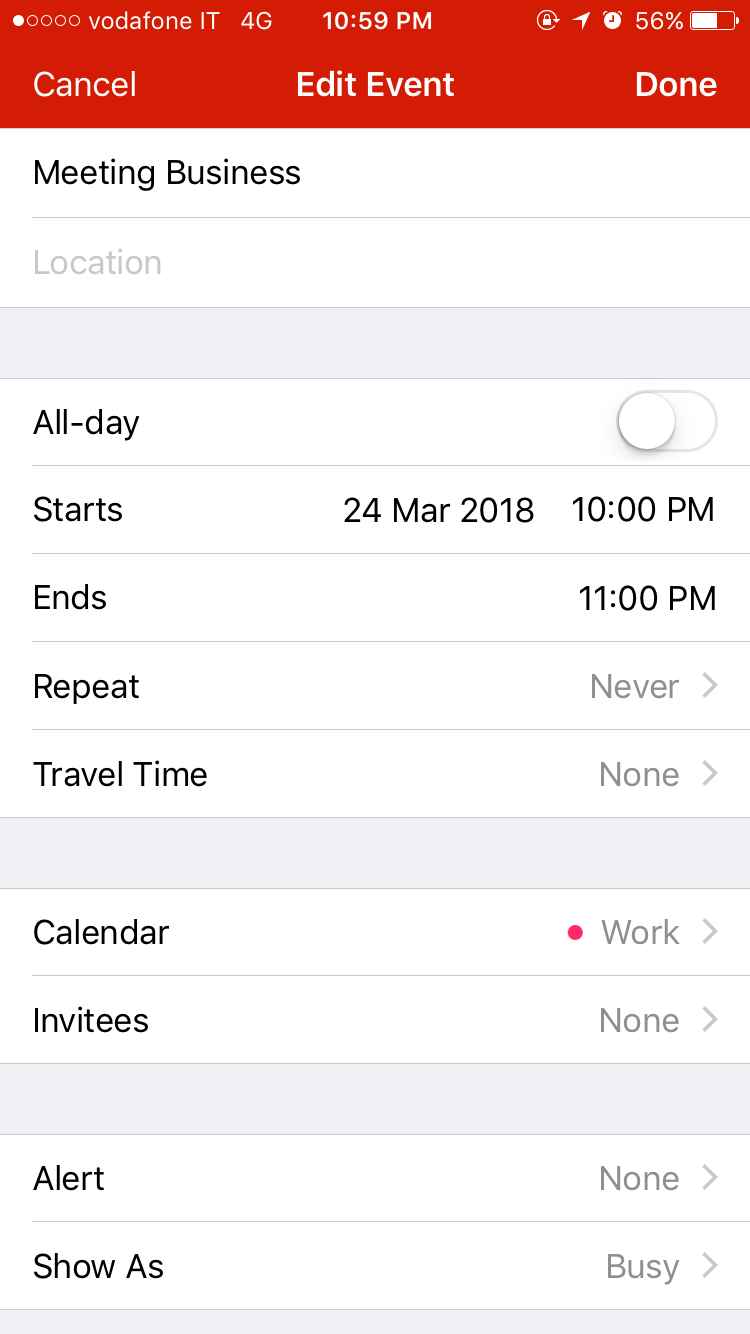
Editing an Event
There are several ways to edit an Event.
- To edit the name, double click the Event and type a new title.
- To adjust duration, start/end time or the date of the Event, while viewing the
Daily Schedule or any of Planner Views select the event, hold the click, drag and drop to a new location.
- For more editing options, give a secondary click to the event, select Get Info.
IMPORTANT: when editing Repeating Events any change will affect all future events unless you choose otherwise when prompted.
Adding & Editing Event Alerts
To add or edit an Alert to any event:
1. Give a secondary click to the event and select “Get Info”.
2. On the following window, next to Alert you will see “None”. Click and select
the kind of alert you’d like for this event:
• None
• Message
• Message with Sound
• Email
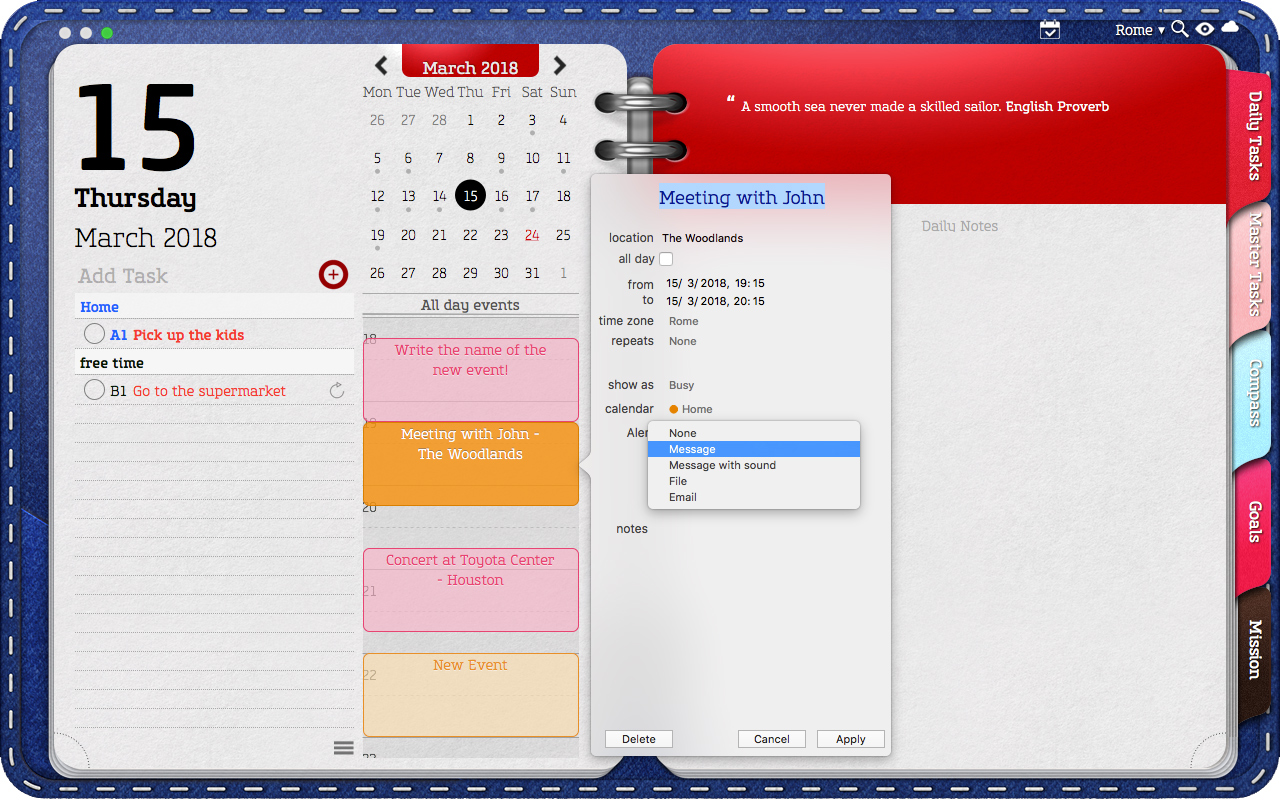
3. To change the time for the alert. Click over the “5” and set a different number and click over “Minutes” to set a different time unit like “hours” or “days”.
1. Click “Apply” or elsewhere on the planner for the change to be saved.
Additional information regarding alerts:
The default alert is set to:
• 5 Minutes before; or
• The preset alert time you have set on your Mac’s Calendar app.
When choosing “Message with Sound”, the default sound will be “Basso”. To select a different sound, click over “Basso” scroll through the list and select a sound of your choice.
When choosing to be alerted via email, you will need to provide the recipient’s address.
Even though the option to be alerted with a file is listed, currently this is not possible.
- Events added from other places and sites may have a different preset alert time. i.e. events added via iCloud.com will appear on Opus One with the default alert set on iCloud.com.
Adding a Default Alert for All New Events
This cannot be done directly in Opus One but it can be done using the Mac’s
“Calendar” app. To add a default alert:
1. Open the Calendar app.
2. Select the “Calendar” menu.
3. Select “Preferences.”
4. Click on “Alerts.”
5. Choose an alert for new events.
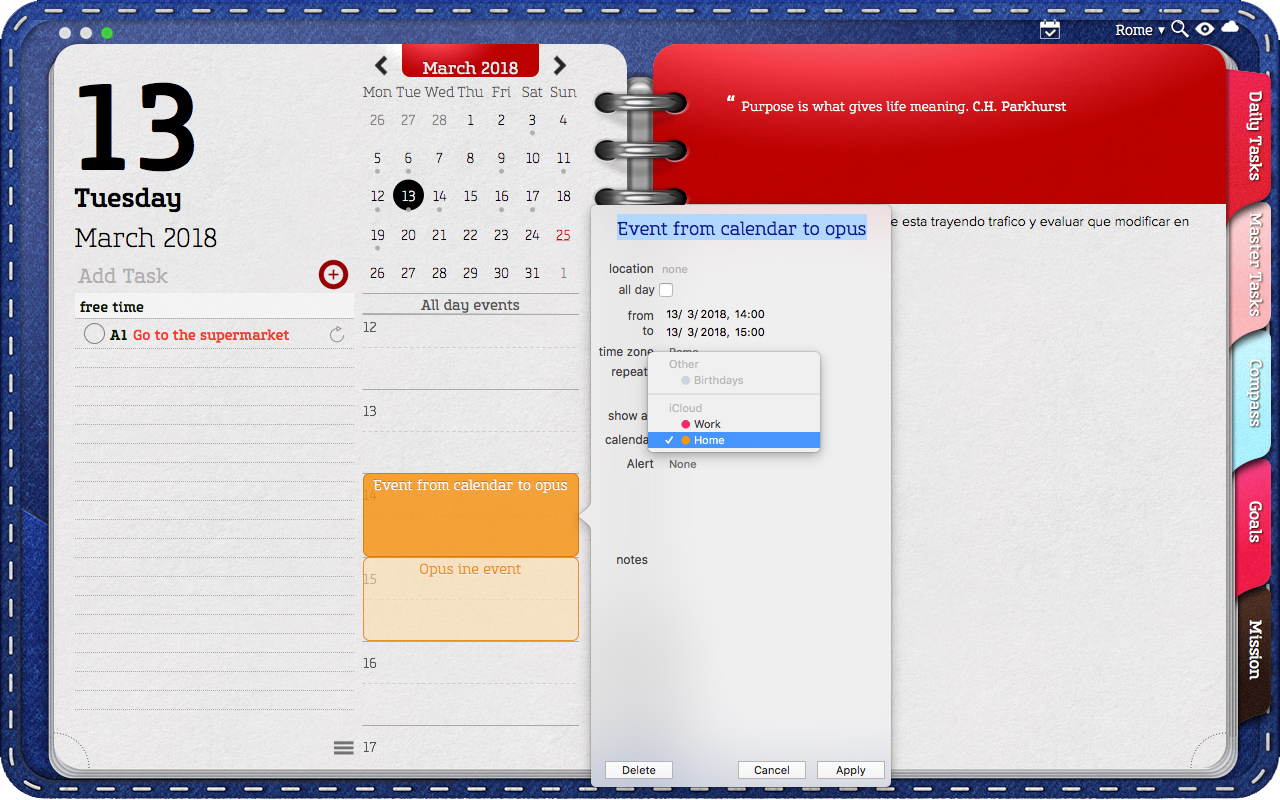
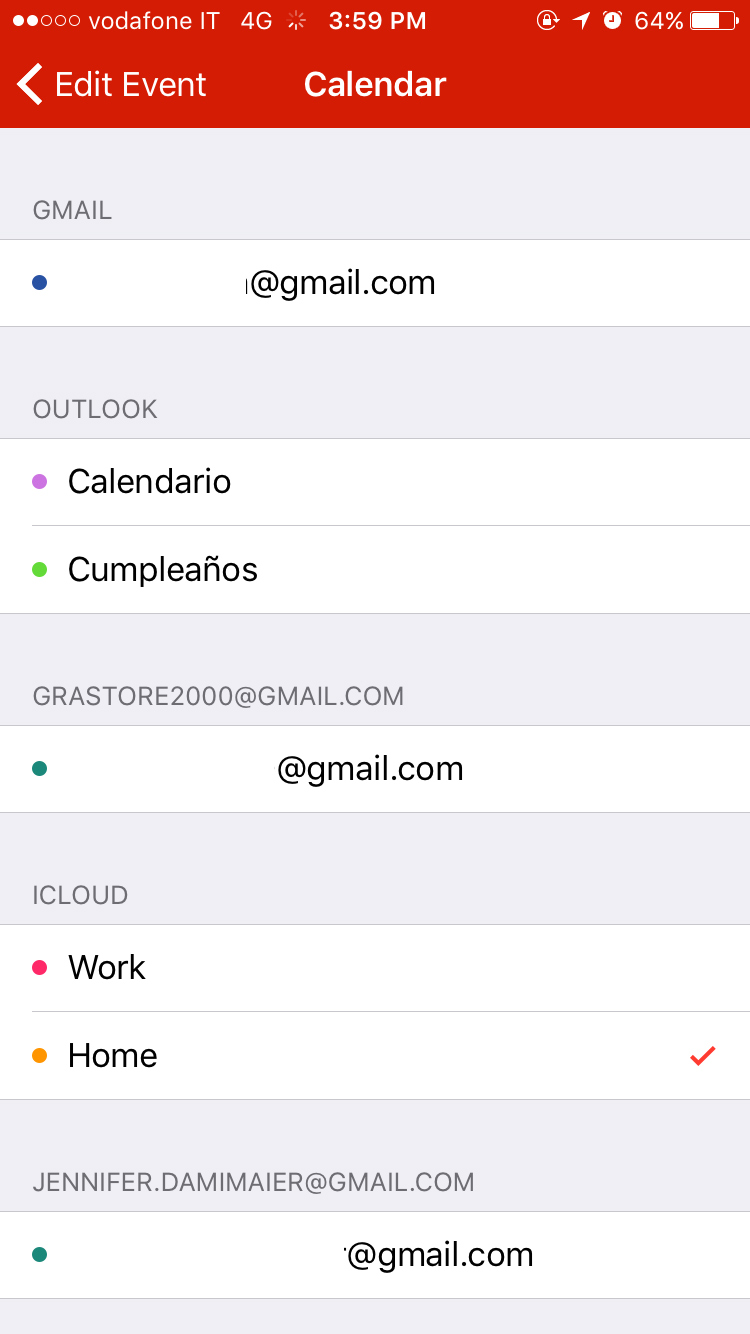
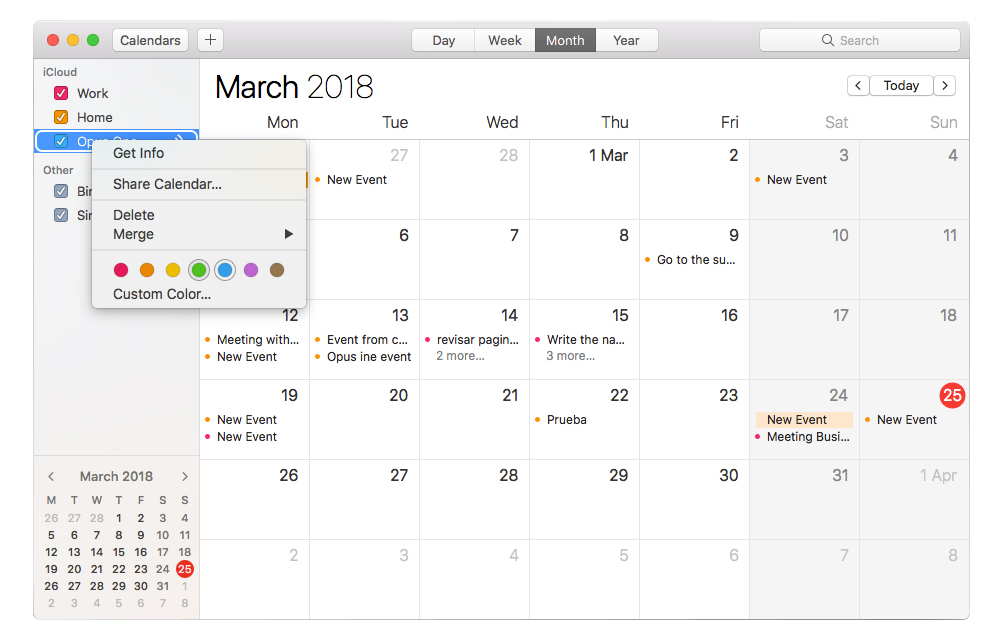
Assigning Events to a Different Calendar
To change the Calendar to which an Event is assigned:
1. Give a secondary click to the event.
2. Select “Get Info.”
3. Click the current Calendar.
1. Choose a new Calendar from the the available options.
The default calendar for events added in Opus One will be the same as on your Mac’s Calendar app. For information on how to Add Calendars please refer to the “Calendars” section.
For Mac:
For iOS:
 |
 |
Adding Repeating Rules for Events
To add a repeating rule to any event:
1. Give a secondary click to the event.
2. Select “Get Info”.
3. Go to “Repeats.”
4. Click and select a repeating frequency. The available options are:
• None
• Daily
• Weekly
• Monthly
• Yearly
5. When finished click “Apply” for the changes to be saved.
For Mac:

For iOS:
| |
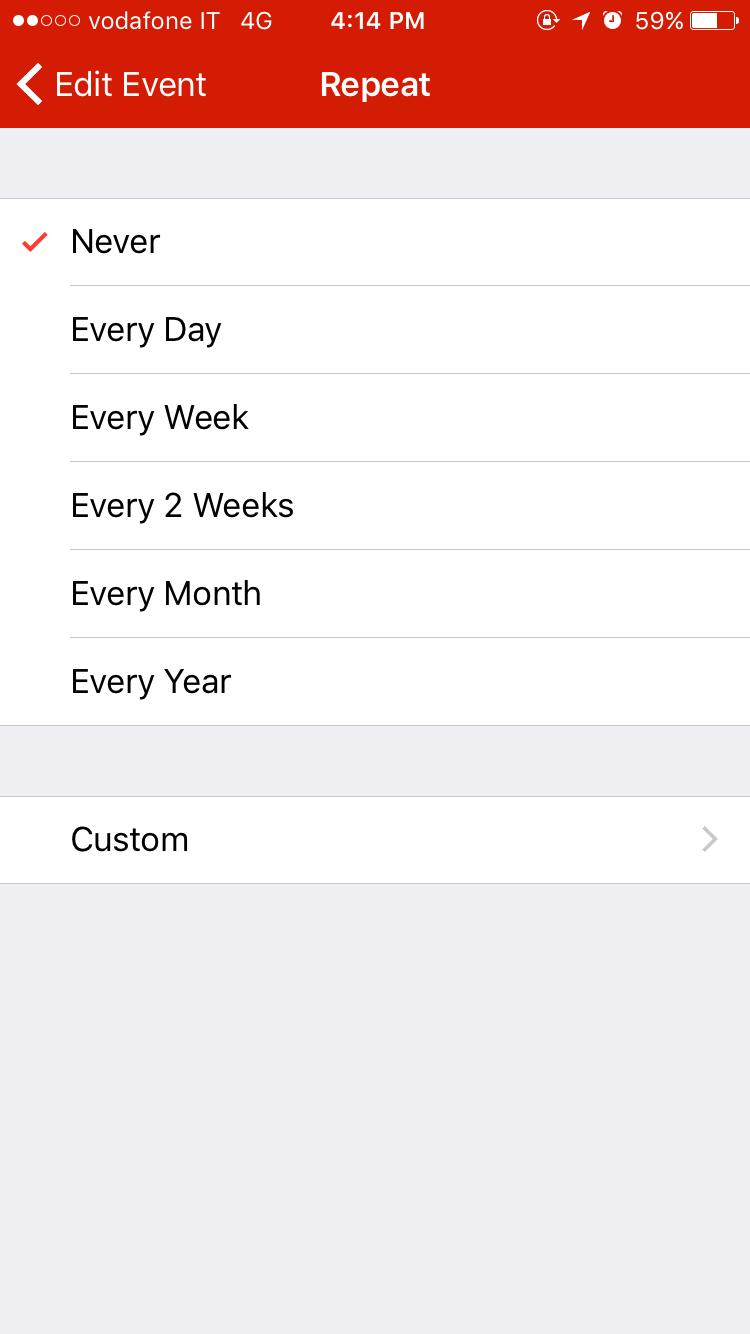 |
Adding Notes to Events
1. Give a secondary click to the event.
2. Select “Get Info.”
3. Click next to where it says “notes” and type.
Event’s notes only support text and emoji. Photos, maps, checklists, drawings & audio notes are only available for Task Notes and Daily Notes.
For Mac:
For iOS:
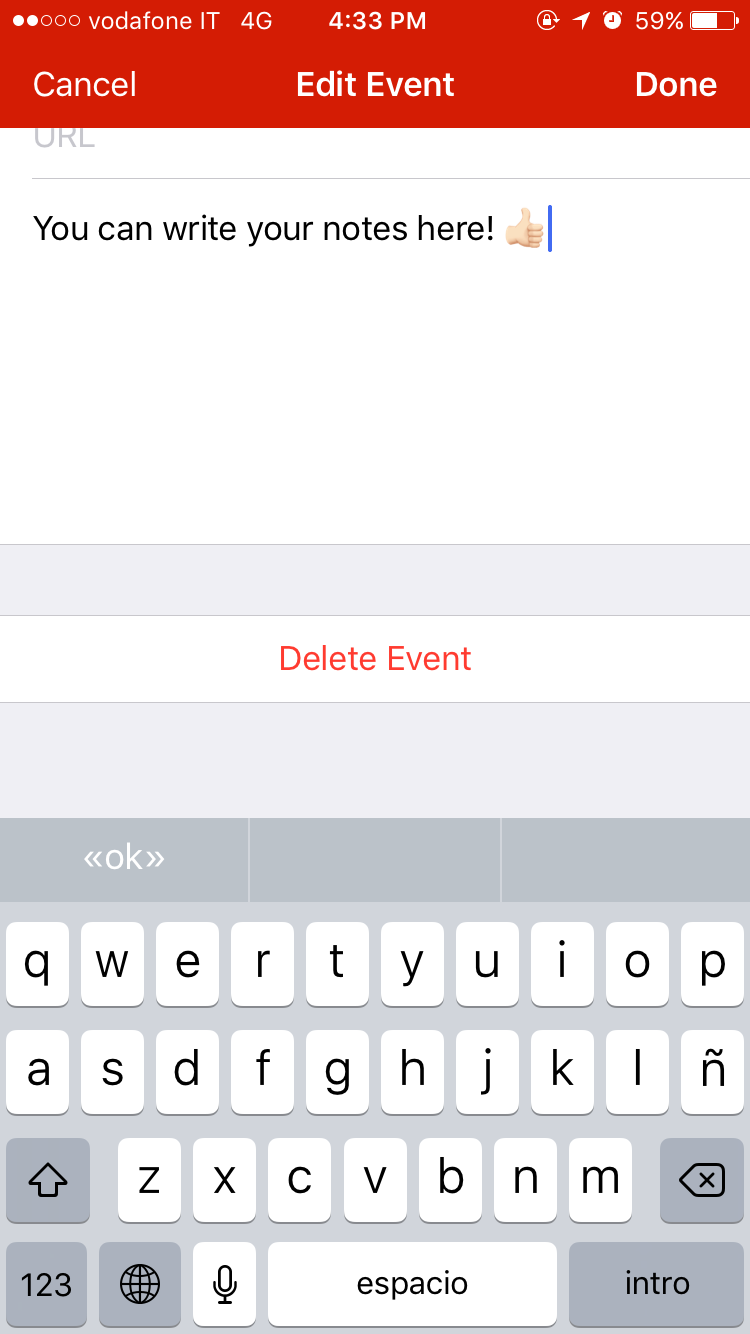
Deleting an Event
There are several ways in which you may delete an Event:
• Select the Event and use the backspace key;
• Give a secondary click to the Event and select “Delete”; or
• Give a secondary click to the Event, select “Get Info” and then select “Delete.”
- IMPORTANT: When deleting a repeating event you will be prompted whether you’d like to erase a single event “This Event Only” or “All Future Events”. Past events will not be affected.
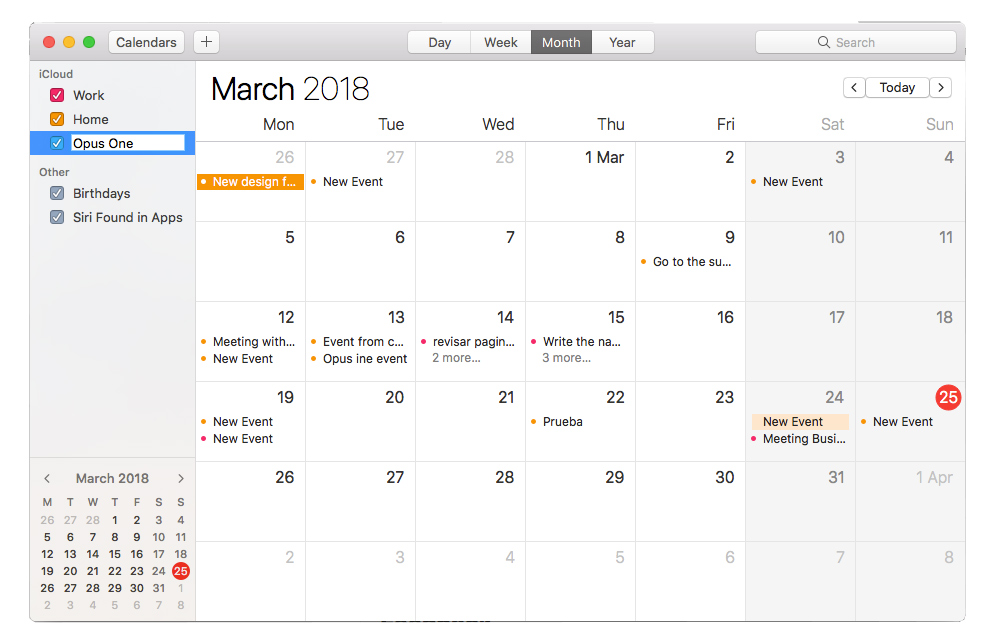
Calendars
Calendars cannot be added or deleted in Opus One. New calendars need to be added in the Mac’s Calendar app. Calendar properties such as: the default calendar for new events, the calendar’s color, name, first day of the week and sharing, also need to be set in the Mac’s Calendar app.
Adding Calendars
1. Open the Mac’s Calendar app.
2. From the top menus, select “File.”
3. Select “New Calendar” / “iCloud.”
4. Double click on the calendar to set its name and color.
5. To add more calendars, repeat steps 2 to 4.
Next time Opus One is opened the new Calendars will be available for selection.
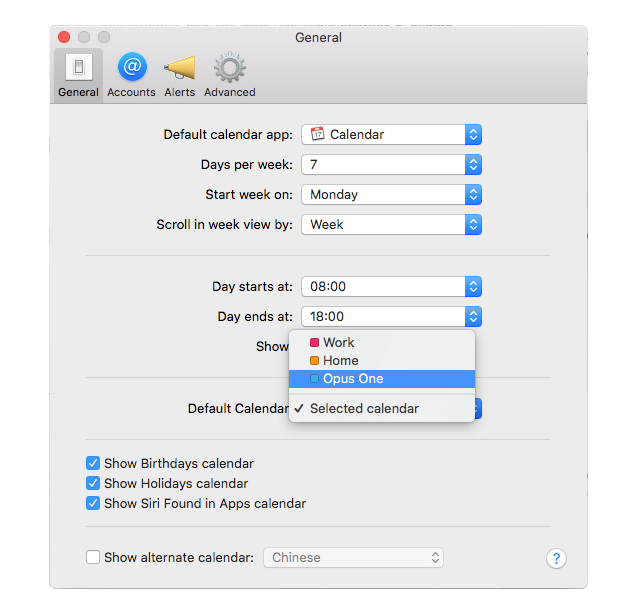
Setting a Default Calendar
The default calendar for events created in Opus One will be the same as on your Mac’s Calendar app. Events added from other places and sites where a different default Calendar might have been set, will keep their original calendar.
Example:
The default calendar on your Mac is “Work” and the default calendar on iCloud.com is “Home”. Events created in Opus One will be set by default to the Work Calendar while events added in iCloud.com will be assigned to the Home Calendar.
To set a Default Calendar:
1. Open the Mac’s Calendar app.
2. From the top menus select “Calendar.”
3. Select “Preferences.”
4. Select “General.”
5. Go to the 8th option “Default Calendar.”
6. Choose from the available calendars.
Hiding Calendars
1. From the top menus, select “Opus One.”
2. Select “General.”
3. Select “Calendar.”
4. Check the Calendars you’d like to be hidden in Opus One
Linking Task Categories and Calendars
To automatically assign events created from tasks to a specific calendar, you need to open the “Categories” panel and set a Calendar for the category. For more information about Categories refer to the corresponding section of this manual.
Changing the color of a Calendar
1. Open the Mac’s Calendar app.
2. Click on the “Calendar” button at the left top corner for calendars to show.
3. Give a secondary click to the Calendar .
4. Select a new color.
For changes to be shown in Opus One you will need to Quit and Open.
Adding a Subscription Calendar
1. Quit Opus One.
2. On the web, find the calendar subscription.
● If there’s a Subscription button click it and skip to step 7, or
● Copy the calendar’s URL
3. Open the Mac’s Calendar app.
4. From the top menus, select “File.”
5. Select “New Calendar Subscription.”
6. Enter the URL and click “Subscribe.”
7. Choose color and preset alerts for this calendar.
8. Open Opus One and check that events from the new subscription calendar have been added.
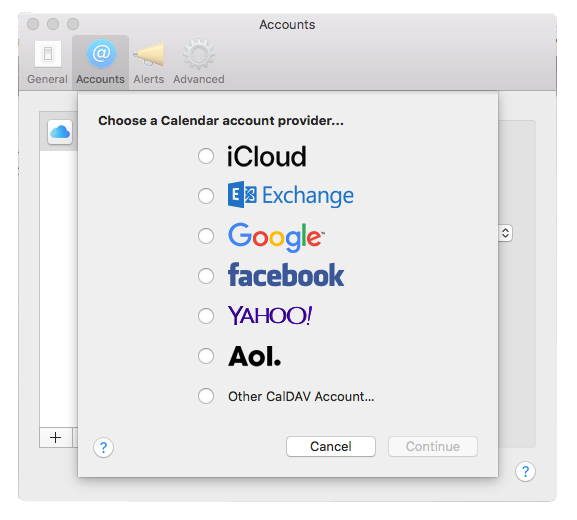
Syncing with Google Calendars
1. Quit Opus One.
2. Open the Mac’s Calendar app.
3. From the top menus, select “Calendar.”
4. Select “Preferences.”
5. Select the “Accounts” tab.
6. Click the plus sign (+) found below the accounts list.
1. Select “Google.”
2. Enter your Google credentials and click “Set up.”
Depending on the security settings of your Google account, you might need an application specific password.
 |
 |
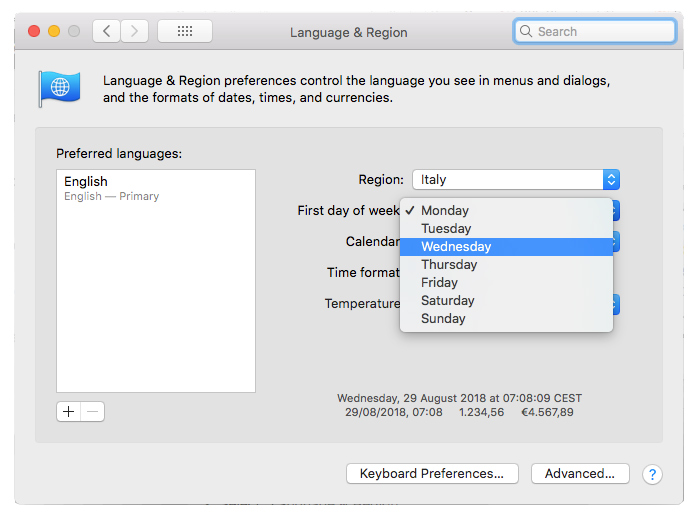
Changing the First Day of the Week
1. Open the Mac’s “System Preferences.”
2. Select “Language & Region.”
3. Go to “First Day of the Week.”
4. Choose the start day from the available options.
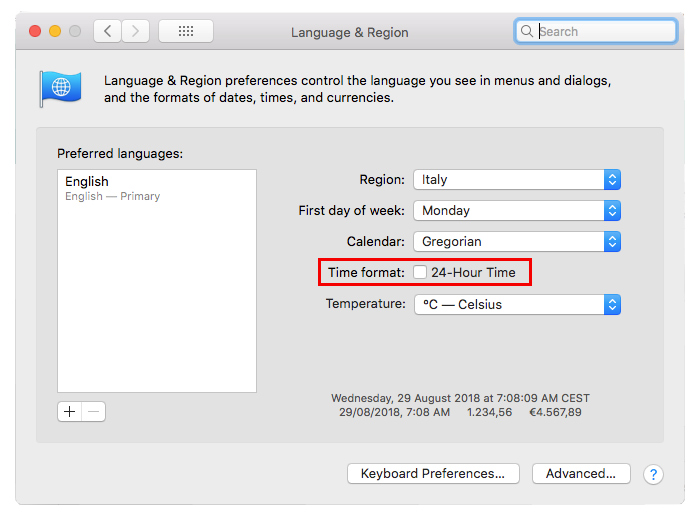
Changing the Schedule from AM/PM to 24 hour format.
1. Open the Mac’s “System Preferences.”
2. Select “Language & Region.”
3. Go to “Time Format”
4. And check or uncheck the “24-hour format” box.
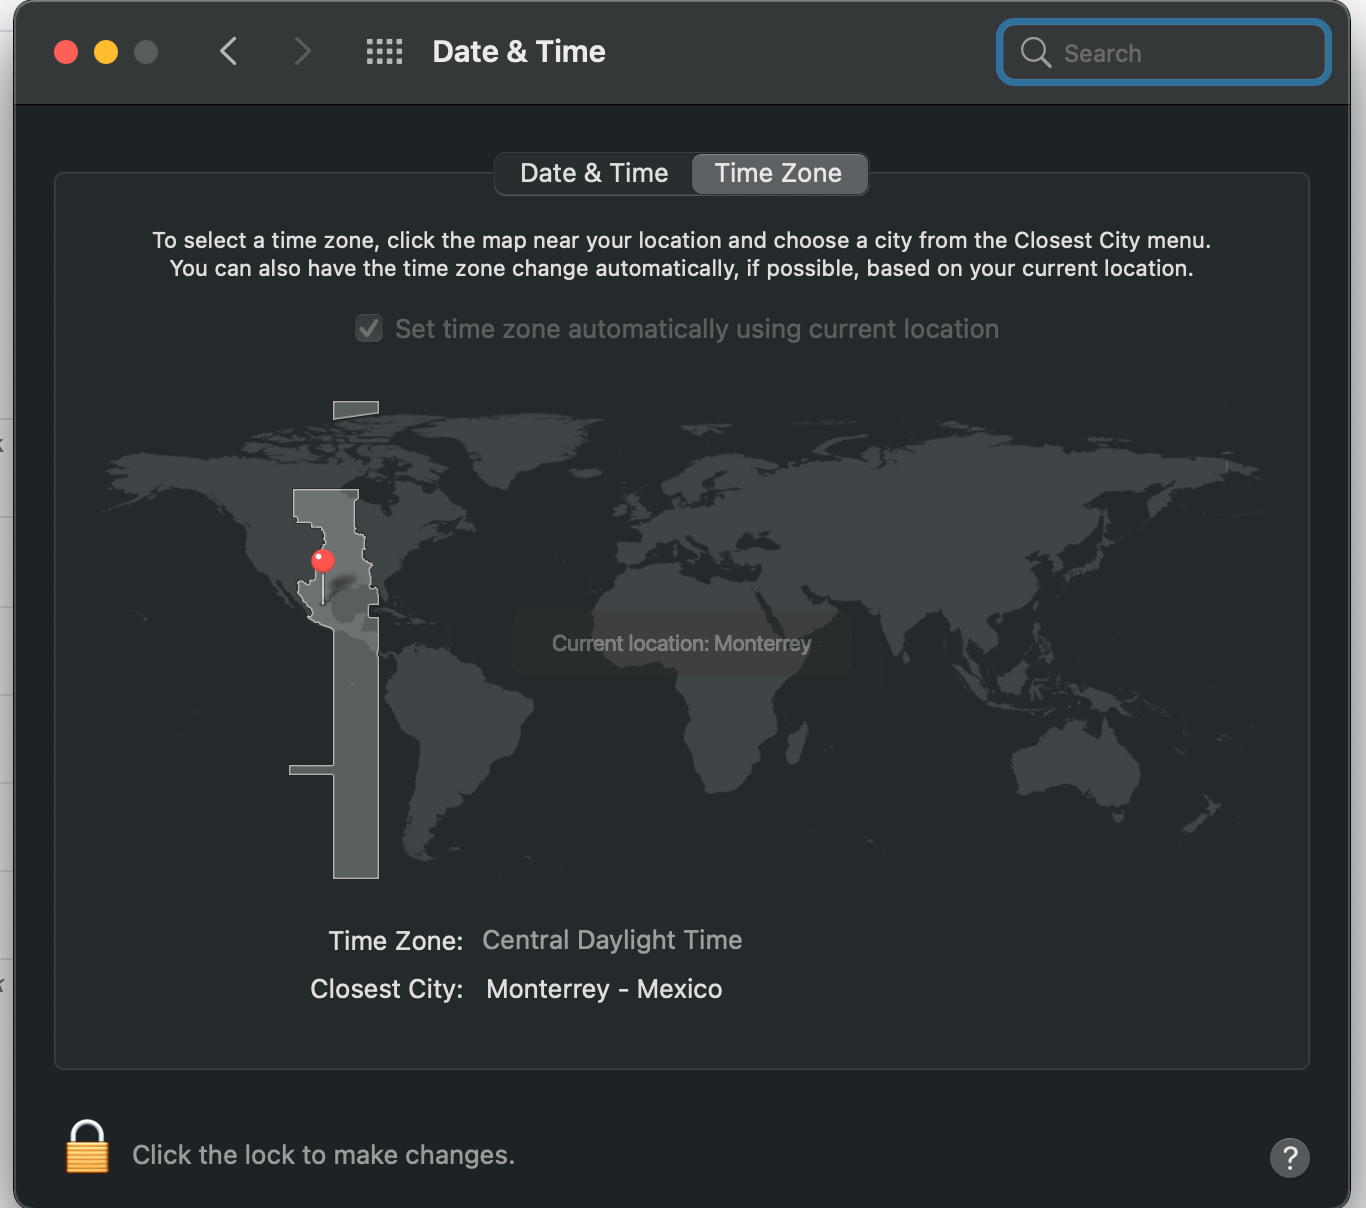
*Changing Time Zone on Events:
*
To update the time zone in macOS or Mac OS X, click on the Apple menu on the top left of your screen and select System Preferences. Choose the Date & Time panel and then click on the Time Zone tab. A world map will appear – click on your location and your time zone should appear below the map.
On Mac:
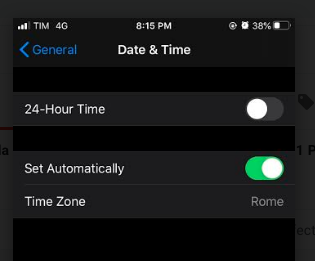
On iOS:
To update the Time Zone on iOS, select Settings from your device. Choose the Date & Time option. Select the Time Zone of your preferences.
Post your comment on this topic.