
Adding Goals
To add a Goal:
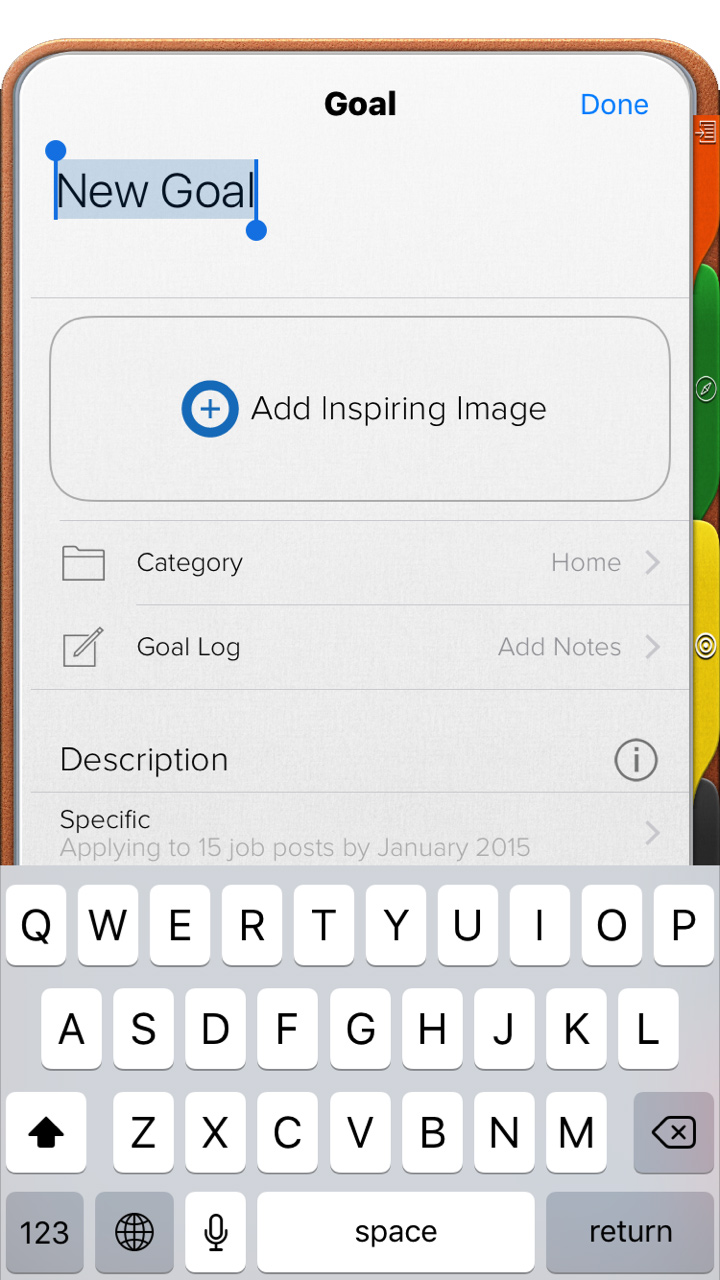
1. Click the “+” sign next to “Add Goal”.
2. Enter the goal’s name.
3. Add a due date.
4. To add information click the pencil icon or give a secondary click and select “Edit”
For Mac: 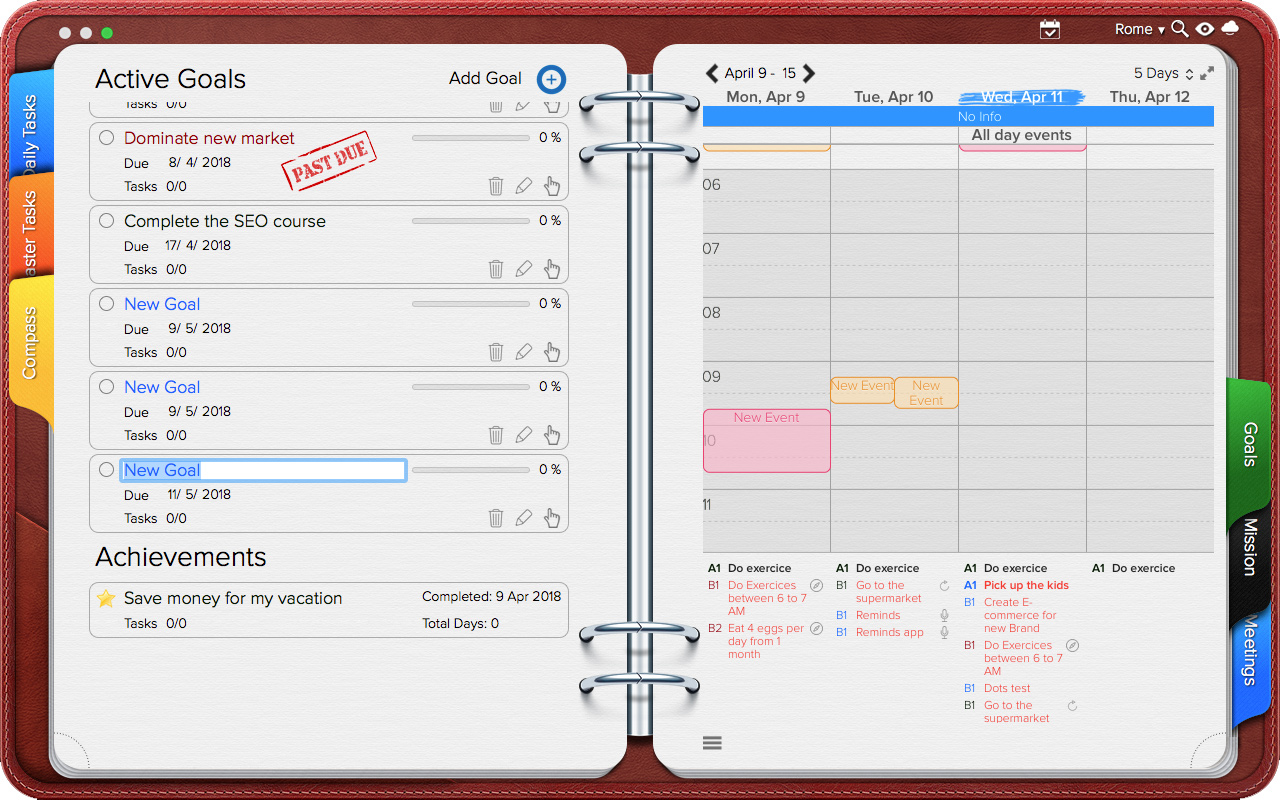
For iOS:
 |
 |
Editing Goals
There are several ways in which you can edit a goal.
- A click to the circle located before the goal’s name will mark the goal as completed.
- Double clicking the goal’s name will allow you to edit it.
- Clicking the goal’s due date will allow you to select a new due date.
- Drag the goal to a new place in the list.
- A secondary click to the priority will open a Quick Option menu where you can quickly:
• Mark the goal as completed.
• Delete the goal.
• Edit the Goal’s Information Card.
- You can also edit a goal by entering the Goal’s Information Card. To access this menu, select a goal, give a secondary click and choose “Edit” or click the pencil icon. Here you can edit the goal’s:
• Image
• Category
• Tags
• Notes or Log
• Description
• Due Date
• Tasks
• And add the goal to your calendar as an Event
For Mac: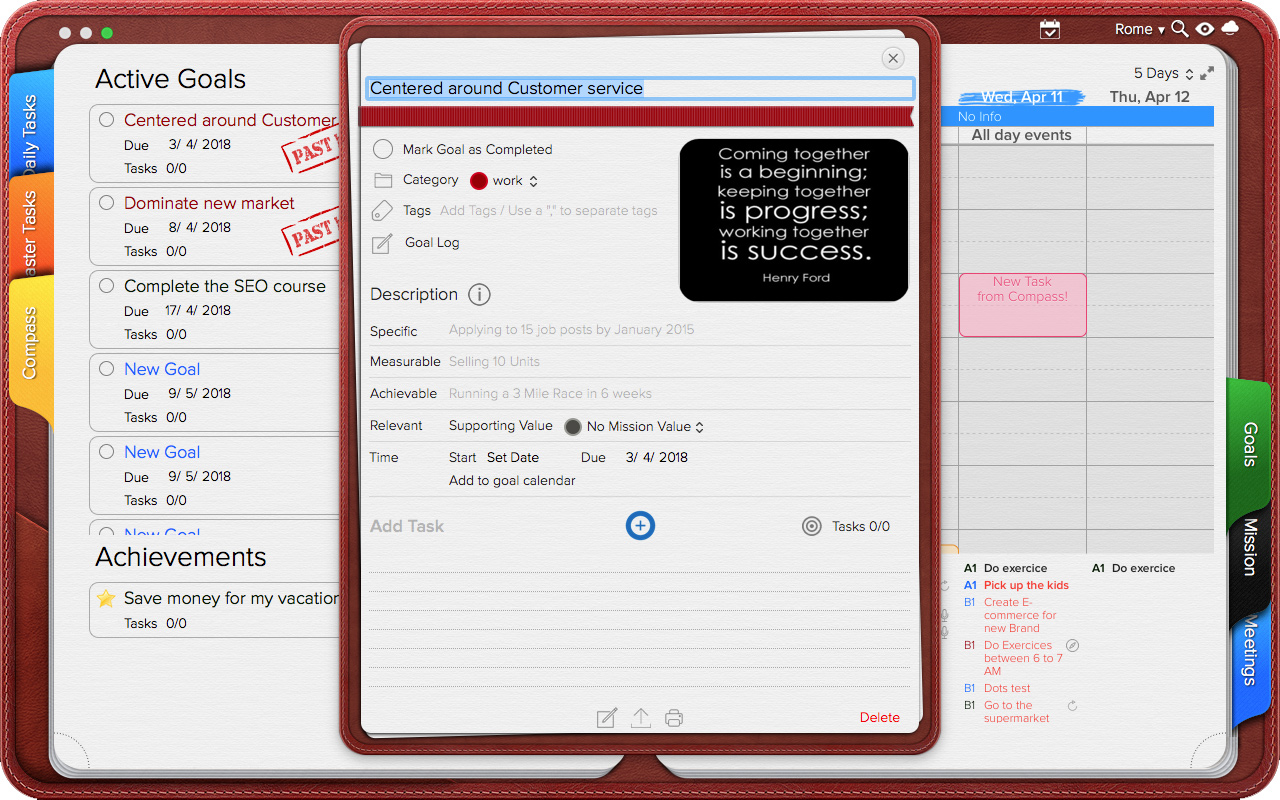
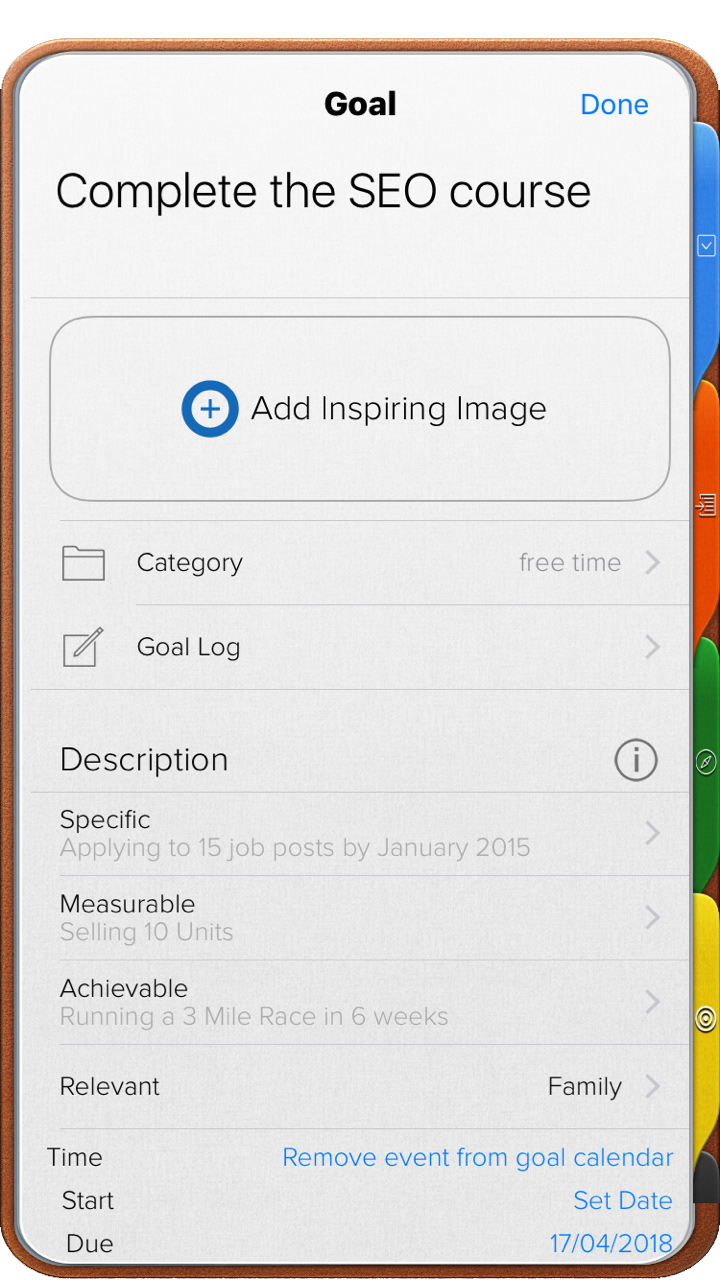
For iOS:
Goal Category
The goal category is the category to which all the tasks related to this goal will be assigned. The goal’s default category will be the same as the default category for your Daily Tasks.
To change the goal category:
1. Give a secondary click to a goal and select “Edit” or click the pencil icon.
2. Open the Goal’s Information Card.
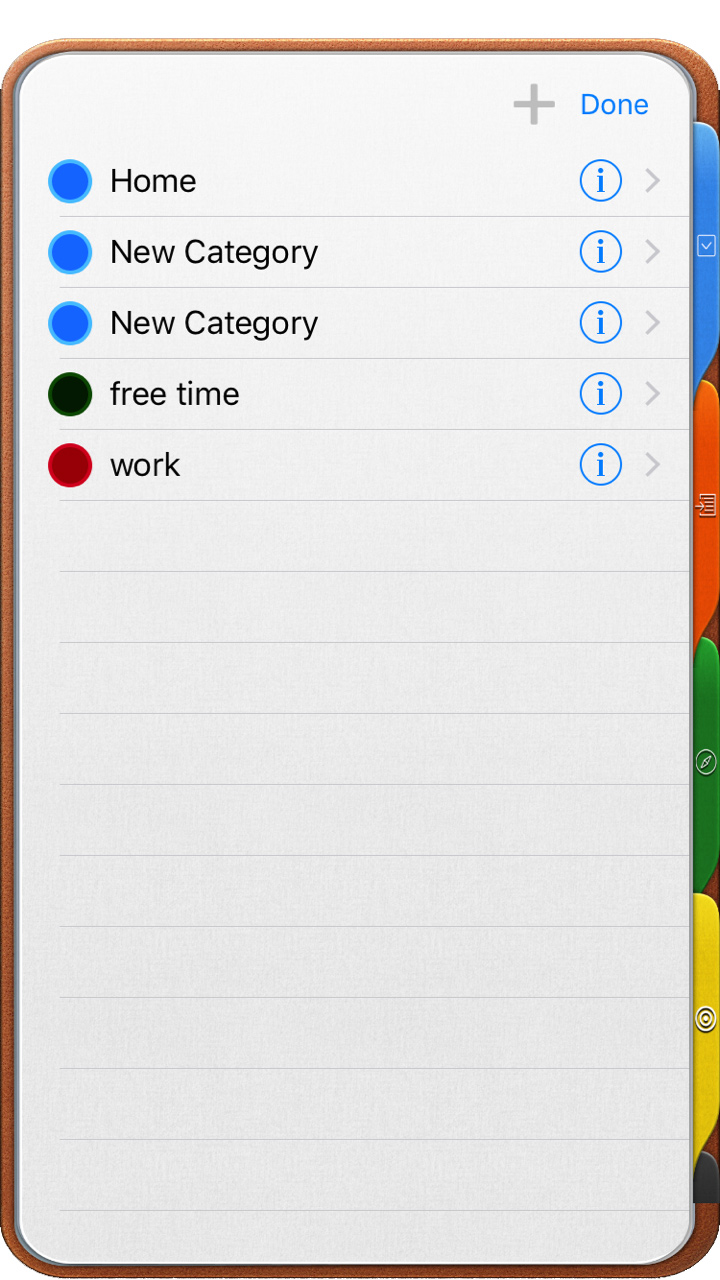
3. Click over the goal’s current category.
4. Select a new category from the available options; or
5. Select “Add Category” and proceed to add a new category.
For Mac:
For iOS:
| |
 |
Goal Tags
Goal tags are designed to help you group similar items and easily access them using the search feature.
Adding Goal Tags
1. Give a secondary click to a goal and select “Edit” or click the pencil icon.
2. Open the Goal’s Information Card.
3. Go to the “tags” field.
4. Enter one or more tags, separated by commas.
If the goal already has a tag and you want to add a second tag, place the cursor after the last tag and enter the new text.
For Mac: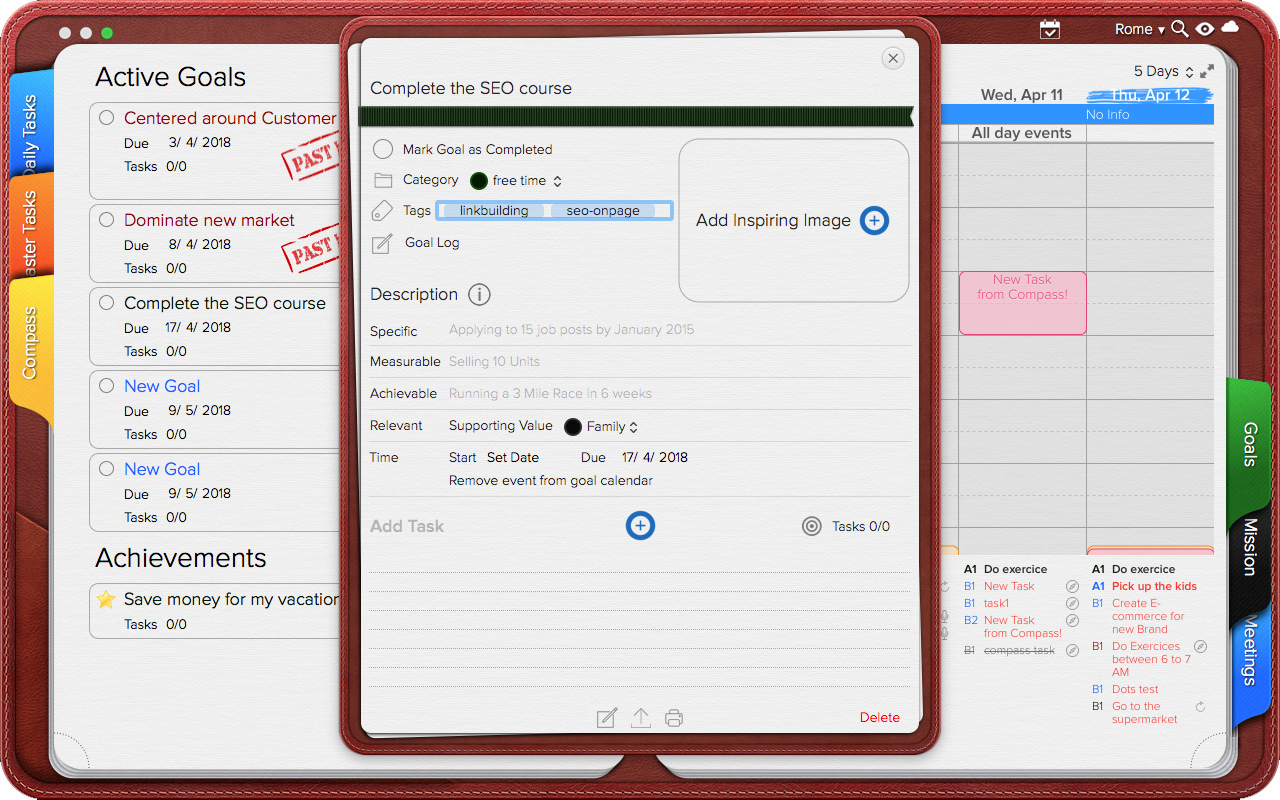
Removing Goal Tags
1. Give a secondary click to a goal and select “Edit” or click the pencil icon.
2. Open the Goal’s Information Card.
3. Go to the “tags” field.
4. Select the tag or tags to be removed
5. Press the backspace key.
Goal SMART Description
According to literature, a well defined goal is
• Specific
• Measurable
• Achievable
• Relevant
• Time bound
The Goal’s Information Card has a loaded template and several examples aimed to help people, write well defined goals.
For Mac: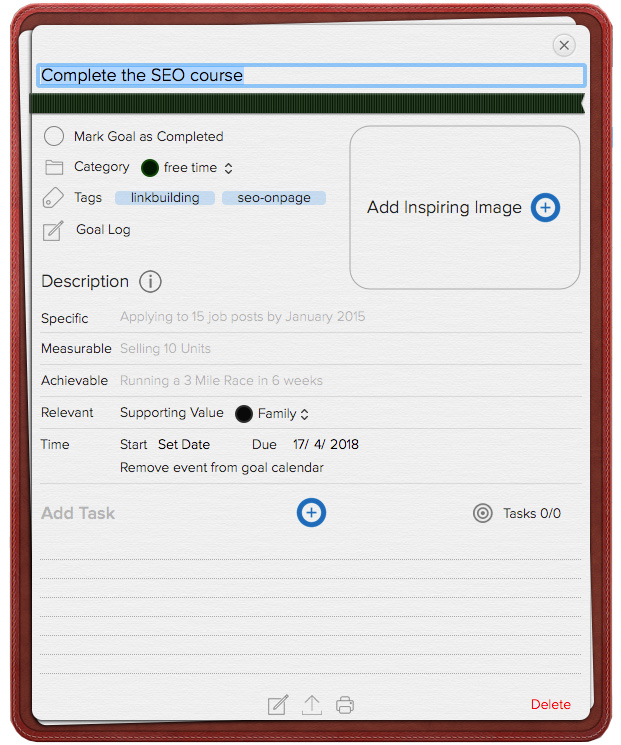
For iOS:
Linking Goals to Values
According to literature, well defined goals are “relevant”. This means that the goal will bring you closer to your personal mission, plus when goals are associated with one or more values the chances of accomplishing them increases. By default set’s the goal’s “Supporting Value” field is set to “None”.
To change this:
1. Give a secondary click to a goal and select “Edit” or click the pencil icon.
2. Open the Goal’s Information Card.
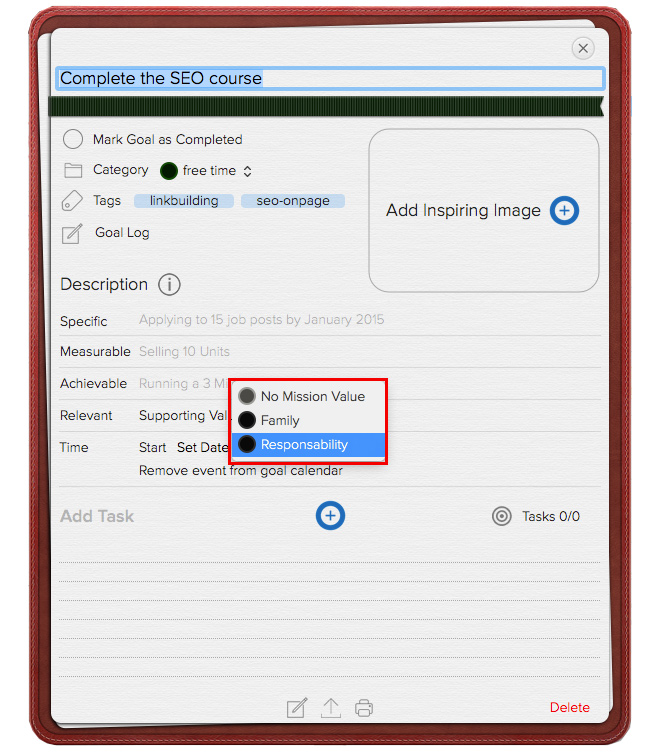
3. Go to the “Supporting Value” field.
4. Select one of the available values from the drop down list.
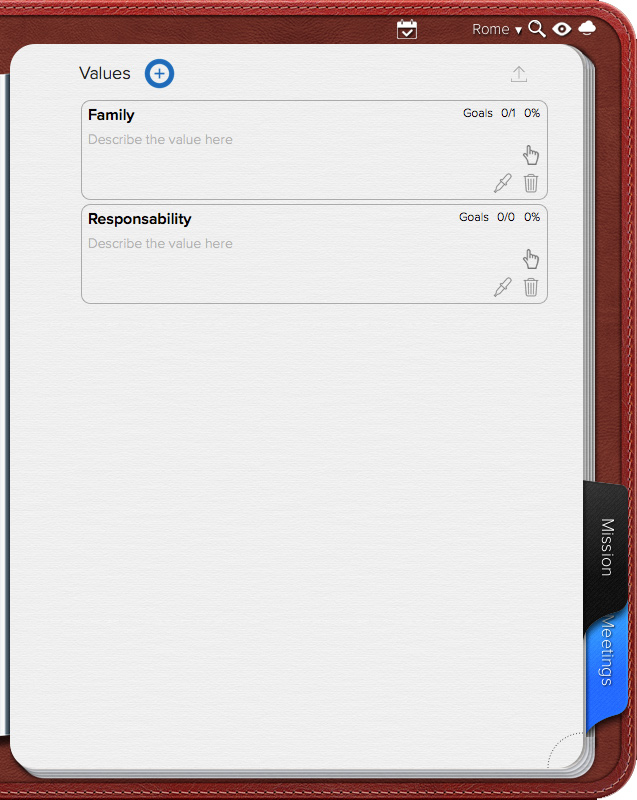
- The list of “values” is taken from the Values in the Mission Section.
Whenever a goal is linked to a value, the goal counter in the Value will be increased by one. To add new values please refer to the Mission Section from this manual.
For Mac:
 |
 |
Goal Images
Adding Goal Images
1. Give a secondary click to a goal and select “Edit” or click the pencil icon.
2. Click the “+” sign next to “Add Image.”
3. Select an image from your Mac.
4. Click Open.
For Mac: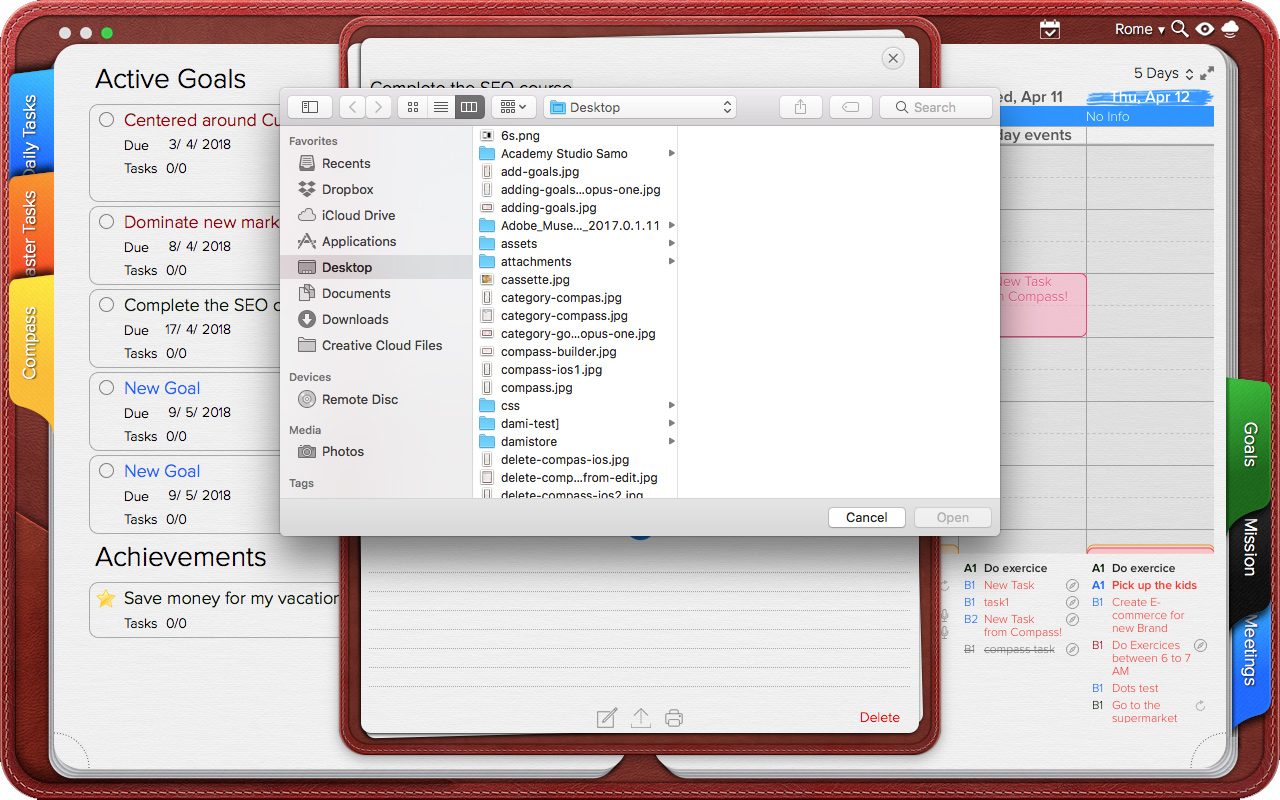
For iOS: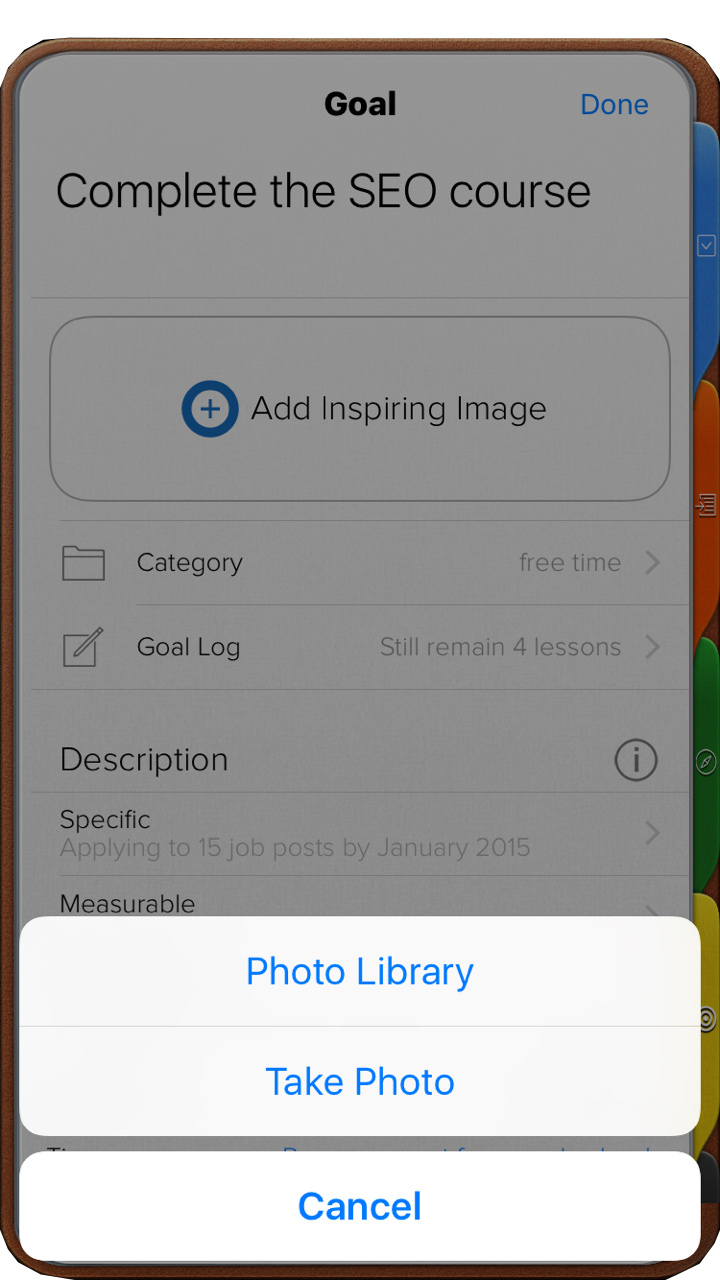
Deleting Goal Images
1. Give a secondary click to the goal’s image.
2. Select “Remove.”
For Mac: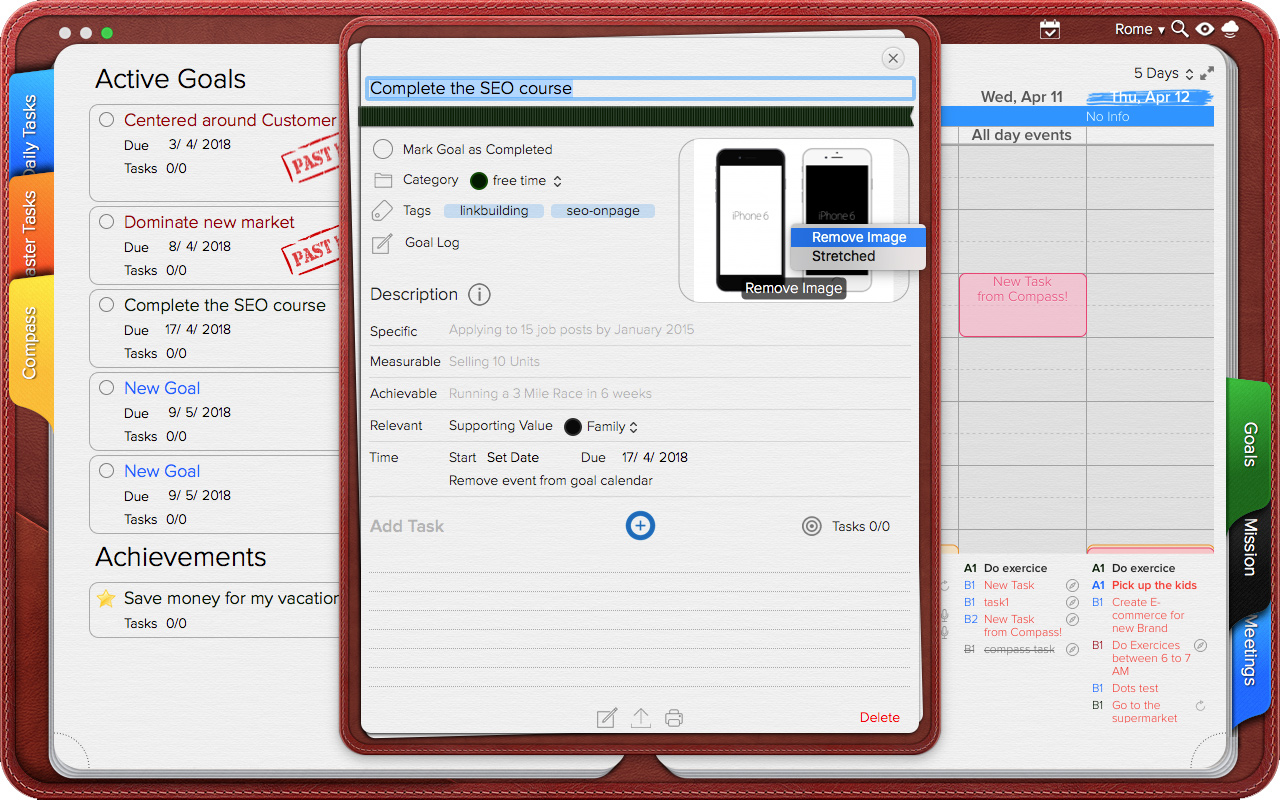
For iOS: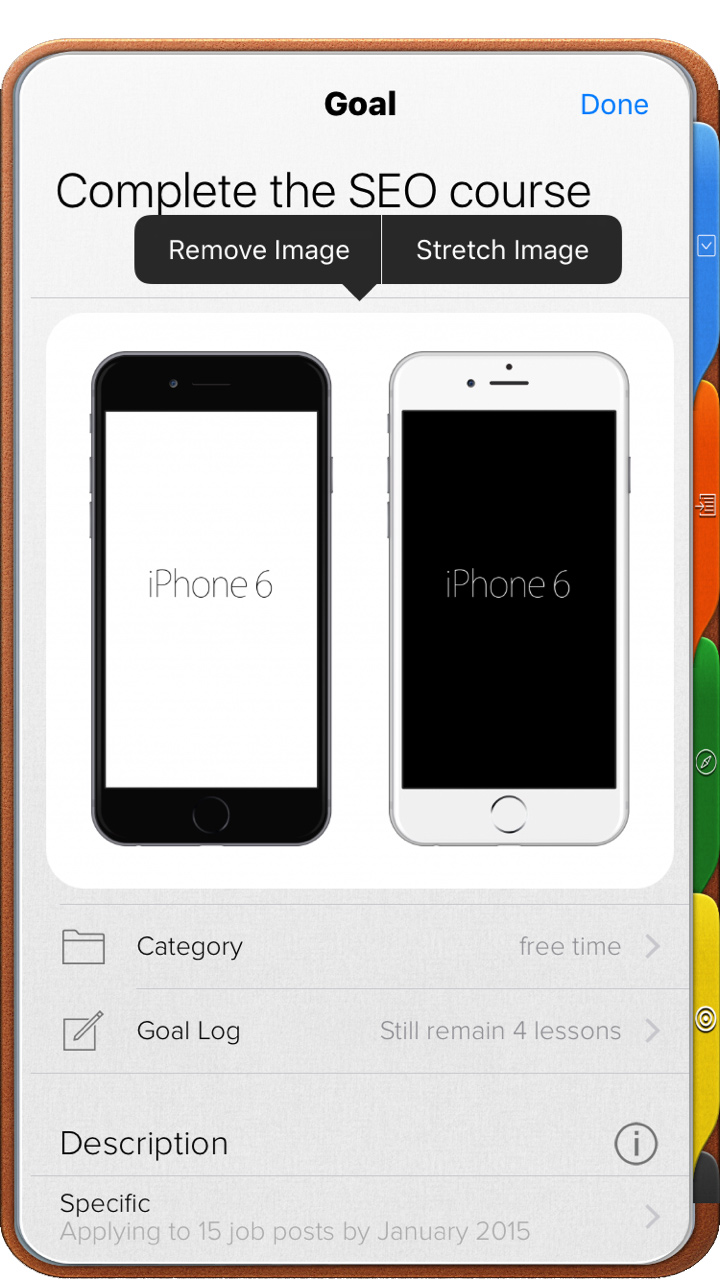
Replacing Goal Images
1. Delete the current goal image.
2. Add a new image.
For more information on how to delete or add goal images, please refer to the instructions above.
Adding Tasks to Goals
1. Give a secondary click to a goal and select “Edit” or click the pencil icon.
2. Open the Goal’s Information Card.
3. Click the “+” sign next to “Add Task”.
4. Enter the task’s name.
For Mac: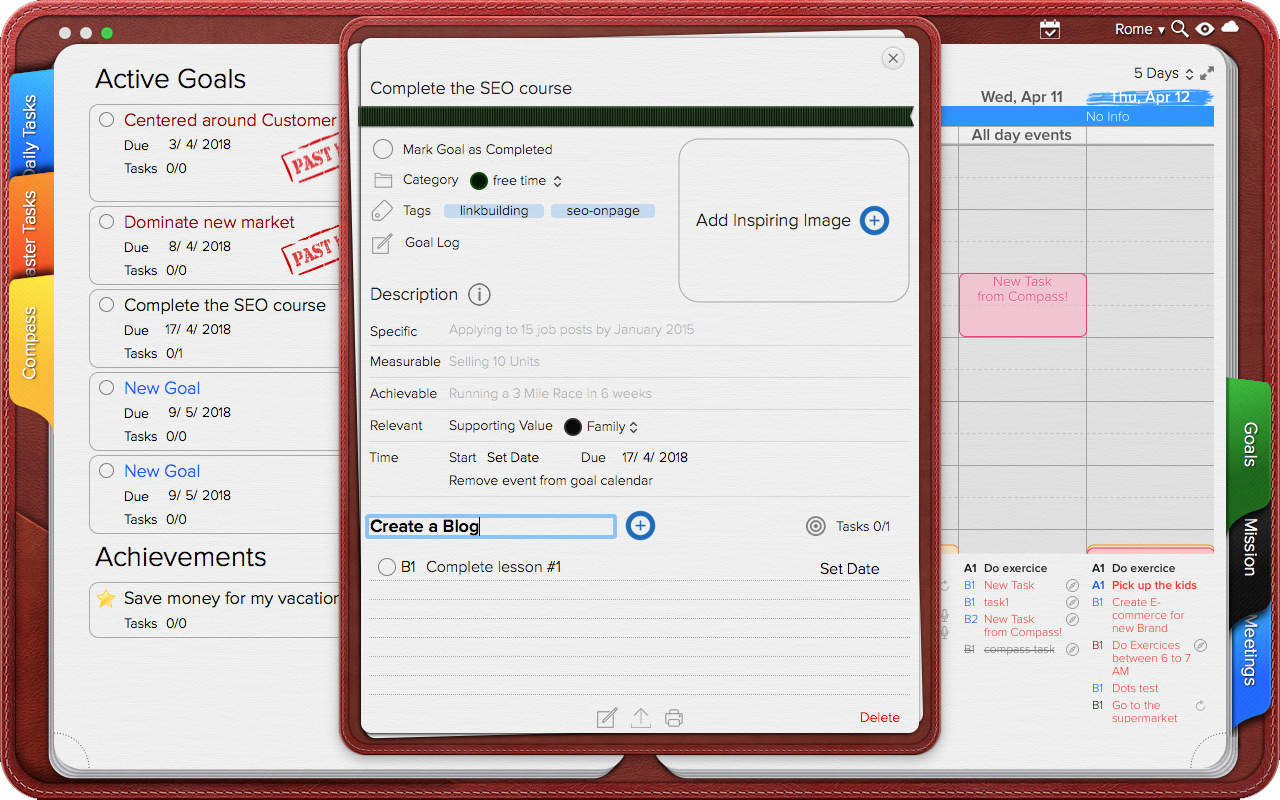
For iOS: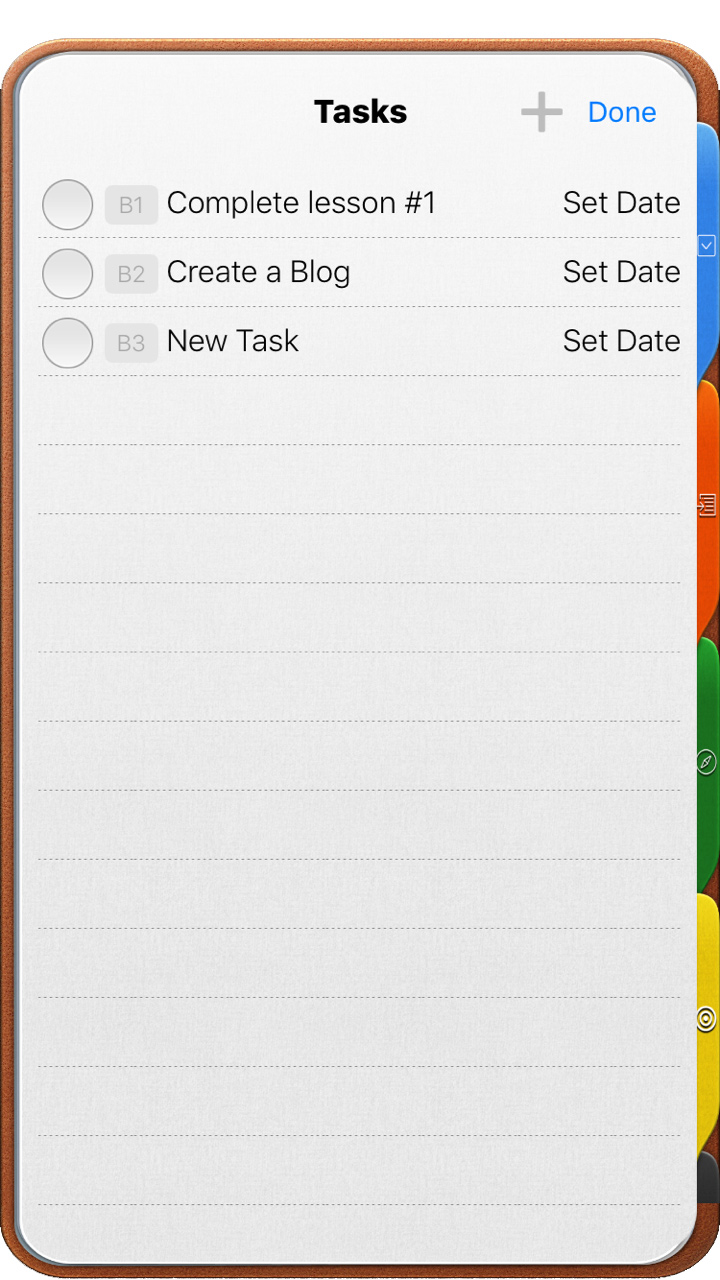
Or
1. Give a secondary click to the Role and select “Edit” or click the pencil icon.
2. Open the Role’s Information Card.
3. Click Daily Task Tab, Master Tasks Tab any of the Planner Views – so you will have on your screen both the Task List or Planner View and the Role Card.
4. Drag tasks from the Daily Task List, Master Task List or the Planner and drop them into the task section inside of Goal Information Card.
- IMPORTANT: You cannot use the drag and drop method to move tasks from Compass Roles to Goals or vice versa. And changing any of the goal task’s category, will change the goal’s category.
Goal tasks will feature a goal icon so you can easily identify them on your task lists and they have the same properties as Daily Tasks. For more information, please refer to the Daily Task section of this manual.
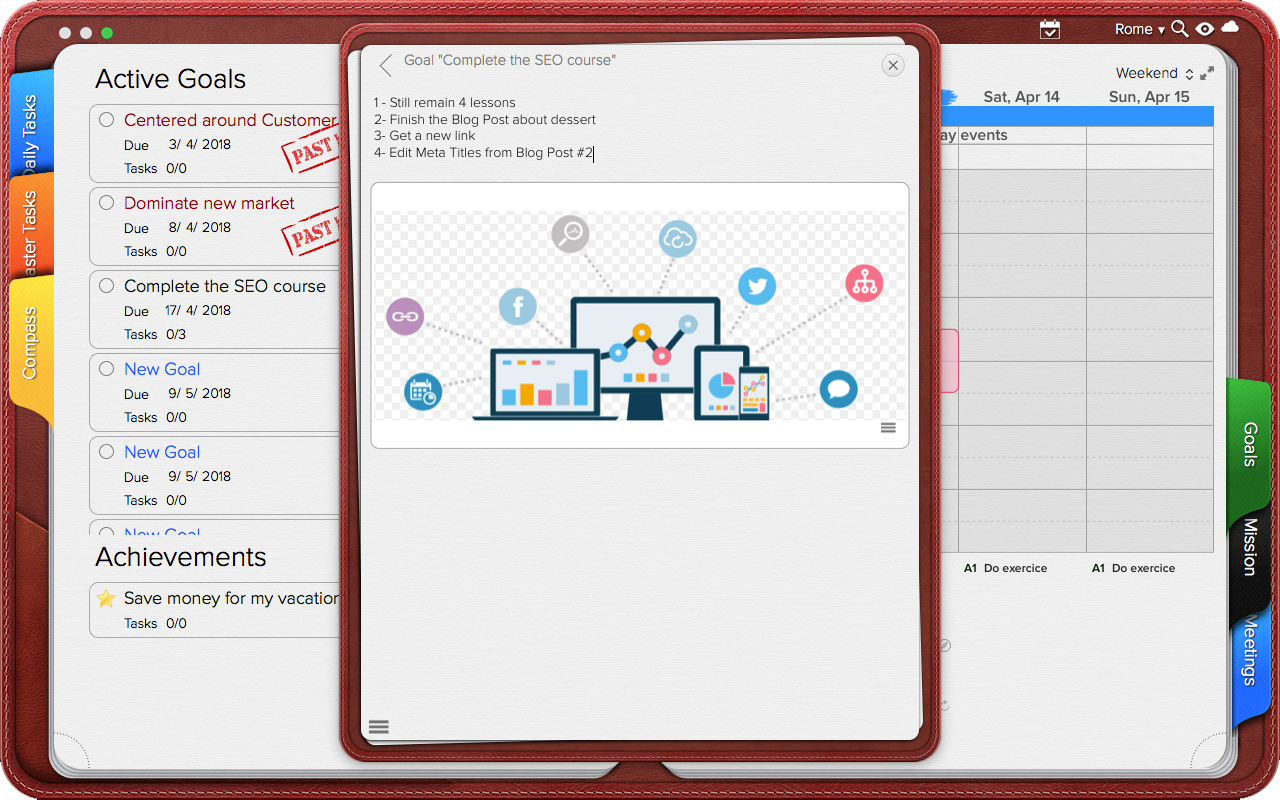
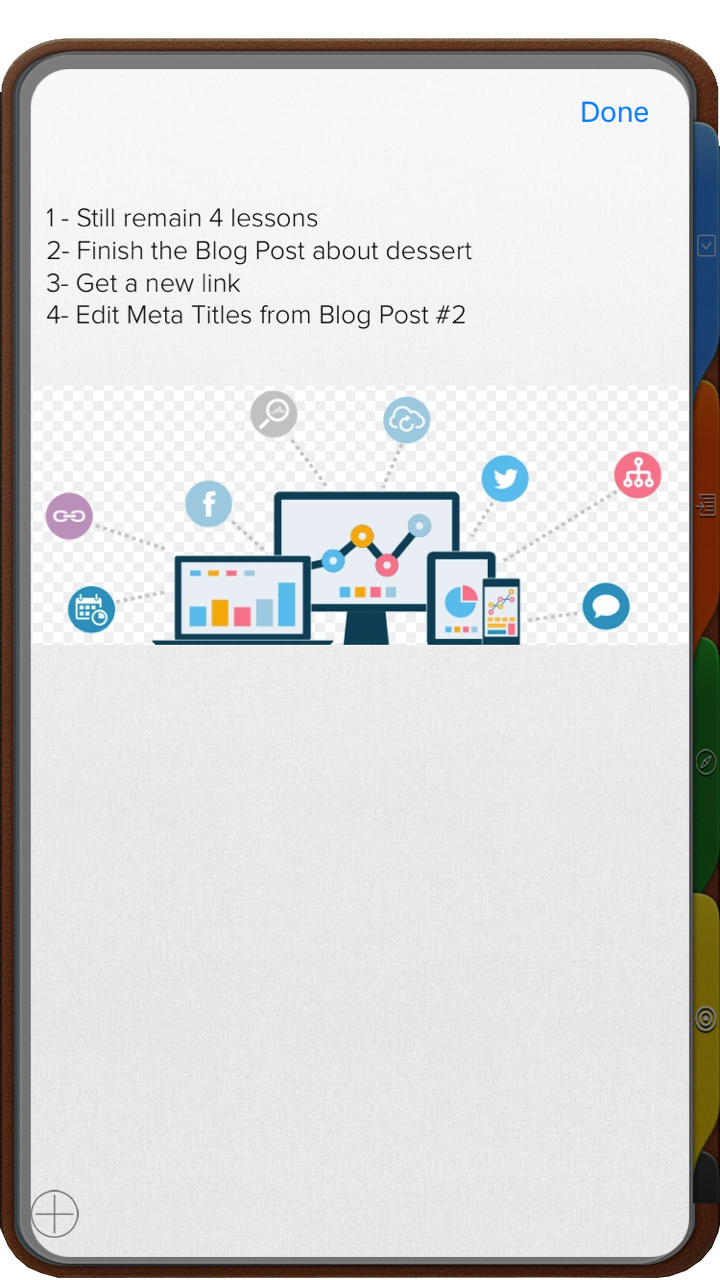
Goal Log
This space is provided with the intention that you keep track of your progress while reaching your goal, much like a journal. Here you can enter text notes, images, maps. checklists, audio notes and more. Goal log’s have the same properties as Notes. For more information, please refer to the Daily Notes section of this manual.
To add a log to a Goal:
1. Give a secondary click to a goal and select “Edit” or click the pencil icon.
2. Open the Goal’s Information Card.
3. Click “Goal Log” or go to the bottom of the Goal Information card and click the notes icon.
For Mac: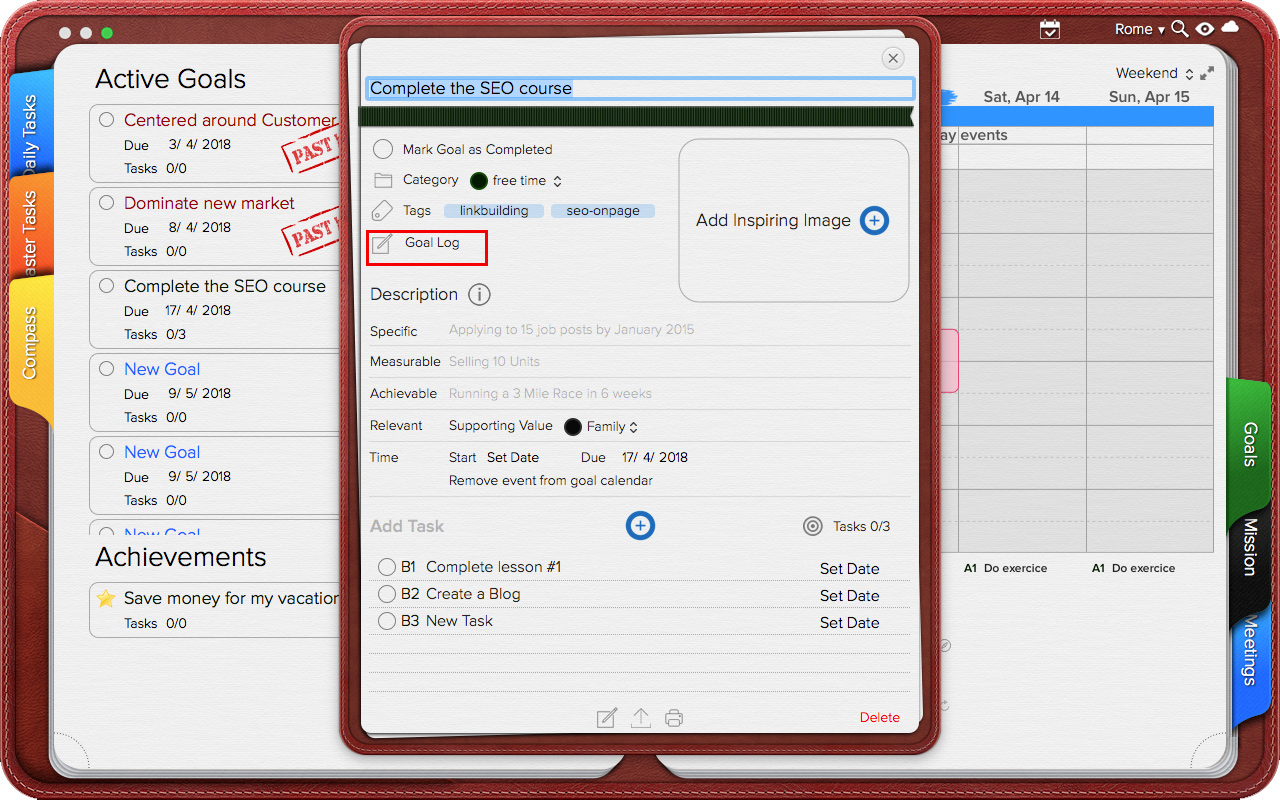
For iOS:
 |
 |
Goals in Calendar
Adding Goals as Calendar Events
To add a Goal as an event in your Calendar:
1. Give a secondary click to a goal and select “Edit” or click the pencil icon.
2. Open the Goal’s Information Card.
3. Look for the “Add to Goal Calendar” button located below the goal’s due date.
4. Click.
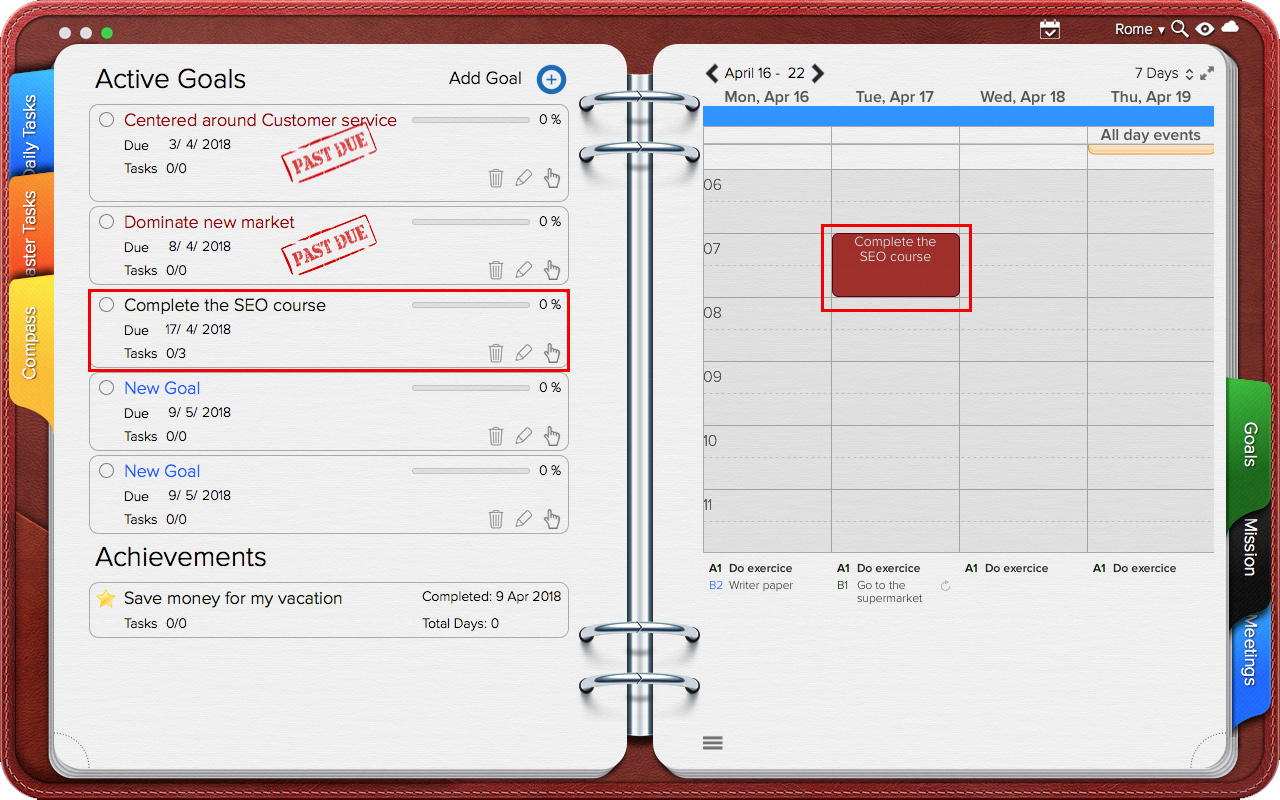
5. The goal will be added as an event to a special calendar, the “Goal Calendar.”
For Mac: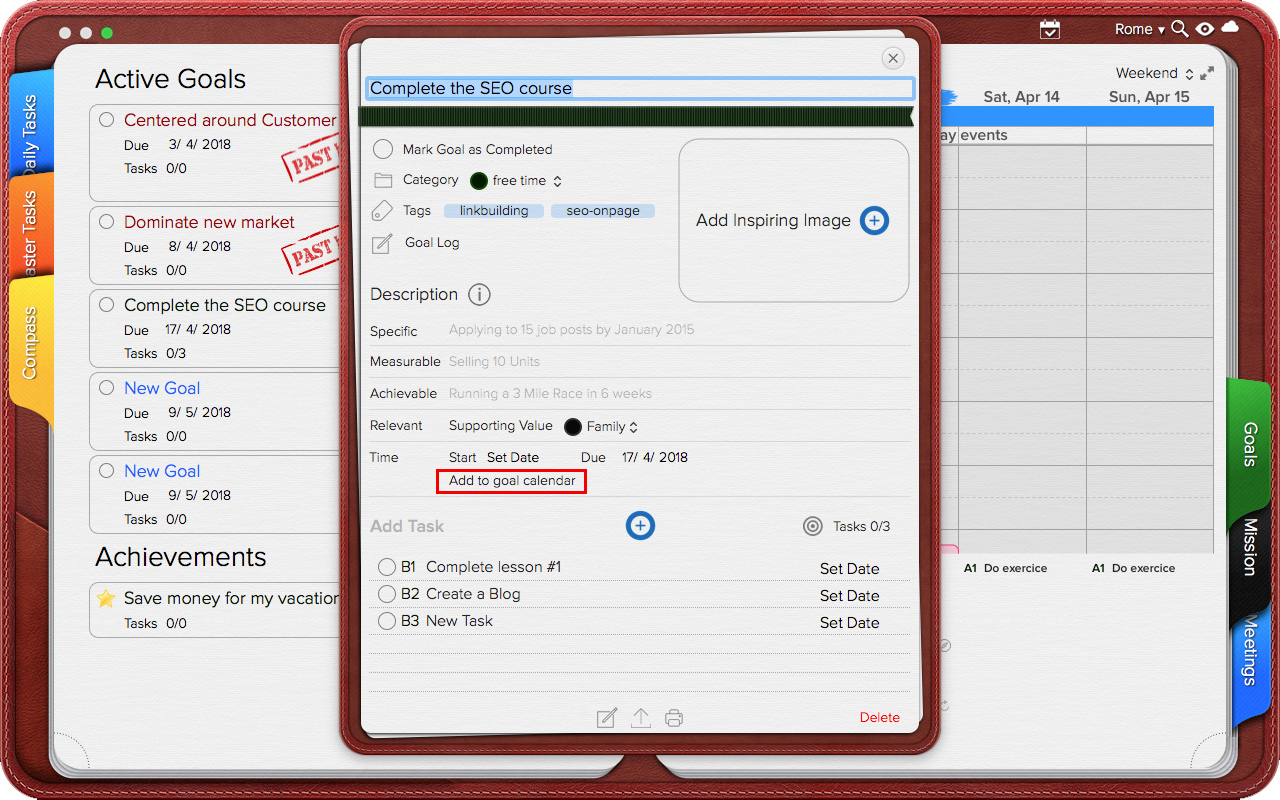
iOS: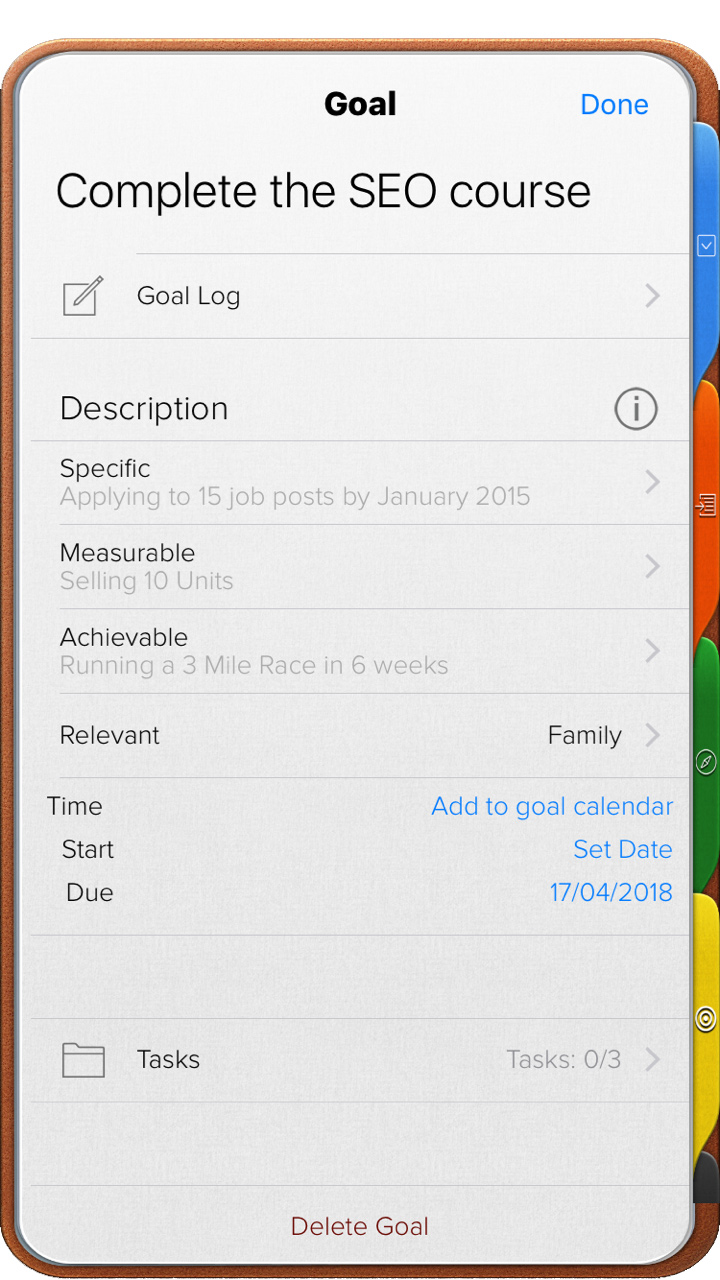
Removing Goals from the Goal Calendar
You can remove a goals from your calendar in two different ways:
1. Give a secondary click to a goal and select “Edit” or click the pencil icon.
2. Open the Goal’s Information Card.
3. Look for the “Remove Event from Goal Calendar” button located below the goal’s due date.
4. Click it.
For Mac: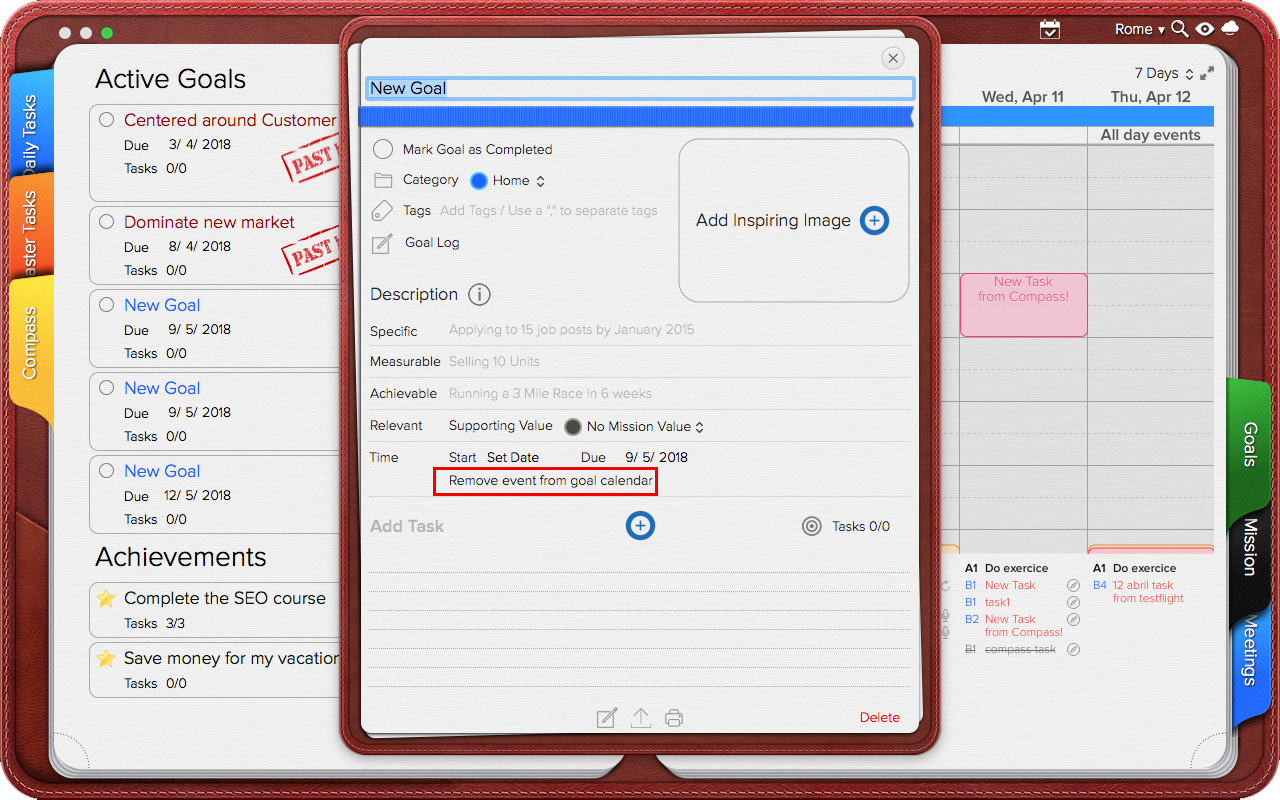
For iOS: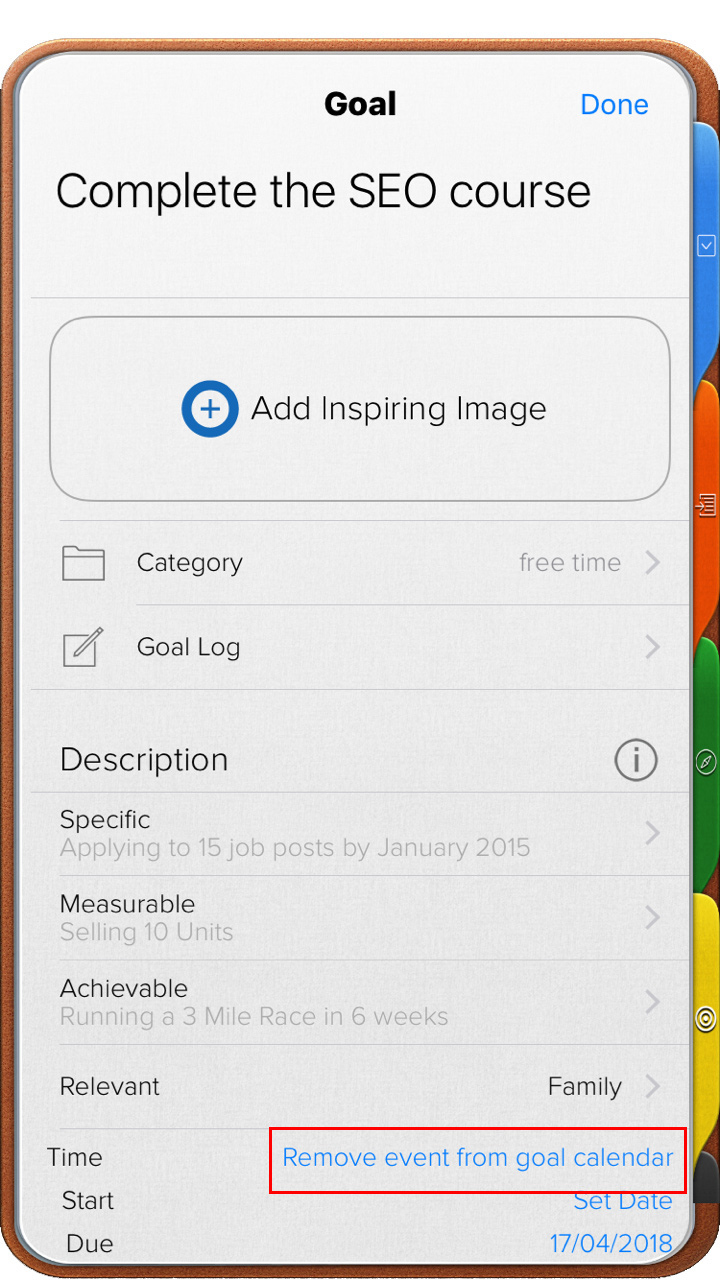
Or
1. Go to your calendar
2. Select the event
3. Give a secondary click to a goal and select “Delete” or use the backspace key
For Mac:
Sharing Goals
Goals can be shared by message, email, Facebook, Twitter or more. To share goals:
1. Give a secondary click to a goal and select “Edit” or click the pencil icon.
2. Open the Goal’s Information Card.
3. Go to the bottom of the Information Card and click the 2nd icon.
4. Choose how to share.
For Mac: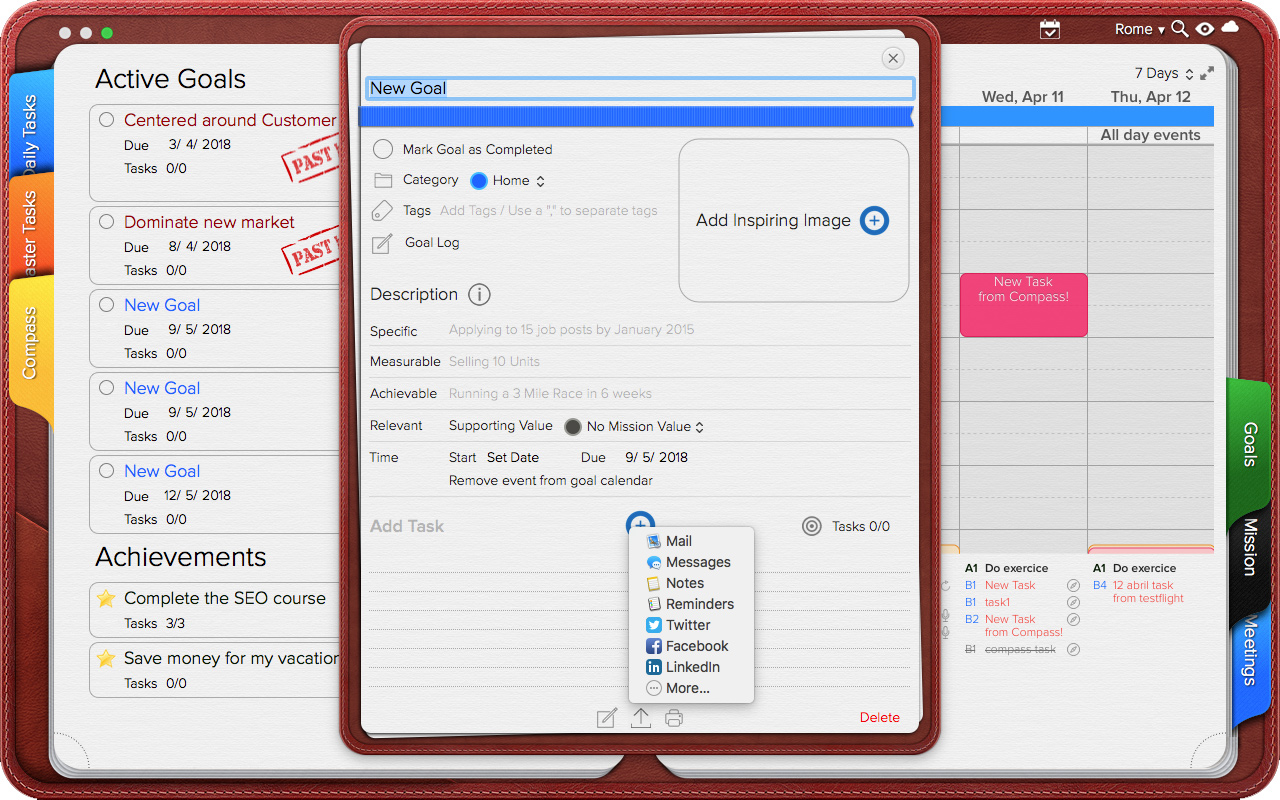
Completing Goals
Completed Goals are not deleted, instead they are moved to the Achievements section. To mark a goal as complete, click the circle located before the goal’s name.
When all due tasks are completed the Goal will automatically complete itself. If the goal was linked to a value, the value counter will be automatically updated.
For Mac: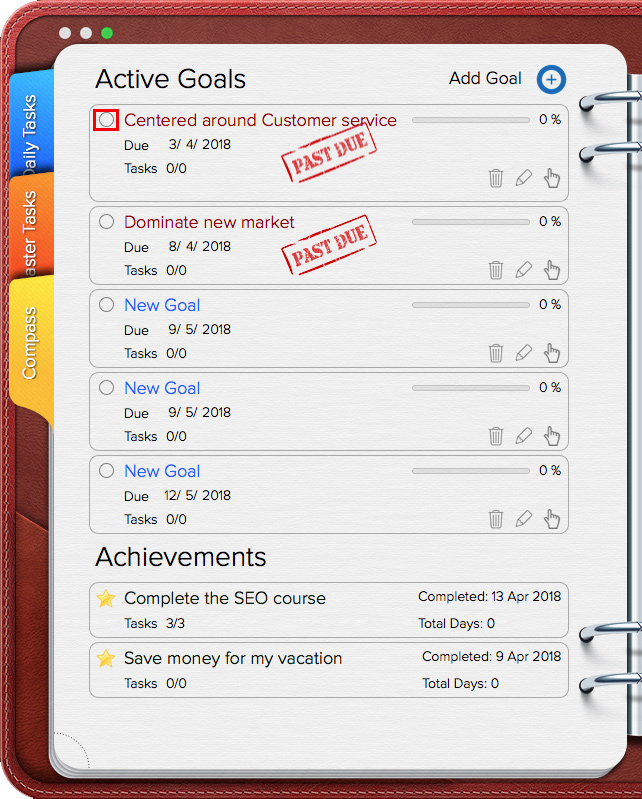
For iOS: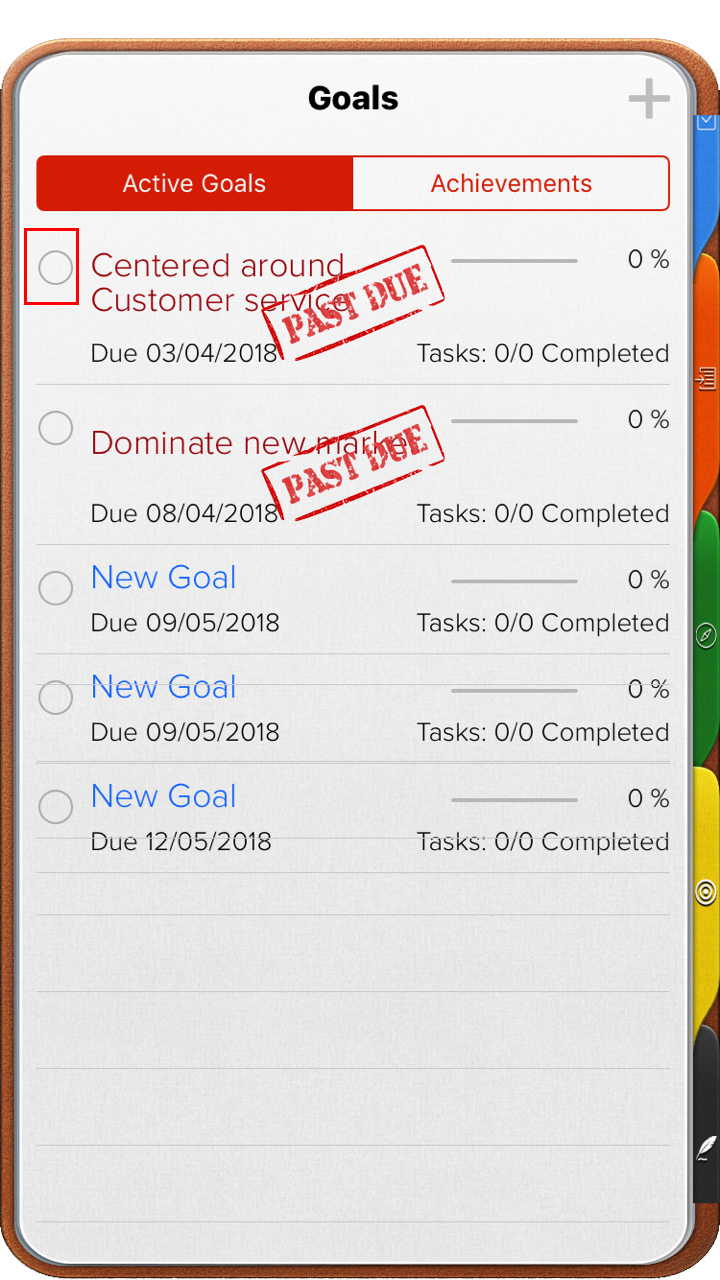
Deleting Goals
Deleting a goal will remove it from the Goal’s Section along with its information. Goal tasks will be deleted as well.
To delete a goal:
• Give a secondary click to a goal and select “Delete”; or,
• Click the trash can icon.
For Mac: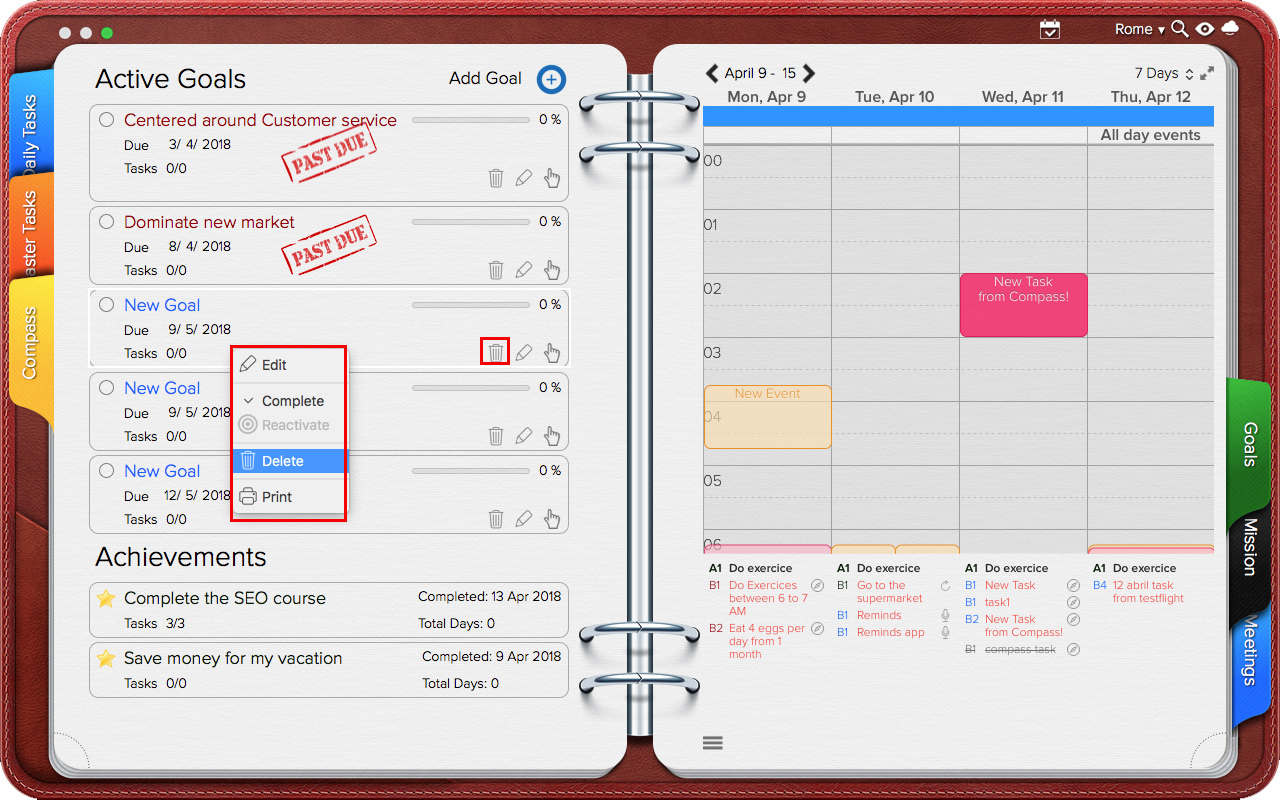
For iOS: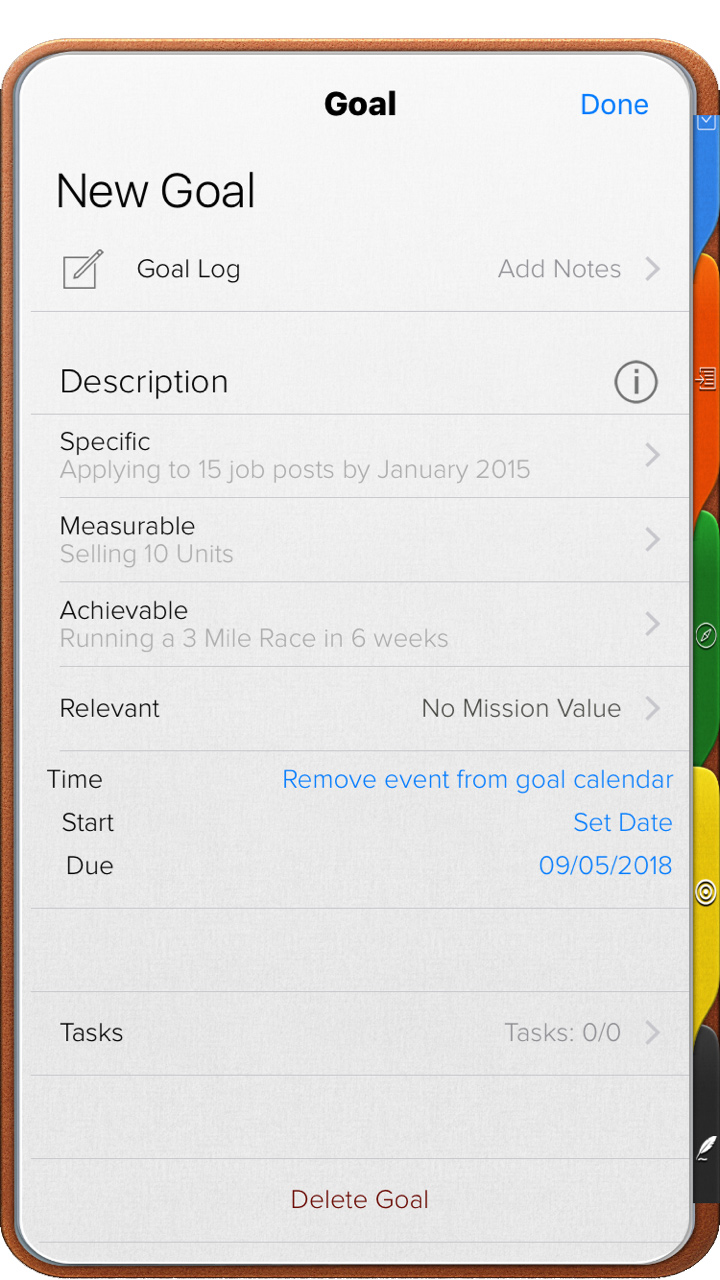
Reordering Goals
To reorder the goals list:
• Drag and drop; or
• Click the hand icon and drag the goal to a new position in the list.
Achievements
This is section that keeps track of all completed goals. This section serves two purposes:
1. It might be used to boost confidence.
2. Information on past achievements helps plan better future goals.
All achievements present the following information:
• Name of the achieved goal.
• Date when the goal was reached.
• Total number of tasks.
• Total days it took to complete the goal
For more details, give a secondary click to any achievement and select “Edit” and the Goal’s Information Card, will be displayed.
For more on Goal’s Information Card, please refer to the corresponding section of this manual.
For Mac:
For iOS: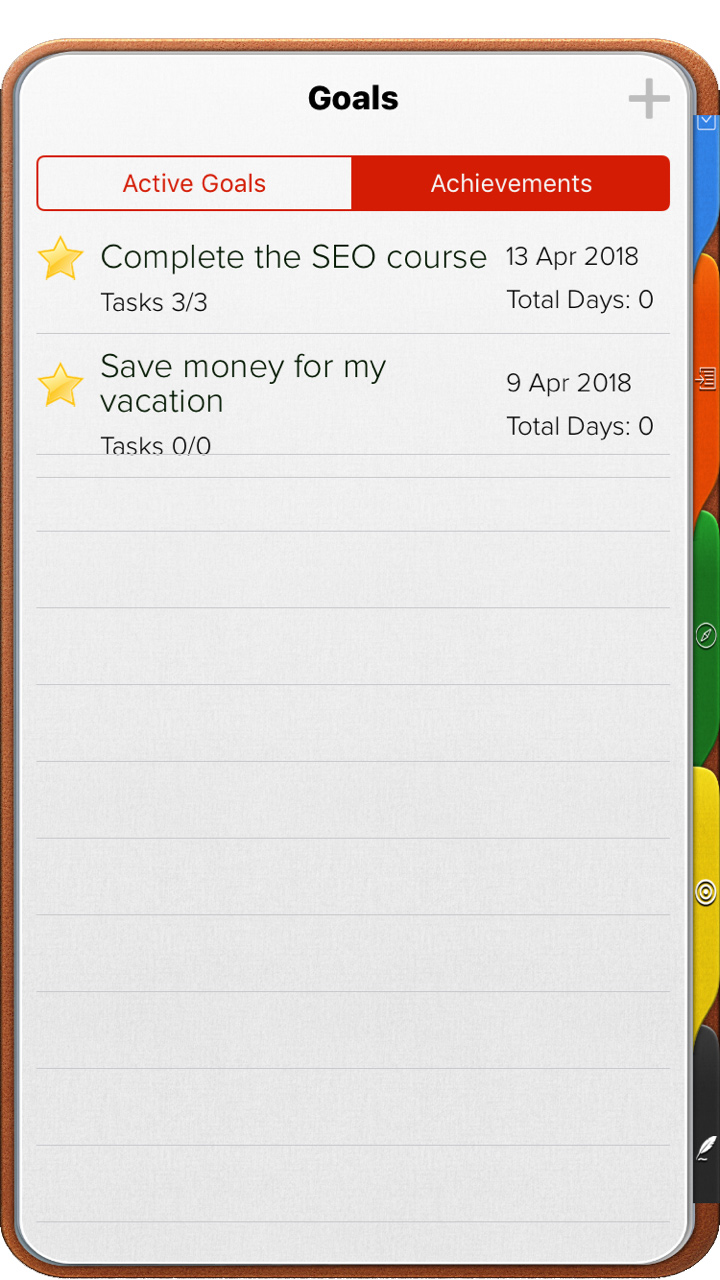
Adding Achievements
They only way to add an achievement is to create a Goal and complete it.
Editing Achievements
Achievement can be edited in the same was as Goals. For more information, please refer to the Goals section.
Deleting Achievements
Deleting an Achievement will remove it from the Goal’s Section along with its information. All related tasks will be deleted and if linked to a value, the value counter will be adjusted.
To delete an Achieved Goal:
• Give a secondary click to a goal and select “Delete”; or,
• Click the trash can icon.
For Mac: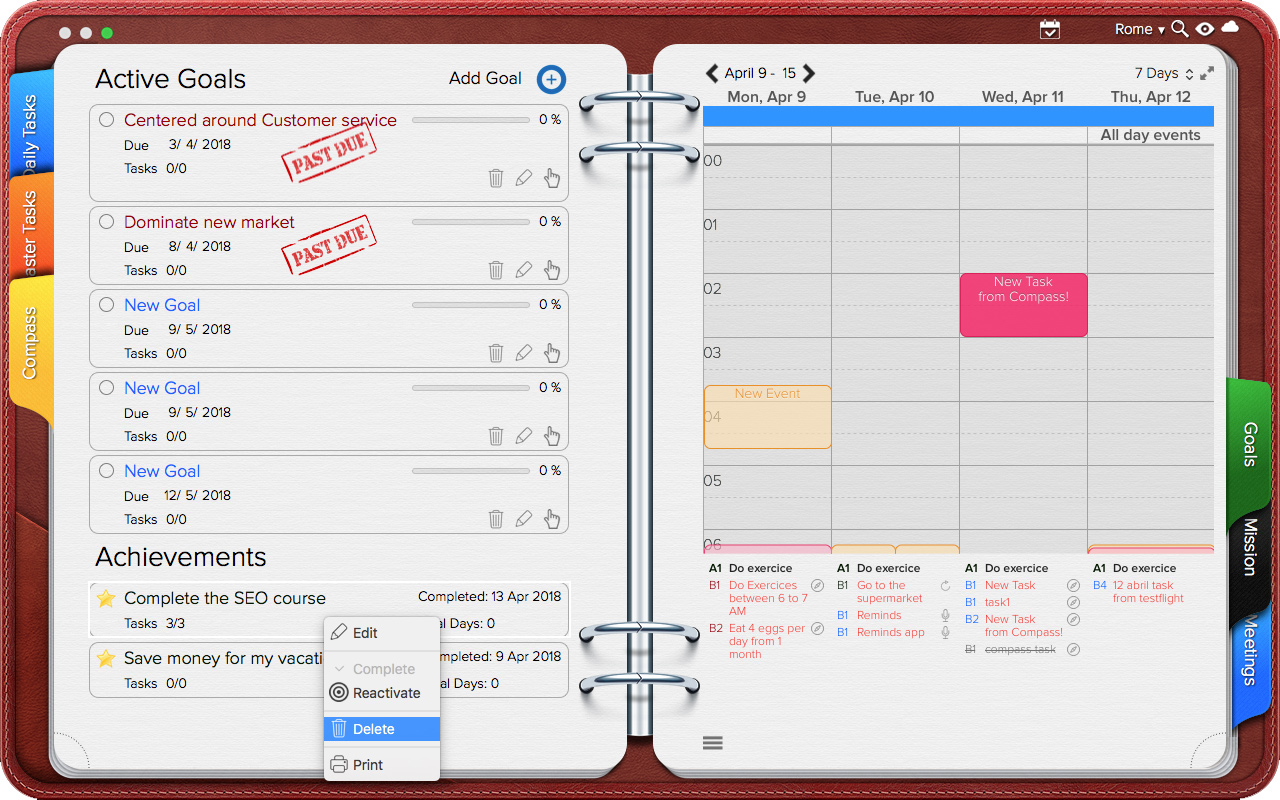
For iOS:
Post your comment on this topic.