
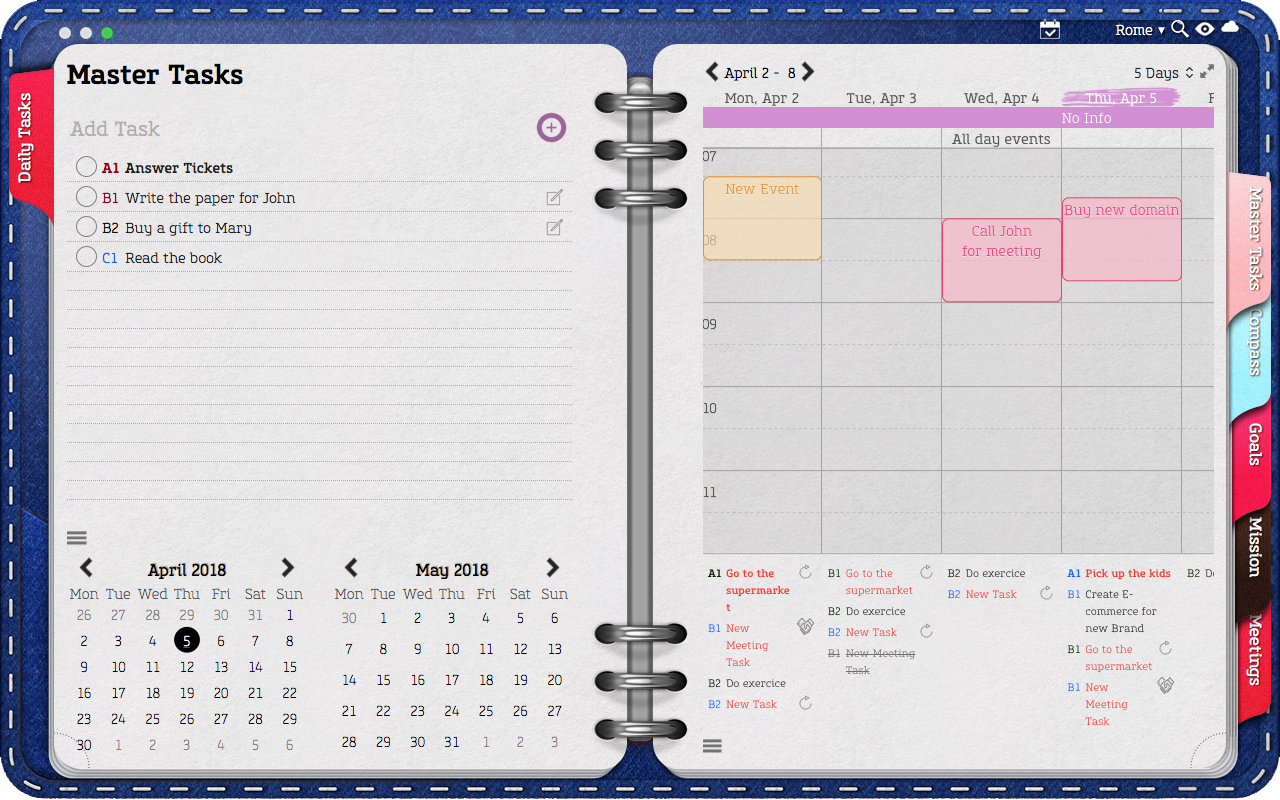
The Planner Views are found on the right page of the following tabs:
• Master Tasks
• Goals
 |
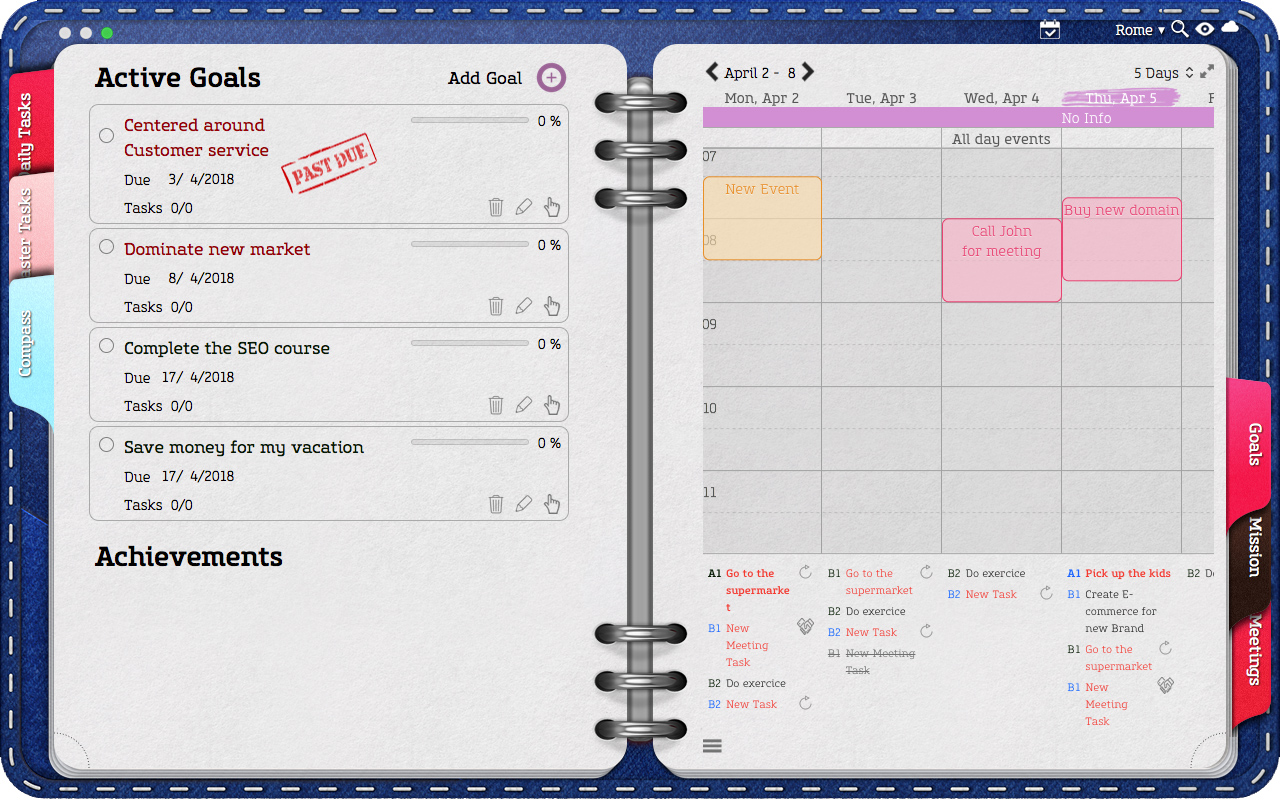 |
The Planner shows:
- The current week
- The Planner View selected
- Events & Tasks for the selected period
- And the Weather Forecast for the next 10 days.
You will be able to add, edit & delete Tasks & Events as well as assign your Master Tasks to a specific date.
Changing the Planning View
To change the planner view:
1. Click over the current view
2. Select a different view from the following available options:
- Single day
- 5 days
- 7 days
- Weekend
- Monthly
- Yearly
For Mac:
Viewing the Planner in Full Screen Mode.
To see the Planner in Full Screen Mode, click on the arrows at the top right corner of the Planner. To go back to a normal view, click on the “x” button located at the top left corner.
For Mac: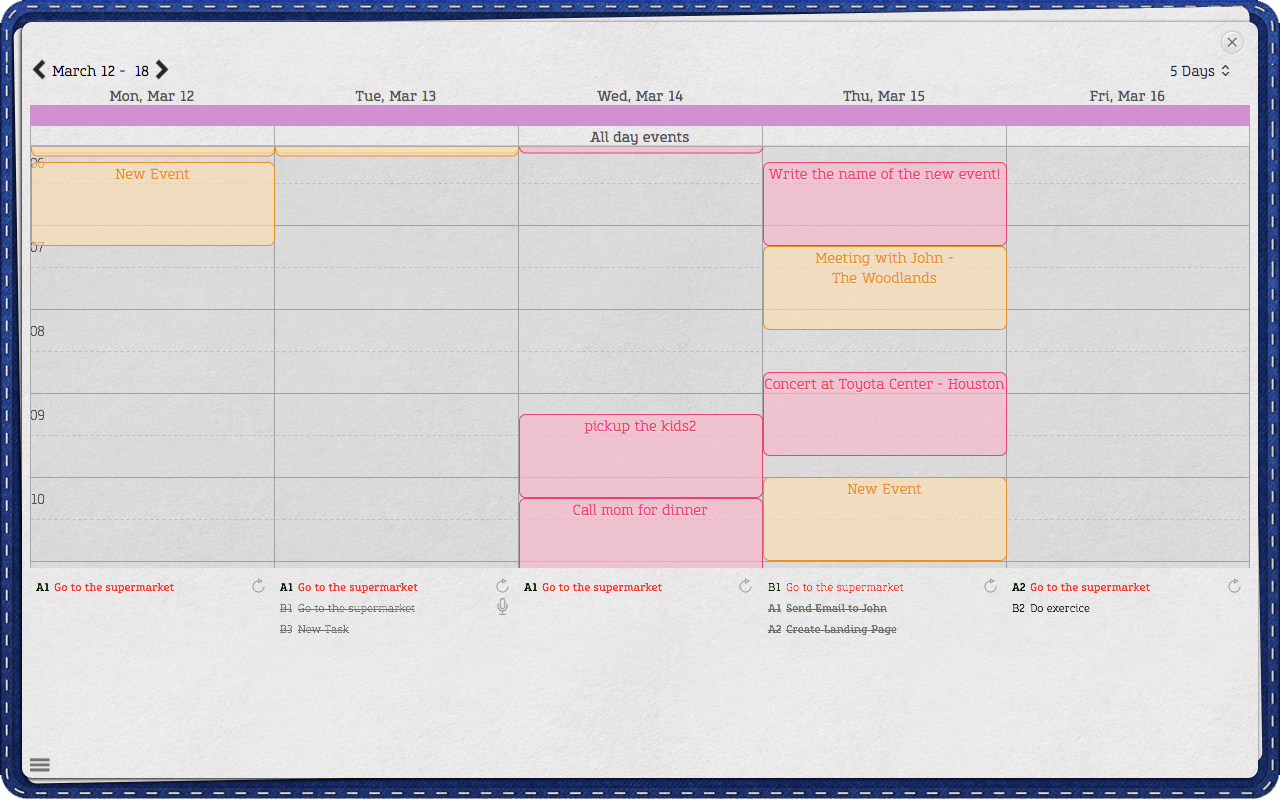
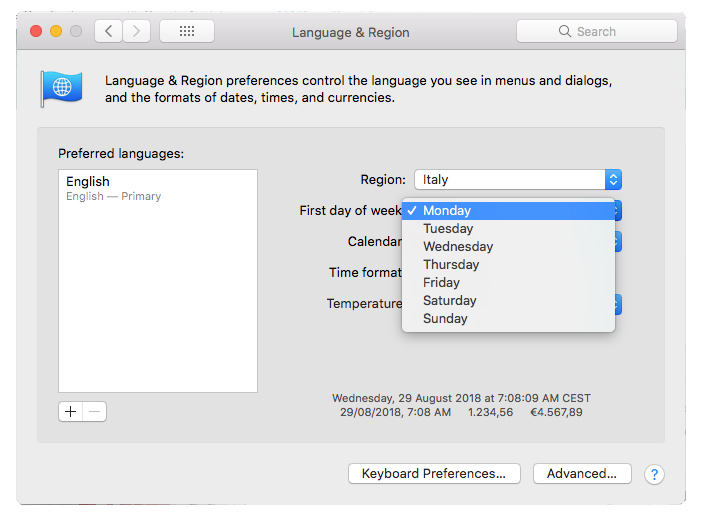
Selecting the First Day of the Week.
• When using the 5–day View the first day of the week will always be Monday.
• When using the Weekend View the first day of the week will always be Thursday.
• When using the 7–day View or the Monthly View the first day of the week will be set according to your Mac’s System Preferences. If you’d like to change the day in which the week starts for this views.
1. Open the Mac’s “System Preferences.”
2. Select “Language & Region.”
3. Go to “First Day of the Week.”
4. Choose the start day from the available options.
For Mac:
 |
 |
Changing the date in the Planner View.
To view a different day, week or month in the Planner:
1. Go to the top left corner, where the time period is shown i.e. “January 2015”
2. Use the arrows to move forward or backward.
For Mac: 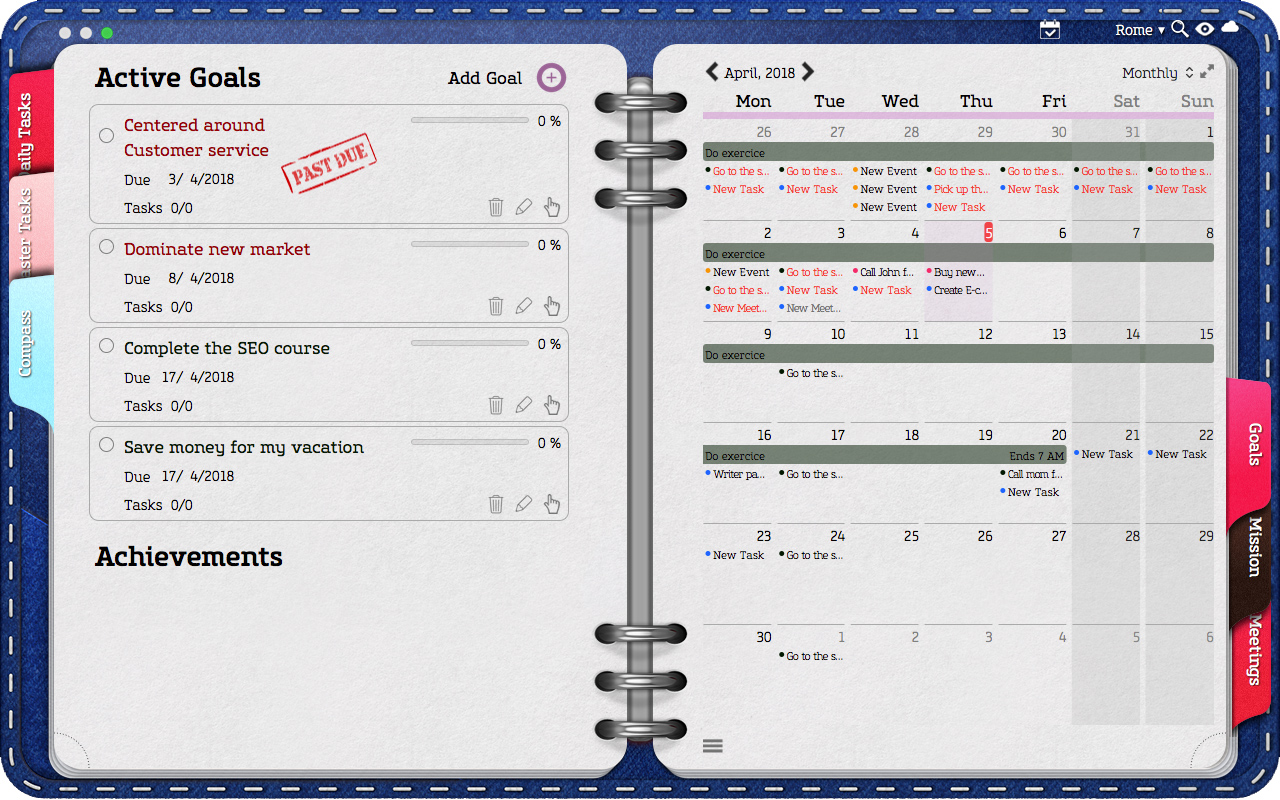
Today Button
To quickly go back to the current day, week or month click month’s name on the
calendar below the Master Task List.
Planner Settings
Selecting the First Day of the Week
• When using the 5–day View the first day of the week will always be Monday.
• When using the Weekend View the first day of the week will always be Thursday.
• When using the 7–day View or the Monthly View the first day of the week will be set according to your Mac’s System Preferences. If you’d like to change the day in which the week starts for this views.
1. Open the Mac’s “System Preferences.”
2. Select “Language & Region.”
3. Go to “First Day of the Week.”
4. Choose the start day from the available options.
| |
|
Font Size
The planner font and font size twill be set according to your Opus One’s main font and main font size preferences.
To adjust Opus One’s main font or main font size:
1. Go to the top right corner of Opus One
2. Click on the second icon. The icon that resembles an eye.
3. Select a main font and/or adjust the font size.
For Mac: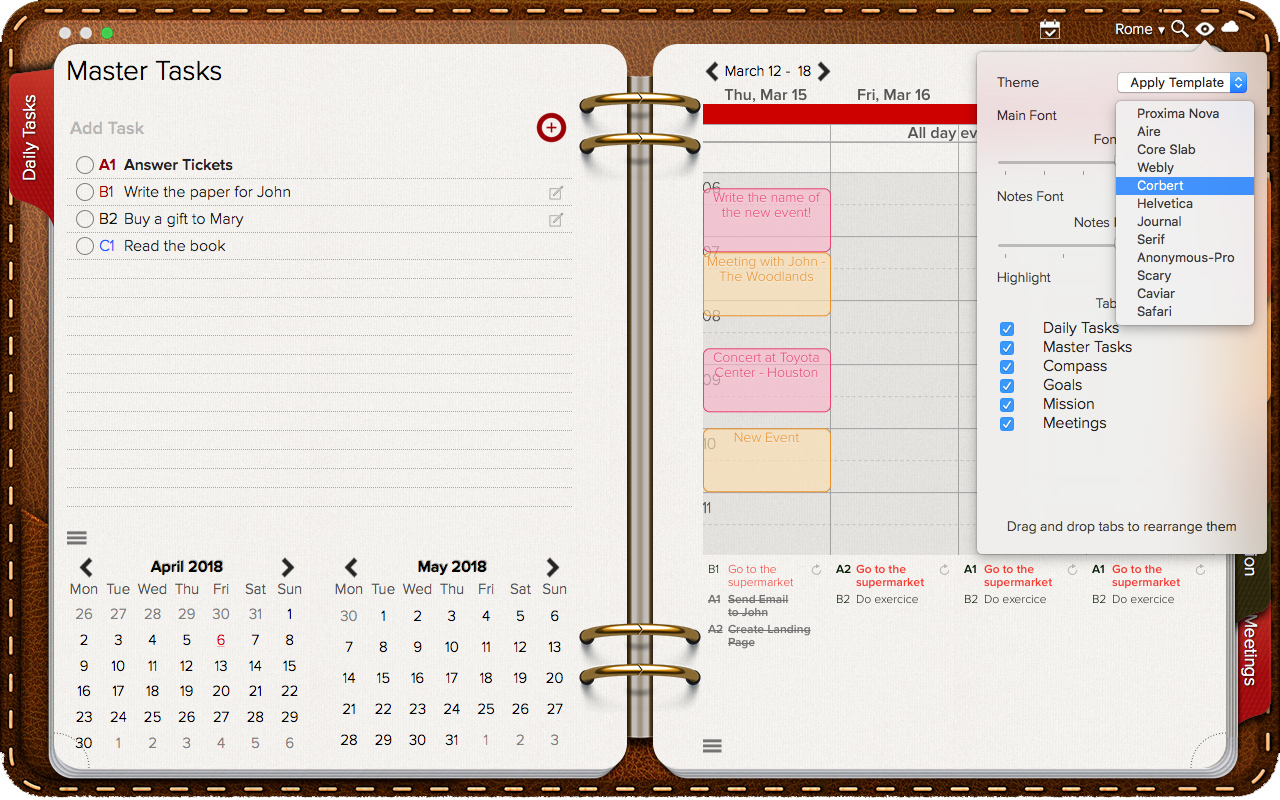
Weather
Opus One will show the weather forecast for the next 10 days. This information cannot be saved.
Task View
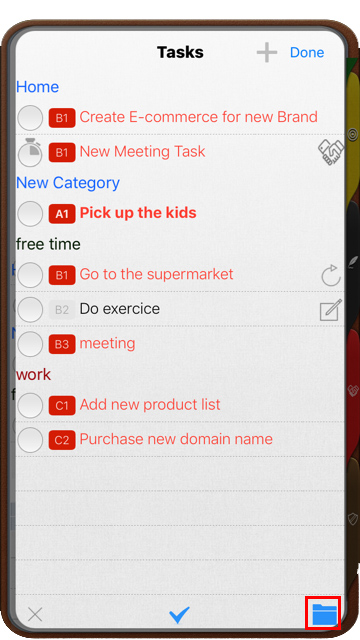
Tasks can be shown as a Single List or By Category. To change the way the list is shown, hover the cursor over the three lines found at the bottom left corner of the Planner page and select the folder icon.
For Mac:
 |
 |
For iOS:
 |
 |
Viewing a different week or month
The top right corner of the planner view shows the currently chosen view: Daily, 5 days, Monthly, Yearly etc., while the top left corner shows the time period that is currently being displayed January 1, January 6-10, January 2014, 2014, etc. To see a different period of time,
- Go to the top left right (where the shown time period, i.e. “January 2014”, is displayed)
- Using the arrows on the side, move forward or backward the date.
- This section is independent from the Daily Tasks Tab, so you can see one day on the Daily Tab and a different date range on the Planner View. If you’re subscribed to the weather service, the Weather Forecast will show on the Planner for the current day and the following 9 days.
For Mac: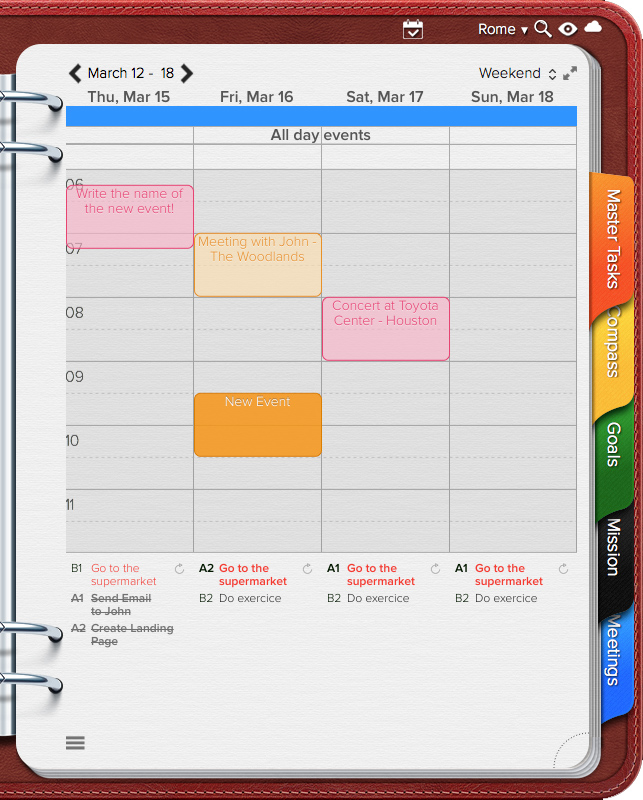
Viewing & Editing Events in the Planner View
Quick Shortcuts
While on the Planner View, you can quickly
- Add a New Event
- Copy & Paste an existing Event
- Delete an Event
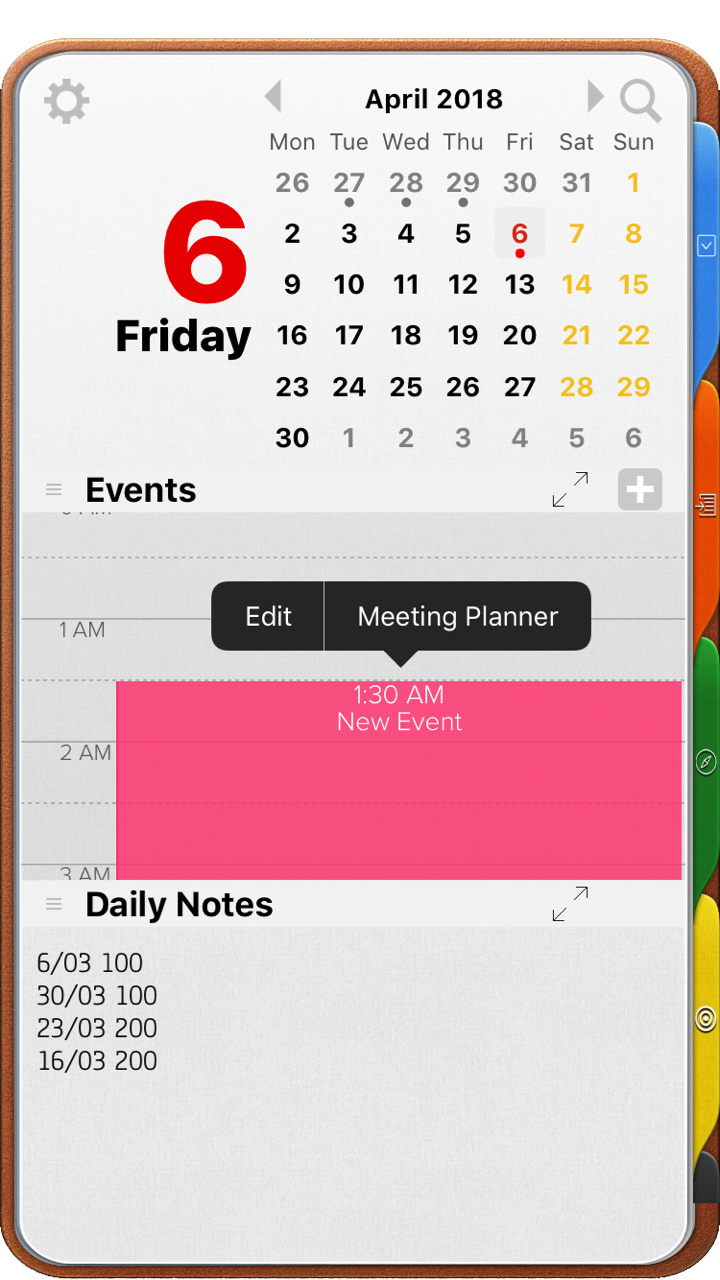
Quick Add Event
To quickly add a new event while on the planner view
1. Select a blank time/date slot
2. Give a secondary click
3. Select “New Event”
For Mac: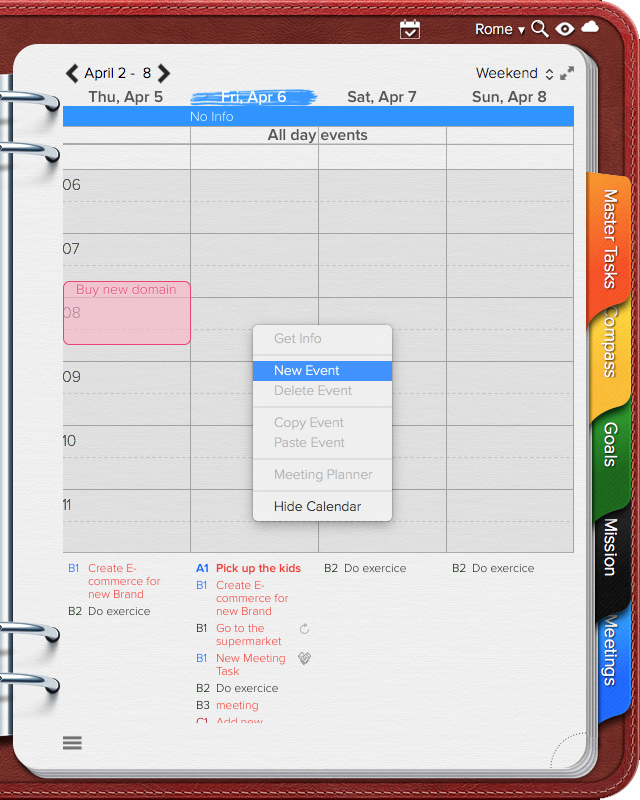
For iOS: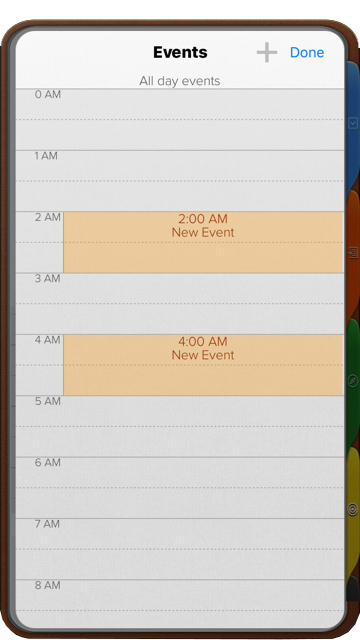
- IMPORTANT: If the time slot you wish to use is already occupied by another event, the “New Event” option will not be shown. You will still be able to add a new event, but you will need to either use the Event’s Information Card or create the event on a blank time slot and drag it to the correct time.
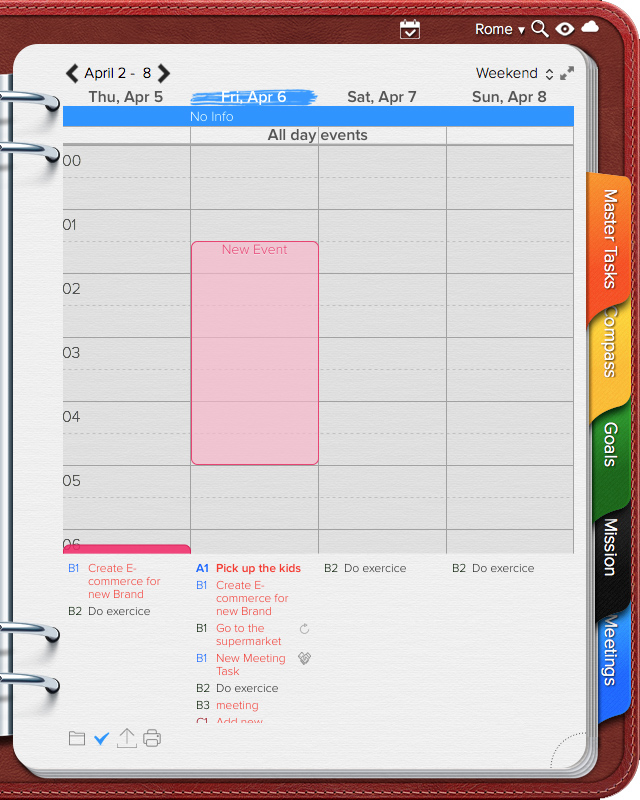
To create events that last more than a day or that expand into the next day:
1. Double click on the selected time slot
1. When the Event is created, click elsewhere in the planner. So the event is not select.
2. Move the cursor over the Event near the event’s bottom line until the cursor has the shape of a line and two arrows.
3. Adjust the Event’s duration.
For Mac: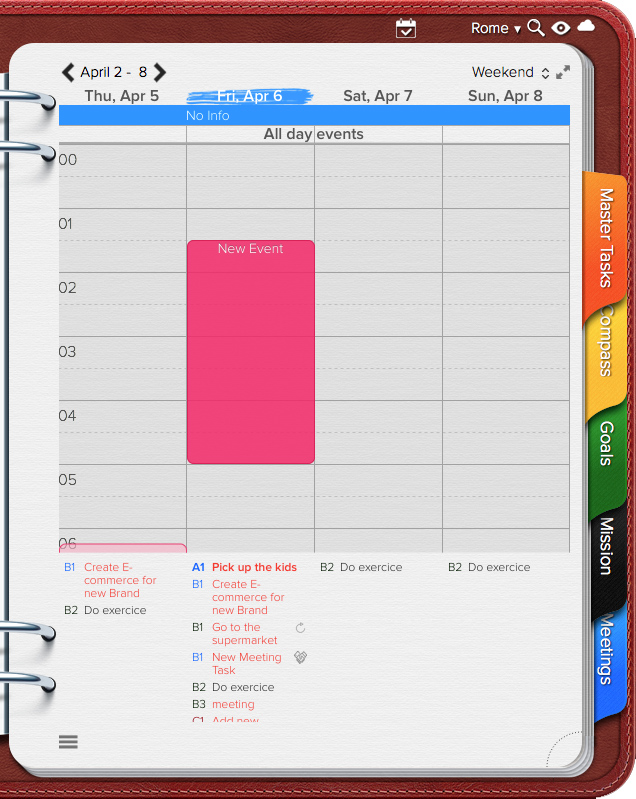
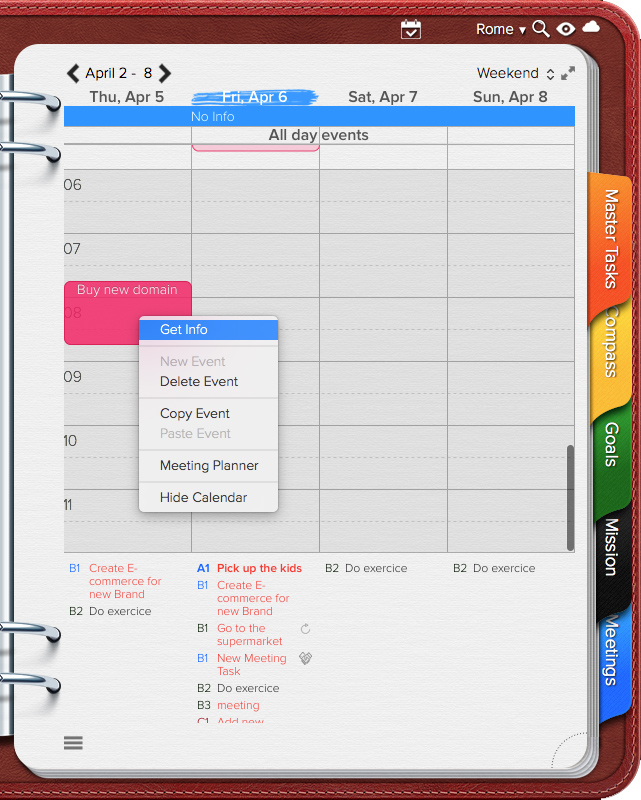
To Copy & Paste an Event
To quickly add a new event while on the planner view
1. Select the Event to be copied
2. Give a secondary click
3. Select “Copy”
4. Select the time/day slot where the event will be copied
5. Give a secondary click
6. Select “Paste”
7. If you’d like to copy the event more than one time, repeat Steps 4 – 6 as many times as necessary
For Mac: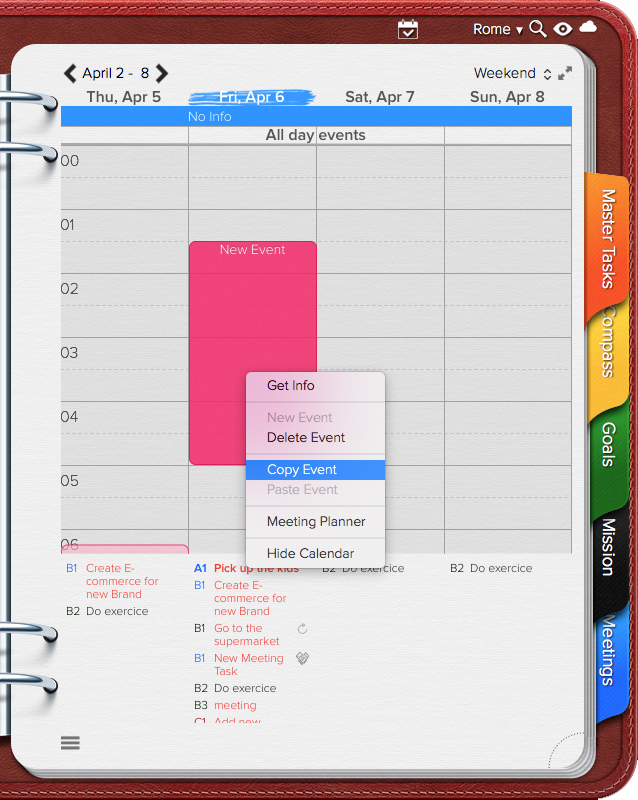
Quick Delete Event
1. Select the Event to be deleted
2. Give a secondary click
3. Select “Delete”
For Mac:
For iOS: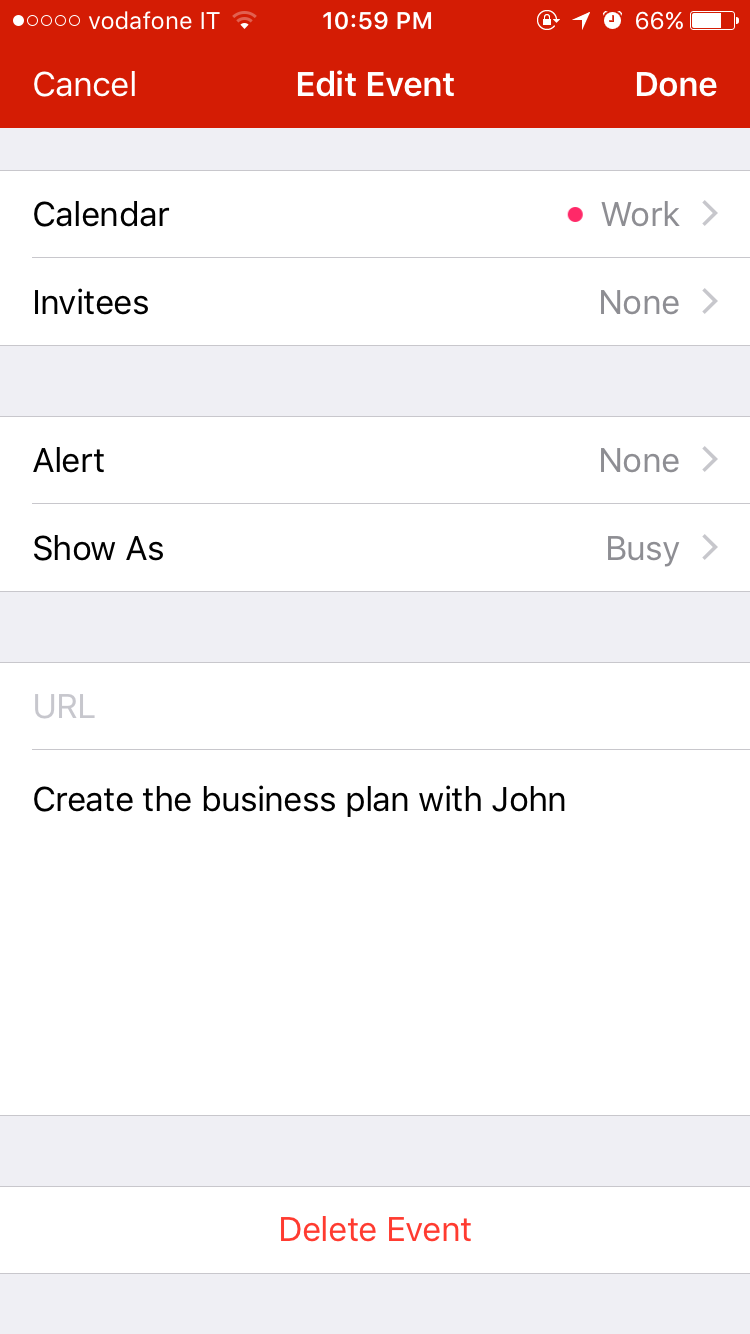
Or
1. Select the Event to be deleted
2. Click the Backspace key
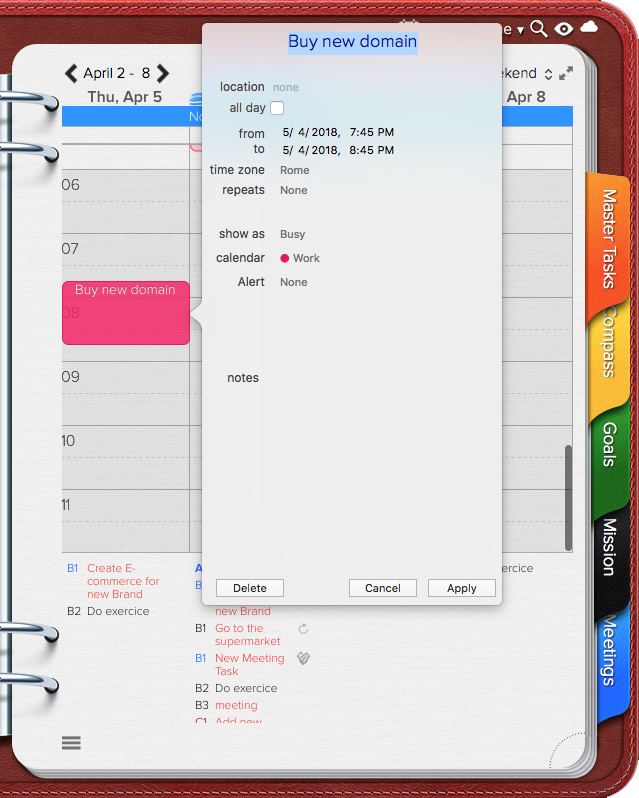
Editing Events using the Event’s Information Card
To edit Events while on the Planner View
When using one of the first four available views is selected (one day, 5 days, 7 days or weekend)
1. Select the Event
1. Give a secondary click
2. Select Get Info
3. Once the Event’s Information Card opens proceed to edit:
• Location
• Duration
• Time Zone
• Repeating Rule
• Calendar
• Alerts, or
• Event’s notes.
For Mac:
 |
 |
For iOS:
 |
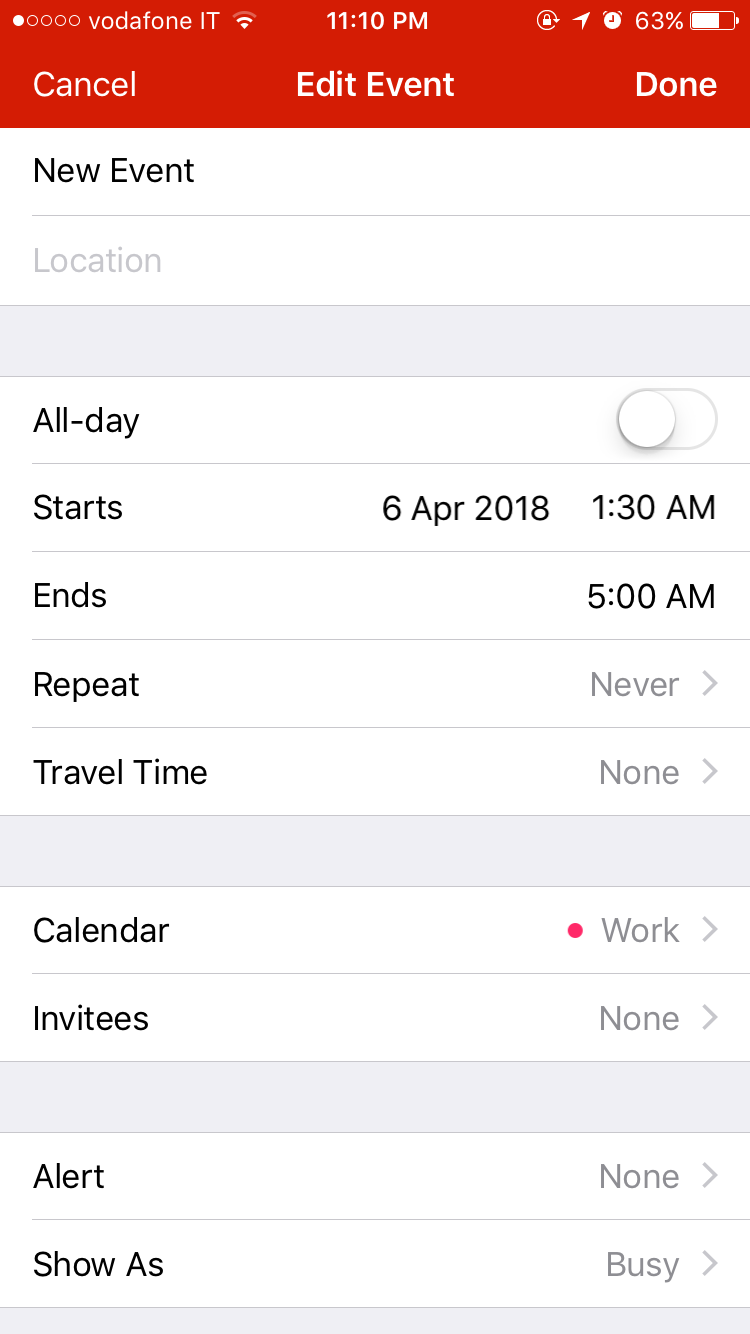 |
If using the Monthly View
1. Give a secondary click on the Event to be edited
2. Select Edit “Event Name”
3. And proceed to edit.
Viewing & Editing Tasks in the Planner View
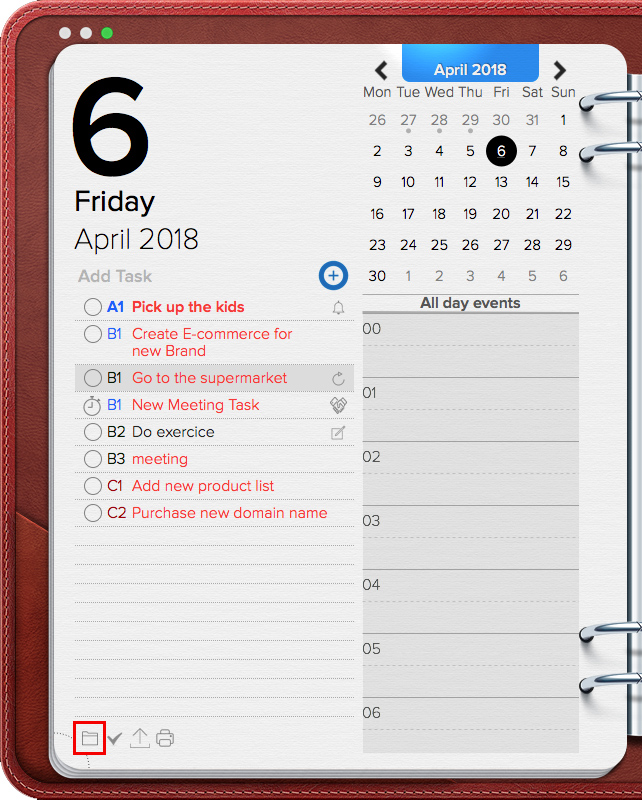
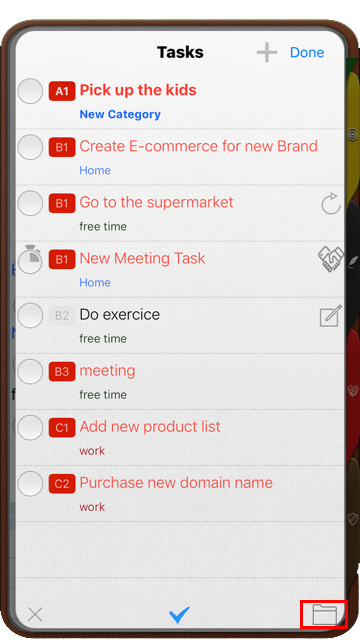
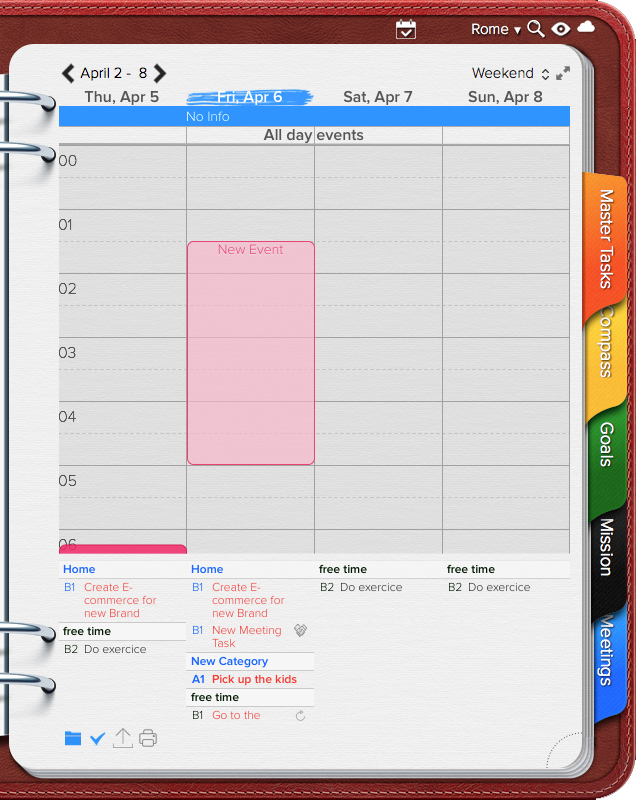
Tasks will appear:
- Under the schedule, on the 1 day, 5 day, 7 day & Weekend view.
- Under the listed events, on the Monthly View.
To see the entire contents of a single day, click on the selected date and, if needed, scroll up or down.
Tasks can be shown as a Single List or By Category. To change the way the list is shown, move the cursor towards bottom left corner of the planner page and click the folder icon.
For Mac:
 |
 |
To edit a Task while on the Planner View
- Locate and select the Task to be edited
- Give a secondary click
- Select Edit
For Mac: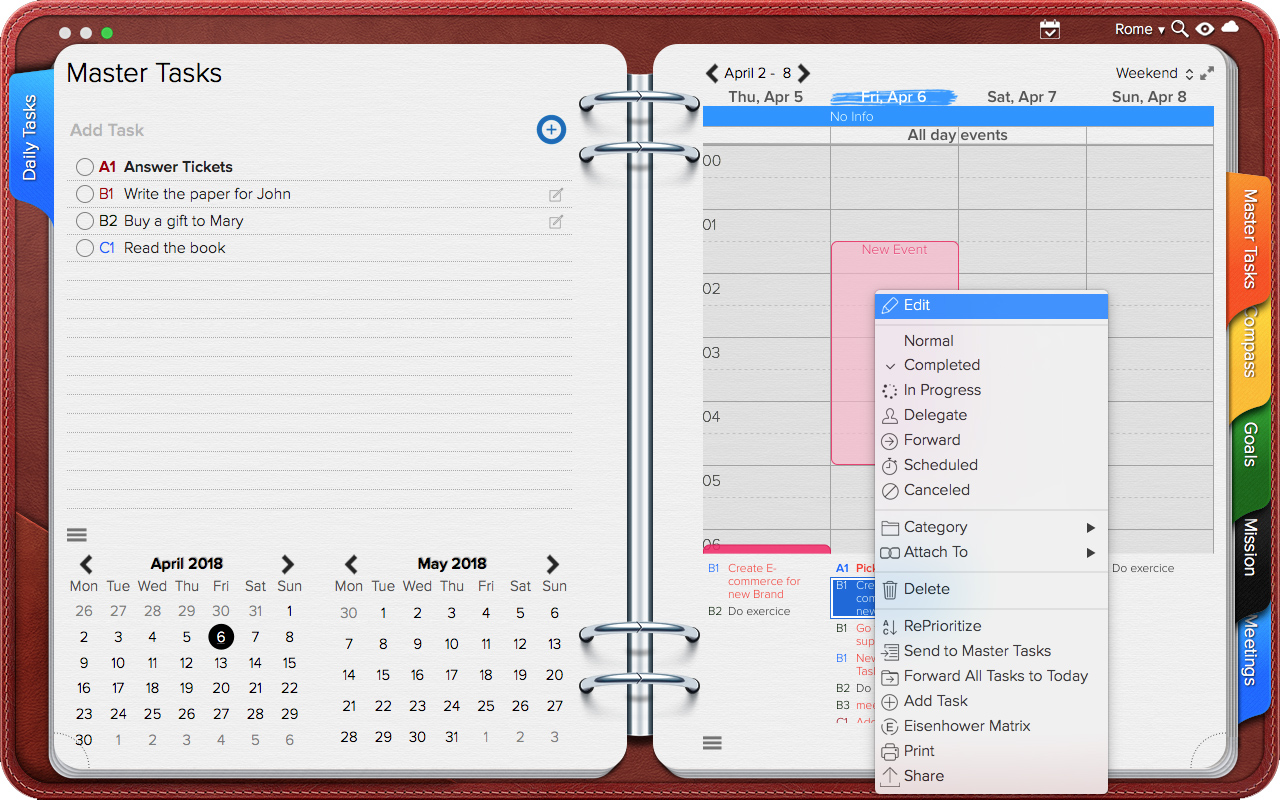
Sending Daily Tasks to the Master Task List (and vice versa) while in the Planner View.
There are two ways of sending a Daily Task to the Master Task List while on the Planner View.
1. Give a secondary click and select Send to Master Tasks, or
2. Drag any task from the Planner and drop it into a Category and Priority of your choice in the Master Task List.
To assign a due date to Master Task (which will transform the Master Task into a Daily Task)
1. Drag the Master Task into the Planner.
IMPORTANT: This only works when the Planner is set to a 1 day, 5 day, 7 day or weekend view.
2. Drag the Master Task and drop into the small calendar located below the Master Task List.
3. Give a secondary click to the Master Task, select Edit and choose a Due Date for this task.
IMPORTANT: if you drop the Master Task into the Schedule, it will create an Event instead of a Task.
Please be aware that Completed Tasks cannot be moved using the drag & drop method. The only way to move these tasks is to give a secondary click, access the Task’s Information Menu and change the End Date.
For Mac: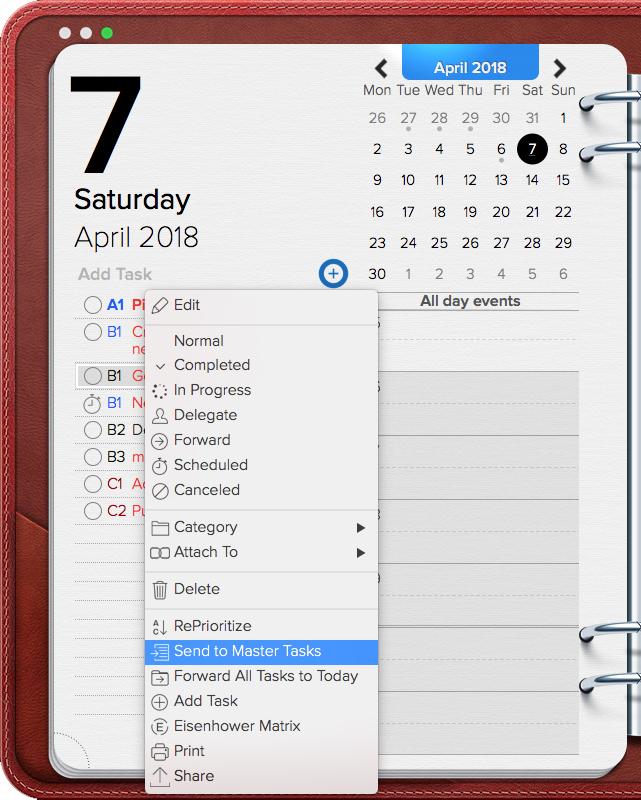
Post your comment on this topic.