
The fifth step in setting up the tree control is to specify the associated control attributes in the “Control Profile” box, which is displayed in the form to the left of the form design by selecting control in the form sheet.
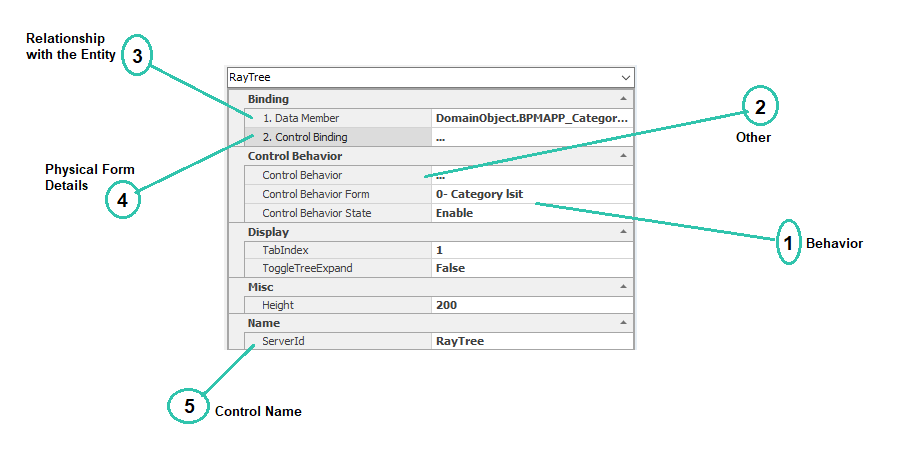
1. Behavior:

Current form behaviors (See 7.2) are displayed in the “form” section.
Enable: If this option is selected, the control will be enabled on the web.
Disable: If this option is selected, the control on the web is disabled and cannot be changed.
Invisible: If this option is selected, the controls will be invisible on the web.
2.Other:

Determining access to tree facilities (adding, editing, deleting in a tree) and validating controls are possible using this section.
Clicking on this section and selecting the button  the “Behavior of Edit Form” will be displayed, which includes two “tree behavior” and “validation” tabs.
Tree Behavior tab:
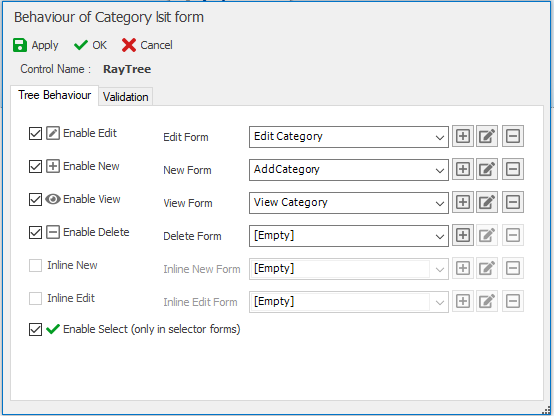
Enable Edit: By selecting this option and specifying its behavior, at that stage, the node’s edit functionality (See 7.1.2.10.6) is activated for the responsible person .
Enable New: By choosing this option and specifying its behavior, at that stage, the possibility of creating a node for the responsible person is activated.
Enable View: By selecting this option and specifying the behavior, at that stage, the node’s ability to display the node is activated for the responsible person .
Enable Delete: By selecting this option and specifying the behavior, at that stage, the node deletion action can be activated for the responsible person.
Enable Select: (See 7.1.2.20.5): If you select this option, you can double-click the tree node to add an equivalent display value to the “Searchable Drop down List” and “Assignment List” controls.
Validator Tab:
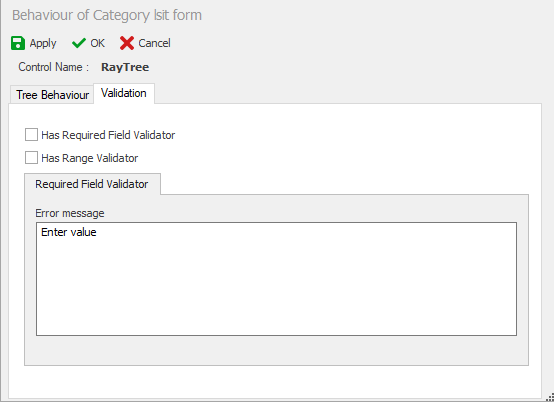
Validation or, in other words, checking that the tree is not empty when submitting a form, is available in this tab and is activated by selecting the option “Has Required Field Validator.”
By selecting the validation option, the message box will be displayed to insert and type the message.
3. Relationship with the Entity:

Clicking on this section and choosing the button the contact form will be displayed with the selected control entity. More …( See 7.1.2.10.3)
4. Physical Form Details:

5. Control Name:

With the click on this part, the English name of the control can be edited.