
IRB Set-up (pre-operations)
Good teamwork and clear communication will ensure that the IRB is operational. There are a number of tasks that need to be completed in order to adequately prepare an IRB for operations. The IRB Driver is responsible for setting up the IRB for operations and should supervise and assist the IRB Crewperson to complete all tasks.
These include:
Checking the log for previous issues or notes
It is essential that all clubs that operate IRBs maintain a log of operations and complete the motor maintenance log section. These logs can be hard copy or electronic such as the Powercraft section of the SLS Operations App. The log should be read for at least the two previous patrol or training activities to confirm that there are no major issues that prevent the IRB from being used.
As part of their pre-operational activities, both the IRB Driver and the IRB Crewperson should:
- Check the log’s two previous entries for any relevant information
- Complete the sections required
- Sign, where necessary
The log is a means by which any signs of operational stress can be reported so that the relevant club officer can take appropriate action. Faulty equipment may also be tagged out.
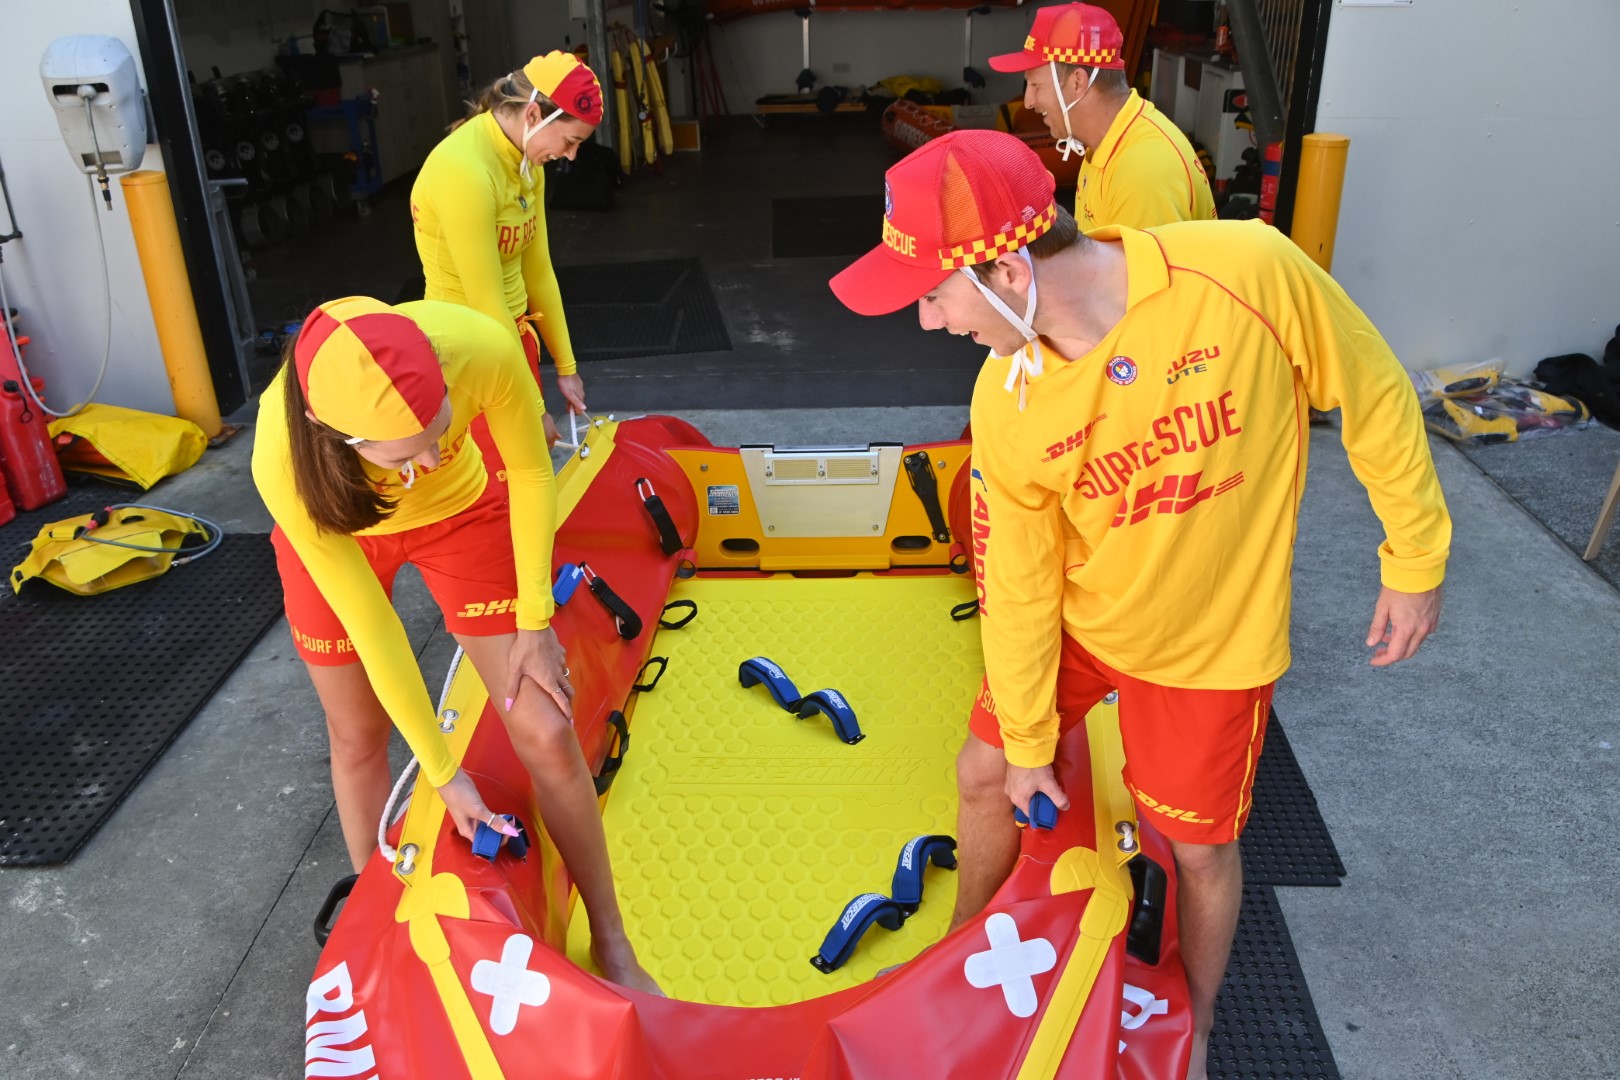
Checking the hull, floorboard and auxiliary equipment
- Check floorboard for defects (chips, cracks, etc) and condition of floormat and foot straps
- Ensure that the floorboard is fitted correctly into the IRB
- Check all fuel cell loops are secure and not stuck under the floorboard
- Ensure that all foot straps and boarding/crewing handles are intact and secure
- Ensure that foot straps have covers
- Check the buoyancy tubes and the keelson are at the correct pressure as specified by the manufacturer of the IRB and kept inflated at all times while operating
- Inflate buoyancy tubes (if required) in the following order: partially inflate the two rear buoyancy tubes, followed by the bow, then top up to correct pressure in the same order, finally inflate the keelson
- Check the hull and valves for leaks. Replace valve caps as required
- Ensure that the required auxiliary equipment is stowed and secured correctly as per the checklist in the IRB log, and in accordance with your manufacturer’s specifications
- Check the re-righting rope is stowed and ready for use.
- Ensure there are no sharp objects on the IRB
- Place the hull on a trailer and secure ready for transport
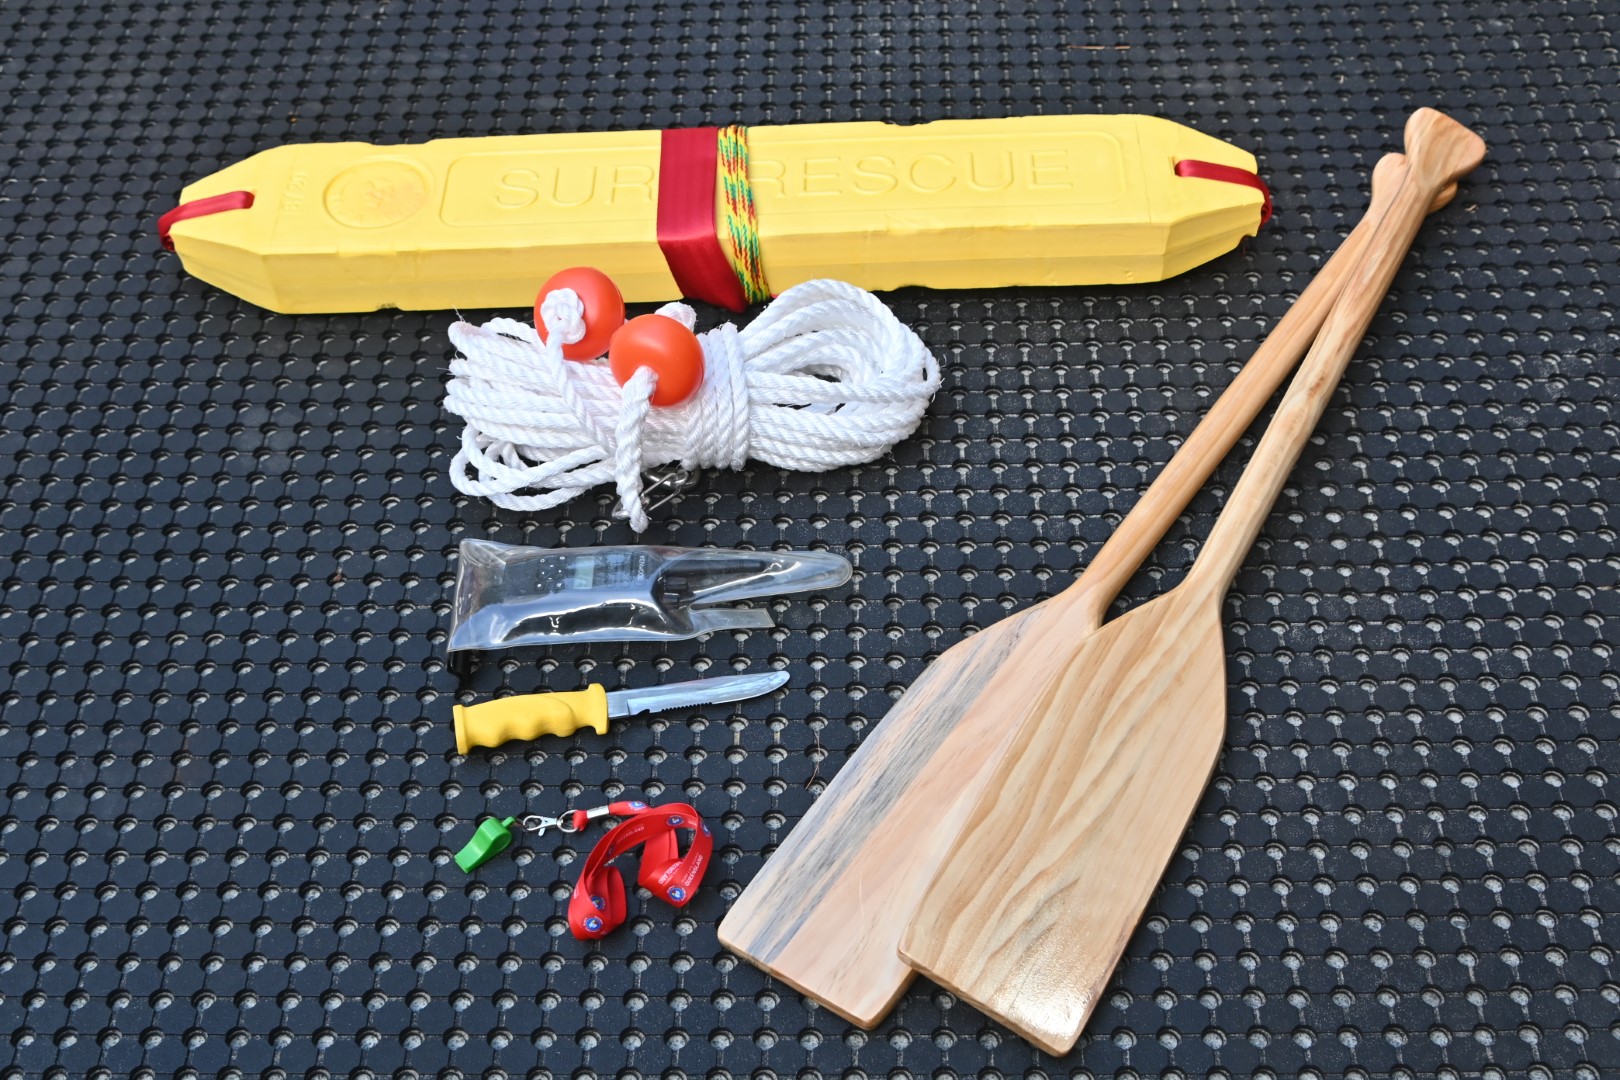
Required auxiliary rescue equipment
This is a list of the additional equipment required in a fully operational IRB:
- Knife—stainless steel with blunt end, contained in a sheath
- Pair of paddles secured to the IRB
- SLSA approved Rescue Tube secured to IRB
- Pea-less whistle with minimum 30cm lanyard located in a position that is accessible to the IRB driver
- Towrope with floats secured to IRB
- Approved and operational radio housed in an appropriate waterproof carrier
Some areas may have additional auxiliary equipment requirements. Please refer to your local SOPs for more details.
Filling, fitting and refuelling the fuel cell
Two-stroke motors require oil to be mixed with the fuel to lubricate the internal components of the motor. Running a two-stroke motor without sufficient oil added to the mix will cause the motor to overheat and seize.
All fuel should be mixed in the correct ratio of fuel and oil as specified by the manufacturer of the motor being used. As a guide, a typical ratio of fuel to oil is 50 to 1 (50:1).
The following precautions should be taken into account when conducting any refuelling:
- No smoking, naked flames or sources of ignition are permitted anywhere near fuel or fuel vapours
- Refuelling should always be conducted in a well-ventilated location
- A suitable fire extinguisher must always be available adjacent to refuelling operations
- Appropriate PPE including disposable gloves and safety glasses with side shields
- Care should be taken not to spill fuel, and containment provisions and spill kits must be used or be available
- Ensure that you are refuelling away from any stormwater drains or similar, in case of spills
- If you do spill fuel or oil, follow your SOPs regarding cleaning up and disposing of hazardous waste.
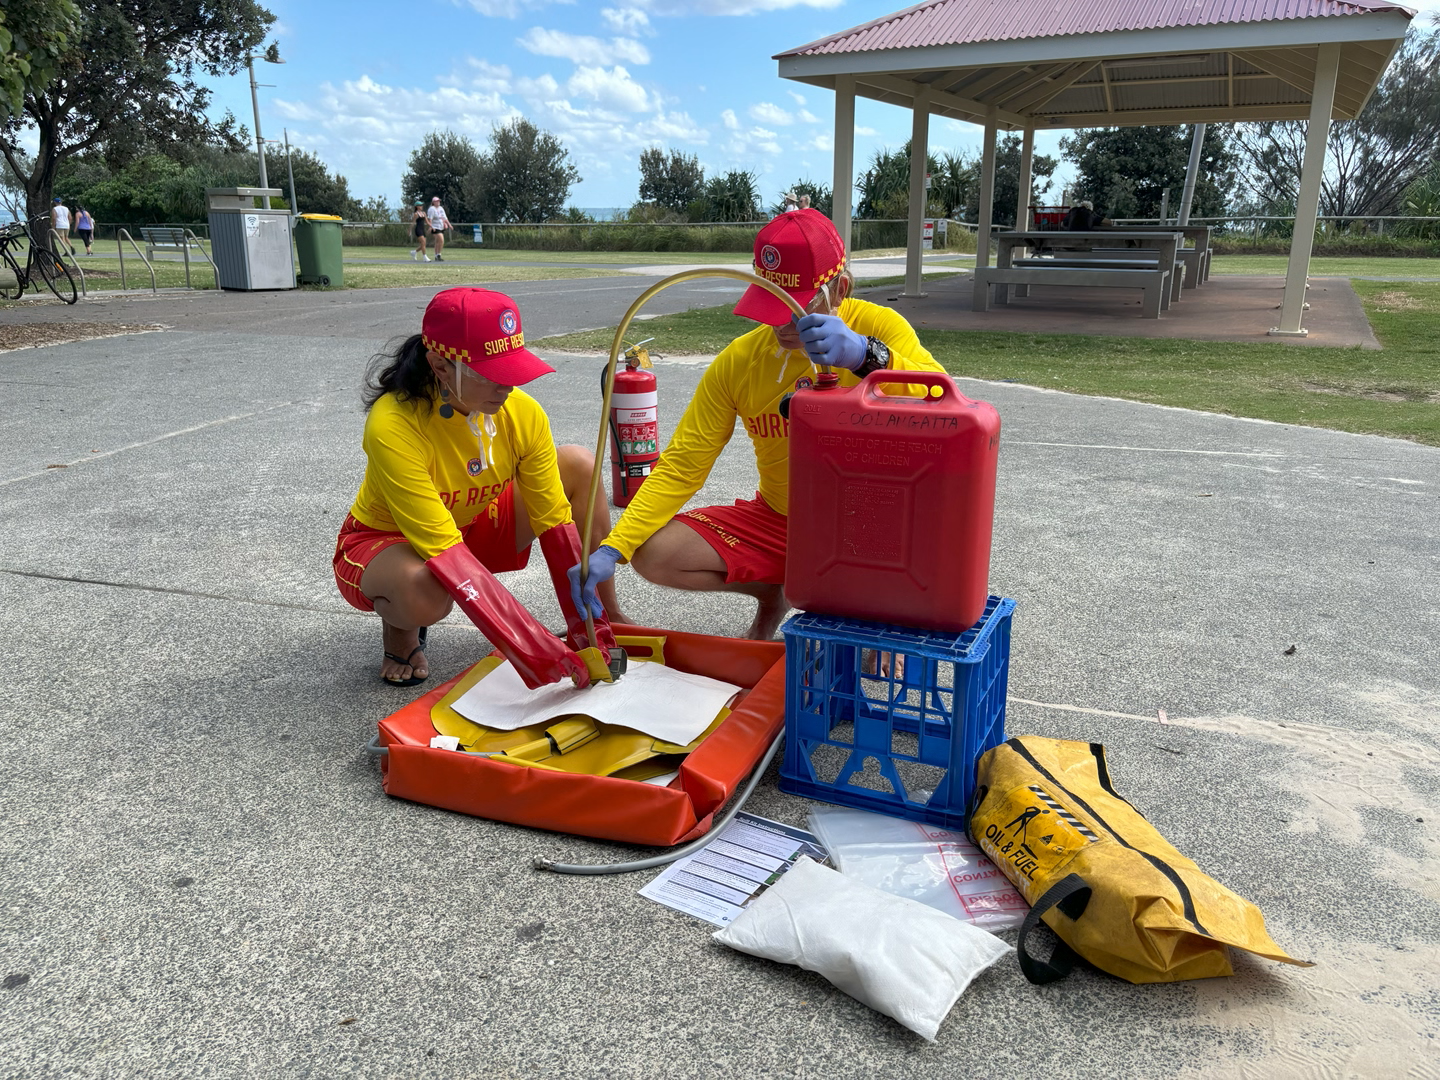
There are a range of methods for filling fuel cells, including fuel pumps and a siphoning hose.
A siphoning hose provides significant advantages over other methods including improved manual handling (avoids awkward twisting while pouring), greater control when decanting fuel and less spillage. A proper siphoning hose has a fitting on the end that forces fuel through the hose when it is jiggled in the container of fuel.
To use a siphoning hose, ensure that the level of the fuel being transferred is higher off the ground than the container that it is being transferred to. Put the siphon end of the hose in the supply container and the other end in the fuel cell being refuelled. Prime the hose by moving the siphon end quickly up and down until fuel starts to flow through the hose. Remove the hose when refuelling is complete.
Care should be taken to stop the flow of fuel by first removing the hose end in the supply container. Any residual fuel in the siphoning hose should be drained into the fuel cell before removal from the tank. Any fuel spilled on the fuel cell should be removed before transfer to the IRB. Fuel can create an operational hazard and may damage the IRB.
A funnel and a pouring nozzle can also be used, but care must be taken when lifting the fuel container and avoiding spills.
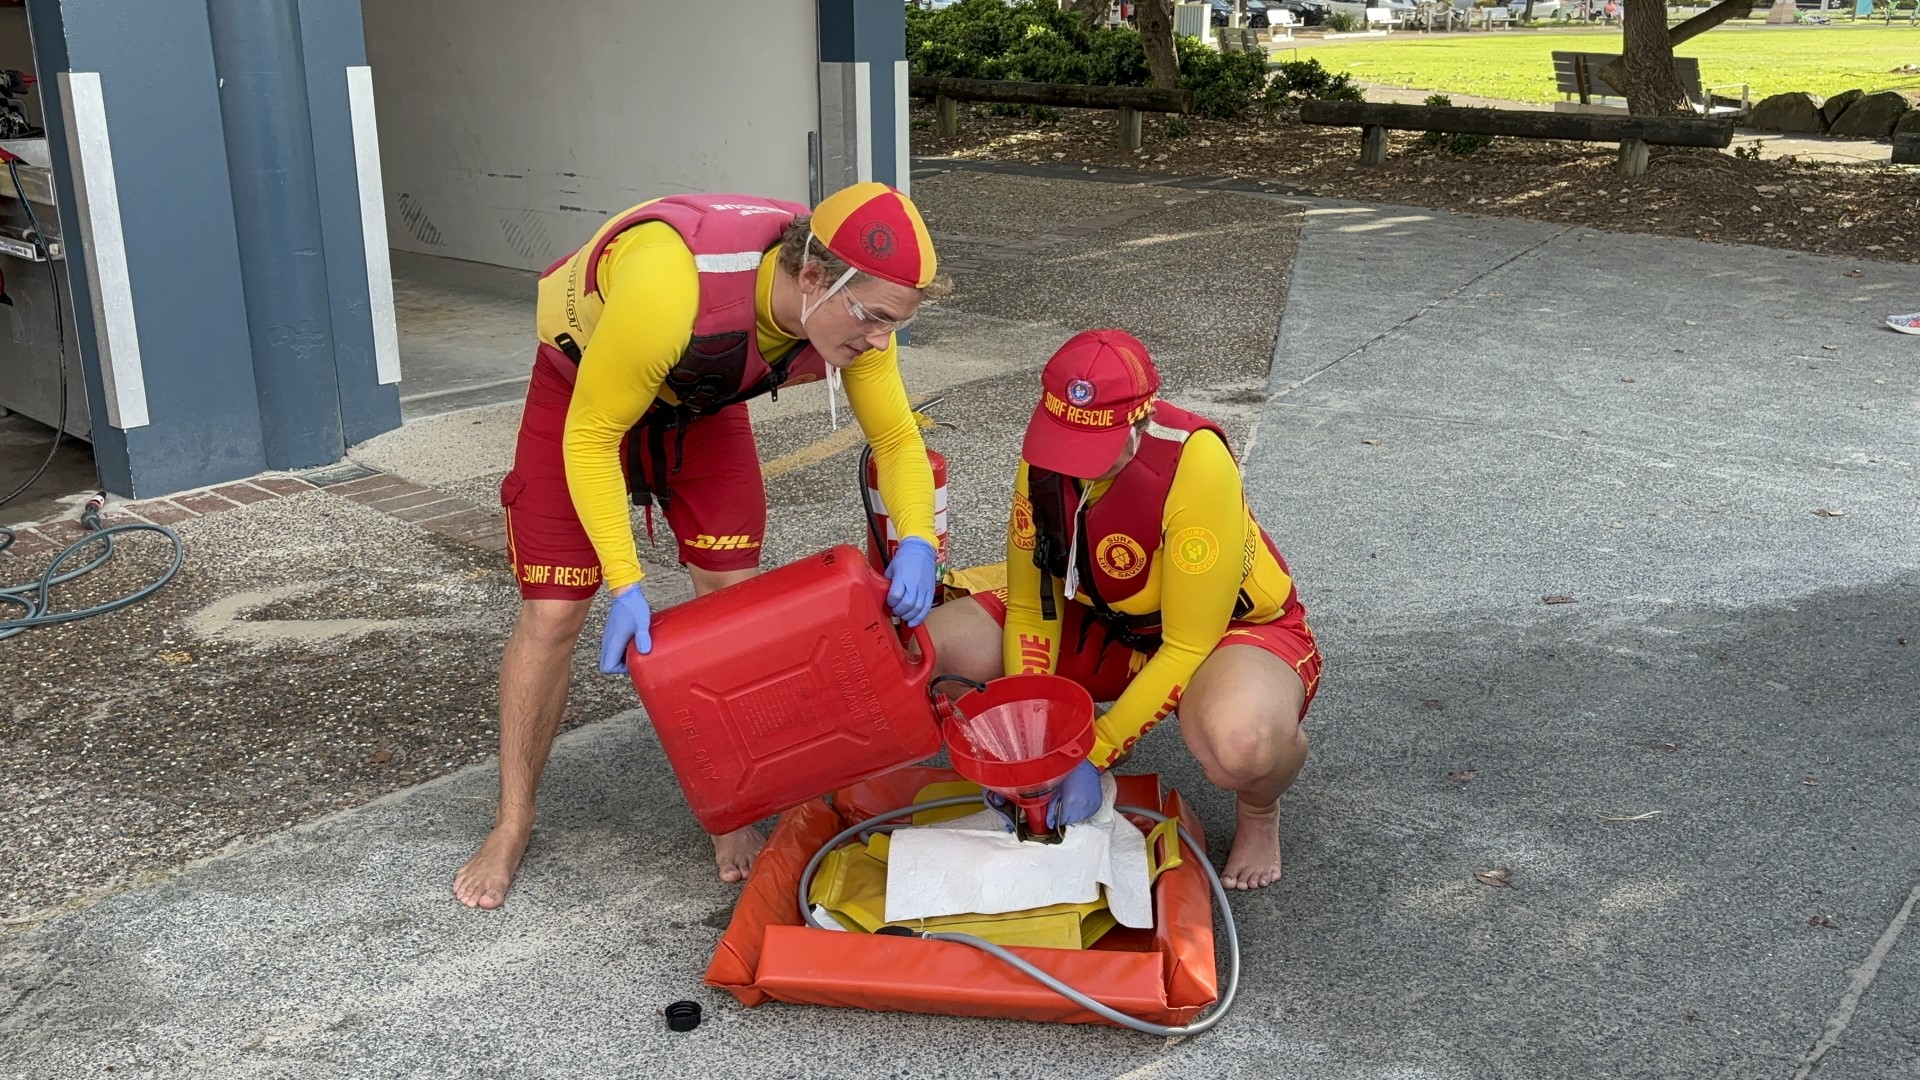
It is important that any excess air is removed from the fuel cell once the cell has been filled. Gently lower the fill point to the level of the fuel to remove any excess air and replace the cap. You can also run your fingers along the sides of the fuel cell to remove any air bubbles prior to replacing the fuel cap. It is important to ensure there is no air left in the fuel cell before securing the fuel cap. Any air gap could lead to air in the fuel hose that may cause the motor to stall. It may also lead to a fuel cell expanding when left in the hot sun, which may lead to damage to seams and fuel leaks.
Fuel volume and consumption
Fuel use must be monitored at all times. Depending on conditions on the day and the activities being undertaken, refuelling may happen more regularly than at other times. Always ensure a margin of safety in fuel level and that there is enough fuel to return to shore or your point of origin. As a guide, the fuel consumption rate of a 25hp 2 stroke Tohatsu Motor at full throttle is 10L per hour.
Take care so as not to overfill your fuel cell, as fuel will expand and contract throughout the day. As a guide, approximately half to three quarters full (typically 10 to 15 litres) would be appropriate. A ¾ full may weigh over 10kg requiring attention to manual handling techniques.
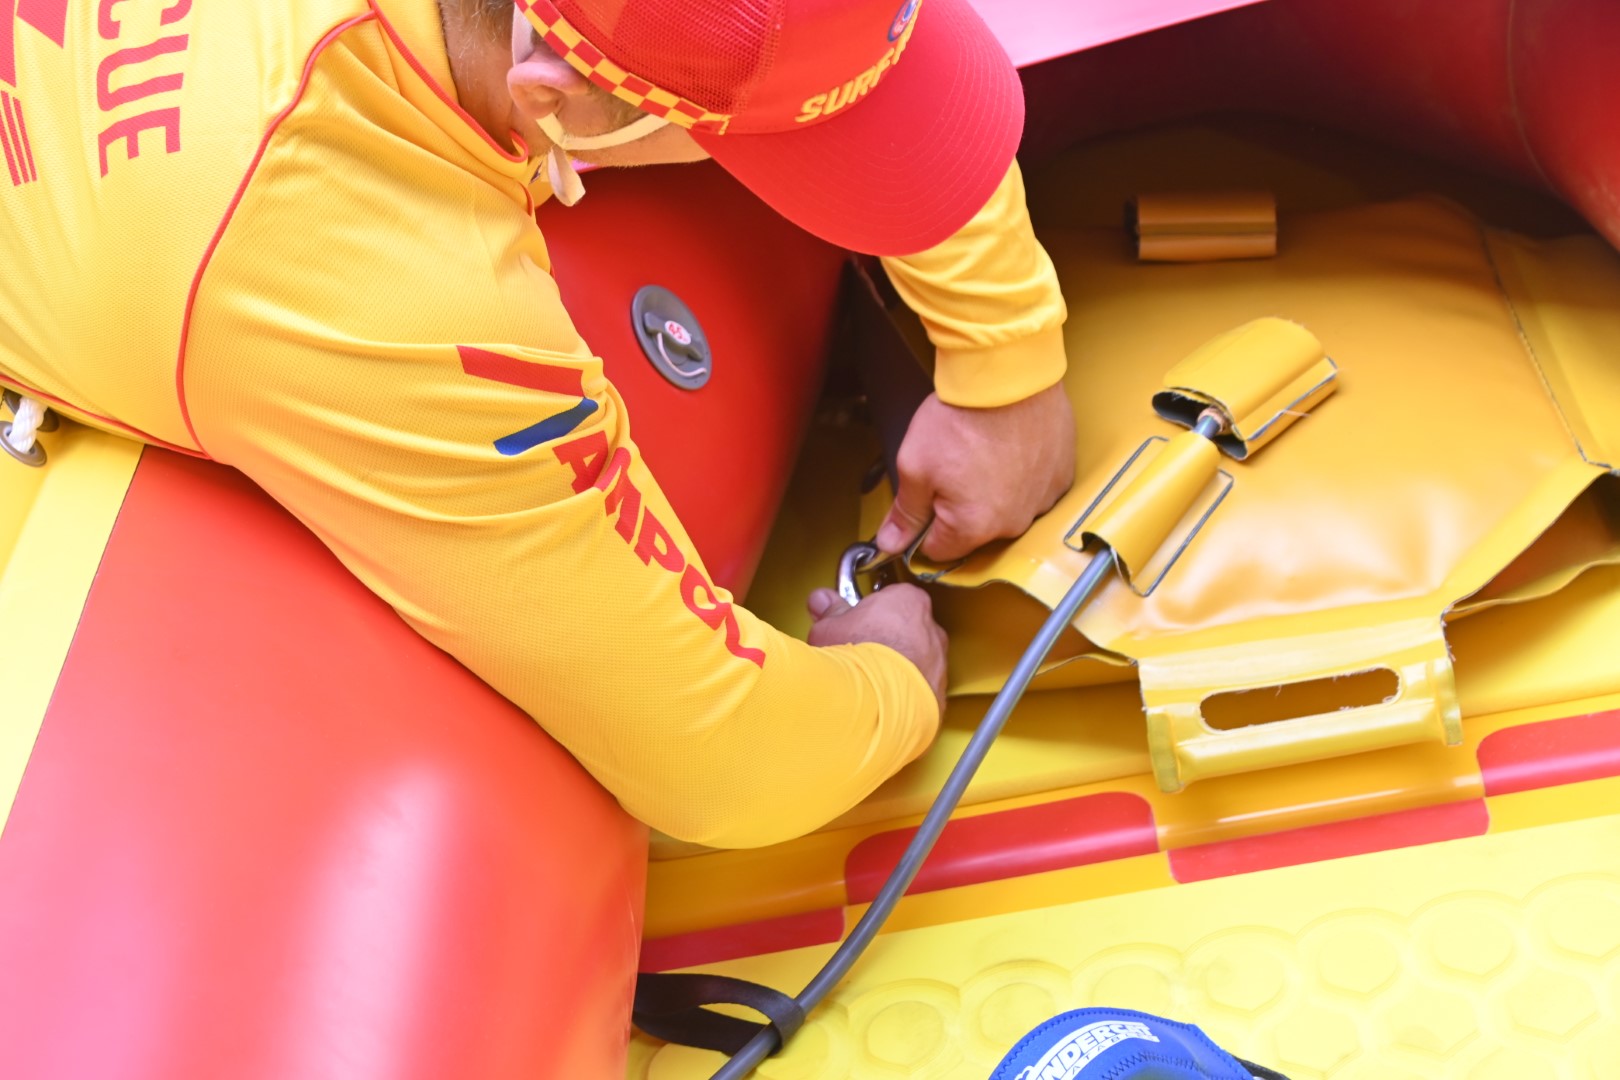
Installing or fitting
Install the fuel cell to the floor boards towards the bow of the IRB securing at four points with the clips facing downwards under the fuel clip covers.
- Ensure that the fuel hose is threaded through the loops along the hull.
- The fuel cell and hose should be checked for wear and tear, leaks, and connection points adequately sealed.
Fire Extinguisher Safety and Use
Fire extinguishers are a critical tool for managing small fires before they escalate. Knowing how to use them effectively can save lives and property.
Only ever operate an extinguisher if safe to do so, if in doubt, get out.
Let’s look at the essential safety considerations and proper use of fire extinguishers.
Safety Considerations
Before using a fire extinguisher, ensure your safety and the safety of others.
- Assess the fire.
Is it small and manageable? If not, evacuate and call emergency services. - Check the extinguisher.
Ensure it’s the correct type for the fire and that it’s in working condition. - Maintain a safe distance.
Stand at least 2 to 3 meters away from the fire.
The Pass Method
Follow the Pass method for effective use of a fire extinguisher.
P – Pull the pin: Release the locking mechanism. Test before approaching to check extinguisher is working taking note of how far the stream travels. Only move as close as needed.
A – Aim: Point the nozzle at the base of the fire.
S – Squeeze: Press the lever slowly and evenly. To stop the flow release the handle. This saves contents incase of any reignition.
S – Sweep: Move the nozzle side to side at the base of the fire.
Limitations and Maintenance
Fire extinguishers have limitations. They are designed for small fires only and should be inspected regularly.
- Check pressure gauge: Ensure the arrow is in the green zone.
- Inspect for damage: Look for rust, dents, or missing pins.
- Replace or recharge: If the extinguisher is used or damaged.
Preparing, fitting and testing the motor
A clear understanding of the basic components, SLS modifications and maintenance requirements of an outboard motor is essential to ensure that the motor remains ready for operations.
Motors used for SLS operations may have a number of modifications completed before they are used for patrol and other surf lifesaving duties. Modifications allowed as part of the surf kit can be found in the SLSA Approved Gear and Equipment List and SLSA Inflatable Rescue Boat – Technical Specification.
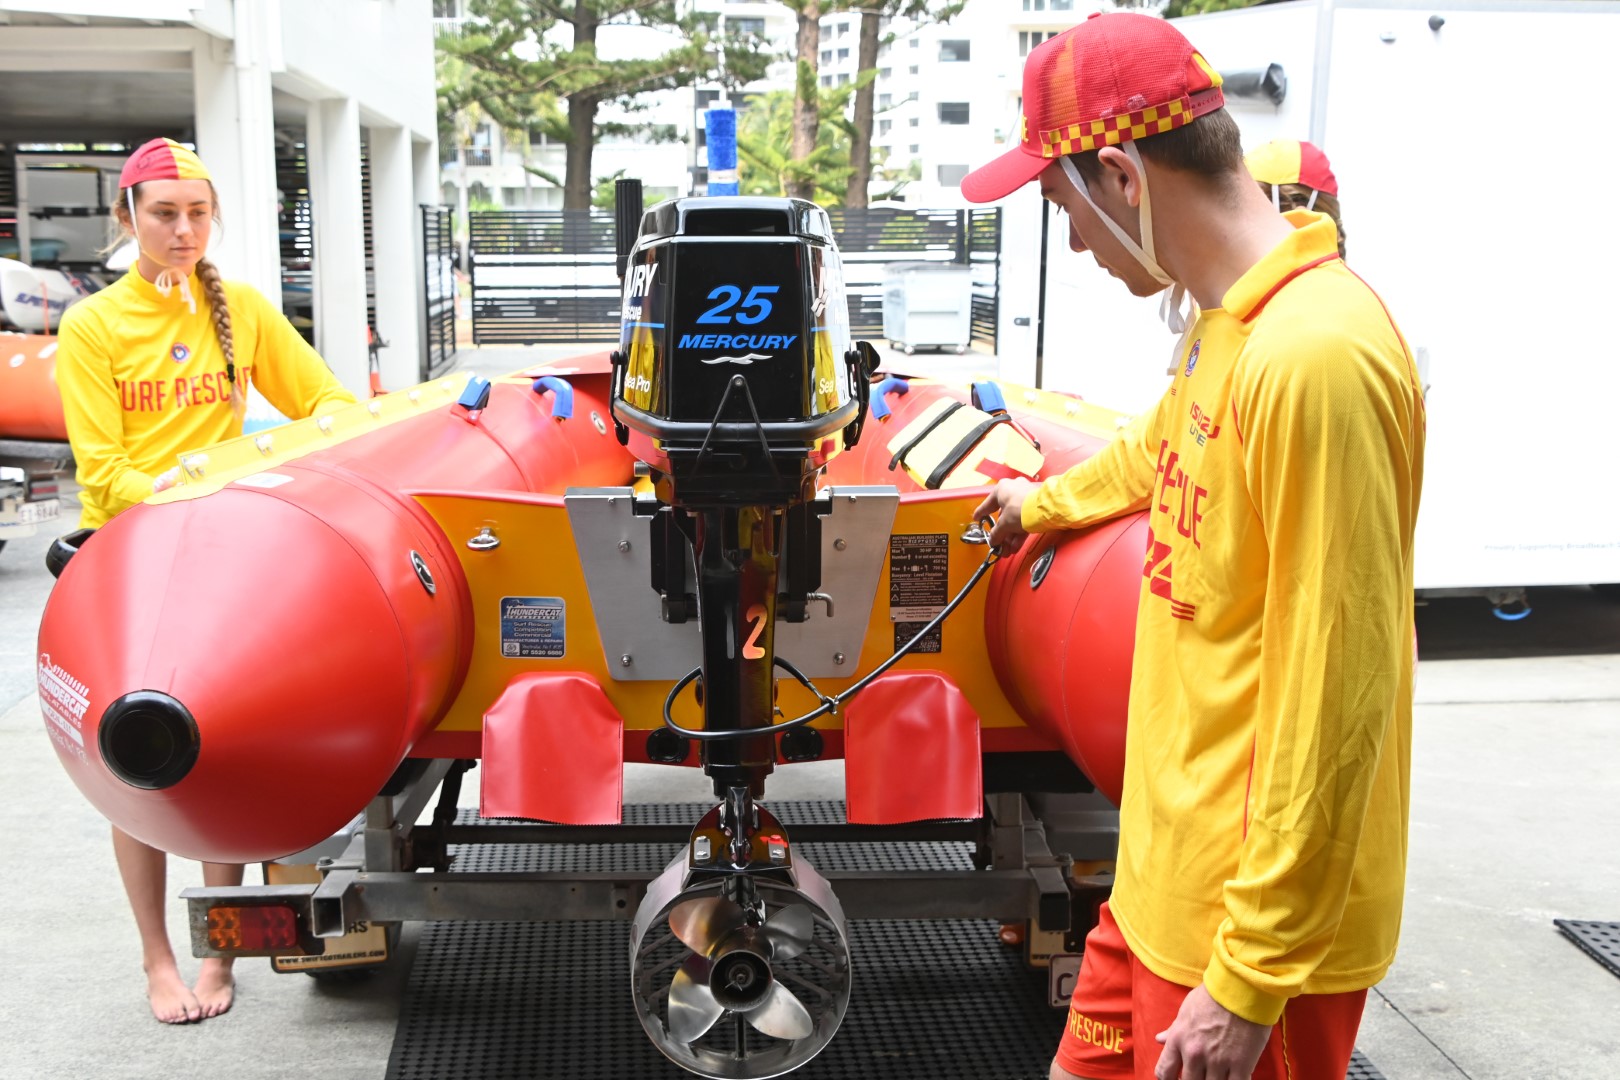
Fitting the motor
- With assistance from the IRB Crewperson, lift the motor onto the transom. Ensure the motor is located centrally on the transom plate and secured in position with the transom four arm spin clamp
- Ensure the safety cable is securely attached to the ‘starboard’ eye bolt on the transom, and secured around the leg of the motor
- Ensure the motor tilt pin is fixed in its correct position – motor should be sitting level
- Ensure motor tilt is not overtightened or too loose
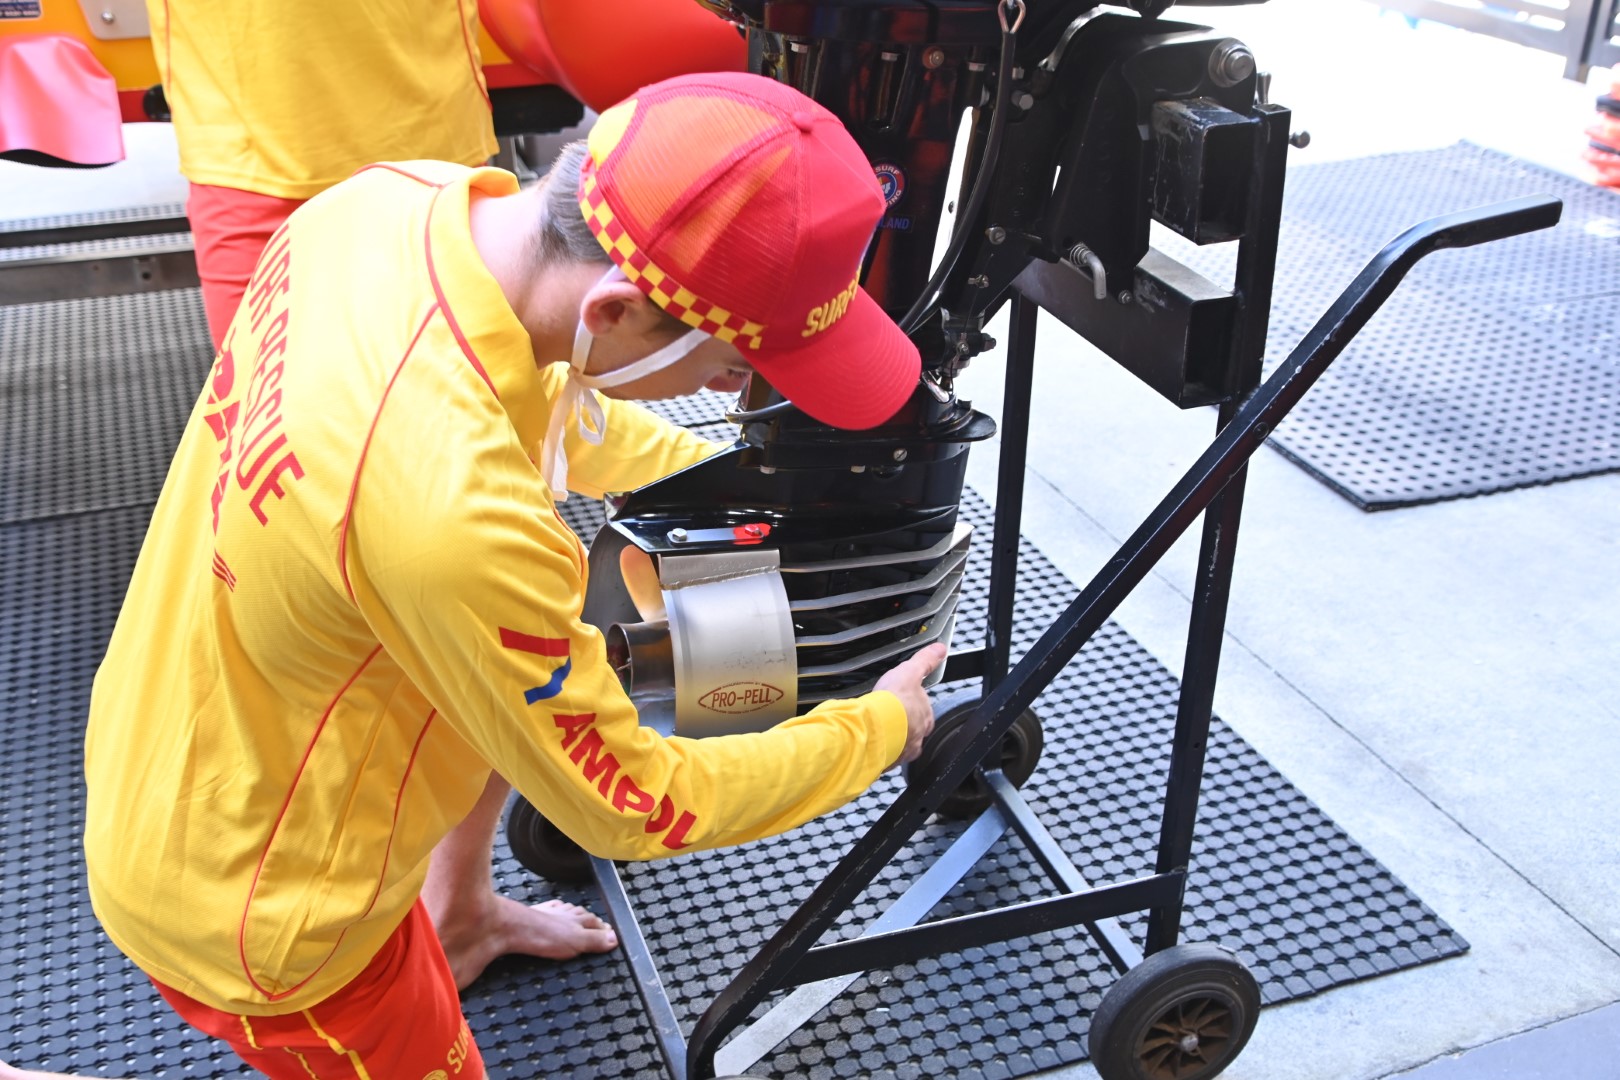
Checking the propeller guard
It is important to check that:
- There are no sharp edges, cracks, bends or twists in the vanes or ring
- The bolts attaching the propeller guard to the anti- cavitation plate and the skeg are secure
- The propeller does not extend past the edge of the propeller guard
- The propeller spins freely with neutral gear selected.
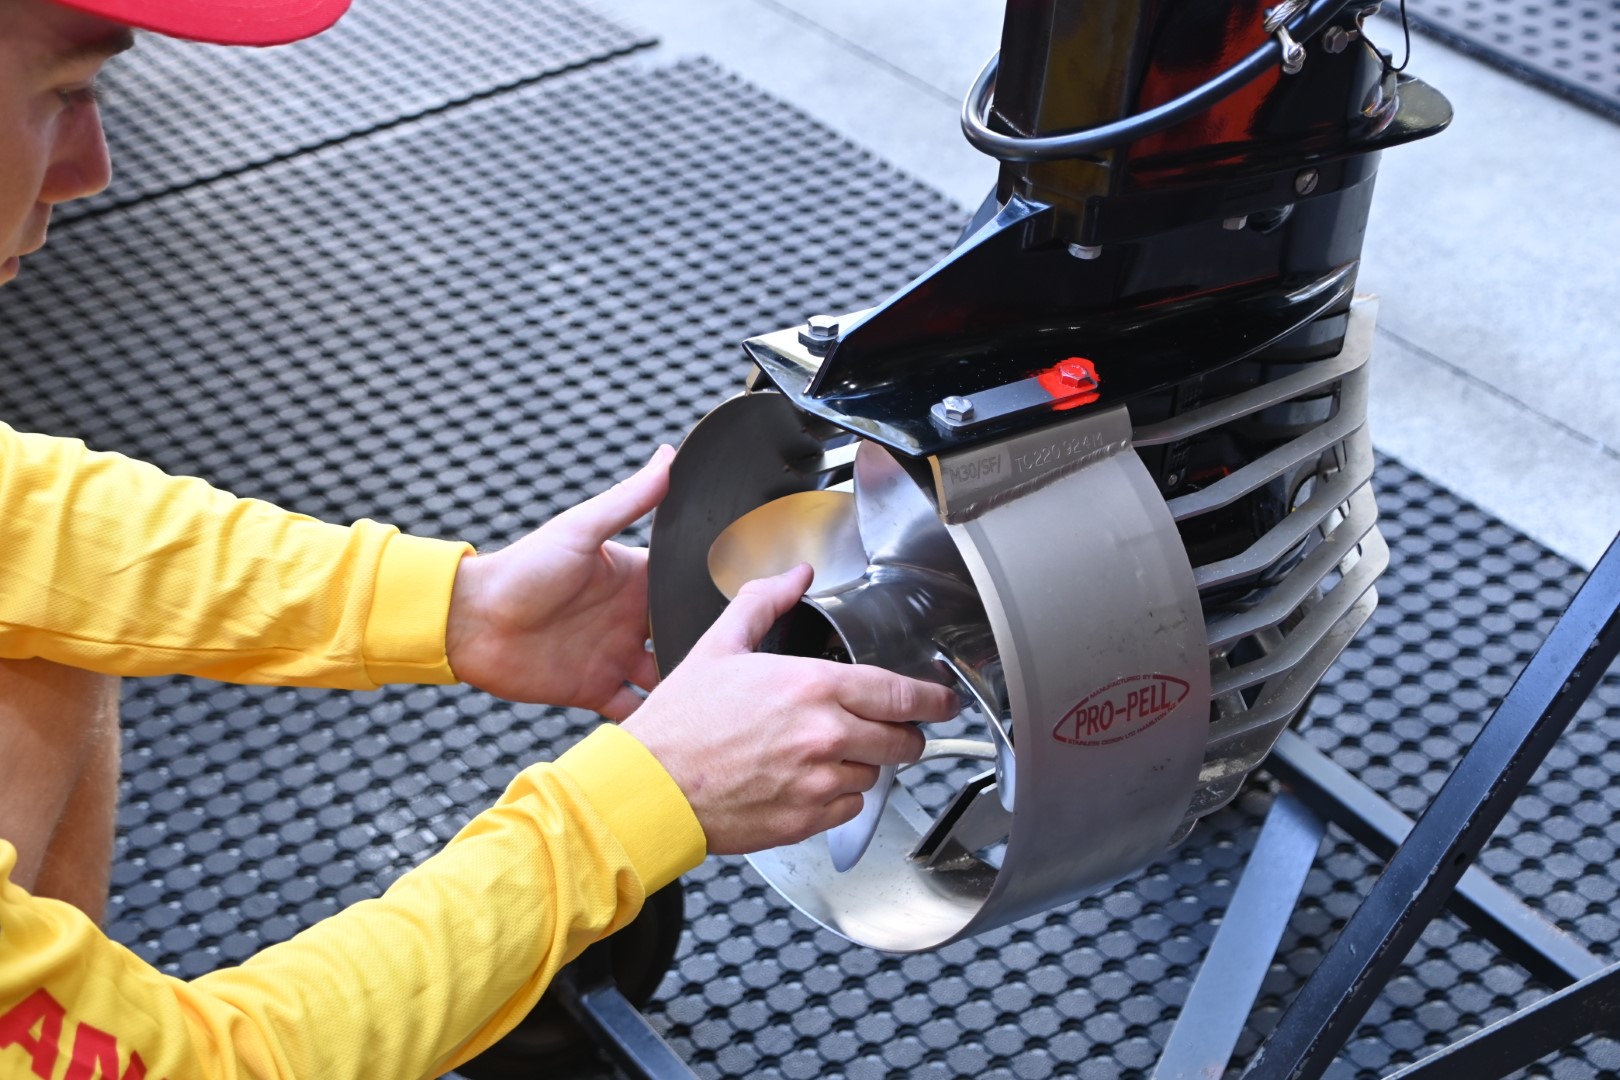
Checking the propeller
- All SLSA approved propellers must have four blades
- The propeller must be securely attached to the leg of the motor with a washer, bolt and split pin
- Check the washer, nut and split pins are in good condition
- Prior to duty check to ensure that the propeller is intact and there are no sharp edges
- There is no movement in the fitting that will allow the propeller to touch the propguard.
Preparing and testing the motor
The motor should be checked to confirm operational readiness. The motor checks include confirmation that:
- The motor is clean and appears in good working order
- The spark plugs and boots are secure
- The fitting of the fuel hose is clean and free of sand. If necessary, blow sand free from the fitting
- Connect the fuel hose to the motor and check that the fitting is locked in place
- All linkages move smoothly and connections are secure, including moving gear into forward and reverse and back to neutral
- The throttle returns back to idle
- Place cowling on motor and secure bungees on side and back (which ever applies)
- Start the motor, ensuring that there is a water supply
- Check all gears work
- Check that water is streaming from the tell-tale.
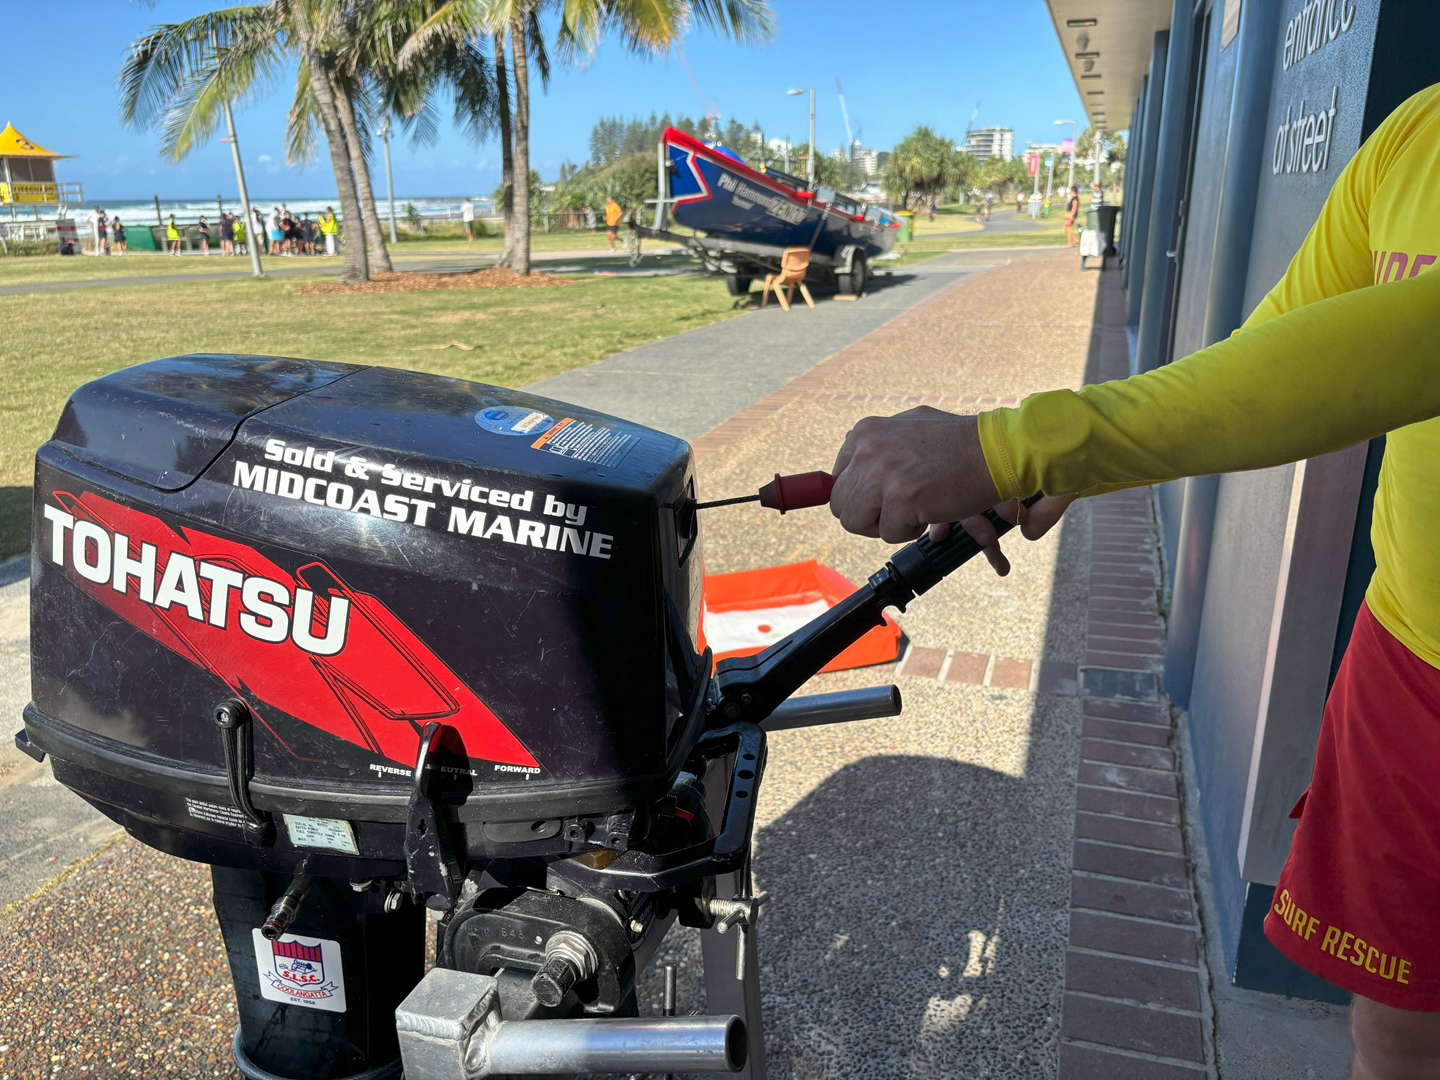
Starting the motor
When starting the motor always ensure that there is a water supply.
- Prime the fuel bulb by squeezing it until it is firm. Check for any fuel leaks anywhere between the fuel cell and the motor
- Holding the throttle in line with casting mark (start mark on the tiller arm) and the kill/ toggle switch is off, pull the choke out and pull over twice.
- Push the choke in, flick the kill/ toggle switch to on and pull to start
- The motor idles and runs satisfactorily in neutral
- The water pump is operating—the tell-tale outflow must be operating
- Turn off using the kill/ toggle switch to ensure that it is functioning correctly
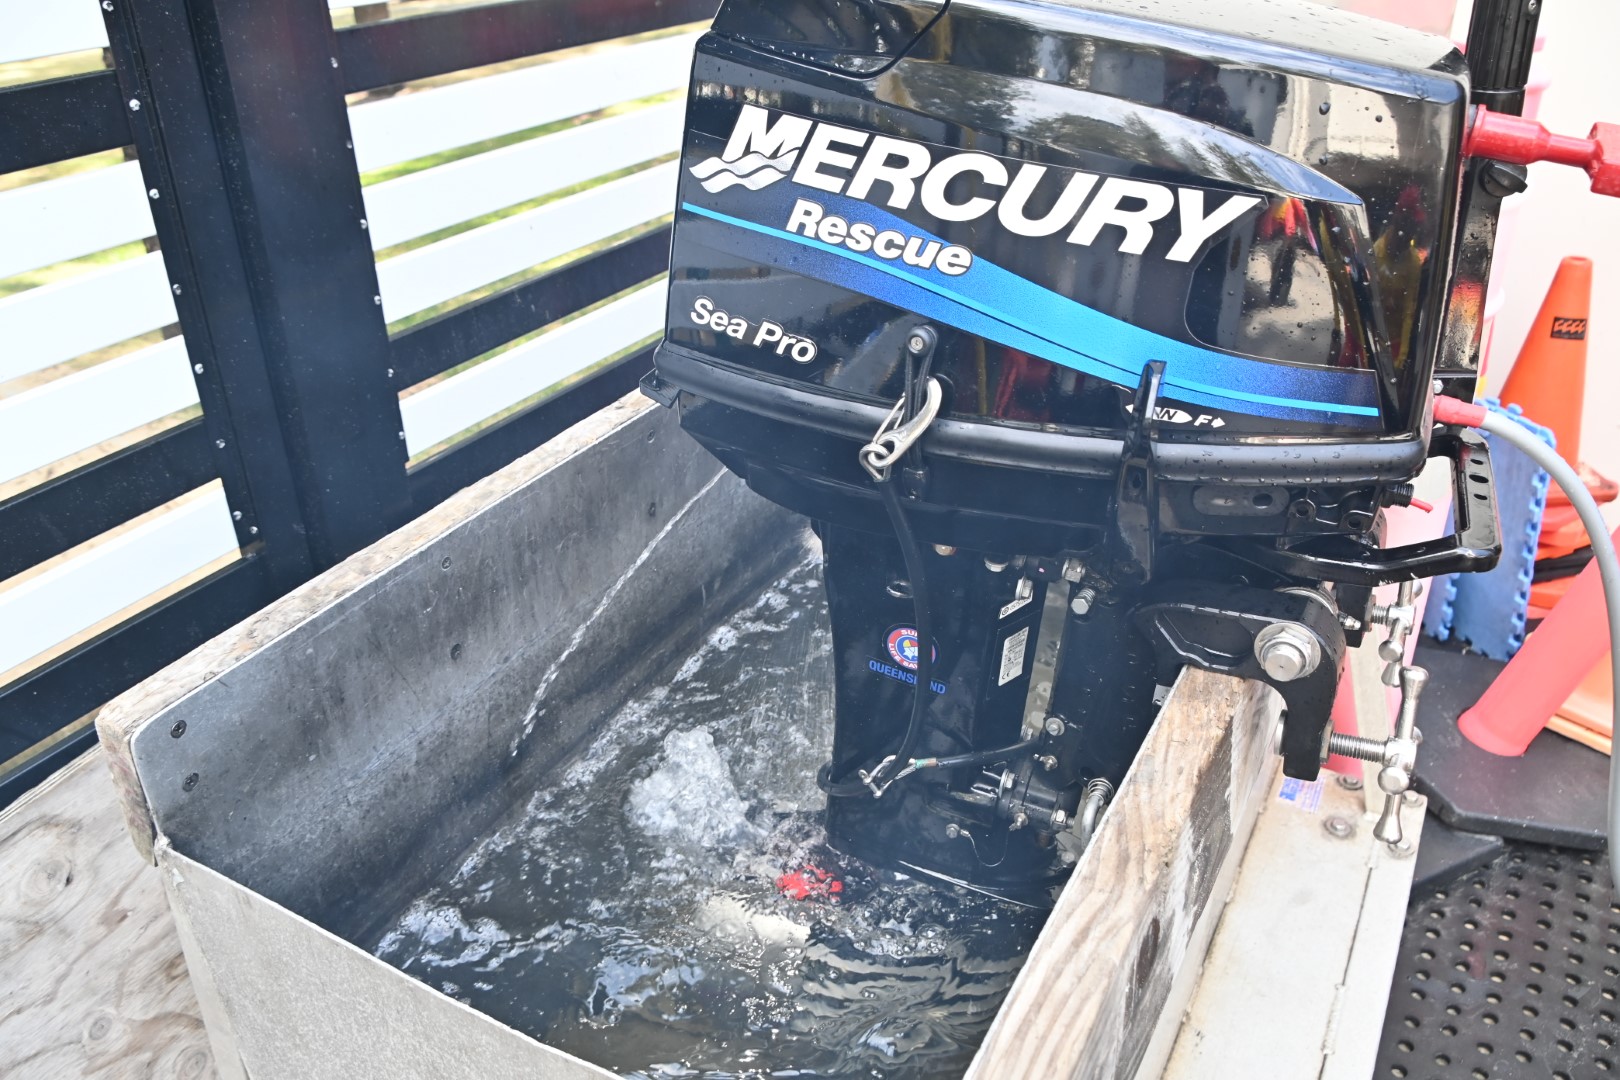
It is recommended that the motor is run for at least three minutes with/in water at least 15 cm above the cavitation plate in a test tank or similar prior or with a motor flush adaptor in water prior to use in the surf.
Finalising preparation of IRB
- Load all remaining auxiliary equipment into the IRB
- Position the IRB in a rescue-ready location. The Patrol Captain should be consulted when determining the location and additional patrol members should assist with lifting and transporting the IRB.
![]()