
Once you know how to set up and use your preferred basic Skalp Style scenario’s, you can start refining these even further with Style overrides.
You can add several style overrides, and combine them into a customized Skalp Style. You can use overrides in combination with just the default style settings or even add these as extra rule lines on top of any of the above described scenario’s.
Style overrides thus provide an extremely powerful method to define style ‘exceptions’. You can remap just about any combination you like.
Some examples:
Remap a pattern to another pattern, Leave a pattern as is, but place it on a specific layer. Colorize some tagged elements in the section, …
The combinations are endless: up to you to decide and use as needed. Let’s see how this works:
To use overrides in general:
- Add a style rule line
- Set the ‘source’: click on its left most icon to set its source type to either ‘layer’, ‘tag’, ‘pattern’, ‘material’ or ‘scene’.

- Just to the right of the chosen source type icon, select the specific source you wish to remap.
This can be a layer, a tag, a * pattern / SketchUp material or a * scene, depending on the chosen source type.
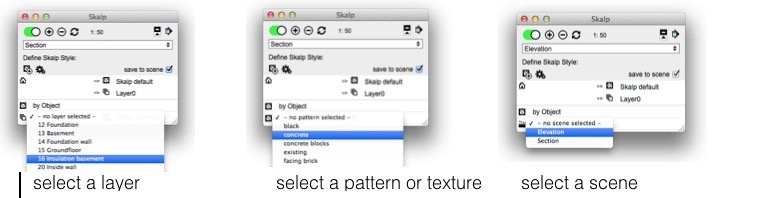
In case of a tag, you need to type in the desired tags to look for. If you want to remap several tag’s at once, separate them by commas.

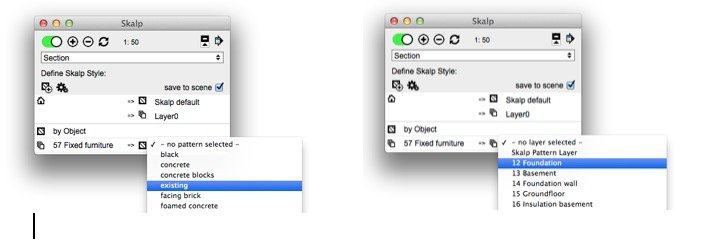
- Set the ‘destination’: Choose the destination mapping type by clicking the second icon on the line. This can be set either to remap to a pattern or to another layer._ (pattern is called ‘hatch’ here in Skalp version 1.0.0090)_
- Finally select the specific remapping destination: either a Pattern, Texture or a layer depending on the chosen destination mapping type.
Post your comment on this topic.