
A styled Skalp Section offers the key missing link in printing SketchUp based construction documents. On real professional plans all patterns, hatches and their line widths also need to be tuned and tailored to your actual print size.
This tedious task is what Skalp scales can automate for you: adapting Skalp materials to specific print scales: making sure they always look correctly scaled with sharp lines on your printouts. This is what scaled sections might look like:
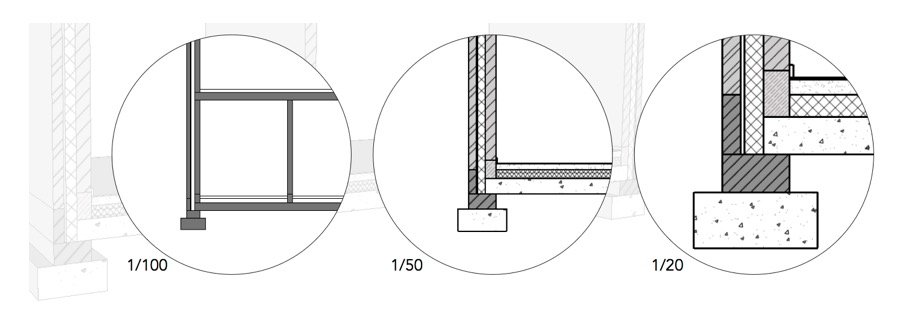
An example: The same Skalp section is represented at 3 different scales. The ones at 1/50 and 1/20 share the exact same Skalp style. They only differ in their scale settings. For each scale used on one or more scenes in the model, all needed Skalp patterns are automatically adjusted and parametrically maintained. The section at 1/100 uses a tweaked Skalp style to override some patterns to a solid grey representation. (see Style Overrides) Note that this example is actually a single screenshot directly taken from a Layout session. The same one model has 3 scenes referenced. See ‘printing from Layout’
Some things you need to now about Skalp scales:
- A Skalp scale is a property of a scene.
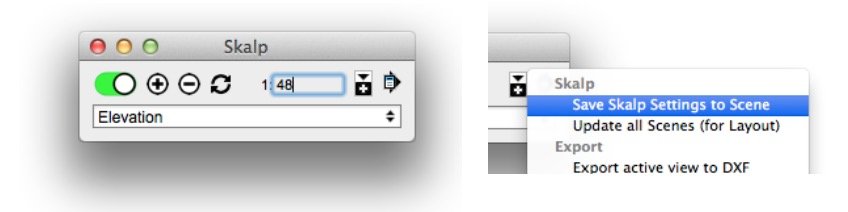
As such you can set and change the scale value by clicking on the denominator number on the main Skalp dialog. If you are using imperial units you could type in ‘48’ to set a scale 1:48 for example. Just like the active Skalp section setting, if you want your scale to be ‘remembered’ on this scene, you need to store this onto your active scene using ‘save Skalp Settings to Scene’ from the menu.
- Only Skalp Patterns, created with the Pattern Designer will be influenced be the scale setting.
- Using scales, multiple scaled textures are generated for the same Skalp Pattern.
This is normal and by design. We advise you to leave these untouched. If you delete such a material anyway, Skalp will recreate it upon updating the section.
In the example shown below, the model has several scenes with Skalp sections using different scales.
Skalp has added separate tileable materials to your model to support these scales.
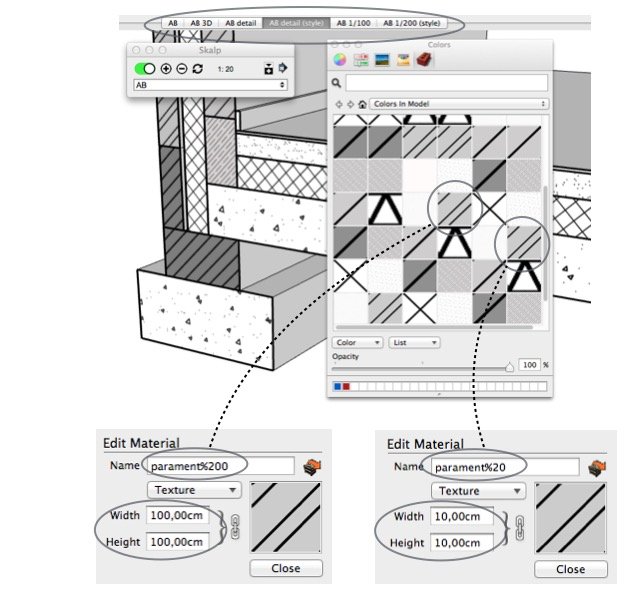
While the added textures look identical in the ‘Colors’ window, a closer inspection shows they are actually different in placement size. Apart form the %xx part showing their scale, they share the same name. A pattern intended for a smaller print scale will be placed in the model at a larger size.
In this example ‘parament%200’ is a material to be printed at 1:200.
Placed in the model it will measure 100cm. Once printed at 1:200 it will measure 0.5cm (100cm / 200)
The fact that for scales extra variants of a material are needed also explains why typing in new scale on the Skalp dialog might take some extra time, adding them to your model. Once a texture is created for a certain scale, it is stored in the model and will be reused whenever possible. If you have many Skalp sections with different scales in your model, modifying a Skalp pattern might take more time as well, as all scaled variants of same pattern need to be processed.
Post your comment on this topic.