You can configure the Lightning Conductor app part to display one view of the data or multiple views. Multiple Views allow you to display content from different data sources or the same data source within the same instance of the app part, so that you do not have to add multiple instances of the app part on the same page. It is common to use views to display data from the same data source, such as, all tasks within a site collection, and apply different filters, for example, All Tasks, My Tasks and My Overdue Tasks. The view that is used when the App Part is first rendered is the default view, and has an icon 
If you wish to take advantage of multiple views within your Lightning Conductor app part, you must first enable multiple views, which creates one view, named, View1. You can then subsequently create additional views. View names can be changed on the App Part tab of the Configure Lightning Conductor App dialog.
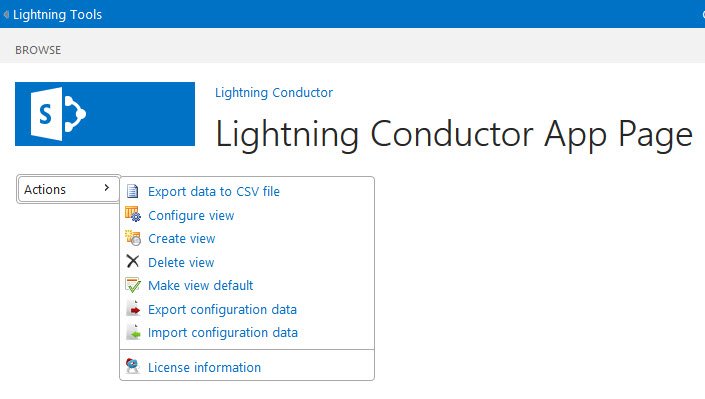
When you enable multiple views on the Lightning Conductor, a View menu is added and the following changes are made to the links on the Actions menu:
- Links removed:
- Configure Lightning Conductor
- Configure Lightning Conductor
- Links added:
- Configure view
- Create view
- Delete view
- Make view default
- Configure view
Enable Multiple Views
To enable multiple views, use the following steps:
- Click Settings
, and then click Edit page.
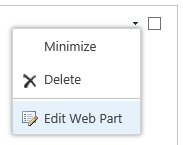
- From the Web Part menu of the Lightning Conductor app part, click Edit Web Part.
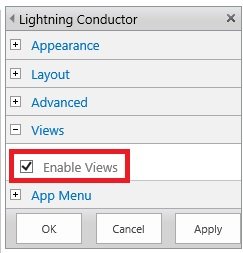
- In the Web Part tool pane, expand the Views section and select Enable Views.
- At the bottom of the Web Part tool pane, click OK.
Create a View
When views are enabled, a view is automatically created. To create additional views, use the following steps:
- From the Actions menu, click Create a View.
- After you have created a view, you can re-configure the view by selecting Configure view.


 , and then click Edit page.


Post your comment on this topic.