
The Audit Logs tab allows Administrators to monitor user interactions with the selected Orchid Recorder. The Audit Logs cover nearly all user interactions including viewing video, exporting video, PTZ camera control, and editing camera configuration.
Accessing the Audit Logs
- From the Servers screen, select a server and click on the Audit Logs tab.

Working with the Audit Log List
| |
Click this icon to update/refresh the Audit Log |
| |
Click this icon to download the Audit Log list currently displayed on the screen |
By default, the Audit Logs screen will provide a list of user interactions from the past 24 hours. Use the Filters portion of the screen to select from available filters (so you can focus on something more specific). The bottom portion of the screen will list all of the applicable events. You may then click on any item in the list to see more details.
Sorting the Audit Log List
You can sort the Audit Log by the date and time of the entries, so you can start your review with the newest events or the oldest events.
- To sort the list, click the arrow icon at the top of the Date/Time column.
- Each time you click the icon, the sort order will switch between ascending and descending.

Filtering the Audit Log List
You may filter the Audit Log to display only the activities that you specify. You may filter the list using any one or more of the four filter types. These include a date/time filter, user filter, camera filter, and an advanced filter.
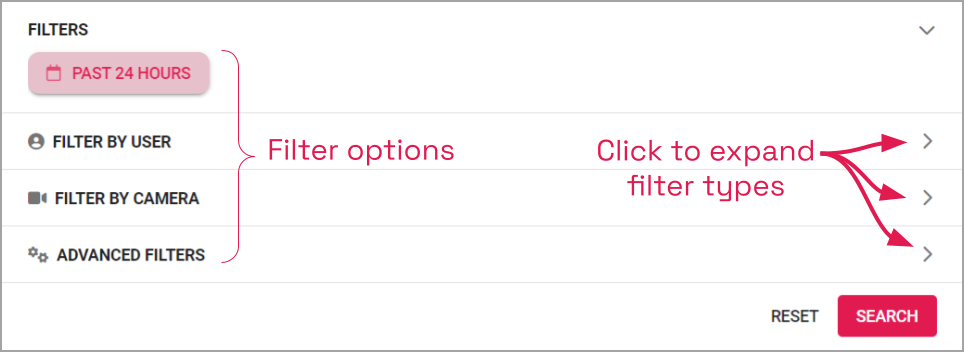
- To filter the Audit Log, click in the Filters field to expand it.

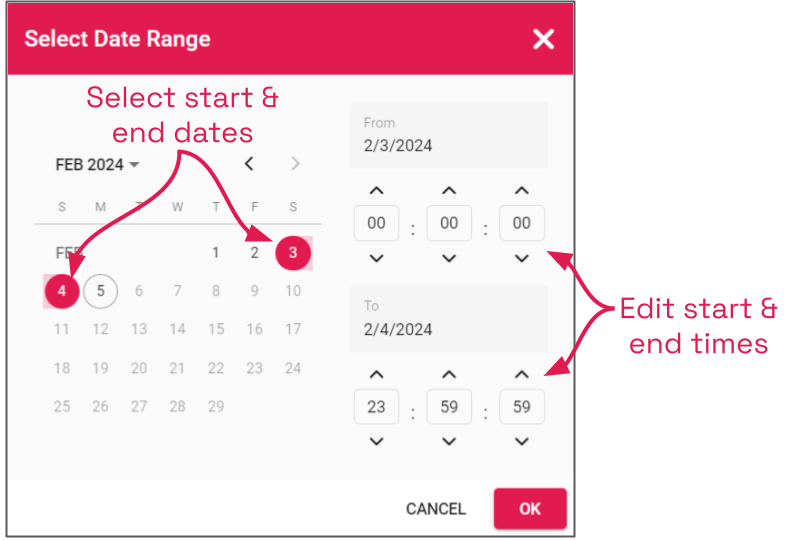
- To filter the list by date:
- Click on the Past 24 Hours button. The Select Date Range dialog will open.
- Click on the filter start date, then the end date.
- Then edit the start and end times, if needed.
- Click OK, when done. (The filter start and end dates will now appear on the button.)
- Click the Search button to apply the filter and review the results.
- Click on the Past 24 Hours button. The Select Date Range dialog will open.
- To return the date filter to the last 24 hours, click the X on the date filter button, then click Search or Refresh.
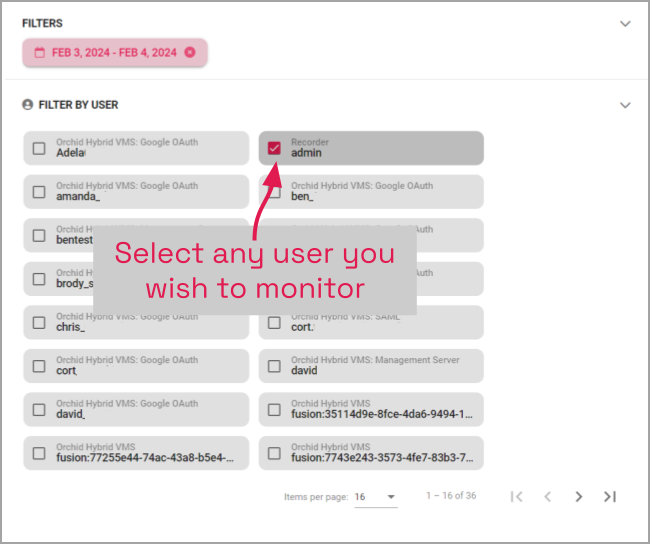
- To filter the list by User:
- Click on the Filter by User section to expand it.
- Mark the checkbox next to any User that you want to monitor. (You may select more than one.)
- Click the Search button to apply the filter and review the results.
- Click on the Filter by User section to expand it.
- To clear the User filter, click the X on each User filter button, or unmark each User checkbox. Then click Search or Refresh.
- To filter the list by camera:
- Click on the Filter by Camera section to expand it.
- Mark the checkbox next to any camera that you want to monitor. (You may select more than one.)
- Click the Search button to apply the filter and review the results.
- Click on the Filter by Camera section to expand it.
- To clear the camera filter, click the X on each camera filter button, or unmark each camera checkbox. Then click Search or Refresh.

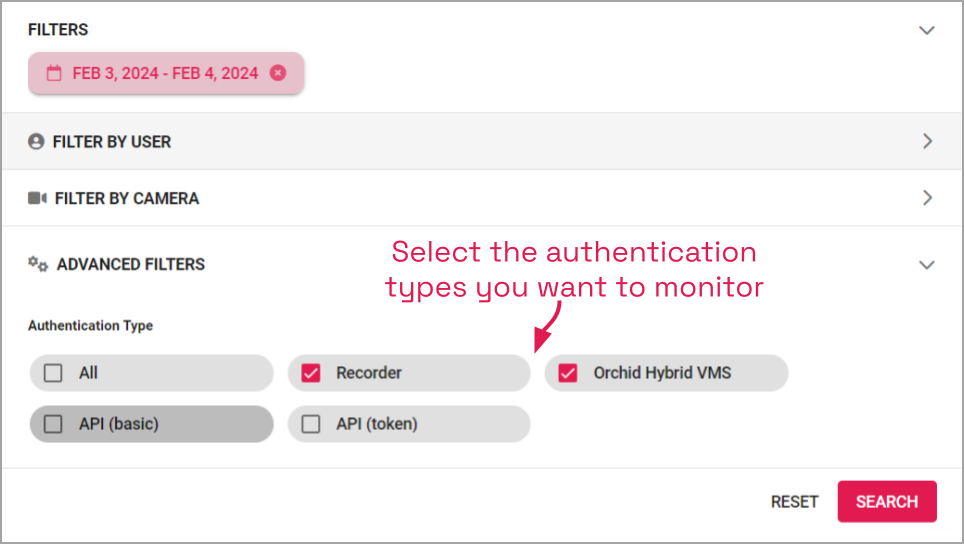
- To filter the list using advanced filters:
- Click on the Advanced Filters section to expand it.
- Mark the checkbox next to any authentication type that you want to monitor. (You may select more than one.)
- Click the Search button to apply the filter and review the results.
- Click on the Advanced Filters section to expand it.
- To clear the advanced filter, unmark each checkbox, then press Search or Refresh.
- To clear all filters, click the Reset button.
- Click the Search button to view the updated list.
Post your comment on this topic.